How to replace bearings in a top-loading washing machine
 Replacing vertical bearings is a rather labor-intensive procedure. Understanding that all the removed elements of the unit will need to be put back in their original places after installing new bearings may make you doubt your abilities, but you should not get upset ahead of time. You can make the replacement yourself, without resorting to the help of a professional; you just need to carefully read the instructions for action.
Let's get some tools
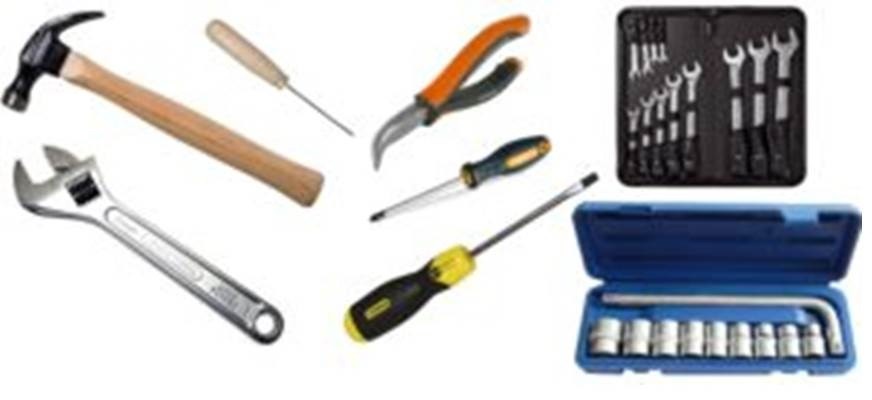
So, you have finally decided to repair the washing machine yourself. Before you begin disassembling the automatic machine, make sure that you have all the tools necessary for the work. During the repair process you will need:
- two types of screwdrivers: Phillips and flat;
- screwdriver;
- open-end wrenches of various sizes;
- set of hexagons;
- metal rod.
 In addition to tools, you will need new parts that will be installed in place of the failed ones. To do this, find out the full name of your top-loading washing machine. The brand of the unit can be found in the instructions for the equipment or from the inscription on the body of the machine.
The full model name will make it easier for you to find new components.
You can buy bearings either at specialized retail outlets, or by placing an order on online store websites. To replace failed parts you will need to purchase:
- a set of bearings for a specific washing machine model. For top-loading machines, prefabricated caliper kits are provided;
- oil seals.Selected in accordance with the automatic machine being repaired;
- special lubricant for oil seals and bearings;
- universal aerosol lubricant WD-40 (or other liquid with a similar principle of operation).
When all the tools and components are prepared, you can begin preparing the washing machine. To do this, you need to turn off the power, disconnect the water intake and drainage hoses. It is best to have a smartphone with a good camera on hand, as well as a notepad and pen. In the process of disassembling equipment, it is better to photograph each stage, take pictures of how parts, wiring and contacts should be located, and, if necessary, make notes in a notebook. This precaution will help you reassemble your top-loading washing machine correctly and quickly.
Preparing and disassembling the washing machine
After the machine is disconnected from the power supply and house utilities, you can begin to disassemble the unit. To carry out work, you need to provide free access to the machine, so it is better to move it to a spacious room or garage. So, the algorithm for further actions will be as follows:
- First of all, you need to remove the right side wall of the case; to do this, you will have to unfasten the three screws located on the back. For most vertical machines, the pulley is located on the right side;
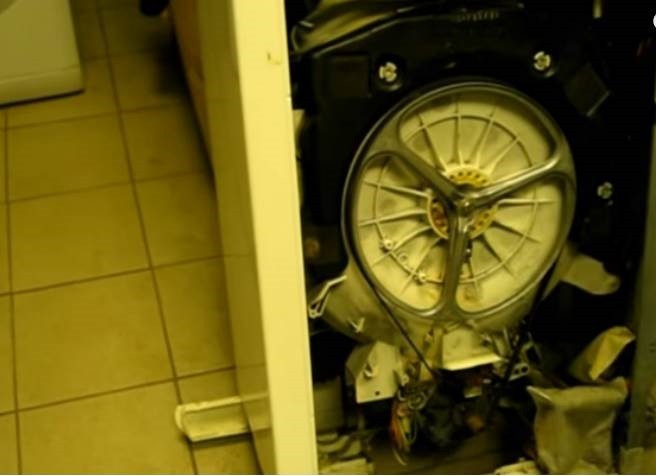
- carefully pull the drive belt off the pulley;
- Using a screwdriver, unscrew the bolt holding the CMA drum pulley.
The first part of the work is the simplest and usually does not cause difficulties. Remove the drum pulley and place it aside. Now you can move on to the main stage of the repair process.
We change bearings
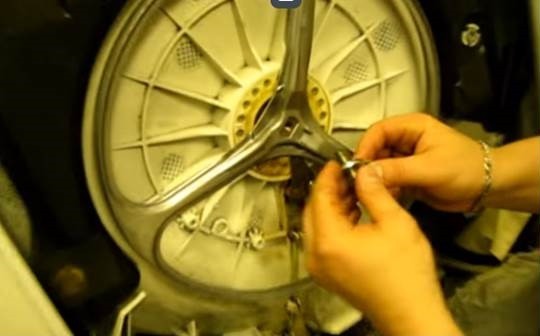
After the pulley is removed, it is necessary to remove the drum ground located near the support.Using a Phillips screwdriver, remove the bolts holding the part in place.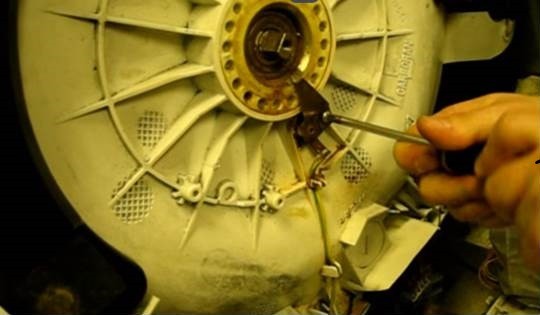
Now we have to get out the old caliper. To do this, you will need a pair of screwdrivers and a long metal rod that will act as a lever. Screwdrivers are inserted into the holes of the support from opposite sides, the rod is placed between them.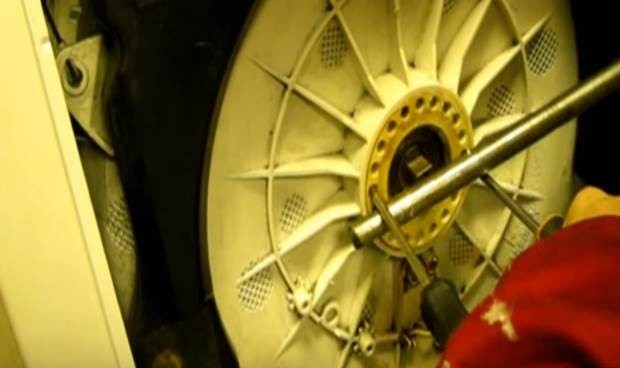
Which way should I unscrew the caliper? It is necessary to carefully examine the support; the direction of movement of the part should be indicated on it with the inscription “Open”. By pressing firmly on the lever and turning the screwdrivers several times, you will remove the element from the washing machine body.
For most models of top-loading washing machines, ready-made calipers are available for sale, including both an oil seal and bearings. Therefore, you just need to put a new caliper on the shaft. The part usually comes with a bushing with lubricant intended for treating the surface of the element before placing it in the washing machine body. The lubricant is applied in a dense layer to the oil seal and the drum shaft in the area of its contact with the oil seal.
It is imperative to treat the parts with lubricant; this will ensure good moisture resistance of the joint, less susceptibility of the elements to wear, and guarantee them a long service life.
If there is no lubricant included with the caliper, you can use any lubricant designed for SMA bearings and seals. Once the surfaces are finished, carefully screw the caliper back into the body. To do this, you need to take two screwdrivers and a rod again and rotate the part in a different direction. The caliper should go in completely and fit well into its seat.
Putting the equipment back together
The main work is done, all that remains is to put the vertical back together.To return the machine to its original appearance, you need to do the following:
- put the drum pulley in place;
- screw in the grounding connection that was disconnected at the beginning of the work;
- install the fastening nut holding the pulley in place and tighten it well;
- tighten the drive belt;
- Attach the side cover to the body.
If you see the main signs indicating that the drum bearing has broken, do not rush to invite a technician. Having understood the essence of the upcoming work, you can replace parts on your own.
Interesting:


Reader comments
- Share your opinion - leave a comment
Categories
Washing machine repair


For buyers


For users


Dishwasher


Add a comment