How to replace bearings on a Siemens washing machine
 Replacing bearings on a washing machine is a rather labor-intensive task. The user will be notified that the bearings have failed by unpleasant noise, creaking and knocking noises that occur when the washing machine is operating. Specific sounds will only intensify over time, and if you do not replace them, after a while the machine will simply rumble during the washing process, and, in the end, will completely stop functioning. Therefore, having noticed alarming “symptoms”, it is better to immediately diagnose the washing machine and replace the faulty part with your own hands.
We collect everything you need
The scope of work is quite wide: the unit will have to be disassembled almost completely. For this, of course, you will need auxiliary tools. To replace bearings on a Siemens machine, you must have in your arsenal:
- Phillips and slotted screwdrivers;

- keys of various diameters;
- reversible screwdriver with a set of bits;
- pliers;
- sealant characterized by excellent water resistance;
- punch;
- hammer with rubber nozzle;
- puller;
- several bolts and nuts;
- an ordinary small hammer.
In addition to a working set of tools, you should take care of purchasing new parts. The oil seal and bearings can be purchased at specialized stores. When purchasing, you must provide the full name of the washing machine model or specify the serial number of the parts, which can be seen on failed items.
Perhaps, when disassembling the washing machine yourself, you will see that the old bearings are strongly stuck to the surface and even partially collapsed.To make them easier to remove, purchase WD-40, an all-purpose spray lubricant.
The tanks of most Siemens machines are non-separable, they will have to be cut. A grinder is useful for these purposes.
Getting to the tank
When starting to make repairs yourself, keep in mind that you will have to remove the tank with the drum from the body of the automatic machine. To carry out such a manipulation, you will first have to remove the walls of the housing and remove from the unit all the components that interfere with the removal of the tank. It is best to have a camera on hand and record the progress of the work, this will allow you to easily reassemble the unit. We will provide you with an accurate and understandable algorithm for replacing bearings in a washing machine.
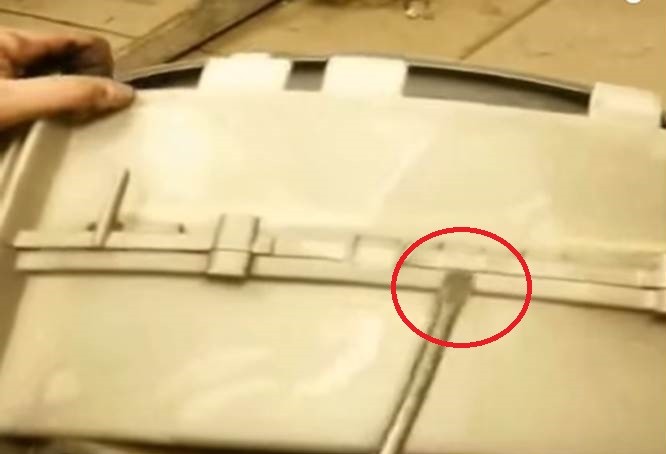
- Disconnect the top cover of the machine; to do this, you will have to unscrew the screws holding it in place. Set the lid aside.
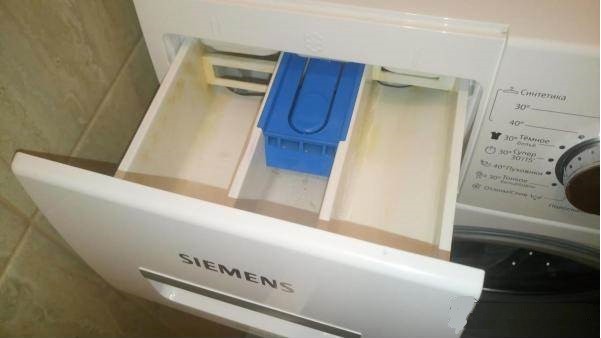
- Remove the dispenser from the unit - a tray designed for loading detergents.
- Unscrew the bolts securing the control panel without disconnecting the chips, and carefully hang the element to the side.
- Using a screwdriver, pull out the metal clamp holding the hatch cuff and tuck the rubber seal inside the drum.
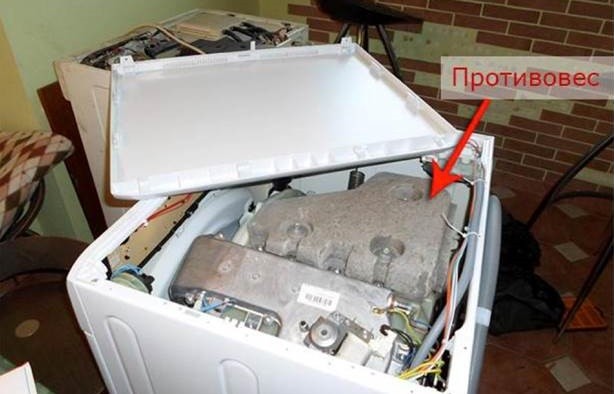
- Remove all counterweights, the filling valve from the machine body, disconnect the filling pipe, and the wiring leading to the elements. This will prevent you from damaging parts when removing the tank.
- Remove the false panel located at the bottom of the washing machine.
- Unfasten the anterior wall of the MCA. This can be done by unscrewing all fasteners. At this stage, you should carefully unscrew the hatch locking device or simply remove the contacts from it.
- Unfasten the pressure switch and the hose leading to it.
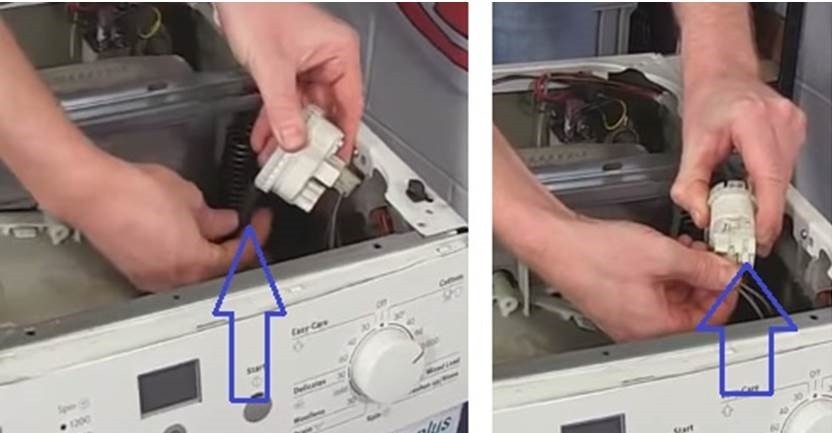
- Disconnect the contacts (grey, brown and black power wires) and ground (yellow or green wire) from the CMA motor.
- Disconnect the sensor and heating element wires.
After carrying out the above steps, free access to the tank will be obtained. Carefully remove the element from the housing and place it on the floor. Please note that the machine's engine is not disconnected from the tank. Remove the drive belt, unscrew the two bolts holding the motor, and move the engine to the side. Disconnect the flywheel. You can move on to the next stage of work - disassembling the tank and installing new bearings.
Tank disassembly and bearing repair
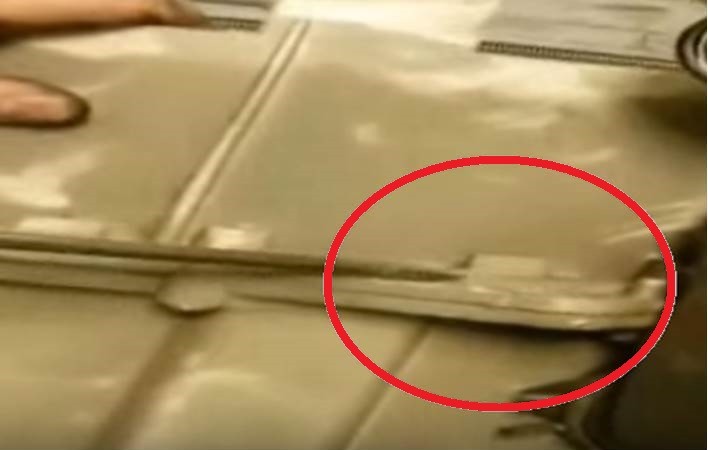
As mentioned above, the tanks of most models of automatic machines are non-separable, so in order to gain access to the bearings you will have to cut or break off the fasteners connecting the two halves of the tank.
The problem may arise with the internal fastenings on which the hook hangs. It can either be knocked down using a hammer or cut off. It will be impossible to disassemble the tank any other way.
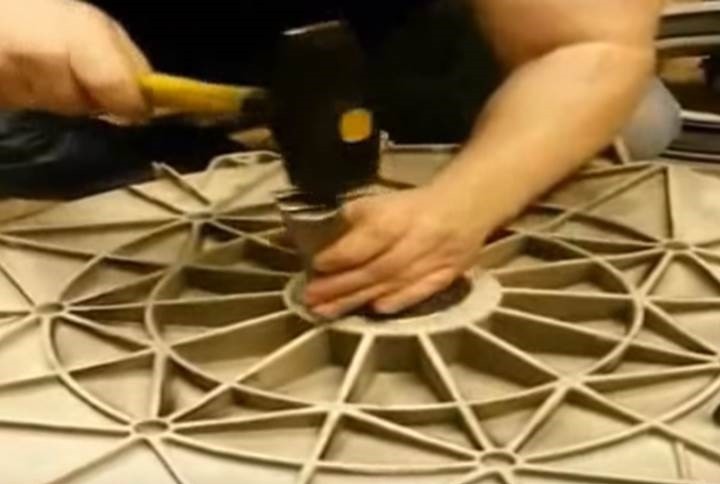
Once the tank body is opened, you can begin to replace parts. First you need to dismantle the old oil seal. To remove the bearings from the caliper, it is best to use a puller. If you see that the parts are stuck to the surface, treat them with WD-40 lubricant, this will make the process of removing the bearings much easier.
If a puller is not at hand, you can use a special drift and a regular hammer. Using a plumbing tool with a hammer, knock out the outer and inner bearings.
The failed elements have been removed, now all that remains is to put new components in their place.To begin, install the outer bearing; drive it in carefully using a flat drift and hammer.
The inner bearing is installed in a similar way. Next, you should put a new oil seal on the seat. It is best to install the original rubber seal.
When installing a new oil seal, it is necessary to treat the part with a special lubricant.
The “lip” of the oil seal is completely clogged with grease, and the drum shaft is also processed at the point of contact with the oil seal. A lubricant is necessary to prevent moisture from entering the bearings; thanks to it, the service life of system elements is significantly increased.
The next step is to install the drum in the tank. After this, install the flywheel and secure it. You can proceed to reassembling the tank. Connect the two halves of the part, treat the connecting seam with moisture-resistant sealant. Then tighten all previously unscrewed bolts. By putting the drive belt on the pulley and attaching the washing machine motor, you can install the tank back into the unit body.
The Siemens machine is assembled in the reverse order. Photographs will help you accurately connect all the wiring, contacts and pipes that were loosened during the repair work.
Interesting:


Reader comments
- Share your opinion - leave a comment
Categories
Washing machine repair


For buyers


For users


Dishwasher


Add a comment