How to Replace Bearings in a Hayer Washer
 Knowing how to replace bearings in a Haier washing machine can save you money on the job of a wizard. It is difficult to do this without experience, but it is possible if you strictly follow the instructions, observe safety precautions and not experiment with spare parts. Where to start, what to prepare and how to repair - we will tell in detail.
What may be required for repairs?
The disassembly process of the Haier washing machine is standard, and is practically no different from models of other brands of washers. You have to get under the tank and remove a lot of spare parts, so you can not do without a set of tools. So, it is advisable to have at hand:
- pliers;
- screwdriver;
- flat and Phillips screwdrivers (or better, a universal screwdriver with several nozzles);
- round pliers;
- hammer;
- set of wrenches;
- rubber or wooden mallet;
- chisel with a blunt tip.
It is better to prepare waterproof sealant and WD-40 universal cleaner in advance. Rags and protective gloves do not interfere. To put a new bearing assembly, you should purchase a pair of seals and bearings. You can buy replacement parts in the service center or in a specialized online store. A suitable diameter of spare parts is selected by the serial number of the existing machine. Another option is to remove the old one and show the consultant a used sample.
It is necessary to prepare for repair and the machine itself. We disconnect the unit from the sewer, mains and water supply, and we reel all the cords and hoses. Then we move the case away from the wall, providing free access to the washing machine from all sides. It remains to drain the water through the trash filter and proceed with the dismantling process.
Free tank and drum
The bearing assembly is located on the drum shaft, so you have to completely get the tank. Once again, check the disconnection from the power supply and begin dismantling the machine. We adhere to the following instructions:
Important! Amateur masters are strongly advised to record their actions on the camera or mark all parts and wires.
- We approach the washer in the back and unscrew the back cover.
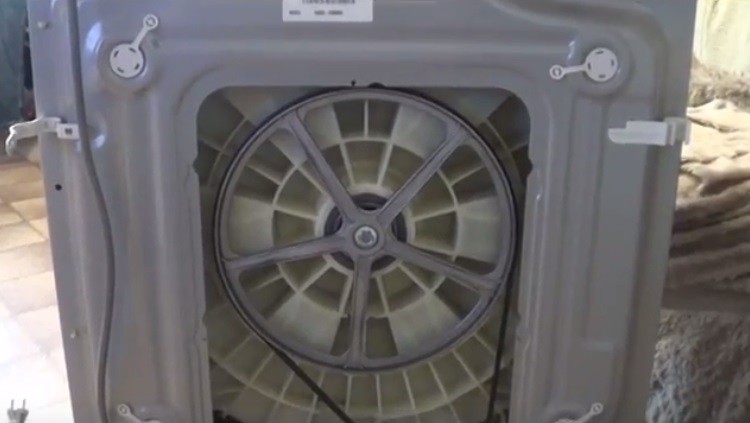
- We unscrew the bolt on the pulley.
- Remove the drive belt by gently pulling it towards you while rotating the pulley.
- Weaken the external clamp on the cuff and thread the sealing gum inward.
- We take out the powder receptacle.
- Unscrew the upper bolts from the back, push the upper cover forward and remove.
- We unscrew the two pairs of screws that hold the front panel and the rail with a screwdriver.
- We use a pair of pliers to hook the clamp on the hose under the tray, as well as on the pipes and channels connected to it.
- We remove the dispenser from the machine.
- Using a 14 key, unscrew the bolts holding the upper and lower counterweights.
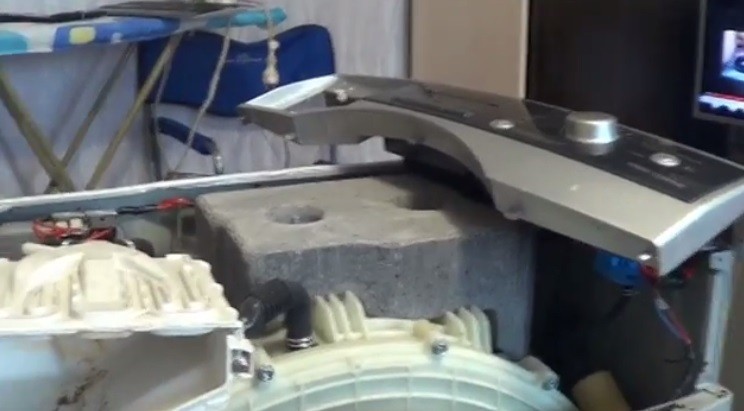
- We take out the balances.
- We pay attention to the drainage system: we unfasten the clamps on the casing, nozzle, drain hose and remove the waste filter, pump and snail as a whole.
- Free wiring.
- With our hands we spring and remove the shock absorbers, and after them - the water level sensor.
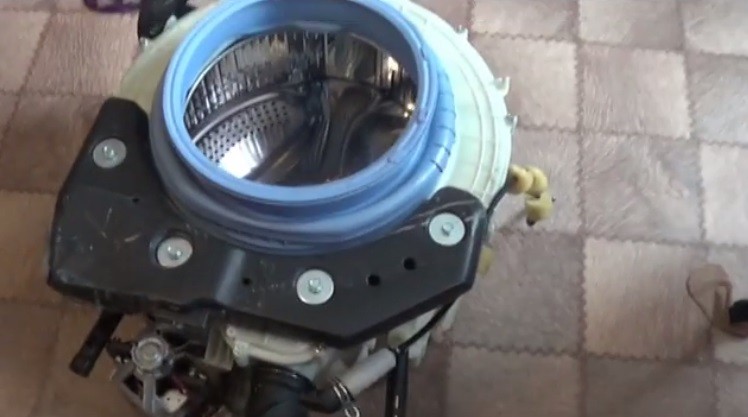
The tank is now completely empty. To pull it out, it is necessary to squeeze a pair of side springs with one hand and sharply pull the edge of the other. It remains to put the container in a place convenient for further dismantling and begin to remove the bearings.
Dismantling the tank and replacing bearings
This is not all: to pull out the bearing assembly, you will have to disassemble the tank and knock the shaft out of the drum. It is better to carry out the indicated procedures by lifting the container to a springy surface (for example, a tire) and turn the cuff up. You can do otherwise and raise the part by 3-4 laid on the side of the chair and lay down a soft pillow. Further we act as follows.
- In a circle we unscrew the screws at the central joint and remove the small half of the casing.
- Turn the tank with the open hole down.
- We take a mallet and with sharp blows we knock out the drum from the rest of the protective casing.
- We process the inside of the WD-40 tank, removing scale, rust and accumulated dirt.
- We knock out a bearing and an oil seal from it.
- If necessary, wash the hole with a cleaner and wipe dry.
- We insert the outer bearing with a puller, and if it is missing, put the ring in the groove and carefully tap in a circle with a hammer through the chisel.
- We turn the tank over and place the internal bearing, fixing it with a similar tapping.
- We put an oil seal on the bearing ring.
It is recommended to fill in the waterproof sealant over the gland and cover it with a layer of superglue to prevent water from entering the bearing assembly and washing out the factory grease.
On this instruction, how to remove the bearings with your own hands, almost ends. It remains only to return everything to its place. We put the removed half of the tank on the shaft and fix it with a few hammer blows. Next we connect to the second part and securely screw all the provided screws. Next, we install the container in the machine, and most importantly, we check the quality of the repairs made: by scrolling the drum and evaluating the smoothness and noiselessness of rotation.
If there are no suspicious braking and creaking, then we mount shock absorbers, we hook the pressure switch and connect the wiring. Next in line are the balances, dispensary, dashboard and drive belt. At the end, we carry out the final test: we start the test cycle at minimum speed and monitor the absence of unnecessary sounds.
Interesting:


Reader Comments
- Share your opinion - leave a comment
Headings
Washing machine repair


For buyers


For users


Dishwasher


Add a comment