How to replace bearings in a Beco washing machine
 The user will know immediately that the bearing in the automatic machine has worn out or completely crumbled. The washing machine will start to make a “knocking” sound, buzz, vibrate and give out malfunctions. In order for the unit to not finally fail, it is necessary to replace the drum bearing as soon as possible. Timely repairs will save the remaining elements and components of the system.
Before proceeding with the replacement, you should understand the essence of the upcoming work. You can change the bearings yourself without resorting to the help of masters. How to do this, we will describe in detail in this article.
Bearing failure detection
First of all, I want to note that in Beko washing machines, in comparison with other brands of technology, the process of replacing bearings is quite simple, and this is good news. First, let's analyze what signs will indicate the absolute need for replacement?
- A hum that occurs when the drum rotates by hand.
- The presence of significant play of the drum.
- In the "Spin" mode, the washer makes a lot of noise and knocks.
In some cases, not only the wear of the bearings can be observed, but also the failure of the cross. Such a situation will lead to more expensive repairs, since it is impossible to purchase the part separately, it is supplied only complete with a drum.
Proceed to disassemble the machine
To disassemble the washing machine, it is necessary to prepare a screwdriver, a Phillips and flat head screwdriver. Using these tools, you can remove all parts of the machine and get to the washing machine tank. The algorithm of actions will be as follows:
- disconnect the device from the power supply;
- remove the top cover of the case, and for this you need to unscrew 2 screws located at the back;
- remove the powder receiver from the unit;
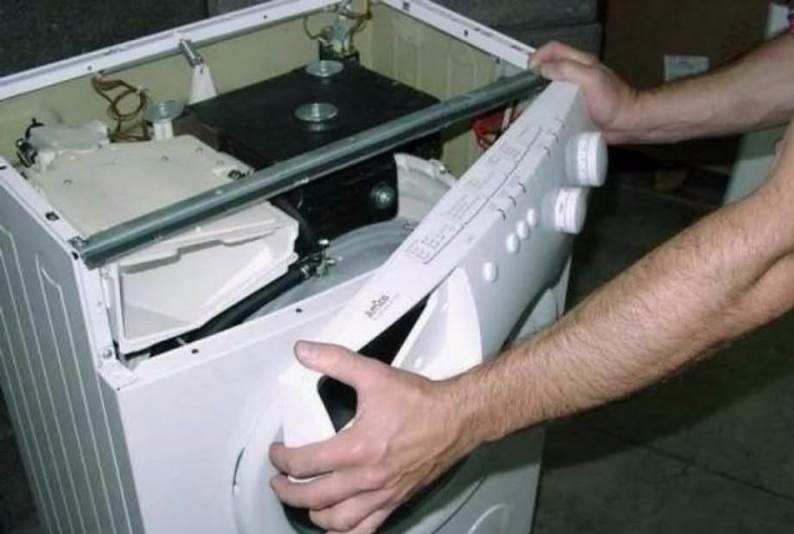
- unscrew the screws that hold the control panel, remove it to the side;
- unfasten the lower decorative panel from the body;
- unscrew 3 screws located behind the decorative panel;
- unclench the wire clamp holding the cuff, put it aside and put the elastic into the drum;
- unfasten the front wall of the housing.
Removing the front panel, you will see that the hatch lock is not disconnected from the main part of the machine. It is necessary to carefully, without damaging the contacts, reset the lock chip or simply unhook the UBL.
- unfasten the filler pipe;
- disconnect the wire leading to the dispenser and disconnect the tray from the case;
- remove the upper metal bezel that opens after disconnecting the control panel;
- lower the counterweight slightly down, to do this, loosen its mounting bolts;
- disconnect the thermistor, to do this, reset its terminals;
- remove the power and ground wires from the contacts of the tubular heater;
- remove the heating element from the housing;
- unfasten the clamps holding the plastic tank cap;
- remove the cover and put it to the side.
The main stage of the SMA analysis was completed, as you understand, you can do the work yourself, it is not necessary to transfer the washer to the workshop. To change the bearings, you have to remove the drum from the housing and gain access to worn parts.
We take out the drum and remove the old bearings
Further repairs will be made after removing the drum of the washing machine. It is necessary to loosen the pulley, reset the drive belt. We act carefully.
- We unfasten the back wall of the Beko washer body, it is fastened with five screws located around the perimeter.
- Remove the drive belt.
- Unscrew the nut holding the pulley.
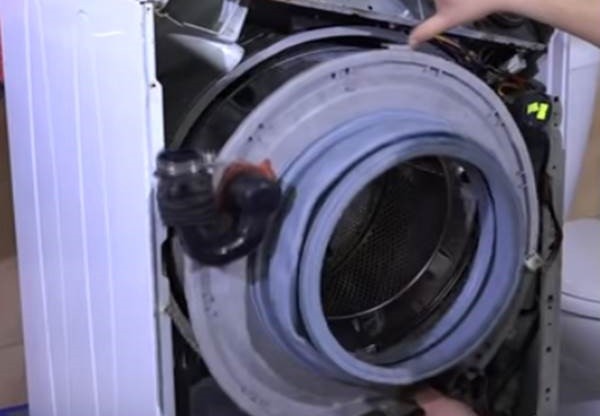
- Carefully remove the drum from the housing.
At this stage, you should inspect the cross of the drum for the presence of development. If its marks on the shaft are not found, you can continue to repair according to plan. If the crosspiece is in poor condition, you will have to purchase or repair the part, and only then continue to work.
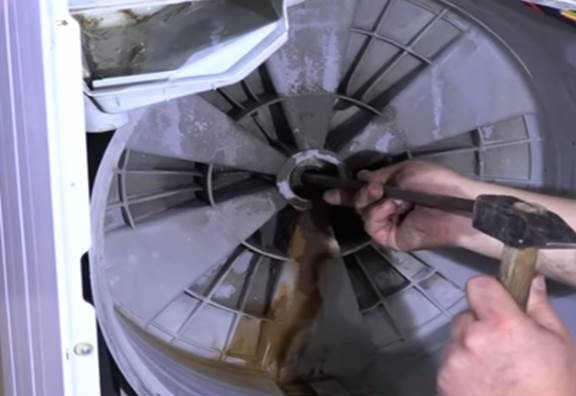
You can begin the crucial stage - knocking out the bearings from the tank. To do this, you need a regular hammer and a special punch. The action algorithm is quite simple.
- Remove the oil seal (rubber o-ring).
- Set the end of the drift in the center of the rear bearing and tap the metal rod with a hammer.
Be sure to change the direction of the punch, do not hit the same place.
- Go around the machine from the back side and start knocking out the second bearing.
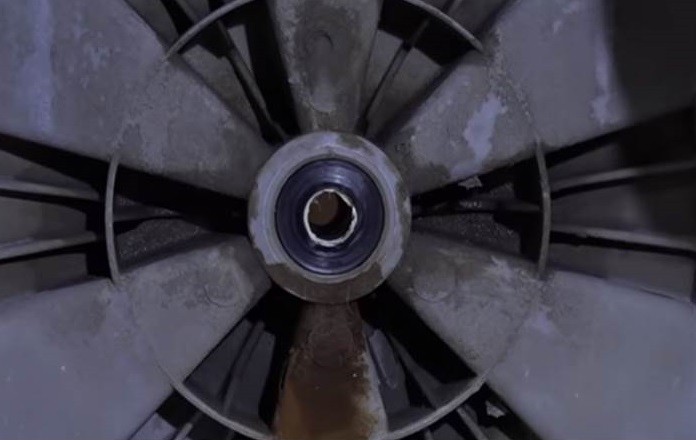
After the parts requiring replacement are knocked out, the tank will look like this:
Now you should clean the seat from liquid, rust, dirt, plaque. Be sure to clean the drum shaft. After disassembling the drum of the Beco machine, it is possible to press-fit new bearings.
We put brand new bearings
To purchase suitable accessories for the washer, you need to know the full name of the model of the machine. When buying bearings, you should give this information to the manager. Another option is to go to a specialized store with the elements already extracted and ask the specialists to pick up identical parts.
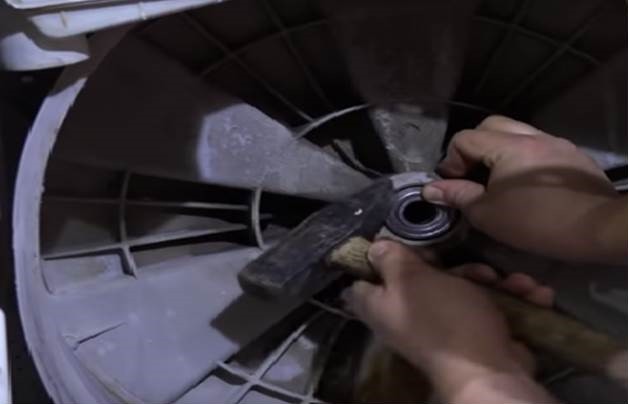
A smaller diameter bearing is installed on the outside of the tank (actions can be taken through the removed rear wall of the housing). It is clogged with a hammer and a punch. It should rest solely on the outer clip of the part and, tapping with a hammer, carefully press the element into the tank.
In no case do not hit the inner race of the bearing, this may lead to its destruction.
Having acquired one of the details, you can proceed to the installation of the second element. To begin, insert the bearing into the hole and with one blow of the hammer fix its position.
Then, using a punch, drive the element into place. After installation of bearings it is necessary to "put" a gland in place. The rubber ring is treated with special grease, this is necessary to improve performance and extend the life of the seal.
After the gland is firmly fixed, it is necessary to treat the drum sleeve with a lubricant. Lubrication will ensure water resistance and heat resistance to the connection, extend the life of bearings and O-rings.
The replacement is made, now it is necessary to put all the elements of the system in the housing. First of all, a drum is put in place, a pulley is attached, a drive belt is put on. Following in place, the rear wall of the unit is screwed. Subsequent assembly is performed in reverse order. As you can see, it is realistic to replace the bearings with your own hands. To do this, you need to prepare all the necessary tools and clearly follow the instructions for action.
Interesting:
 How to repair or replace the crosspiece of a washing machine
 How to disassemble a Zanussi washing machine
 How to replace bearings on a Hansa washing machine
 How to change the bearing on a Samsung washing machine
 How to replace bearings in an AEG washing machine
 How to replace bearings on a Siemens washing machine
Reader Comments
- Share your opinion - leave a comment
Headings
Washing machine repair


For buyers


For users


Dishwasher


Add a comment