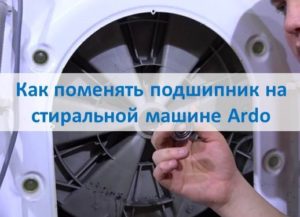
How to change the bearing on the Ardo washing machine
 In 99% of cases, noise, creaking and knocking during washing disappears after replacing bearings in the washing machine. Otherwise, the problem will increase, each cycle will be accompanied by a strong roar, and soon the machine will completely fail, requiring expensive repairs. Therefore, it is better not to take matters to the extreme and change the bearing assembly at the first sign of failure. How to do this quickly and competently - we will tell in all details on the example of Ardo washing machine.
We disassemble the machine
The process of replacing the assembly is quite time-consuming, since you can get to the bearings only by pulling out the tank and drum. To do this, you have to disassemble the machine almost entirely, which often scares away home masters. But in fact, acting consistently and accurately, anyone can cope with the task. The main thing is not to deviate from the following instructions:
- disconnect the machine from all communications, power, water and sewage;
Attention! Do not forget to fix the location of wires connected to the parts of the camera in order to avoid errors during reassembly.
- provide free access to the rear wall of the machine;
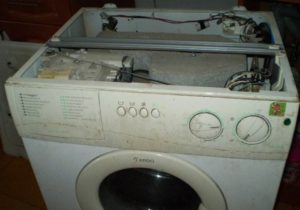
- unscrew the corresponding bolts, remove the back panel;
- throw off the belt (in old Ardo models it is wedge);
- reset the sensors attached to the tank by prying off the rubber with a flat screwdriver and bending each group of wires;
- remove grounding from the shaft by unscrewing the nut at the base;
- release the wiring on the heating element, loosen the retaining TEN bolt, push the rod inward and remove the part;
- unscrew the two screws on top and lift the front panel up, while being at the back;
- take the head 13 and remove the metal plate designed to tighten the tank;
- fix the flywheel with a screwdriver, unscrew the central nut and remove it;
- unscrew all self-tapping screws located on the middle circular joint of the tank;
- grab the upper tank with both hands and, leading it in different directions, pull out through the existing hole.
If you act in this way, there will be no need to remove the balances, engine, shock absorbers, dispensary and other untouched elements of the machine. Only the drum with the smaller half of the tank is pulled out. We put it on the old car tire and begin dismantling with subsequent replacement.
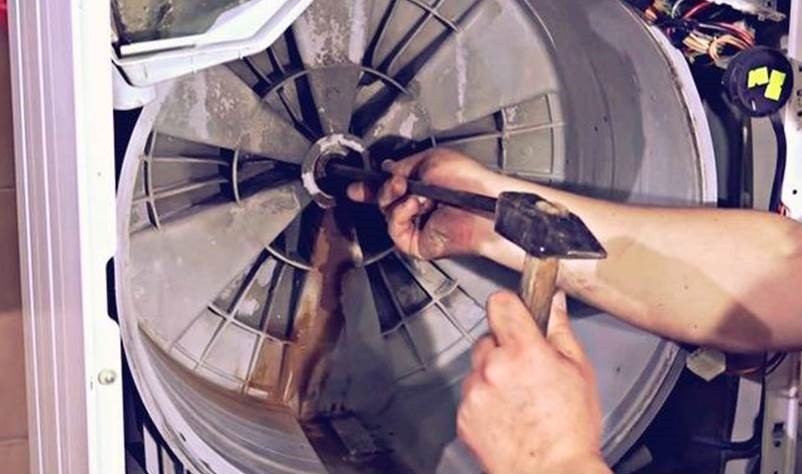
Removing old bearings
Putting the removed tank in front of you, it is necessary to assess the condition of the shaft. Most likely, over many years of operation, a lot of rust and scale accumulated in the center of the casing, so you will have to treat it with a universal cleaner like WD-40. While the composition is corroding dirt, we substitute a brick base under the container, and between them - a soft pillow. We continue to act.
- We knock out the sticky shaft, for which we substitute a rubber mallet and through it we tap with a hammer until the drum falls into the inside.
- We knock out the outer bearing and oil seal remaining on the tank.
- If the external bearing is very stuck, we grind the chisel and, varying the angle of inclination, knock it out with a hammer.
- When the inner ring is inaccessible, we carefully make cuts on both sides with a grinder and unscrew it with a gas key.
- Next we remove the second oil seal.
Now you need to prepare a place for the subsequent installation of the bearing assembly. Thoroughly clean the drum and tank with a cleaner and a rag. Then wipe dry and get the replacement parts.
Assembly of new parts
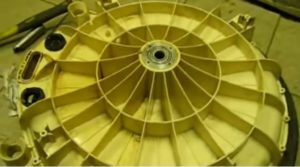 It remains only to change the bearings with your own hands. First, take a smaller diameter ring, put the tank with the hole for the drum up and insert the part into the seat. We lower the chisel with a blunt base and tap it with a hammer in a circle until it completely shrinks. After we fit a suitable oil seal, lubricate with a special composition and turn it over.
Next in line is an external bearing, which is mounted in the same way: put into a hole and rammed with blows. After abundantly grease the shaft and screw the drum into the tank. It will be useful to walk through the bearing assembly with a sealant.
Now we have to competently reassemble. We return the tank to its place and connect together the two halves of the tank with previously screwed screws. At this stage, we recommend checking the quality of work by scrolling the tank left and right. If there is no extraneous noise, the installation is excellent.
Next, fix the pulley, tighten the balances, attach the heater and connect two removed sensors. Be extremely careful with capillary - the gas tube is easily damaged by the slightest pressure. At the “finish” you need to put on the drive belt and tighten both covers. Do not forget to “drive off” the machine with a test wash, choosing the shortest mode.
Interesting:


Reader Comments
- Share your opinion - leave a comment
Headings
Washing machine repair


For buyers


For users


Dishwasher


Add a comment