How to change the cuff on an LG washing machine
 How to replace the cuff on an LG washing machine? Some craftsmen suggest carrying out repairs without removing the front wall of the case, while others suggest removing it. It is more correct to change the cuff by dismantling the front wall, top cover and control panel, especially when it comes to repairing a modern LG washing machine. Enough with the introductions, let's get down to business.
Preparation for repair
In order to change the hatch cuff on an LG front-loading washing machine without much difficulty, you need to prepare. First, of course, we will study the instructions on the procedure for carrying out work and the safety instructions for repairing electrical appliances.
- We need to turn off the machine and drag it to where it will be convenient to work with it.
- We also need to purchase a new hatch seal that is guaranteed to fit your LG washing machine.
- After this, we need to collect simple tools, prepare mentally and begin work.
So, turn off the machine using the on/off button. We completely de-energize it by removing the power plug from the outlet. Next, turn off the water supply to the machine and remove the hoses: drain and fill. We twist the power cord and hoses, and then drag the machine to the place where the repair will be carried out.
Open the door of the washing machine. There is a silver plate right above the hatch that shows the full model name of your LG washing machine, for example LG F1056MD. We rewrite the name and go to the washing machine spare parts store. Knowing the name of your machine model, the seller will give you the cuff you need.
Now a few words about tools.You don’t need anything serious for the job, just a Phillips and flathead screwdriver and a flashlight. If you are too lazy to turn the screws, you can use a screwdriver. That's all, let's start the repair.
Disassembling the machine
It is difficult to replace the cuff without disassembling the washing machine, so we’ll start with disassembly. We go around the back of the machine and unscrew the screws that hold the top cover. Pull the lid towards you and lift it up.

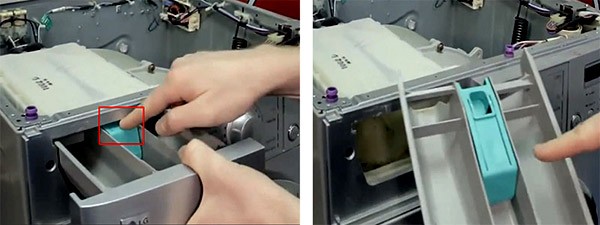
Now we go around the front of the car. We need to get the powder tray out so that it doesn't interfere with our removal of the control panel and front wall. Pull the powder tray out towards you until it stops, press the plastic tab in the center and remove the powder receptacle completely.
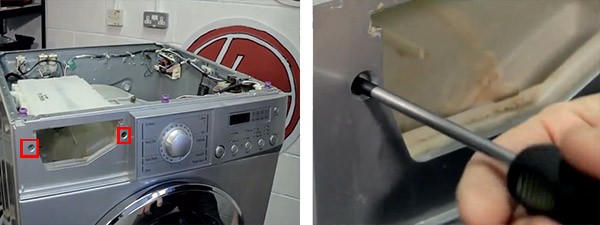
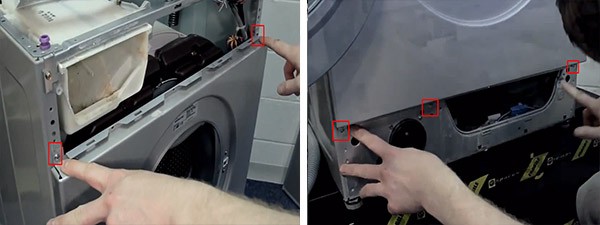
Having pulled out the powder receptacle, you will see that there are two screws to the right and left of its niche. We unscrew these screws as carefully as possible using a Phillips screwdriver.
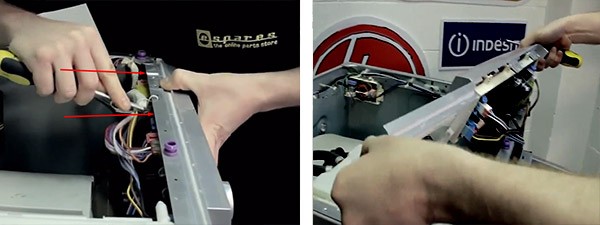
Now we need to remove the control panel of the LG washing machine. There are special latches on the back of the control panel behind the end of the housing. You can press them out using the same Phillips screwdriver. We press the latches one by one and carefully pull off the control panel.
Proceed with caution; there will be a large bundle of wires trailing behind the control panel. There is no need to disconnect them, just place the removed panel along with the wires on top of the corner of the machine body.
We take a flat screwdriver in our hands and squat down. We hook on the manhole cover that covers the garbage filter. This cover is located at the bottom on a narrow decorative panel.
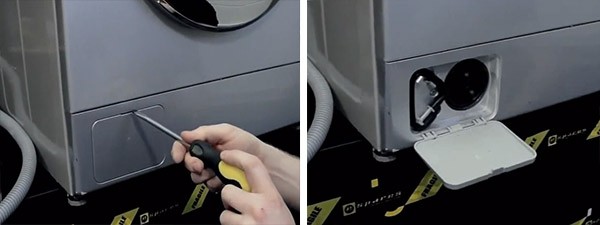
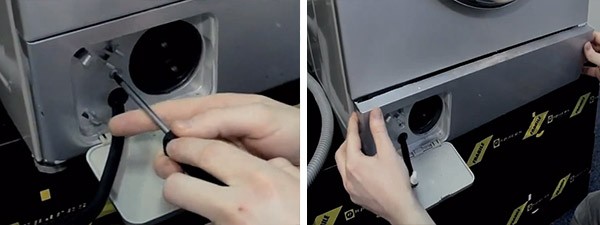
Having opened the lid, we move aside the emergency drain hose, which may interfere with access to the fastening element. Using a Phillips screwdriver, unscrew the screw that holds the decorative panel.The screw is located to the right or left of the filter, depending on the LG CM model. Carefully grasp the decorative panel and pull it off the latches, first on the right side, then on the left.
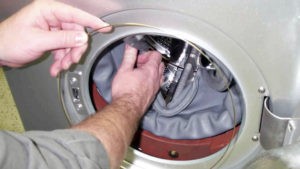
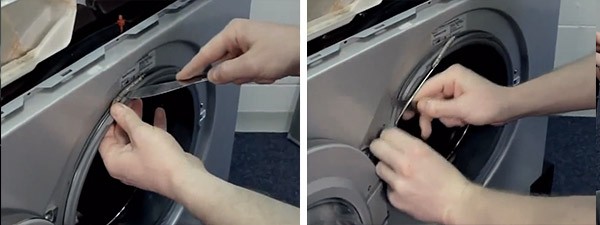
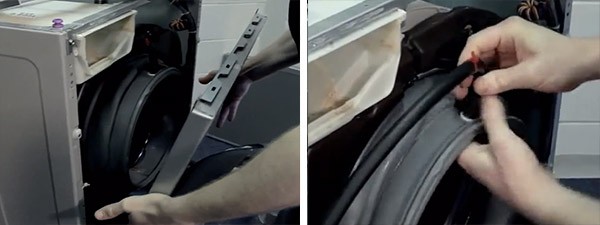
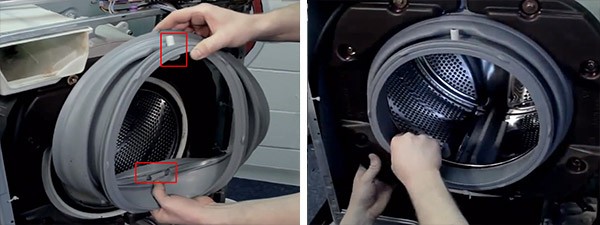
We open the hatch door wide, take a flat-head screwdriver and try to remove the front clamp of the hatch cuff. This needs to be done precisely at this stage, since this clamp will interfere with removing the front wall of the SM housing. We find the spring on the clamp. The spring can be located both above and below. We pry up the spring with a flat screwdriver and, moving it towards ourselves, carefully pull off the clamp.
Instead of a flat-head screwdriver, you can take a dull table knife; it will be even better for this operation.
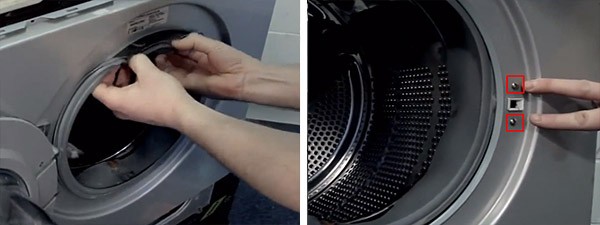
At this stage of disassembly, we cannot yet remove the door sealing rubber. But we can tuck it inside the drum so that its edges do not catch the front wall of the housing during further disassembly. Thread the cuff into the drum. Next, unscrew the two screws that hold the UBL of the LG washing machine. There are screws to the right of the hatch and you will need a Phillips screwdriver to remove them.
To release the front wall of the LG washing machine, you need to unscrew five more screws. First unscrew the two screws on top, and then the two screws on the bottom.
Using a screwdriver, carefully press the UBL out of the front wall so that it falls inside. Now you can remove the front wall and put it aside. There is no need to specially remove the hatch cover; let it remain assembled with the front wall of the machine body. Next we need to remove the hose attached to the cuff fitting.
Replacing the hatch rubber
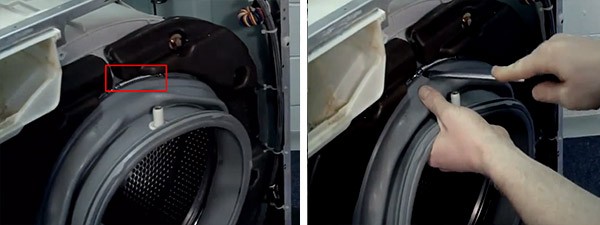
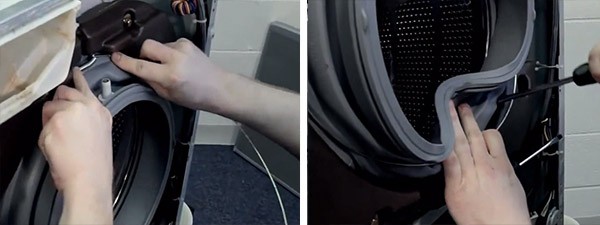
Now it's time to remove the rubber seal from the tank of the machine. It’s true that the internal clamp is preventing us, but removing it is a matter of technique. As in the case of the external clamp, we find the spring, hook it with a screwdriver and pull off the clamp.
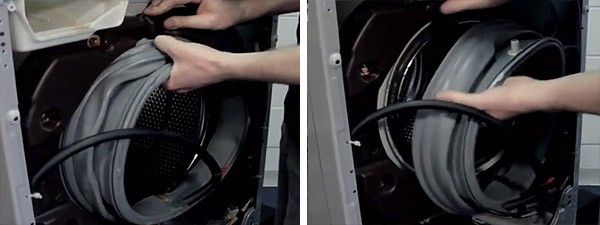
We firmly grasp the cuff and try to pull it off the grooves. You'll have to put in some effort. Don't be afraid to damage the old cuff when removing it, as it will be thrown away anyway. Once you manage to remove the old cuff, move it to the side so it is out of the way.
After removing the old LG washing machine cuff, you may notice a huge amount of dirt that has accumulated in its seat. Take a rag and thoroughly wipe off all the dirt. We remove the bushing from the old cuff and place it on the new cuff.
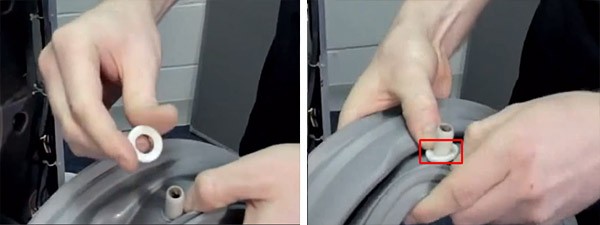
Now let's inspect the new cuff and turn it with the fitting up. You need to install the new rubber band so that the arrow on it coincides with the arrow on the body, and the technological recesses are at the bottom. It is very important. Test everything several times before you place the cuff on the seat. If everything is correct, put on the cuff.
Next we need to secure the cuff with an internal clamp. You can buy a new clamp, or you can install an old one. We stretch the spring a little and put the clamp in place. This is the most time-consuming part of the job, so get someone to help you. To make it easier to put on the clamp, use two flat-head screwdrivers.
The main thing in the process of putting on the clamp is not to accidentally pierce the new cuff, otherwise you will have to run to the store a second time for a new part.
Having put the inner clamp in place, we reach the “finish line”. We attach the tube to the fitting, and then assemble the “home assistant” in the reverse order. Be careful not to forget anything during assembly. With this we consider our instructions complete. If you still have questions, watch the training video that we attached to this article. We wish you good luck and easy repairs!
Interesting:


Reader comments
- Share your opinion - leave a comment
Categories
Washing machine repair


For buyers


For users


Dishwasher


Add a comment