How to replace the cuff on an Ariston washing machine
 Repairs of automatic washing machines take a serious toll on the family wallet, some of them are very expensive. The price consists of the cost of the part being replaced and the work of the technician. The owner can perform certain types of repair work on the Ariston washing machine independently. Replacing the sunroof cuff is just such a repair. Let's consider the question of how you can do this yourself, without involving third-party specialists.
Before renovation
A considerable part of washing machine problems can be fixed without using any special tools. Take cuff replacement, for example. This is a fairly simple operation and can be done with just one screwdriver, but to be sure, it makes sense to collect the following tools:
- hex keys;
- pliers;
- hammer;
- screwdrivers, slotted and Phillips.
There is one small trick. For those who are doing this work for the first time, it makes sense, in addition to the necessary tools, to have a camera or phone with a camera on hand. This is necessary in order to take a series of photographs. They are needed so that later, during assembly, you can use the photograph to install the removed parts in place. This approach will allow you not to confuse anything and start the machine without any problems after repairs.
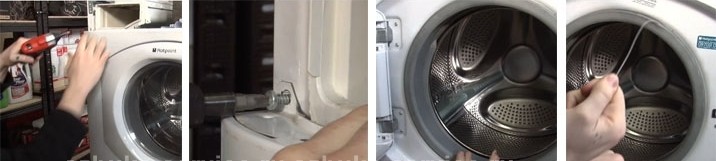
The first step is to unplug the wire from the outlet and turn off the power to the device. This will ensure safety during repairs.
Repair progress
To replace the rubber seal, you need to gain access to the inside of the Hotpoint Ariston case through the front panel of the machine.Rubber parts, in particular cuffs, are considered to wear out quickly and must be replaced first. It is strictly not recommended to delay repairs.
The first step is to remove the screws securing the housing cover. In order to dismantle the cover, you need to move it relative to the machine body, towards the rear panel. Then lift the front edge and disconnect it from the body. After this, you need to gain access to the fasteners that hold the front panel of the machine. To get to these elements, you need to remove the powder dispenser from the housing. Below it are the screws that secure the control panel of the washing machine. They will need to be turned out. Let's proceed further.
- Disconnect the control panel. Care must be taken when performing this operation to avoid damaging the plastic latches.
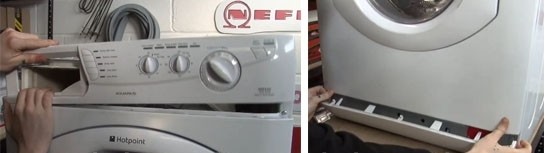
- After removing the front housing element, you can release the lower (base) part. To release it, use a flat object.
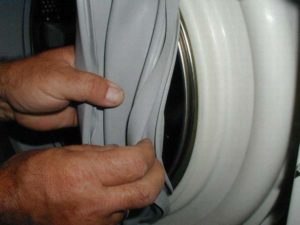
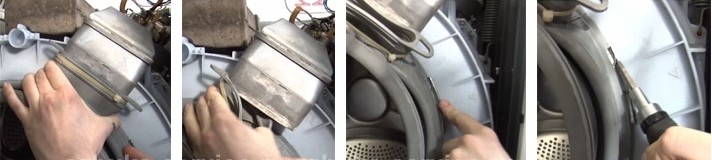
- Now that all the wall fasteners are free and clearly visible, you need to remove all the mounting screws. A special clamp with a spring is installed on a cuff made of rubber. The purpose of the clamp is to press the rubber element to the tank body. Using a flat object, for example, a metal ruler, the clamp must be removed.
- We take the edges of the cuff and tuck them inward so that they do not catch the front wall. We put our hand under the front wall to the right of the hatch and disconnect the wires that go to the UBL.
- Unscrew all the screws in a circle and remove the front wall of the Ariston machine body. This will ensure access to internal parts and components.
- Our damaged cuff is connected to the clothes drying air duct using a tap.You need to take its edge and unhook it from the air duct along with the clamp. Then you need to remove the second clamp that holds the damaged rubber on the tank. To separate the teeth and loosen the clamp, use a slotted screwdriver.
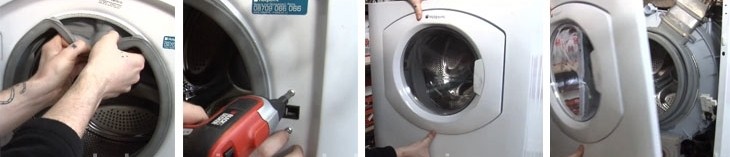
- Upon completion of dismantling the second clamp, our ill-fated elastic band should freely detach from the tank. Now you can remove the cuff simply by grasping it with your hands and pulling it from its seat.
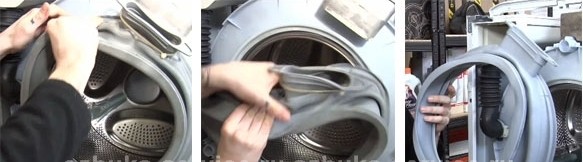
Before placing the new cuff in its original place, preparatory work is performed. That is, they clean the oil seal seat on the washing machine tank. Installation begins with connecting the outlet to the air duct. Then align the holes for draining the water with the lowest point located in the middle. After this, you can install the remaining part of the cuff on the plastic tank. Simply putting the rubber band on the seat is not enough; you need to securely fix it with a clamp. The Ariston machine is assembled in the reverse order.
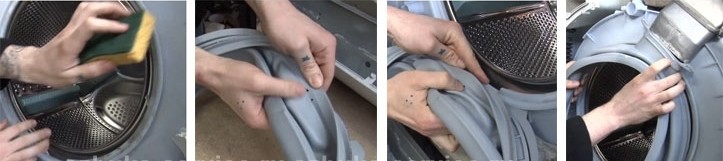
As soon as the part is installed and the front wall is returned to its original place, it will be necessary to test the installed cuff for leaks. If, after filling the tank, water flows through the installed cuff, then most likely it will seep through a poorly cleaned area or the clamp is not tightened enough. After a successful test, you can completely assemble the machine. At this point, the installation of the rubber seal can be considered complete.
Why does the rubber band get damaged?
Damage to rubber components occurs for various reasons. Sooner or later, the weak point becomes a source of water leakage.A torn cuff can cause fungus, a disgusting smell, and can cause unsanitary conditions.
As noted above, cuff wear can be caused by long-term use. Any parts and assemblies have a certain safety margin and during prolonged operation they fail.
Special rubber is used to make the cuff. It is not very resistant to the use of certain detergents that are used when washing clothes. During operation of the machine, contact occurs between the components of the equipment. Under the influence of such contacts, the rubber may be damaged. The same friction occurs between things that are in the drum during washing.
By the way, the door seal of the Ariston washing machine can be damaged if you carelessly load things into the drum.
The more often the user turns on aggressive washing modes, the greater the load on the machine parts, including the cuff. Imagine the devastating effects of high temperatures (up to 900C) and friction force during spinning at speeds above 1000 rpm. If you handle the washing machine in accordance with the operating instructions and take good care of it, the likelihood of parts and components breaking will be significantly reduced.
Interesting:


Reader comments
- Share your opinion - leave a comment
Categories
Washing machine repair


For buyers


For users


Dishwasher


Add a comment