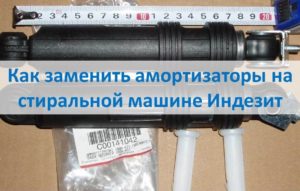
How to replace shock absorbers on an Indesit washing machine
 Most often, the shock absorbers of a washing machine are replaced quickly and without problems, but not with Indesit washing machines. To get to the Indesitan dampers, you will have to remove the electric motor, drive belt and "tricky" latches on the racks themselves. Blindly coping with the task will not be easy, therefore, we recommend that you familiarize yourself with step-by-step instructions, difficulties and nuances of installation. About everything in order - read below.
Get to the details
Worn shock absorbers make themselves felt with increased hum, vibration and jumping of the machine during operation, and in order not to aggravate the situation with balancing the drum, dampers must be changed. But the "diagnosis" is confirmed by disassembling the machine, so let's get down to business. We act strictly according to the established algorithm.
- We disconnect the unit from the mains, shut off the water supply, disconnect the drain and inlet hose.
- We provide free access to the washing machine from all sides.
- We drain the residual water through the trash filter.
- Remove the tray.
- We unscrew the bolts at the back and remove the back wall.
- Remove the drive belt by pulling the rubber onto itself while rotating the pulley.
- Disconnect all conductors suitable for the engine.
Important! To facilitate the reassembly process, fix the location of the wires leading to the motor with notes, markers, or a photograph.
- Using a wrench at 13, weaken all fastenings holding the electric motor.
- We hook each retainer with a flat screwdriver, squeezing the sticky joints.
- Pull the engine towards you and remove.
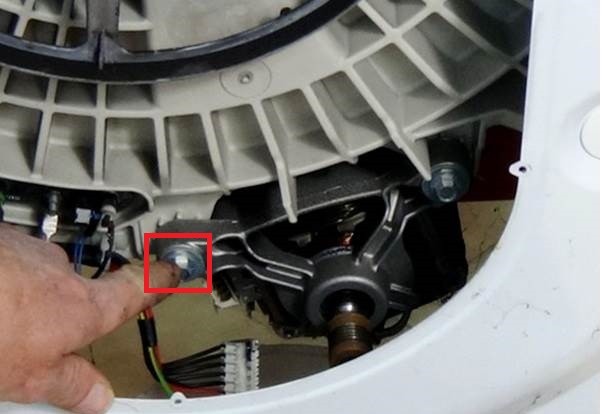
The path to the shock absorbers is open, but they can only be reached from the bottom. Therefore, we cover the floor with rags and turn the machine on its side. Be prepared for the fact that some of the water will pour out, which must be quickly wiped off, avoiding moisture entering the wiring and control board.
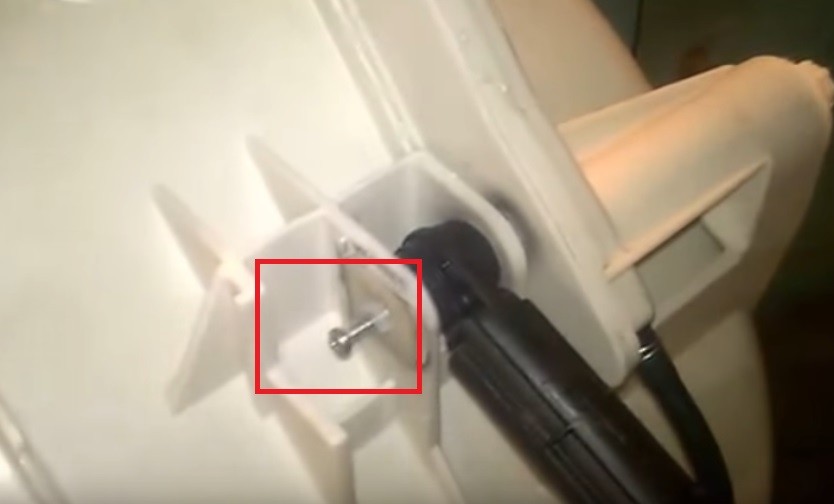
Shock Absorber Removal Problems
They prevent quick and easy removal of shock absorbers from the Indesit machine. Special locks in the form of bursting plugs between repairmen called “nails”. Each passes through a damper and two plastic plates holding a rack on both sides. Its outer base is absolutely smooth, so it is almost impossible to stretch it.
Attention! It is not recommended to try to “get” the screwdriver to the cork on the other hand — there is a risk of damaging the thin plastic and breaking the pressure in the pressure switch system.
The problem can be eliminated if you modernize the cork in this way:
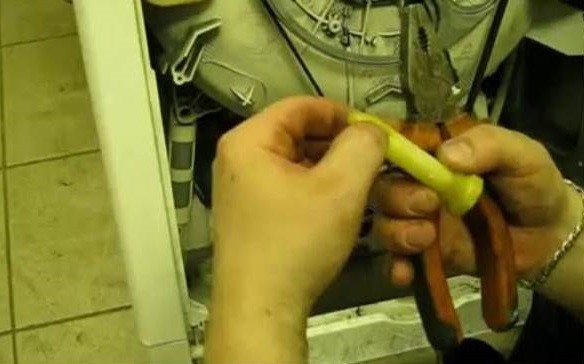
- find a drill with a diameter of 2-2.5 mm and a length of at least 20 cm;
- with a drill or screwdriver, drill a hole in the middle by 3-4 cm, but you can do it through;
- screw the self-tapping screw into the hole made, leaving 3-4 cm on the surface;
- grab a screwdriver with a pair of pliers and pull it towards you.
- gently get a screw with a "nail";
- pull the damper out of the grooves.
To remove the second shock absorber, we repeat the algorithm by turning the washing machine on its other side. The main thing is to choose the optimal drill length and reach the retainer. If you cannot get close to the racks, it is recommended to get the tank out and try again.
Install a new part
Now it's time to replace the old shock absorbers. It is logical that this will require new spare parts that are purchased at service centers or online stores. You can choose the right parts in two ways: bring the previously used rack to the consultant or rewrite the brand and serial number of the washing machine. Reassembly happens like this:
- we get the shock absorber and, applying force, we place it in special grooves;
- we take the previously used cork and carefully drive it into the hole on the damper through both partitions;
- install the drill in the drill and, including the "reverse", take out the self-tapping screw;
- check the reliability of fixation;
- repeat the action with another rack, turning the machine on the opposite side;
- if the tank was removed, then install it back into the body;
- we return the engine to the place, tighten the screws securely and catch all the supply wiring;
- we put on a drive belt, not forgetting to rotate the pulley;
- raise the machine "on its feet" and fasten the back wall.
The final step will be to run the washer at maximum spin. If the machine is stable during the whole cycle, the vibration is moderate, and there is no hum or knock, then the repair is done correctly. Otherwise, we return to the disassembly stage and tighten the fastening retaining shock absorbers.
Interesting:


Reader Comments
- Share your opinion - leave a comment
Headings
Washing machine repair


For buyers


For users


Dishwasher


Add a comment