How to make a wax melter from a washing machine
 Whether in a large industrial apiary with hundreds of bee colonies, or even in a small home one, where there are only 2-3 dozen “boxes,” a fairly large amount of wax waste accumulates over time. This includes old foundation, contaminated frame cuts, and frames infected with wax moth larvae.
Such wax is only suitable for melting, but in order to melt it, you need a good steam wax melter, which we will have to make from parts of a washing machine with our own hands, and then describe the entire process of work in this article.
What do we need?
If you have a broken automatic washing machine gathering dust in your shed, you have the time and desire, you can “bundle” a good steam wax furnace out of it without spending a lot of effort and energy. Why a steam wax melter, since many beekeepers use a regular solar wax melter, which is much easier to make?
- Firstly, a steam wax melter quickly and efficiently melts quite a large amount of wax.
- Secondly, a steam wax refiner gives a greater yield of raw materials.
- And thirdly, a steam wax melter can be used at any time of the year and in any weather.
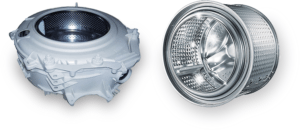 So, we take out the old washing machine from the shed and begin to “tear it up for spare parts.” Complete disassembling the washing machine in order to get to the necessary parts and remove unnecessary ones. What parts of an automatic washing machine will we use in the wax melter? There are only two large parts: the body and the tank assembled with the drum and the hatch cuff. You also need to leave the inlet hose and drain pipe.
In addition to the parts of the old washing machine, we must get: a small flask of 15-25 liters, a metal trough, rubber plugs, silicone sealant, as well as a gas or electric stove. You will also need a metal pan lid to cover the drum hatch. The beauty of the design is that it can be assembled literally from scrap materials, spending only 1-1.5 hours of work.
If you are going to use a wax melter in the field, you can use a regular fire instead of an electric or gas stove.
Build process
To make our wax melter with our own hands, we will need to take two side walls of the automatic washing machine body and the back wall. We twist them together with bolts more securely. Most washing machines have a service hatch in the back wall; you need to remove its cover. If there is no service hatch, you can cut a hole in the rear wall so that the drum pulley can easily fit through it.
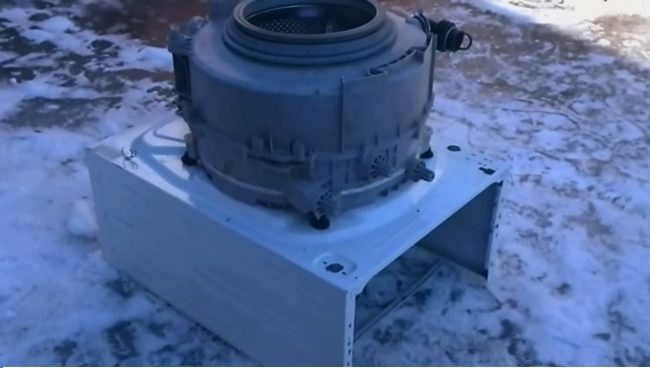
We place the body of the washing machine on the edges of the side walls so that the back wall with the service hatch looks up. Next, we take the tank with the drum and drill several fairly large holes in the tank in the area of the drum pulley, that is, in its rear wall. The technological openings in the tank, except for the hatch and the drain pipe, must be plugged. We place the tank with the drum on the back wall of the case as shown in the figure below.
Now let's secure the tank and drum so that they don't dangle. To do this, you can use service bolts, or you can simply put a rubber band. It's time to prepare the flask. We need to find a hermetically sealed lid with an elastic band for it and make a hole in it so that the inlet hose of the washing machine can be tightly inserted there.
All connections should be as tight as possible, so choose rubber seals for them and use silicone sealant.
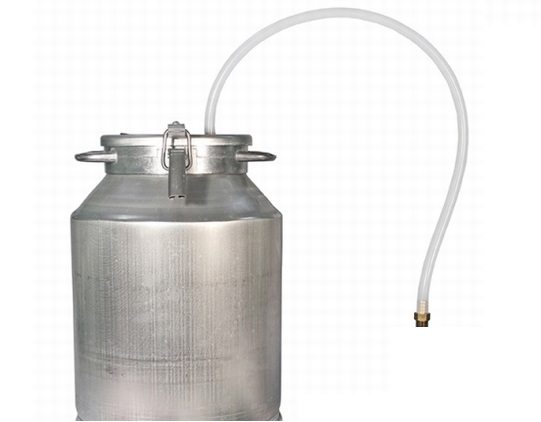
One end of the inlet hose is hermetically inserted into the lid of the flask, we insert the other end into the drain pipe protruding from the tank and seal the connection with our own hands. That's all, as you can see, making a steam wax melter from parts of a washing machine with your own hands is not so difficult. True, it is not yet clear how it works, so we will devote the last paragraph of our publication to the functioning of our unusual device.
How does the device work?
We pour pre-dried wax waste into the hatch of the drum of a former washing machine. The wax needs to be compacted tightly so that more of it goes in. Next, we’ll prepare the wax melter for work.
- Let's install the parts of the wax melter closer to each other so that the hose from the tank with the drum can freely reach the flask.
- Place the flask on the burner of an electric or gas stove.
For your information! If you have assembled a wax melter somewhere in the field, you can place the flask on bricks so that you can build a fire under its bottom.
- Pour 10-12 liters of water into the flask. If the flask or can is ten-liter, then you need to fill it 3/4 with water.
- We light the fire and wait for the water in the flask to start boiling.
- Steam begins to flow through the hose from the flask into the tank of the washing machine, we need to temporarily close the holes we previously drilled and place a trough under them.
- We close the drum hatch on top with a lid and press it down with something heavy.

The diagram presented above shows what will happen inside the wax furnace.Hot steam from the flask will rush through the hose into the tank of the washing machine, immediately penetrating from the tank through many holes directly into the drum, where we previously placed the wax. The melted wax along with hot water will flow through the holes in the drum to the bottom of the tank, and from there through the holes into the container you placed. When the water and wax cool, the wax will harden and float, and the beekeeper will only have to pick up the finished product.
So, having made a steam wax melter from washing machine parts with your own hands, you will not regret the time spent, because with such a device you will be able to melt tens of kilograms of old wax while spending a minimum of time. And most importantly, making a wax melter will cost very little, and maybe even free if all the necessary parts are already in stock. Good luck!
Interesting:


Reader comments
- Share your opinion - leave a comment
Categories
Washing machine repair


For buyers


For users


Dishwasher


Add a comment