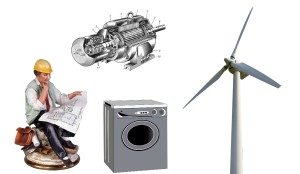
Wind generator from a washing machine engine
 Today, many are interested in alternative energy sources, but things do not go further than reasoning and ideas, since such sources cost incredible amounts of money. For example, a 2.5 kW wind generator together with a gearbox and propeller will cost $0.6 thousand, not counting the installation fee, which is, to put it mildly, a little expensive. But you don’t have to give up the idea due to lack of money; you can make a wind generator with your own hands from parts of a washing machine, and we, in turn, will share with you our experience in making this thing.
Is it necessary to start making a windmill?
Everyone must answer the question whether or not a wind generator is needed for themselves. But if the issue is acute and there is only a dilemma to buy a windmill or make one, we will give you specific numbers. A Chinese-made wind generator assembled “with all the guts” and installation (which is called “turnkey”) will cost you $750, and this is at pre-crisis prices. A DIY wind generator from a washing machine will cost an average of $35 (may be a little more expensive if there is a “tightness” with scrap metal). As they say, feel the difference.
Of course, it’s not just about money, to “bring to mind” a homemade wind generator, it will take a lot of time, ingenuity and “golden hands”, but overall the result is worth it, because at the end you will get a stable device with a power of 2.5 kW. This is enough to electrify a small dacha to a minimum. In particular, our windmill provides lighting for two rooms of a country house, operation of a computer and a small portable TV.
For your information! In order for the efficiency of a wind generator to be as high as possible, it is necessary to immediately consider the location of its installation. The ideal option is an open place.
We select the necessary spare parts
As already mentioned, if you have a garage full of various metal junk, the cost of making a wind generator from a washing machine engine with your own hands is sharply reduced. The main element that you need to deal with first is the generator. The generating unit is the basis of your homemade windmill, but it is also its most expensive element.
Some “homemade” people offer to make a generator from a washing machine engine. There is a reason for this, but there is also a problem. This engine will have to be redone, namely, equipped with a magnetic rotor. There are two ways: the first is to buy a magnetic rotor, the second is to make it. We suggest not to bother and order a ready-made rotor, why?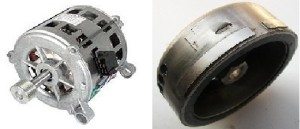
- For a homemade rotor you will need special neodymium magnets, which will have to be ordered anyway. And the price tag for a set of such magnets is the same as for a new Chinese-made magnetic rotor.
- Assembling a homemade magnetic rotor with your own hands is associated with certain problems. You will need to cut out a special shape and stick each magnet very securely - this is a thankless and painstaking job.
- The magnets on the rotor must be positioned at the correct angle, otherwise they will stick and the generator will stop working. It is difficult to calculate this angle, and it is difficult to secure the magnets in this position.
Note! The magnetic rotor for the future generator is the main part of the cost; with shipping it will cost about $20-25.
The 2.5W magazine rotor fits perfectly into the motor of a modern washing machine; there’s no need to do anything special. By the way, from a washing machine engine you can make not only a windmill, but also, for example, grain crusher, But that is another story. Next you need to get a mast, gearbox, long shaft, gears and impeller. We admit that if certain materials are available, technical solutions may be different; in our case, the mast was made like this:
- Several sections of used 32 mm steel pipes were taken and connected to each other, resulting in a single hollow structure 10 m long.
- Next the mast was painted white.
- After this, the mast was ready to be hoisted onto the pole. On it we attached protruding steel brackets from an angle with a hole so that the mast was securely held vertically, at the same time, so that nothing prevented its rotation.
If there is no non-functioning pole nearby, then the problem of supporting the mast will need to be solved, since the pipe structure itself is unstable. Next, we will assemble a gearbox for a wind generator with a vertical axis of rotation, which is shown in the figure below.
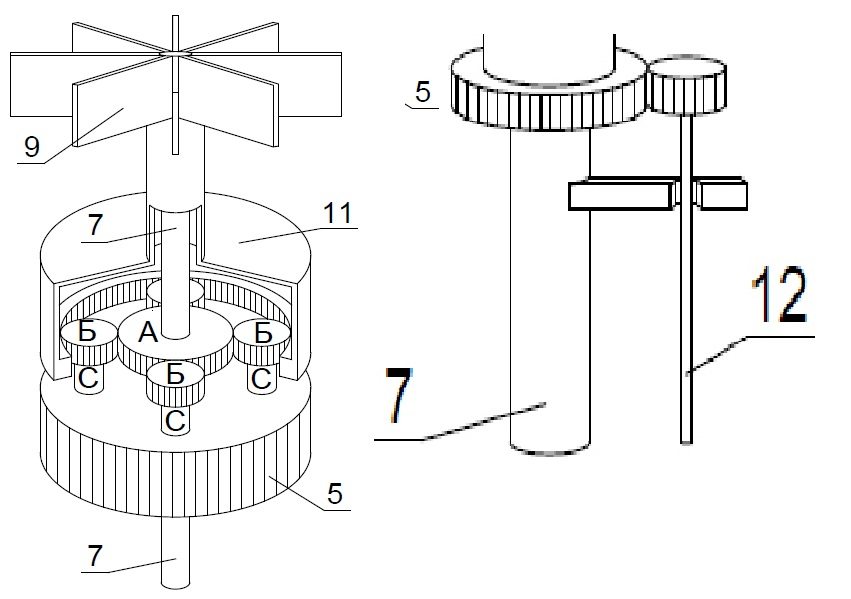
- The main gear (5), mounted on the mast, was taken from the water pump drive.
- Turned pieces of reinforcement are welded in a circle onto the gears, they are also axles (C) - 4 pcs.
- Bearings with gears (B) are pressed onto the axle.
- A small gear (A) from the same water pump, mounted on the mast, comes into contact with the gears (B), while at the same time, along the edges of the gears (B), they interact with the teeth of the gearbox housing.
The peculiarity of this gearbox design is that its housing rotates around the mast completely freely along with the propeller. Due to this, the rotation speed of the propeller slows down somewhat, which affects the efficiency of the windmill, but the structure becomes more stable and durable. Even in hurricane winds, the wind generator will not break thanks to the gearbox that controls the propeller speed.
The “stumbling block” can be the gearbox housing (11), what it is made of. The specific bottle-shaped body with teeth in a circle must have suitable dimensions. We got out of the situation by adapting a steel motor housing from an industrial pump; we didn’t even have to cut a thread. The insides of the gearbox have already been designed to fit its dimensions. You can do the same or make the case yourself according to the dimensions.
Important! To make a gear housing, you will need the help of a specialist, so to save money, try adapting ready-made housings from used engines and pumps.
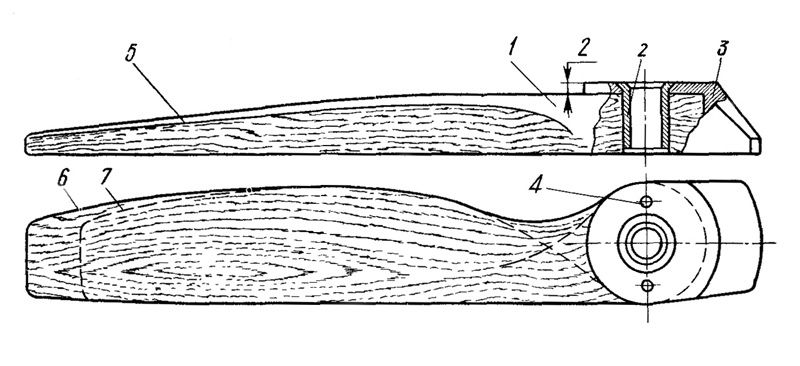
Another difficulty is making the impeller. By the way the impeller will not be located perpendicular to the earth's surface like most industrial windmills, but horizontally, as this makes the design simpler and more reliable. In this case, you do not need a device that will direct the impeller in the wind. With this it is clear, it is also clear that the impeller must be rigidly attached to the rotor body, but how and from what should it be made? We had a whole “epic” with this.
- First we made the impeller blades from five-ply plywood. Maybe this material would be suitable if the blades were shorter. But since our design requires a blade length of at least 1.5 meters, and preferably 2 m, the plywood propeller broke with wind gusts of 10-15 m/s.
- Solving the problem of how to make a propeller light and durable, we used scraps of fiberglass sheets that friends gave us. This is a very durable material, but at the same time flexible. To ensure the rigidity of the structure, we had to cut not three rectangular strips, but six and glue them together. And only then connect the strips into an impeller with a length of each wing of 1.6 m. The impeller turned out to be very durable, it even survived a storm with a wind speed of 37 m/s.
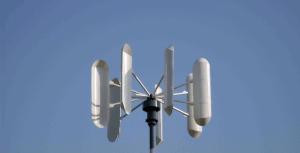
- While we were making a fiberglass propeller, the idea came up to make a propeller of a different (orthogonal) type, as shown in the picture below. The base of the structure, made of a lightweight duralumin corner, is crowned with large oval blades made of painted sheet metal. Unfortunately, it was not possible to implement the idea due to lack of time, but you might want to do something similar.
Next, we need a small gear and a shaft (12), onto which it is pressed. We will fix the shaft in special fasteners so that it does not jump out, but at the same time rotates freely. And the last thing we need is a flange to connect the rotating shaft to the generator. We will make the shaft from reinforcing bars welded together.
Some will ask, why such complexity, some kind of rotor with a bunch of gears and gears? In fact, everything is quite justified, since most of the territory of Russia has a very uneven wind load. The wind often changes direction and speed, which negatively affects the mechanism of a standard windmill, which will often break down, and this is unacceptable. The windmill mechanism we propose from a washing machine engine is much more stable and, if performed well, will work for a long time.
We construct a windmill with our own hands
 The design concept was determined, spare parts were selected, and a drawing was made based on them. Now you can start assembling the windmill from the washing machine engine. First, we determine the location of the windmill. The support should be placed in an open, windy place, preferably on a hill. The height of the support should be as high as possible; in our case (as we have already said), we used a 10-meter-high wooden electric pole located on our plot of land, disconnected from communications. Next we do the following.
- We install the mast on a support using special fastenings. During installation we used mounting claws.
- We install the previously assembled gearbox with the impeller on the mast, making sure that it is working.
- We connect the shaft to the main gear (5), located on the mast at the base of the gearbox.
- We fix the shaft in the special fasteners described above.
- We connect the rotating shaft to the generator, which must first be secured to a steel support welded from angles vertically directly opposite the shaft. Any support can be made, as long as it securely holds the generator.
- To prevent the generator from getting wet by rain and covered with snow, you can build something like a booth or a durable canopy over it. In this case, it will last much longer.
So we have described in general terms the process of creating a wind generator from a washing machine engine. Now you can start testing it, we hope it will help you take one more step towards an autonomous power supply for your dacha or private home.
Interesting:


Reader comments
- Share your opinion - leave a comment
Categories
Washing machine repair


For buyers


For users


Dishwasher


Add a comment