How to put a washing machine in a dressing room
 Often the best solution is to install a washing machine in the dressing room. This option saves space in the bathroom and kitchen, but creates some difficulties with connecting communications and other preparations for placing the machine. It is necessary to assess the hardness of the floor, calculate the distance to the water supply and sewage system, re-equip the outlet and think about ventilation. How feasible this is and whether the game is worth the candle - we will find out in a detailed analysis.
Installation feasibility assessment
It’s definitely not worth scratching the walls for a new outlet and dragging the machine into the dressing room right away. First you need to evaluate the location for installing the machine. First of all, we find out whether the body of the washing machine will fit into the space allocated for it: we carefully measure the width, depth and height, not forgetting about the protruding elements. We add another 7-10 centimeters to the resulting values - the hoses should fit behind the unit, and the sides should not be squeezed by neighboring objects.
If there are no problems with accommodating the dimensions, we proceed to evaluate the flooring. A hard floor is required that does not sag under a weight of 70-80 kg. Ideally, concrete or tiles. Wood, chipboard, linoleum are prohibited, otherwise there is a high probability of the body falling through and the drum becoming unbalanced during washing. The unevenness of the floor does not matter: the main thing is to adjust the legs of the washing machine using a building level.
The distance to the nearest communications is also important. So, if the sewer pipe is 3 meters or more away from the intended location, it is better to abandon the idea of placing the machine in the dressing room.Pumping dirty water will put too much strain on the pump and cause premature failure. The problem can be solved by installing an additional pump, but this will be more expensive and technically more difficult.
It is worth considering that the hoses of most washing machines have an average length of 1.4-1.5 m, and to extend them over longer distances you will have to change it to a longer sample or extend it with special nozzles.
We are also considering options for organizing sufficient ventilation. The washing machine is constantly damp, so ventilation is necessary to prevent dampness, mold and mildew. Keeping the door to the pantry open all the time is inconvenient and unsightly; only a forced air system will do.
This is not to say that installing a washing machine in the dressing room is an impossible mission. But if the upcoming work is too troublesome and financially expensive, then it is better to place the machine in the kitchen or bathroom. If the difficulties are easy to circumvent or solve, let’s get down to business.
Connection to water and sewerage
The most difficult thing is to connect the unit to the water supply and sewerage system. Moreover, the earlier methods of connecting to the central water supply using taps and a piece of rubber hose are no longer relevant. Now the inlet and drain hoses are already built into the washer and you need to screw them to the pipes using bends or tees.
It is better to install adapters with a shut-off valve, which will allow you to shut off the water after the end of the cycle, during repair work or moving the machine to another location.
The task is simple - cut a hole and install a tee in it. The sequence of actions and the necessary tools depend on the pipe material.So, it’s easier to cut into PVC with cold water supply: install an adapter with a tap and connect the washing machine hose to the outlet. The machine is also connected to the sewer. But if you do not have the proper experience, it is not recommended to do the installation yourself: it is much safer to seek help from a professional plumber.
Installing a socket
Sockets are rare in the dressing room, but even if there is one, it is better to install a new one. The fact is that a washing machine requires more power, therefore, the wires must be supplied with a sufficient cross-section. Otherwise, the conductor will overheat, ignite and cause a fire.
It is not recommended to use an extension cord to connect the machine - it is better to organize direct contact with the electrical network.
To convert an outlet or install a new one, you will need: 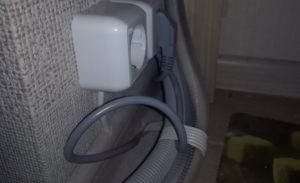
- socket with a moisture-resistant housing;
- new wiring with a core cross-section of at least 2 square meters. mm.;
- socket box;
- drill or wall chaser.
When all the tools and materials are prepared, we proceed to installation. First, we select a place for a new outlet, and then turn off the power supply to the apartment. Then we act like this.
- We make markings. We measure the height for the future outlet within 30-100 cm from the floor and mark the corresponding hole with a pencil.
- We calculate how many meters of wiring need to be laid from the washing machine to the junction box. It is recommended not to forget about a margin of 20-30 cm to facilitate installation and possible repairs. We mark the path to the shield with a pencil.
- We supply the drill with an attachment suitable for the type of wall and electrical fittings.
If you don’t have a suitable drill attachment, you can use a standard one: just drill a few holes in the wall, and then remove the remains with a chisel and hammer.
- We put on personal protective equipment: goggles, respirator and gloves.
- We connect the door to the electrical network. The use of an extension cord is allowed, as there is no need to limit the free use of the tool.
- Carefully drill a hole for the socket, following the markings.
- We make a 2-3 cm groove using a grinder or a chisel with a hammer.
- We clean all drilled holes from dust and remnants of building materials.
- We take out the socket box and fix it in the hole we made.
- We place the wire in the groove and insert one end into the shield and the other into the socket box.
- We cover the holes with wires with plaster or putty and wait for complete drying.
- We insert the socket and connect the wires.
- We head to the panel and connect the conductors to the corresponding contacts. It is strongly recommended to use terminals for connections, as twisting wires is dangerous and unreliable.
Once again we check the reliability of the fastenings and turn on the general electricity. Within a few minutes we try to detect a suspicious smell or the presence of smoke. Lastly, we insert any household appliance into the new outlet and evaluate the quality of the current supply. If everything is done correctly, then there will be no problems.
Organization of ventilation
It would seem that with electricity and water supplied, the washing machine can be placed in the dressing room and begin to operate. But don’t rush if your pantry occupies a minimum of square meters and does not have windows with vents. A closed room without ventilation slots is absolutely not suitable for a moisture-distributing machine. Ventilation will have to be organized in the following ways:
- Make a gap between the door and the floor.
- Choose a special door with ventilation grilles or holes equipped in the door leaf.
- Drill several holes in the walls at a distance of up to 30 cm from the floor. Ideally, 5 cm above the baseboards.
- Leave special gaps of 2-3 cm at the top of the partition.
- Consider a ventilation hole in the floor, if we consider private houses with a lower floor/basement with acceptable humidity.
A normal dressing room should have a free flow of air, since in the absence of oxygen circulation, things begin to smell unpleasant and get dirty faster. Moreover, there are standards for the size of inlet openings, which depend on the occupied square meters and the source of ventilation. So, to ensure a single exchange in a room with a width of 1.5 m, a length of 2 m and a height of 2.8 m, 8.4 cubic meters of air are collected, and in an hour it must be completely renewed due to incoming and outgoing flows. But this is for standard clothing storage, and with the installation of a washing machine you should increase the figure three times.
Calculating the air volume in a dressing room is simple: just multiply its length, height and width.
In a room with normally functioning ventilation, it is enough to make a hole for air flow with an area of 100 cm. The shape is not important - round, square and rectangular are acceptable. It is not prohibited to increase the dimensions.
In addition to the supply gap, it is necessary to organize an exhaust channel.It will be a similar ventilation grille, but located on the opposite side of the room and preferably closer to the ceiling. Ideally, it should be located as far away as possible so that the circulating air covers the entire room. If the air intake is planned from the middle of the room, then there should be two “exits” - on the right and on the left, with a distance from the corners of up to 25 cm. It is best when the air from the dressing room goes out into the ventilation duct, and enters from the street.
Only by strengthening the floor, thinking through the connection to communications, organizing air circulation and making a powerful outlet, can you move the washing machine to the pantry and use the machine for its intended purpose without risks. If everything is done correctly and wisely, then interruptions in the supply of water, short circuits and mold will not threaten the laundry and the home.
Interesting:


Reader comments
- Share your opinion - leave a comment
Categories
Washing machine repair


For buyers


For users


Dishwasher


Add a comment