How to remove the bearing from the LG washing machine?
 To remove the bearing from the drum of the LG washer, you will have to completely disassemble the equipment. But if most novice repairmen can get to the tank, then everything is not so simple - the bearing assembly is removed quite difficult. We suggest not experimenting with the machine, but acting strictly according to the instructions.
We get to the bearings
If the path to the tank is passed without problems, then we take out the container from the housing and place it on a flat surface. First of all, unclench the two halves by disconnecting the screws or latches. Having removed the "empty" part of the drum, we put the second pulley up.
If the bolts are rusted or there is a foreign coating on the surface of the tank, then these areas must be treated with a tool such as WD-40, left for 10-15 minutes and remove any rust.
- We unscrew the fastener that secures the drum pulley, and, having pulled out the wheel, we return the bolt to its place. “Castling” will further protect the shaft and tank surface from mechanical damage.
- We insert the metal pin into the screw that was screwed back in and carefully beat it with a hammer, slowly knocking out the shaft. It is necessary to act with extreme caution, since a strong blow will result in an expensive repair.
As soon as the shaft with the sleeve breaks out, they should be carefully examined for integrity. It is easy to check the degree of rod wear: just fasten the bearing onto it and unscrew. If there is any play between the parts, a replacement part is required. When there is no clearance, you can proceed with removal.
We take out damaged parts
When repairing the bearing assembly, you will have to not only remove the bearing from the LG washing machine, but also change the seals. Therefore, from the back of the drum we get the aforementioned gasket, hooking the rubber with a slotted screwdriver. It is worth remembering that these parts are changed only by a pair, regardless of the degree of wear of the second seal.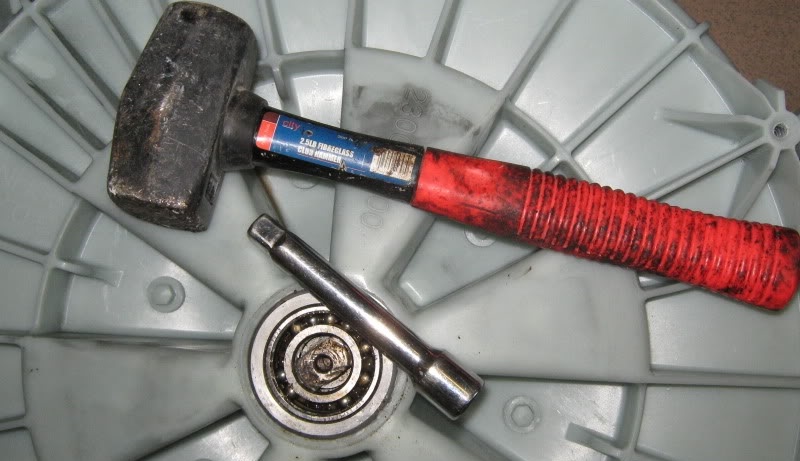
Next, remove the bearings themselves. New ones can simply be pushed through, while old and rusted ones will require considerable effort. Immediately process the surface of the WD-40 and clean the footprint. Then we bring the metal stud to the edge of the ring and, constantly changing its position, try to knock the part out with uniform blows.
The hairpin must be constantly moved - to the other edge, crosswise, closer to the middle, otherwise the bearing will come out longer and not completely.
The old bearing can not be spared, and when the base is destroyed, you can get it in parts using pliers, tweezers or hairpins. The edges of the footprint, in contrast, are best avoided. If you deform the hole, tightly install a new ring will not work.
After removing the seals and bearings, do not ignore the cleaning. All chips, rust, dirt and deposits accumulated in the seat must be treated with a cleaner. If the scum layer is very thick and does not lend itself to WD-40, then we “pass” along the surface with a fine emery cloth and sweep away the garbage with a rag. Until the hole becomes clean and dry, it is not recommended to proceed with the installation of a new bearing assembly.
Interesting:


Reader Comments
- Share your opinion - leave a comment
Headings
Washing machine repair


For buyers


For users


Dishwasher


Add a comment