How to remove the front panel on an LG washing machine
 Does the washing machine not work? Household appliances can be repaired by yourself. Most failures can be corrected by any man with his head on his shoulders, and "hands from the right place." The main thing is to correctly identify the problem, and for this you need to look inside the broken device. Today you will learn how to remove the front panel of a LG horizontal washing machine without damaging the electronics.
Get ready to disassemble the car
First of all, make sure that the equipment is unplugged, the plug is unplugged. Also turn off the water and disconnect the hoses for pumping and draining water. Pull the washing machine where it will be convenient to carry out repairs, and proceed with the necessary manipulations.
In the process of disassembling a technical device, you will need a minimal set of tools. Prepare a pair of pliers, a Phillips screwdriver and an asterisk. The latter is useful when working with individual LG models where special fastening bolts are used. The dismantling process is carried out in stages:
- unscrew the top cover;
- remove the lower decorative part of the casing;
- remove the control panel;
- separate the hatch lock;
- set aside the front panel itself.
It is important to follow the sequence of steps so as not to damage the case, and not to increase the number of breakdowns of the device. Before performing the first steps, make sure that the safety standards are followed, then follow the recommendations of this instruction.
Remove the top cover
The top of the body performs a protective function, covering the inside of the machine from moisture and dust, as well as from mechanical damage. The lid is fixed on the back wall with two cross-head bolts on the caps. Unscrew them with a screwdriver and set aside. Be careful not to lose the small details so that you do not have to separately look for suitable substitutes in size.
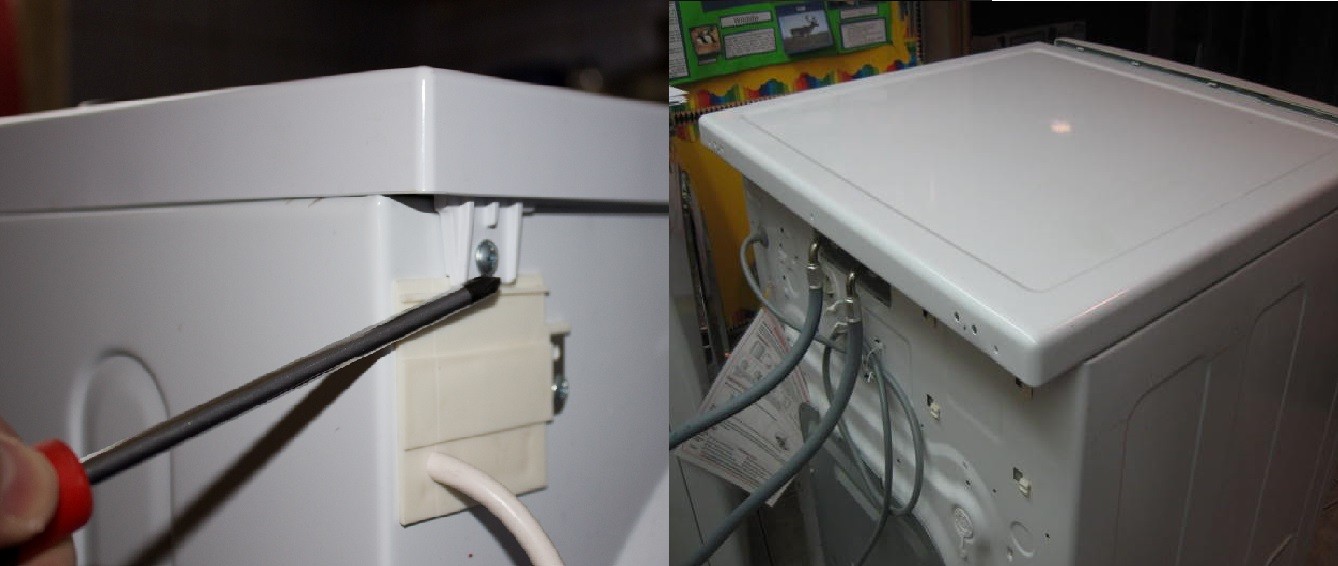
To perform the next step, you need to go to the back of the product, hold the lid with your hands, and pull it towards you in a horizontal plane. Do not attempt to lift the part up before moving the plate a few centimeters from its place. Its vertical movement is not possible due to the design of the mount.
Remove the narrow panel
It is necessary to unscrew the lower front strip, since the fastening of the large front panel is hidden behind it. There is also a hatch that allows access to the pump and filter. Removing it, you will see screws that will have to be unscrewed.
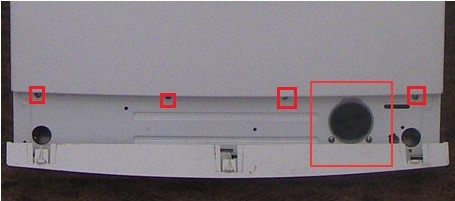
After removing the bolts, slightly pry the bottom cover with a flat screwdriver. The fastening elements will slip out of the grooves, and the plate can be removed, and then put aside.
Dismantling the control panel
The hardest thing will be to remove the control panel. This process requires maximum accuracy and accuracy, since damage to this spare part can lead to irreparable damage to the electronic system. Proceed step by step.
- Unscrew the screws.
- Using a flat-blade screwdriver, pry off the plastic latches located on the upper edges, pull them up slightly and release them.
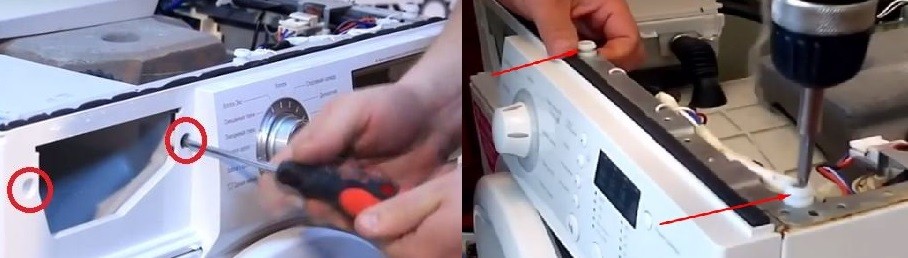
- Slide the panel toward you to release the lower fasteners, then lift it up and remove it.
When you release the fasteners from the grooves, you will hear clicks that are easier when working with the lower latches, and louder at the top. Also do not forget to monitor the integrity of the wiring, so as not to damage it.
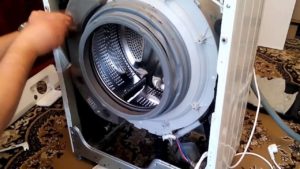
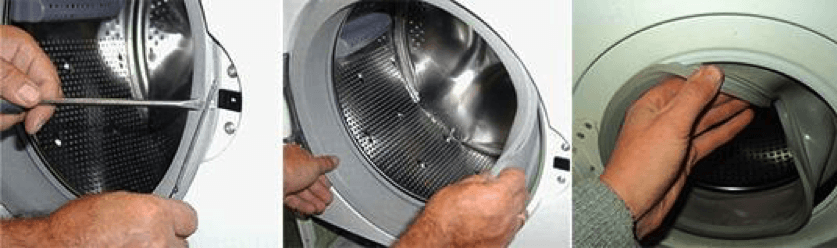
We remove the UBL and the front wall
Before the final stage of work, it is necessary to remove the hatch blocking device so that it does not interfere with the dismantling of the wall. To do this, take alternate actions.
- Loosen the clamp that holds the front wall with pliers, a screwdriver or round-nose pliers.
- Remove the cuff to allow access to the inside of the machine and the lock.
- Tighten the two screws located near the connection of the lock hook to the UBL.
- Remove the part through the hole.
- Disconnect the wires, remove the lock.
At the last stage, the front panel itself is removed. To do this, unscrew the screws holding it, located on the front upper edge of the case, and under the lower decorative strip. Now you can remove the wall, and directly do the repair of the washing machine.
Interesting:


Reader Comments
- Share your opinion - leave a comment
Headings
Washing machine repair


For buyers


For users


Dishwasher


Add a comment