Socket for washing machine in bathroom
 If you decide to install an automatic washing machine in your bathroom, then you need to take care of laying all the necessary communications in advance. The washing machine needs a connection from a riser with cold water, a connection to a sewer pipe, and, of course, a reliable outlet. You need to take special care of electrical communications, because any bathroom has high humidity, and electricity and water, as you know, are incompatible. We’ll talk about how to install a washing machine socket with accompanying communications.
Planning and calculations
Even at the stage of a rough bathroom renovation, you need to take care of where interior items that depend on communications, such as a sink, bathtub, shower or washing machine, will be placed. This can be a problem because many people have very small bathrooms in their apartments, with little room to fit into them. But if you really want to successfully fit large items there, learn more information by reading the article Washing machine in a small bathroom - design features.
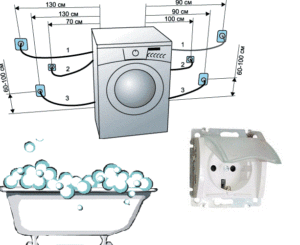
Once you have figured out where to put the washing machine and have drawn a sketch of the bathroom on which you have reflected your ideas, you can begin planning electrical communications. First, figure out where you will make the outlet, on which wall and where it will be located relative to the washing machine. It is better that the socket is located away from the sink, shower or bathtub and heated towel rail, so there is less chance that water will get on it. Ideally, it is better to place the outlet in the most ventilated part of the room - at the entrance.

The planned place for the socket must be placed on the wall, at a height of at least 25 cm from the floor. The height of the socket in the bathroom can be 40 cm, 50 cm, or 75 cm, as is more convenient for you.
On the sketch itself or nearby, draw a diagram of the wiring and installation of the machines. Indicate all the required dimensions and calculate the length of the wire. Speaking of wire. It is necessary to calculate not only its length, but also its cross-section, because washing machines give a serious load. The calculations in this case are very simple.
- We determine the power of your automatic washing machine model. This is not difficult to do, since such information is necessarily in the instructions or on the body of the “home assistant”.
- We are figuring out what other devices we can potentially connect to the outlet.
- We find information about the power that copper cable cores of various thicknesses can withstand. We find out that a 1.5 mm thick cable can easily withstand 4.1 kW and, in principle, is enough for a washing machine. But we recommend taking a cable with a reserve of 2.5 mm and enclosing it in a silicone or plastic cable channel.
Having calculated the length and cross-section of the copper cable for the outlet in the bathroom, you need to carefully plan the route of laying this wire. There are many factors that can affect the route.
- When laying out the route, you will have to avoid the wettest areas of the walls near the sink, bathtub and shower stall.
- Particularly strong, load-bearing walls are also best avoided. Inside, in addition to solid concrete, they have a reinforced mesh, which will significantly complicate gating.
- It is better to lay the cable along the shortest route to save material.
- It is better not to intersect with other branches of the electrical wire and not to arrange boxes, since in such a humid room boxes are not needed - it can be dangerous.
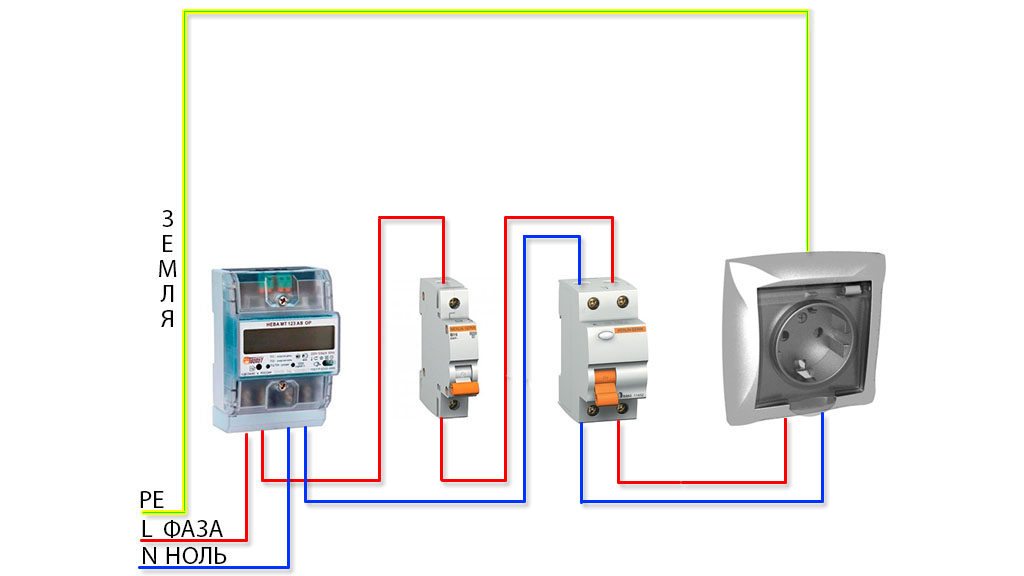
Having laid out the route for laying the electrical wire, determined the location of the socket for the washing machine and calculated the cross-section of the wire, you also need to take care of protecting the socket with an automatic device. At the calculation stage, you just need to find out what cut-off current the device will need. Experts recommend a 10 mA 16A RCD.
Preparing tools and materials
Now we will collect everything necessary to ensure that the socket in the bathroom for an automatic washing machine is made in the best possible way and in the shortest possible time. To carry out the work we will need the following tools and materials:
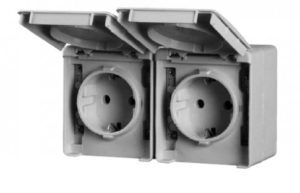
- moisture-resistant socket (single or double);
- copper wire of a certain length with a cross-section of 2.5 mm;
- RCD or difavtomat for 16A;
- rubber or silicone cable channel;
- terminals;
- plastic socket box;
- plastic brackets for fastening the cable channel;
- 1 kg bag of cement.
- perforator;
- crown for socket box;
- grinder with disc;
- chisel;
- hammer;
- tape measure and marker.
Everything is very clear about the materials, but we need to talk a little more about the tools. Almost all of the tools listed are needed for cutting a wall for wiring and arranging a socket box niche. If you have a brick wall, you can get by with just a chisel and a hammer; if it’s concrete, you can cut out the channels using a grinder or a hammer drill. A grinder turns out to be more accurate, but it is not as safe to work with as a hammer drill..
A tape measure and a marker are needed to determine the route of wiring on the wall and mark it.
Socket installation instructions
Let's proceed directly to installing the socket and laying electrical communications. Initially, we need to refer to our installation plan and apply marks on the wall using a marker. The height at which the outlet will be located must be marked and its location determined. You also need to draw bold, clearly visible lines on the wall in the places where the niche for the wiring will pass. Next we do the following.
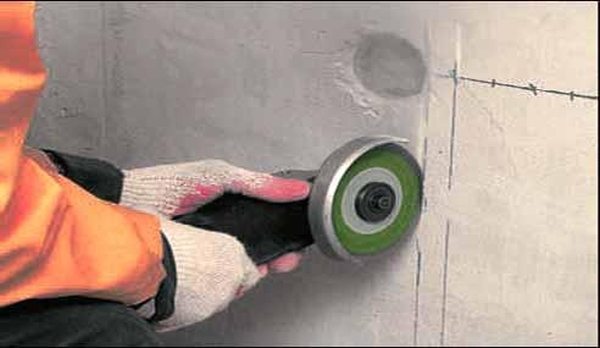
- We insert the crown for the socket box into the hammer drill and drill a perfectly round hole in the place where the socket for the washing machine will be installed.
- Using a hammer drill or grinder, we knock out deep enough grooves in the wall to drown the wiring with the cable channel into them.
- We install an RCD in the electrical panel at the outlet intended for the bathroom. The output must be de-energized.
- We begin to pull the wire by first placing it in the cable channel and connecting it to the RCD. We lead the wire through the groove in the bathroom to the installation location of the socket.
- In the niche under the socket we place a small amount of cement mortar, on which we place a plastic socket box.
- We fasten the cable channel together with the wire to the wall, and then lead the wire strands into the socket box.
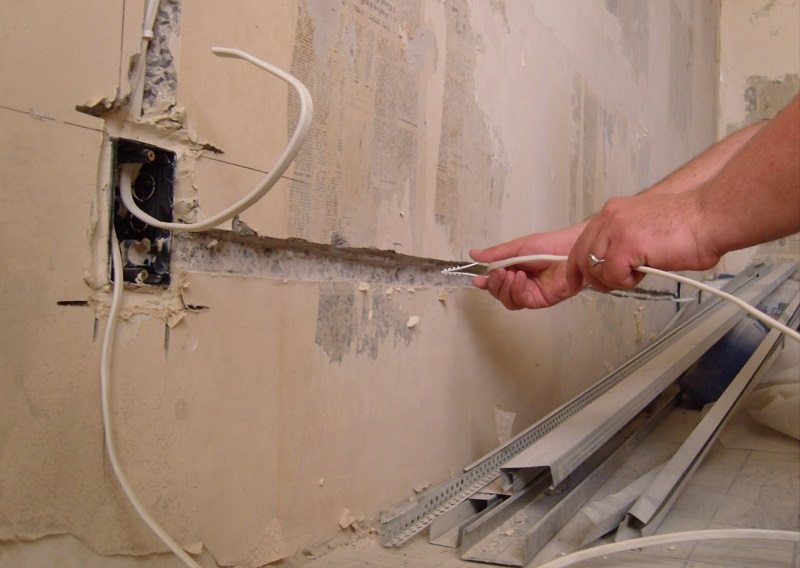
Lead the wire into the socket with a reserve so that if you subsequently replace the socket for the washing machine you will not experience problems.
- We insert the socket giblets into the socket box and secure it. By this time, the cement should dry and grab the socket.
- We connect the wire cores to the contacts of the socket, and then install the outer part of the socket.
Now all we have to do is tidy up the walls and check how the new outlet works. At this point the work can be considered completed.
Interesting:


Reader comments
- Share your opinion - leave a comment
Categories
Washing machine repair


For buyers


For users


Dishwasher


Add a comment