DIY tank repair
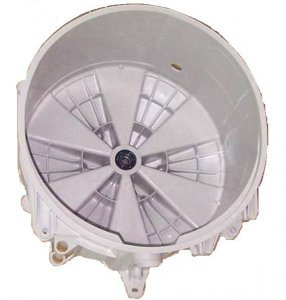 If the cause of the breakdown of the automatic washing machine is a tank or a movable element located in the tank - this means that you have to disassemble the machine to the base. First you have to remove the tank, while disassembling the car body, and then disassemble the tank itself, and then assemble everything back. This is a rather time-consuming job, therefore, repairs need to be done once and honestly, so as not to, then re-disassemble the machine. To make a DIY repair from start to finish correctly, check out our article.
What breaks in the tank of the machine?
The tank of the Indesit washing machine (or any other) is its main part, in which there is a drum and other moving elements. It is in the tank that water is collected and, in fact, washing takes place in it, even though the laundry is in contact with the walls of the drum, not the tank. At first glance, it seems that the tank itself cannot break, because it is only a reservoir. Another thing is the moving elements that are in it, but this is a common misconception. So, what could break in the tank of an automatic washing machine?
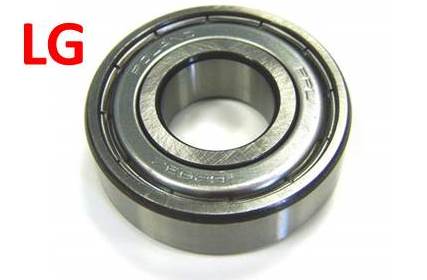
- Bearings. This is a movable element located in the tank. The bearings themselves are worth a penny, but it takes a lot of effort to change them. In this case, there is a risk of serious damage to the shaft, pin and other elements.
- Shaft. It may deform if bearings are not repaired.
- The walls of the tank. They can bend under the action of centrifugal force from contact with the drum, in case of damage to shock absorbers and bearings. In the worst case, the walls can get damaged, which will violate their tightness.
- Tank drain The hole itself, of course, cannot break. But a drain valve is installed on it, which can fail. In addition, the drain hole may become clogged and will have to be cleaned.
Note! If the bearing is not repaired in time, this can lead to complete destruction of the tank by a backlash drum. After that, the tank will definitely have to be changed!
Features of the assembly and disassembly of tanks
The procedure for disassembling the tank of an automatic washing machine is similar in all cases. Although we will be dealing with a non-separable "version" of the tank, at least with a collapsible one. It is quite possible to disassemble the tank of the washing machine with your own hands, but you need to act very carefully. We specifically decided to describe the whole process using the example of a non-separable tank, since it will be somewhat more difficult to handle.
At the first stage, carefully inspect the tank body from all sides. Our task is to determine the location of the welded joint, as well as to outline the places where we will drill holes for future fasteners. After that, we take an electric drill, a thin drill of 3 mm and drill 15-20 holes in a circle, as shown in the figure below.

Further, the crucial moment, we need to act as carefully as possible, to cut the weld seam of the tank body into two halves with our own hands, using a hacksaw for metal. This work will take a considerable amount of time, so be patient and go ahead. So non-collapsible tanks turn into collapsible.
Important! When cutting the tank body, do not go too deep, a maximum of 5 centimeters, because the walls of the body are not thick. If the hacksaw blade slips deeper, you risk damaging the walls of the drum.
After the tank can be cut, two halves should be obtained - the front part and the rear part. The front part is a small ring of irregular shape made of plastic, in the middle of which there is a hatch and a rubber cuff. In the back half of the body is the entire drum, together with a drive mechanism, which can now be removed.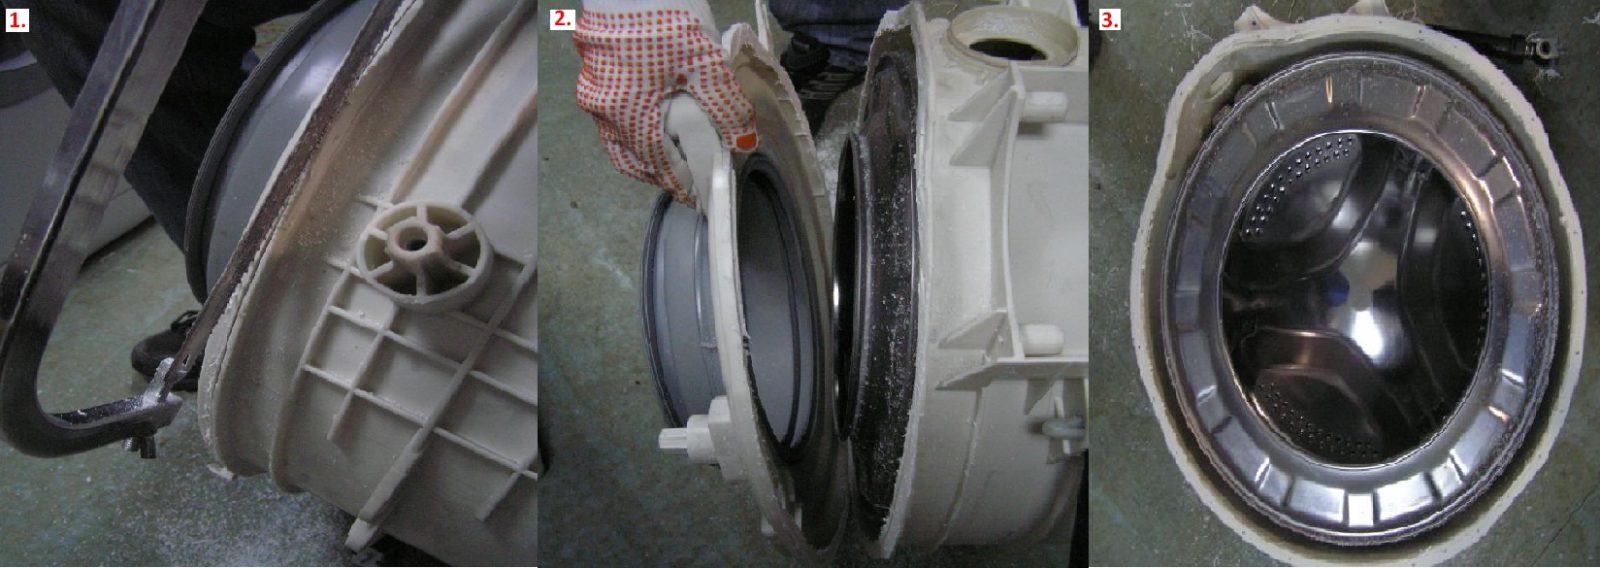
We take the back half of the tank and turn it over with the drum hatch down.Now we need to disassemble the shaft without damaging its main mounting element - the screw located in its middle. To unscrew it, you need to take a metal rod (the punch will work well), point it at the screw and hit the rod several times with a bronze or ordinary hammer. Next, take a Phillips screwdriver, unscrew the screw.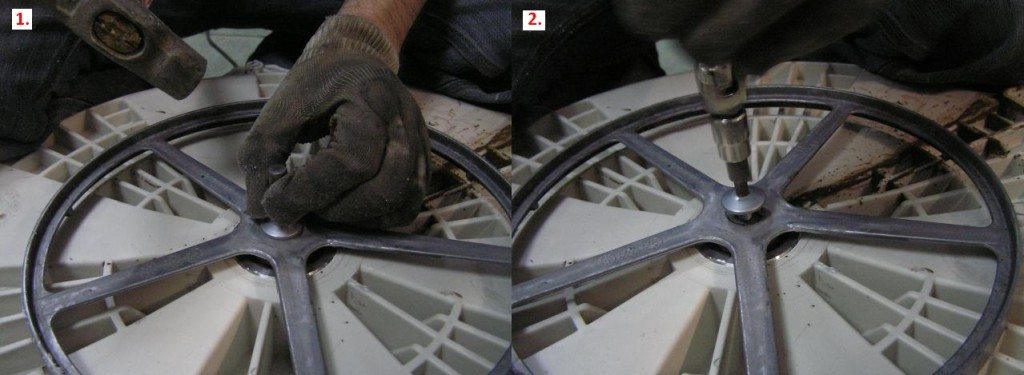
The next stage of disassembling the tank is reduced to the correct removal of the shaft from the rod. It is done like this. First we take a small wooden block and two large bars. We substitute large bars under the edges of the tank so that it stands on them more or less steadily. We take a hammer and a small block, direct the block to the rod and hit it several times with a hammer. We strike like this: first a weak blow, then a little stronger, then a little stronger. After that, the drum should separate from the tank body.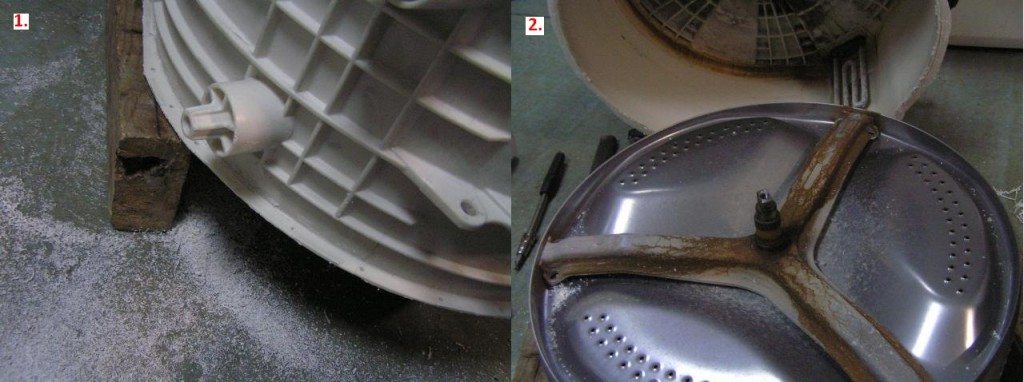
Note! With all your strength, you don’t need to hit the stock through the bar. The stock looks reliable, but the appearance is deceiving, so in order not to damage the part, measure the impact force, it is better to be safe.
The next stage involves the dismantling of bearings from the tank body. If the bearings are serviceable and the problem is in a deformed or leaking tank, you can not touch them, since they do not interfere with the repair. But if the fault is associated with bearings and seals, they must be removed. We take our metal rod, direct it to one of the edges of the bearing and apply a light blow to it with a hammer. We transfer the rod to the other edge of the bearing and strike again. You can not hit only one edge of the bearing, because it is loose, and then it will have to be drilled with a step drill. We extract and we replace both bearings with new ones. After replacing and repairing all defective parts, we assemble the tank in the reverse order. At the same time, we grease the edges of the sawn parts with sealant or cold welding and connect, and through the pre-drilled holes we pass the bolts and fix them with nuts. The size of the bolts will depend on which drill you used.
Troubleshooting
After successfully disassembling the tank, we begin the repair yourself. We already mentioned the process of replacing bearings, so we proceed immediately to fixing the tank body. Repair of damaged tank walls begins with an inspection and assessment of the nature of the damage. Much will depend on the material from which the tank is made. If it is plastic, then cracks can form on it, through which water seeps.
Some homegrown artisans offer to seal the crack and continue to operate the tank. In our opinion (experts agree with us), such a spike will not last long and then it will be necessary to repair the machine with a new one. It’s better to buy a new tank body and replace it. A plastic tank body is cheaper than a metal one.
If the tank consists of stainless steel, and a “hole” has formed in it, it is quite possible to brew it, and it will still serve for some time. In this case, we recommend delegating the welding work to an experienced welder who must do everything quickly and accurately. After welding, paint the weld with waterproof enamel - this will further extend the life of the tank. In general, there are no other adequate ways to fix punched metal tanks - only welding or complete replacement of the unit. No sealant or cold welding will help in this case.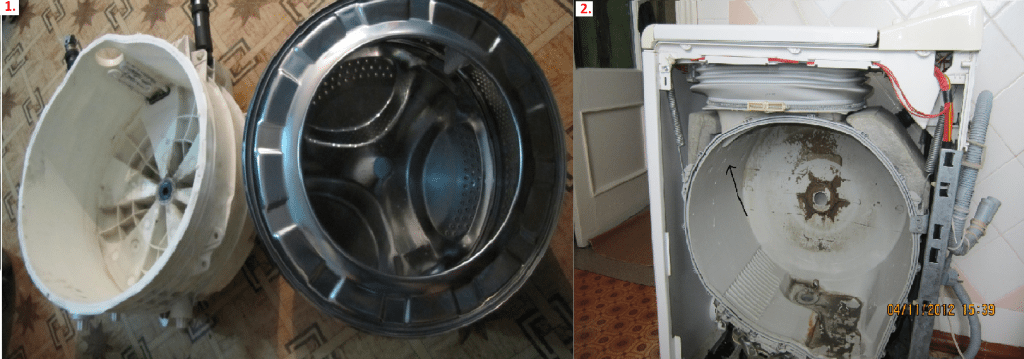
To repair bent metal tanks of a washing machine, it is necessary to carry out repairs in the following order.
- We take an ordinary hammer and a wooden block. If the dent is small and the tank has no holes, nothing else is needed.
- Using a gas burner we heat a dent by heating the outer wall of the tank.
- We set the bar on the bulge of the tank, corresponding to a dent from the outside and until the metal has cooled down, gently hit it with a hammer. The dent should straighten.
Next, we need to check the drain valve and tank drain hole for malfunctions and blockages. We do the following.
- Visually inspect the drain hole, remove the pile, hair, coked dirt and water stone. If you can’t do it with your hands, use sandpaper.
- We check the sealing gum and the cuff of the drain valve of the tank of the washing machine. If the rubber from time to time “zadubil”, became hard and cracked, you need to change the cuff and the sealing gum.
- We take a multimeter and check the contacts of the drain valve, if the resistance is 1, then the unit is faulty. It is necessary to replace the valve with a new one.
Important! Be careful before checking the valve with a multimeter, thoroughly clean its contacts, and then measure.
In conclusion, we note that it is rather difficult to repair the tank of a washing machine. It is necessary to disassemble the machine correctly, remove the tank, then disassemble the tank without errors, and only then proceed with the repair, and it is not a fact that this repair can be carried out at all. Everything will depend on the type of breakdown.
Interesting:
Reader Comments
- Share your opinion - leave a comment
Headings
Washing machine repair


For buyers
For users

Dishwasher





Add a comment