DIY washing machine tank repair
 If the reason for the breakdown of an automatic washing machine is the tank or a moving element located in the tank, this means that you will have to disassemble the machine to the ground. First you will have to remove the tank, while disassembling the body of the machine, and then disassemble the tank itself, and then put everything back together. This is quite labor-intensive work, so repairs need to be done once and conscientiously, so that you don’t have to disassemble the machine again later. To make your own repairs correctly from start to finish, read our article.
What breaks in the tank of the car?
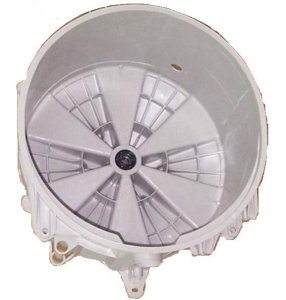
The tank of an Indesit washing machine (or any other) is its main part, which contains the drum and other moving elements. It is in the tank that water is collected and, in fact, washing takes place in it, even though the laundry is in contact with the walls of the drum, not the tank. At first glance, it seems that the tank itself cannot break, because it is just a reservoir. The moving elements contained in it are another matter, but this is a common misconception. So, what can break in the tank of an automatic washing machine?
- Bearings. This is a moving element located in the tank. The bearings themselves cost a penny, but changing them will require a lot of effort. In this case, there is a risk of seriously damaging the shaft, pin and other elements.
- Shaft. It may become deformed if the bearings are not repaired.
- Tank walls. They may bend under the influence of centrifugal force from contact with the drum if the shock absorbers and bearings are damaged. In the worst case, the walls may be damaged, which will break their tightness.
- Tank drain hole. Of course, the hole itself cannot break. But a drain valve is installed on it, which can fail. In addition, the drain hole may become clogged and will have to be cleaned.
Note! If the bearing is not repaired in time, this can lead to complete destruction of the tank due to a loose drum. After this, the tank will definitely have to be changed!
Features of tank assembly and disassembly
The procedure for disassembling the tank of an automatic washing machine is similar in all cases. At least we will be dealing with a non-separable “version” of the tank, at least with a collapsible one. It is quite possible to disassemble the washing machine tank with your own hands, but you need to act extremely carefully. We specifically decided to describe the whole process using the example of a non-separable tank, since it is somewhat more difficult to handle.
At the first stage, we carefully inspect the tank body from all sides. Our task is to determine the location of the soldered seam, as well as to mark the places where we will drill holes for future fasteners. After this, take an electric drill, a thin 3 mm drill and drill 15-20 holes in a circle, as shown in the figure below.
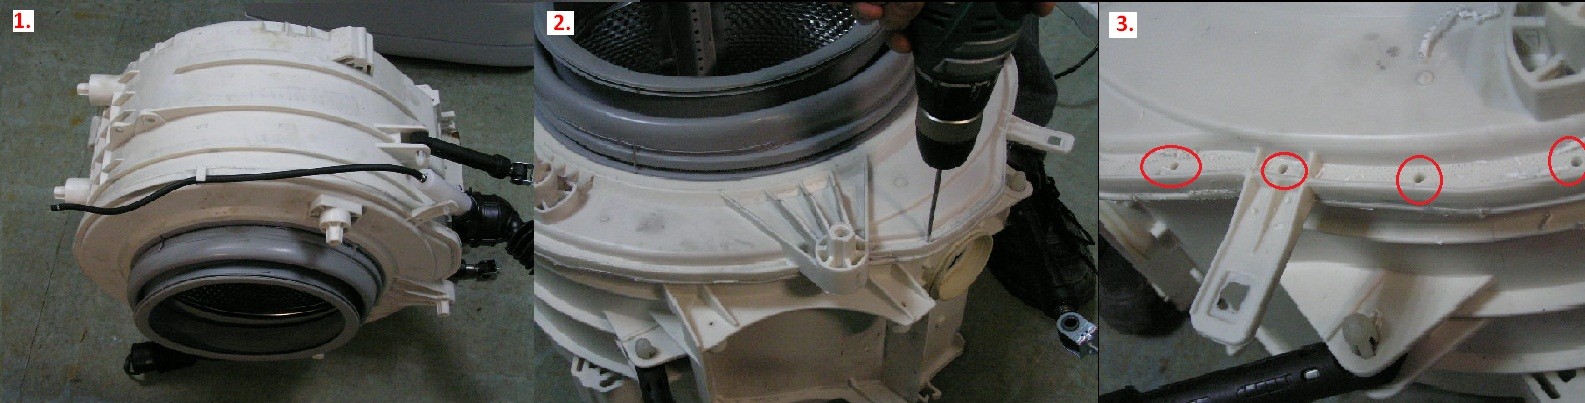
Next is the crucial moment, we need to act as carefully as possible and cut the weld seam of the tank body into two halves with our own hands, using a hacksaw. This work will take a considerable amount of time, so be patient and move forward. This is how non-collapsible tanks turn into collapsible ones.
Important! When sawing the tank body, do not go too deep, a maximum of 5 centimeters, because the walls of the body are not thick. If the hacksaw blade slips deep, you risk damaging the drum walls.
After the tank can be cut, you should end up with two halves - the front part and the back part. The front part is a small irregularly shaped plastic ring, in the middle of which there is a hatch and a rubber cuff. In the rear half of the case there is the entire drum, along with the drive mechanism, which can now be removed.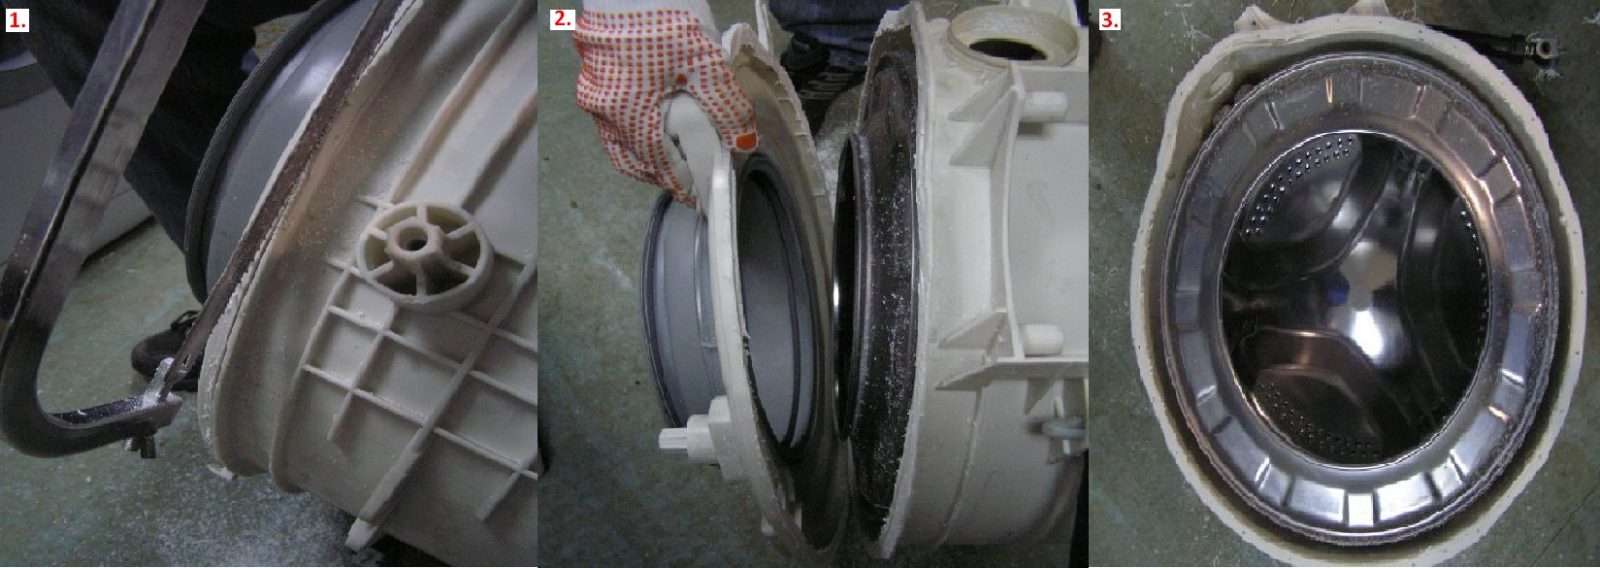
We take the rear half of the tank and turn it over with the drum hatch down. Now we need to disassemble the shaft without damaging its main fastening element - the screw located in its middle. To unscrew it, you need to take a metal rod (a center punch works well), point it at the screw and hit the rod several times with a bronze or regular hammer. Next, take a Phillips screwdriver and unscrew the screw.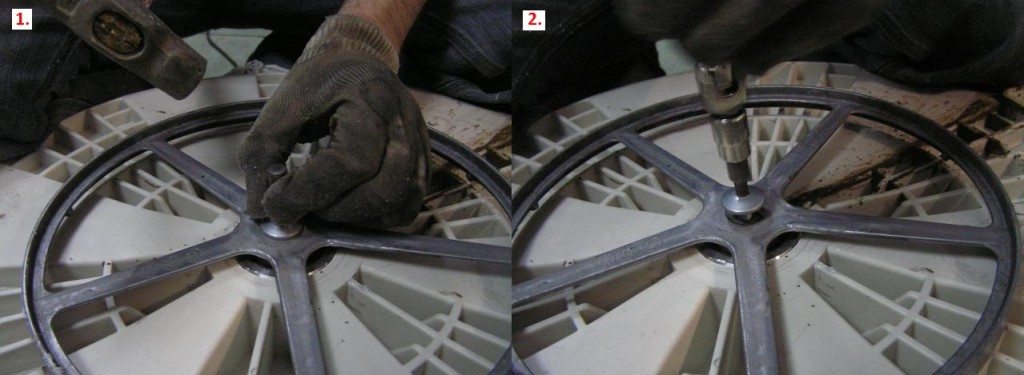
The next stage of disassembling the tank comes down to correctly removing the shaft from the rod. It's done like this. First we take a small wooden block and two large blocks. We place large bars under the edges of the tank so that it stands on them more or less stable. We take a hammer and a small block, point the block at the rod and hit it several times with the hammer. We strike like this: first a weak blow, then a little stronger, then a little stronger. After this, the drum should separate from the tank body.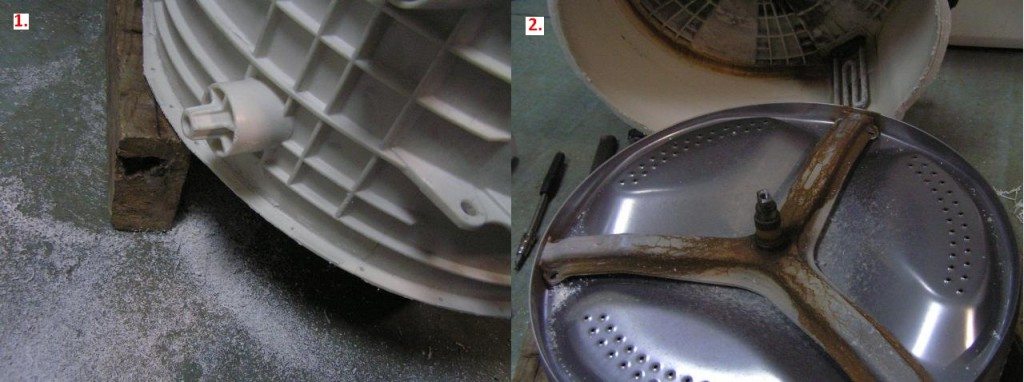
Note! There is no need to hit the rod through the block with all your might. The rod looks reliable, but appearances are deceiving, so in order not to damage the part, measure the force of the impact, it is better to be safe.
The next stage involves removing the bearings from the tank body. If the bearings are in good condition and the problem is a deformed or leaking tank, you don’t have to touch them, since they do not interfere with repairs.But if the malfunction is related to bearings and seals, they need to be removed. We take our metal rod, point it at one of the edges of the bearing and give it a light blow with a hammer. We move the rod to the other edge of the bearing and strike again.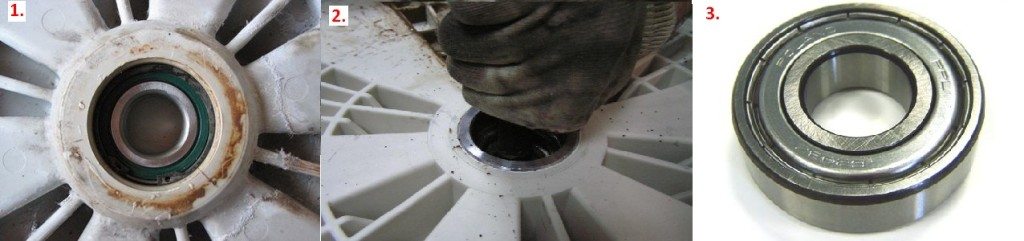 You cannot hit just one edge of the bearing, as it will become loose, and then you will have to drill it out with a step drill. We extract and replace both bearings with new ones. After replacing and repairing all faulty parts, we assemble the tank in the reverse order. In this case, we coat the edges of the sawn parts with sealant or cold welding and connect them, and pass bolts through pre-drilled holes and secure them with nuts. The size of the bolts will depend on what drill you used.
Troubleshooting
After successfully disassembling the tank, we begin repairs ourselves. We have already mentioned the process of replacing bearings, so we will go straight to repairing the tank body. We begin repairing damaged tank walls with an inspection and assessment of the nature of the damage. Much will depend on the material from which the tank is made. If it is plastic, then cracks may form on it through which water leaks.
Some home-grown artisans suggest soldering the crack and continuing to operate the tank. In our opinion (and experts agree with us), such a solder will not last long and then the machine will have to be repaired with a new one. It is better to purchase a new tank housing and replace it. A plastic tank body is cheaper than a metal one.
If the tank is made of stainless steel, and a “hole” has formed in it, it can be completely welded, and it will still serve for some time. In this case, we recommend delegating the welding work to an experienced welder, who should do everything quickly and accurately. After welding, paint over the weld seam with waterproof enamel - this will further extend the service life of the tank. In general, there are no other adequate ways to repair broken metal tanks - only welding or complete replacement of the unit. No sealant or cold welding will help in this case.
To repair bent metal tubs of a washing machine, it is necessary to carry out repairs in the following order.
- We take a regular hammer and a wooden block. If the dent is small and there are no holes in the tank, nothing else will be needed.
- Using a gas burner, we heat the dent, heating the outer wall of the tank.
- We place the block on the convexity of the tank, corresponding to the dent on the outside, and until the metal has cooled down, lightly hit it with a hammer. The dent should straighten out.
Next, we need to check the drain valve and tank drain hole for malfunctions and blockages. Let's do the following.
- Visually inspect the drain hole, remove lint, hair, coked dirt and water stone. If you can't do this by hand, use sandpaper.
- We check the rubber seal and the cuff of the drain valve of the washing machine tank. If the rubber has “stiffened” over time, become hard and cracked, you need to change both the cuff and the rubber seal.
- We take a multimeter and check the contacts of the drain valve; if the resistance is 1, then the unit is faulty. The valve needs to be replaced with a new one.
Important! Be careful, before checking the valve with a multimeter, thoroughly clean its contacts, and only then take measurements.
In conclusion, we note that repairing the tank of an automatic washing machine is quite difficult. It is necessary to properly disassemble the machine, remove the tank, then disassemble the tank itself without errors, and only then begin repairs, and it is not a fact that this repair can even be carried out at home. Everything will depend on the type of breakdown.
Interesting:


Reader comments
- Share your opinion - leave a comment
Categories
Washing machine repair


For buyers


For users


Dishwasher


Add a comment