Disassembling a top-loading washing machine
 Unfortunately, any household appliance fails. Washing machines are no exception. Vertical washing machines break down just as often as the more familiar frontal washing machines, and damage to “vertical washing machines” can be both typical, characteristic of “frontal washing machines,” and individual, characteristic specifically of vertical SMAs. Let's figure out how to disassemble a top-loading washing machine to deal with the breakdown at home.
Getting ready for work
Before you start disassembling the machine with your own hands, you should make some preparatory measures. First, you need to turn off the power to the washing machine and disconnect the unit from utilities. Secondly, you need to prepare a workplace - it should be sufficiently free. Thirdly, it is better to take care in advance of where the parts removed from the device will be stored, allocate space for them on the floor or free up a small table.
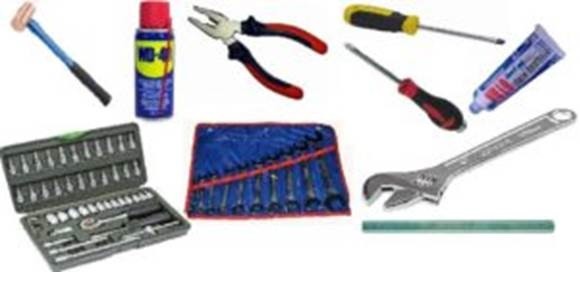
Next, you should collect all the tools and materials that will be needed in the process. To disassemble the “vertical” you need to have on hand:
- two types of screwdrivers: Phillips and slotted;
- spanners of different sizes;
- set of automotive socket heads;
- nippers and pliers;
- flashlight – for convenience of working inside the case;
- universal aerosol lubricant WD-40.
Additionally, you should prepare a small container that will be used to collect the water remaining in the washer, and several dry rags.
It is best to have a camera on hand to be able to record the progress of the work, this will make it easier to reassemble the SMA.
Let's start to disassemble
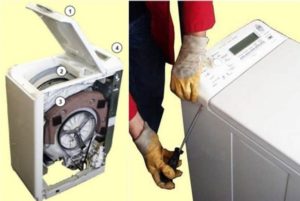
Before you start manipulating the machine, it would be useful to find out how a vertical washing machine works. This will help you better navigate inside the case and clearly understand the name of this or that part. Dismantling of vertical stands of famous brands, such as Bosh, Whirlpool and other companies do the same thing. Of course, there may be small differences, but the basic algorithm of the actions performed will remain unchanged.
- Unscrew the fasteners located on the sides, then pry the main control panel with a screwdriver and carefully disconnect it.
- Tilt the panel slightly to the side and take a photo of how the wiring is connected. After this, you can disconnect and remove the unit.
- Dismantle the board; to do this, remove the remaining wires and unscrew the bolts.
- Unfasten the fill valve; to do this, slightly loosen the clamps and disconnect the rubber pipes, turn off the power and press on the special holes. These manipulations will allow you to squeeze out the part.
- Unscrew the screws holding the side panels. Move them a little to the bottom and carefully remove.
- Unscrew the bolts holding the front wall and move the panel to the side.
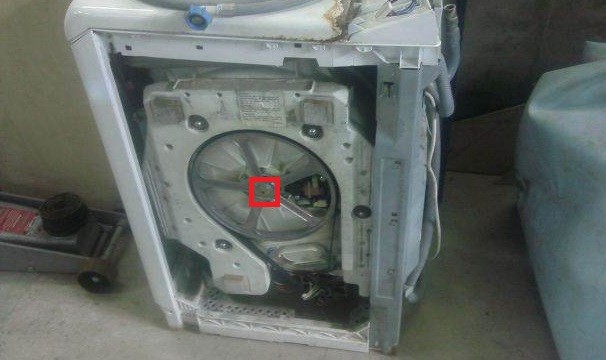
Thanks to the actions taken, you will have free access to the drive belt, electric motor, drain pump, and pressure switch.
In most cases, at this stage you can replace the damaged part yourself and put the vertical machine back together. In very rare cases, when the latch responsible for holding the door after closing fails, you will have to disassemble the machine further:
- lift the cover, unscrew the screws that hold it in place, and remove the part;
- The top cover of the washer will be secured with several bolts located under the sealing collar. It is necessary to unscrew the fasteners and remove the cover.
This will give you easy access to the MCA cuff and door lock. Please note that the vertical tank, unlike front-loading machines, cannot be removed from the housing. Therefore, when replacing drum or oil seal bearings, it is necessary to remove the counterweights and springs and replace the parts.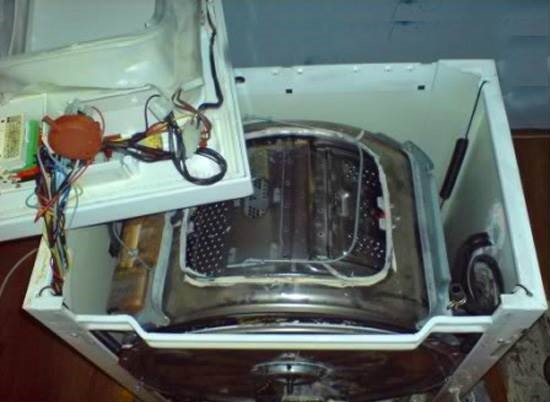
The disassembly of the vertical washing machine is completed, as you can see, doing the work yourself is not so difficult. When the failed elements of the machine are replaced, it is necessary to reassemble the machine in the reverse order. If photographs were taken during the work, it is better to rely on photographs as a guide. Carefully ensure that the wiring is connected correctly; incorrectly connected wires can cause a short circuit in the network.
Interesting:


Reader comments
- Share your opinion - leave a comment
Categories
Washing machine repair


For buyers


For users


Dishwasher


Add a comment