How to disassemble a washing machine baby
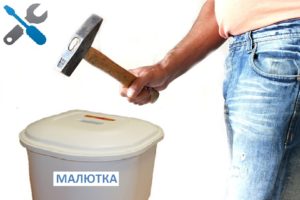 It is not so easy to disassemble the Malyutka washing machine without breaking anything, despite the fact that this washing machine is designed quite simply. It is necessary to make a special key to remove some units, and then read the instructions for disassembling this type of equipment. In this article you will find instructions that will outline the disassembly of the Malyutka washing machine in detail, as well as the described procedure for making a special key.
Specific tool
If you are a thrifty owner and want to disassemble your Malyutka washing machine for parts or to repair it, then you will certainly encounter problems at the very first stage of work. Why is this happening? The fact is that our “valiant” Soviet engineers who came up with the design of this wonderful washing machine were people with humor. Their humor was so simple that they screwed the activator onto Malyutka’s car in such a way that it was impossible to unscrew it with any standard key.
Previously, the Malyutka washing machine was very common, and it was repaired quite often. The owners broke how many screwdrivers trying to unscrew the activator, how many keys they bent, and some tried to break the activator out of anger with a chisel and a hammer. If you are planning to throw your washing machine in the trash, you can follow their example, but we will offer you to make a special key. It doesn’t cost anything to make it at home; all you need is:
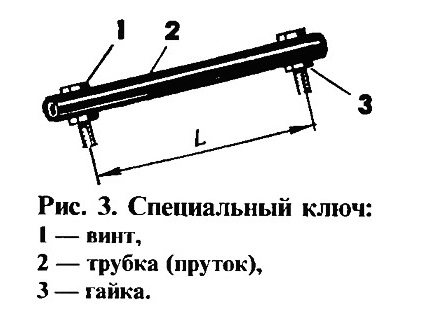
- a tube with a diameter of 1.5-2 cm or a square steel profile of the same cross-section, the length of the tube will be about 20 cm;
- pliers;
- screwdriver;
- drill with a 6 mm metal drill;
- two bolts 6x50 mm, 2 nuts for them.
If you rummage well in the pantry, you will certainly find all the parts and tools. It would be nice to make a key not at home, but somewhere in a garage or barn, where there is a normal workbench, a vice, and maybe even a drilling machine. A drill is a drill, but it will not be easy to drill an exact hole in the right place, especially in a tube. We will make a key for the Malyutka washing machine so that you can disassemble it later.
- We measure the distance between the activator mounting holes. There should be 95 mm, so we drill two holes in the tube so that the distance between them is 95 mm.
If you are drilling holes with a drill, first clamp the tube in a vice, mark the places where the holes will be located, punch the marks with a center punch, and only then drill.
- Insert the bolts into the holes and tighten them with nuts.
- We insert the ends of the bolts into the mounting holes of the activator; if they fit smoothly and without problems, it means that you did not make a mistake in the calculations and everything is correct - the key is ready.
Work progress
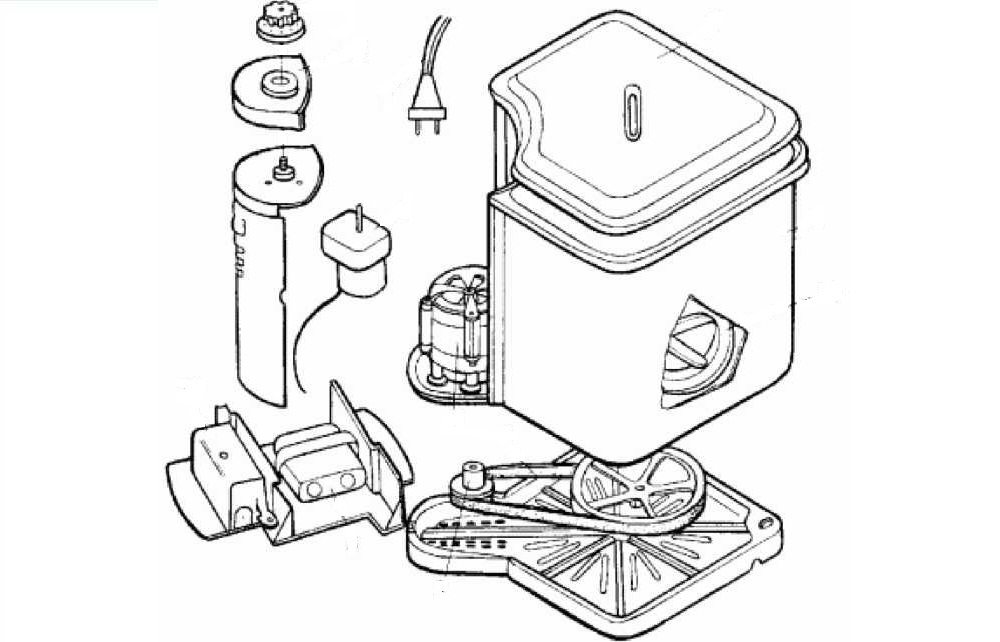
After making the key, we can disassemble the Malyutka washing machine, now nothing will interfere with us. We open the lid of the washing machine, disconnect the hoses, generally remove everything unnecessary, lay down a newspaper, place the washing machine on it and begin disassembling.
- Turn the back of the washing machine towards you. There is a plastic plug that needs to be pryed with a screwdriver and pulled out.
- Rotate the plastic impeller by twisting the activator so that its hole is aligned with a similar hole in the casing.
- Insert a screwdriver or pin directly into the engine rotor to firmly lock it. The screwdriver will go just through the two aligned holes.
- We arm ourselves with our new special key and unscrew the activator along with the housing.

We will not tell you in which direction to unscrew the activator, since the Malyutki were produced with multi-directional threads.
- The tank is held on by six screws, which must be unscrewed one by one to remove it.
- Remove the flange.
- We remove the rubber seal, the washer, and unscrew the fasteners holding the housing halves.
- All you have to do is unscrew the engine, and consider that the Malyutka washing machine is disassembled.
Good advice
Instead of a conclusion, let us give you a couple of tips about disassembling the Malyutka washing machine. If you plan to put the car back together after all the “repair procedures,” take a photo of each stage of disassembly so that you don’t make mistakes when connecting wires and installing rubber bands. If you have photographs, assembling the Baby is much easier. Read more about Malyutka washing machine repair you can read in the corresponding article on our website.
Be extremely careful when disassembling the washing machine. Don't be too zealous with pliers and a screwdriver. If you pick the case too hard with a screwdriver, you will damage the rubber gaskets or plastic parts, and if you unscrew the nuts with pliers, you will tear off the edges and add more work to yourself. Happy disassembly!
Interesting:


1 reader comment
Add a comment
Categories
Washing machine repair


For buyers


For users


Dishwasher


And if the protruding screw does not screw in, but is simply inserted tightly, then how to remove it?