Dismantling the drum of an Indesit washing machine
 In the tank of the washing machine there are vital parts that allow the moving units to rotate smoothly. When they wear out, extraneous sounds occur during spinning, as well as backlash. Unfortunately, the breakdown of these parts is not a rare case, so we will talk about fixing them in this article. For example, we learn how to disassemble a drum from an Indesit machine and replace bearings on it.
Should I undertake repairs?
Bearing wear is one of the most common causes of malfunction of the washing machine. Due to the fact that they allow the drum to rotate, a high load is produced on them, forcing them to become unusable faster than other parts and parts. Bearing units are located on the drum cover, so we need to not only get to the tank, but also completely disassemble it. In general, it will be necessary to make an almost complete analysis of the entire washing machine.
However, even disassembling the drum does not seem such a difficult task compared to disassembling a non-separable tank. Some manufacturers merge a tank with a drum, which does not allow you to manually disassemble it. In this case, repair shops and service centers usually offer a replacement tank. The problem is that its price can be up to 70% of the cost of the washing machine, so it’s more advisable to buy a new “home assistant”.
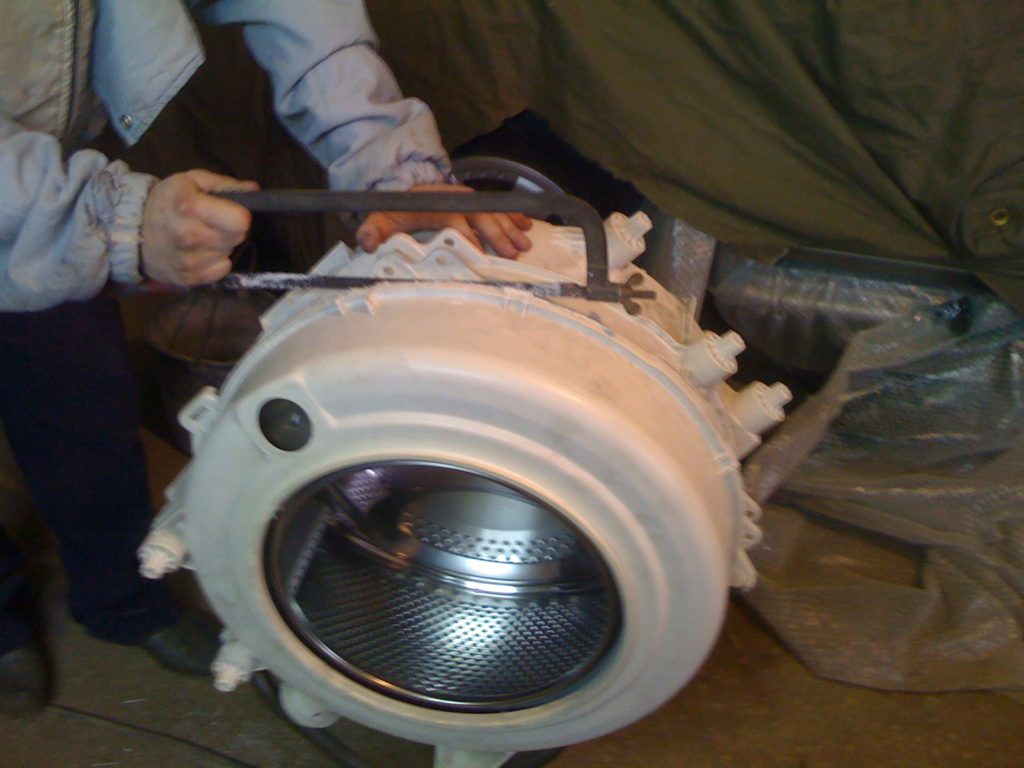
If you don’t want to spend money on replacing the tank, and even more so on replacing the entire washing machine, you can try to saw the tank with a metal saw (followed by gluing after replacing the parts). Serious money can be saved, but self-repair will require time and skill. If you are still full of desire to try, then we will tell you about everything you need to know.
We will collect everything you need
Before you begin, you must collect (or purchase) the necessary tools. By the way, for the repair of machines of the Ariston brand, the tools are the same, since the Indesites and Aristons are similar in internal structure. So, we need:
- saw / hacksaw for metal;
- marker;
- pliers and pliers;
- 8-18 mm open-end wrenches;
- set of heads with knobs;
- Phillips and straight screwdrivers;
- socket wrench set;
- hammer;
- multimeter;
- awl.
If you need to fix the electrical parts of the machine, you can exclude the multimeter from the list. Use an ordinary tester.
Before disassembling
First we need free space. If the car is in the combined bathroom, there may be enough space, and if the bathroom is only “meter per meter” - there will be a lot of inconvenience when parsing and fixing. The best option is to move the device to the garage or to the street (if you are doing repairs in the country). If this is not possible - move the washer to any room where there is at least 2 square meters. m of free space. Next, you must complete the following work.
- Cover the work area with unnecessary cloth or newspapers.
- Transfer the washing machine to the workplace by first disconnecting the hoses and wires from it.
- Disconnect the powder receptacle from the machine - it will only interfere.
- Drain the remaining water from the tank by unscrewing the drain filter (located below).
Also prepare a separate space for small parts and detachable parts. You can immediately put the powder receiver and filter there.
Get to the tank
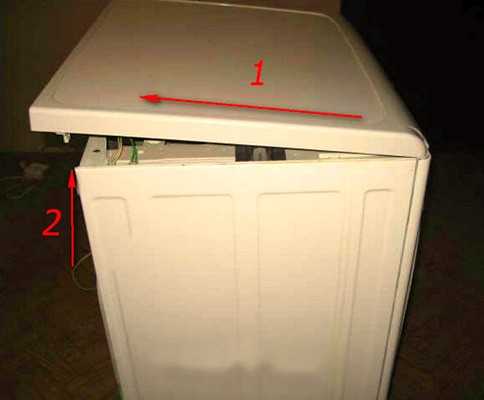
If the preparation is finished, you can start the analysis. First of all, remove the cover. To do this, you need to unscrew the bolts from the back wall to which the cover is attached, and then pull it towards you and up. Nothing complicated.
Next, you need to remove the hatch from the back of the machine. It is fastened with several bolts - they must be removed with the right screwdriver. We remove the front and back panels and see the internal parts of the device. When we remove them, we get to the tank itself.
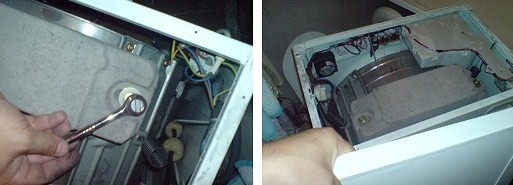
Let's start with the drive belt.To remove it, you need to hold the pulley with one hand, and the belt with the other. Next, turn the pulley and wait for the belt to slip.
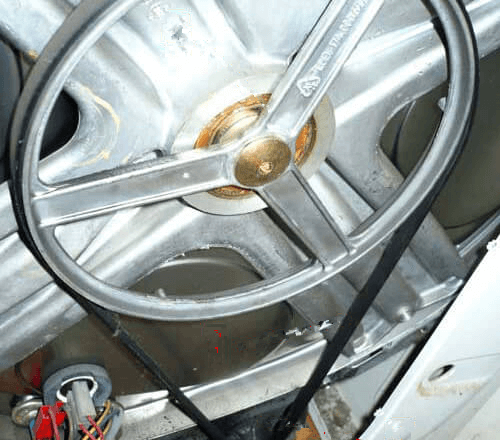
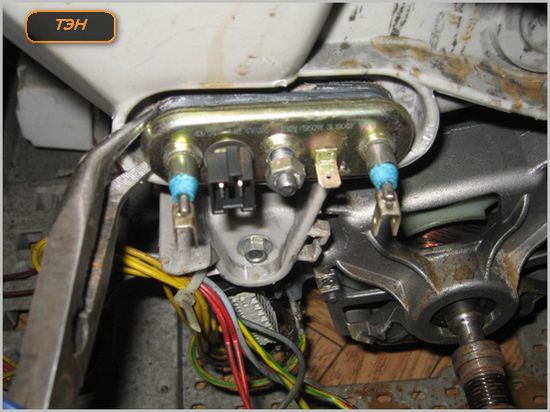
Look at the wall behind the pulley. If it has rusty smudges or oil stains, then the bearings will definitely have to be changed. So we continue the analysis. It is necessary to find a heater (tubular electric heater), the tail from it is visible under the tank. From the heater you need to remove all the wiring, and then remove the nut, which is located in the center of the shank between the contacts. Next, remove the heater from the groove.
Technically, you can disassemble a washer without removing the heater. However, this can lead to damage to the contacts during parsing, which in turn will entail the need to completely change the part.
Next, remove the electric motor. We remove chips and wiring from it, unscrew the bolts, and then remove the engine and remove it to the side. We pass to the top. Manufacturers place a counterweight under the upper wall, whose task is to extinguish centrifugal force during washing and spinning. In appearance, the counterweight resembles a large stone. In essence, the counterweight is simply a large-sized stone. You can remove it with the socket wrench by removing the bolts on which it is mounted. Set the counterweight aside.
The counterweight is quite heavy, so be careful when removing it.
We almost got to the tank. Next, you need to remove the control panel. Proceed as follows:
- remove the fasteners that are at the powder dispenser;
- go to the front of the washing machine, another fastener is on the left, also remove it;
- now only latches hold the block to disconnect the block from them, pull it up (act smoothly and carefully, otherwise there is a risk of breaking the wiring);
- disconnect the wires connecting the control panel and the intake valve;
- remove the part to the rest of the removed parts, if there is a service hook, it will be even better.
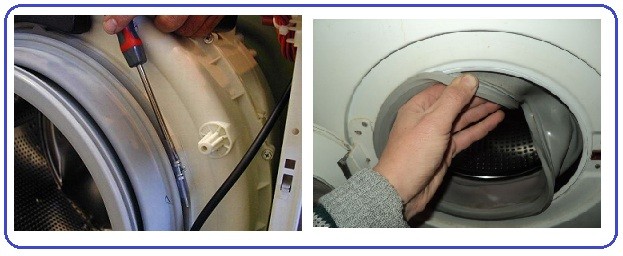
Now you need to access the tank in front. We begin to remove the cuff. Find the clamp that holds the rubber band. Pry it with a screwdriver (it is better to use the thinnest of those that are available). Use a screwdriver to go around the clamp until you feel the fastening. Unscrew the mount. Remove the clamp. Insert the gum into the drum.
At the back of the machine, next to the bay hose there is a mount - you need to unscrew it. Next, we pull out the inlet valve and the niche of the receiver for detergents.
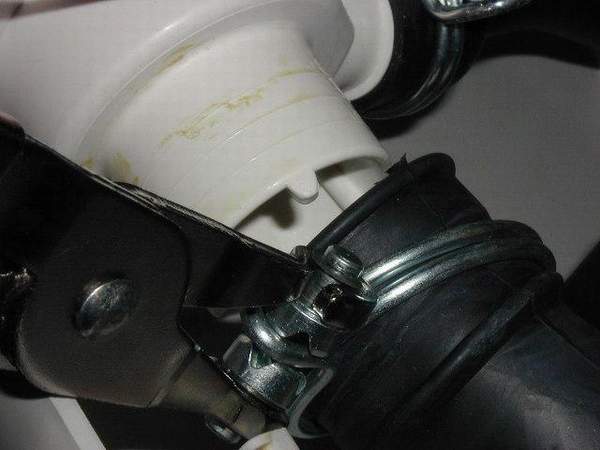
To get a niche of the receiver, disconnect a branch pipe, having opened a collar.
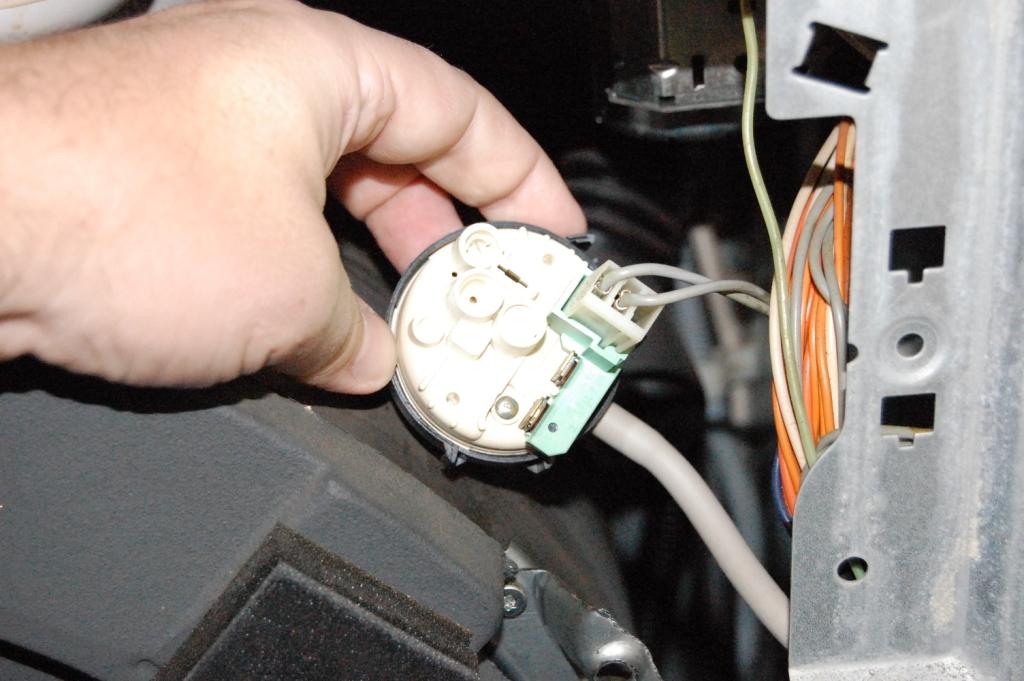
We pass to the pressostat. Disconnect the wiring from it, and then disconnect it from the mount itself. The mount itself is plastic, so be careful when removing the sensor - it is easy to damage it.
Before removing the stand pipe and drain, lay the “home helper” horizontally. As a rule, the bottom of Indesit models is missing, so you will see the right part right away. The pipe is removed from the clamps. To do this, simply loosen the fastener.
Using a 10 mm socket wrench, unscrew the fasteners that hold the posts, and then remove them. After that, you can again put the car upright - we got to the tank and can start cutting it.
Sawing a tank
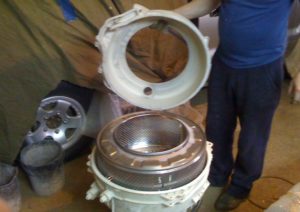
Sawing the tank, of course, is not possible inside the body - first get it out of there. You may not have enough strength alone, so bring another pair of hands to the repair. When the tank is disconnected from the main body - you need to be very careful, trying not to damage the drum and other parts, cut it into two parts along the seam. To do this, perform a number of necessary manipulations. Place the tank upright; the seam you will be sawing should be looking at you. The tank can be mounted on a car tire for added stability.
Make sure that the tank is soldered and sawing is really necessary. If so, cut the tank strictly at the seam. After sawing, remove and set aside the top of the tank.The back is still attached to the drum. The bearings are located there, so it will also have to be removed.
We get to the bearings
Unlike the upper part of the tank, the lower part after cutting is not so easily removed - this is the whole process. To begin, unscrew the nut holding the drum pulley. Then do the following:
- remove the pulley;
- screw the bolt into the thread (no need to use the bolt from the machine - the screw in the bolt will most likely go bad);
- put a rubber part from a mallet on a bolt. If it is not, you can use a wooden block or something similar;
- tap the block or mallet with a hammer until the bottom half moves. If this does not happen, moisten the area near the bolt with the WD-40 and tap again with a hammer.
When you get rid of this half of the tank, you will have full access to the drum. The bearings are located on the shaft. You can remove them using a car puller. If it is not there - take the drum to a car repair shop - there they will help you disassemble the drum of the washing machine.
When the bearings are removed, you can put new ones and assemble the washing machine back. To reconnect the tank, use sealant and bolts. We will not describe how to assemble the car back - everything is the same as during parsing, but in the reverse order.
Interesting:


Reader Comments
- Share your opinion - leave a comment
Headings
Washing machine repair


For buyers


For users


Dishwasher


Add a comment