Disassembly of the Indesit washing machine
 Under the brand name Indesit, low-cost equipment is produced, in which the resource of work is not too large. And when, finally, a breakdown occurs, you have to think about what to do, repair it with your own hands or consult a specialist. If you repair it with your own hands, then first you need to figure out how to disassemble the Indesit washing machine? And not just disassemble, but disassemble so that then assemble and it all worked. We decided to talk about how to do this.
What do you need?
Indesit washing machines in their design strongly resemble Ariston washing machines, but there is a difference between them and this difference, as always in the nuances. If you are interested in the process disassembling a washing machine Ariston, you can read about it in one of our publications. But we will not get ahead of ourselves, but first we will see what tools we need to work. In general, we can get by with a small tool case, where:
- open-end wrenches from 8 to 18 mm;
- set of heads and knobs;
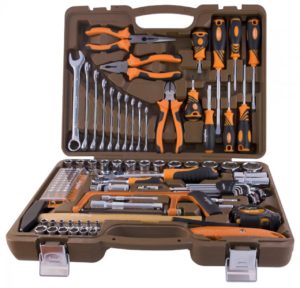
- pliers;
- ticks;
- screwdrivers of various configurations and sizes;
- a small set of socket wrenches;
- multimeter;
- hammer;
- hacksaw for metal;
- color markers;
- awl.
If you do not need to repair an electrician, then you can not take a multimeter, but get by with an ordinary tester, and even so, just in case.
Having collected all the above tool, you can proceed to the next stage of preparation for work.
First stage
What's next? And then we will need to solve the problem with the workplace, namely, where we will disassemble the washing machine and lay out the disassembled parts so as not to lose anything needed. The ideal place is a workshop, or at least a barn or a garage. If there is neither one, nor the other, nor the third, then you will have to disassemble the car right in the apartment, only you need to properly prepare the place.
- Free a 2x2 meter floor area from carpets and other furnishings.
- Cover the area with rags and newspapers.
- Turn off the washing machine and drag it to the disassembly site.
- Take out the powder cuvette and set it aside.
- With your own hands, unscrew the trash filter and drain the remaining water from the tank. Move the filter to the side.
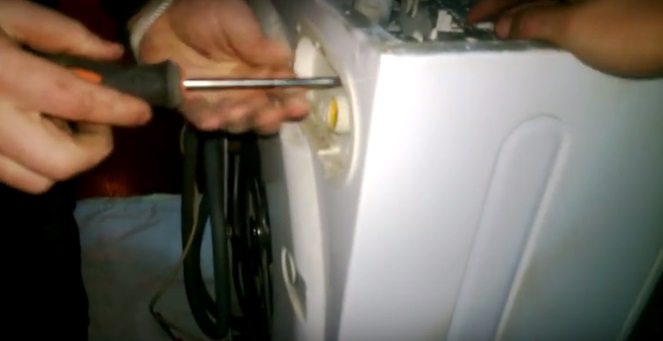
Tools, a place of work and the Indesit machine are prepared, you can start the analysis. First, remove the top of the machine, namely the cover. There are two self-tapping screws in the upper and left upper corners of the washer, they must be unscrewed with a Phillips screwdriver. Then we shift the lid backward and lift it up.

Next, we remove the service hatch cover with our own hands. It is located on the back wall of the Indesit washing machine, for this it will be necessary to unscrew the 6 screws that hold it.
How to get to the tank?
By opening the service hatch and the top cover, we immediately get access to some parts of the washing machine, this must be used.
- Remove the belt from the pulley. To do this, take one hand on the drum pulley, the other on the belt, and twist the pulley - the belt will “jump”.
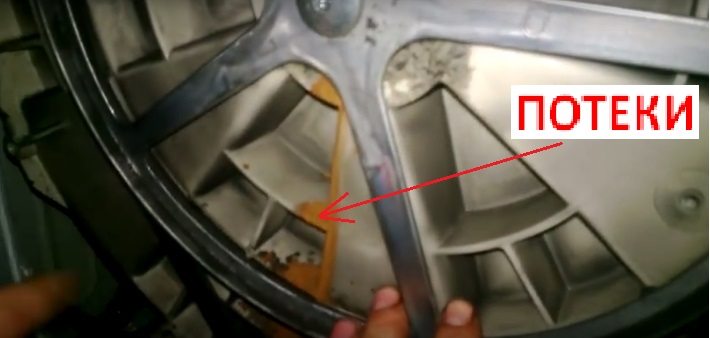
We inspect the rear wall of the tank, which is located directly behind the pulley. If traces of oil, rusty streaks are visible on it, it means that the bearings are definitely broken and a complete disassembly of the machine will be required to change them.
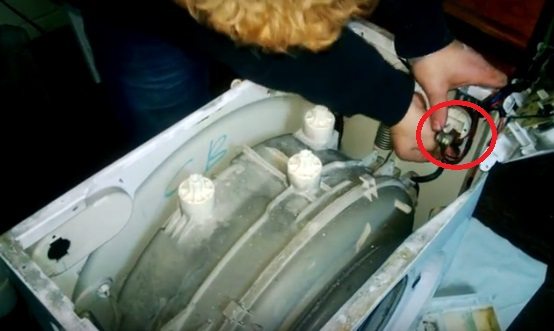
- We pull out the contacts of the heater and the temperature sensor of the wire, unscrew the central nut and carefully pull out the heater. You can still leave the heater in the tank, but then you need to be very careful when parsing so as not to break off one of the protruding contacts.
- We remove wires with chips from the engine of the washing machine. We take the head and head 10 mm, or a long socket wrench 10 mm and unscrew the two bolts that secure the motor. We remove the engine and remove it to the side.
- Go to the top. A heavy counterweight is mounted on three bolts above the upper wall of the tank, it must be removed.We take the same socket wrench and unscrew these bolts with our own hands, and then we pull off the counterweight and remove it to the side. Be careful when parsing, do not drop the counterweight on your leg.
Our tank is almost free, there are little things left, for example, to remove the control panel. First, we unscrew the fasteners located near the niche for the powder receiver. Then we unscrew another screw from the left front corner of the case. Now the control panel is only held by relatively weak latches.

Pull the panel up, and it safely pops out of the latches. In this case, the masters have only one wish - do not pull the panel too sharply, otherwise tear off the wires and add faults to the washing machine Indesit. We disconnect the wires going to the inlet valve and remove the control panel to the side, let it hang with us on the remaining wires from the edge.
We are taken for the cuff of the hatch. This large elastic is fixed with a special clamp, it must be removed without piercing the cuff. What are we doing?
- We find the cuff clamp.
- Gently pick it up with a flat screwdriver.
- We go in a circle and find the mount.
- Unscrew the mount and remove the clamp.
- Fill the cuff deeper into the machine body.
What do we do next? And then we go around the washer in the back and in the area where the inlet hose is connected to the machine, unscrew the screw. After that, we will be able to immediately pull out the inlet valve along with the niche of the powder receiver.
Attention! When removing the niche of the powder receptacle, do not forget to disconnect its branch pipe, which is connected to the niche from below and rests on the clamp.
We disconnect the wires from the water level sensor and pull out the sensor itself from the plastic mount. In this case, be extremely careful not to damage the mount itself and the sensor, otherwise you will have to buy and replace these elements, you still need to find them.
Now we put the washing machine on the left side. There is no bottom at the Indesit washing machine, so we immediately get access to the drain pipe and racks. It is these elements that will prevent us from removing the tank in the future, which means they must be removed, without which further disassembly is impossible.
- We remove the two clamps that secure the drain pipe.
- We pull off the pipe.
- Using a 10 mm socket wrench, unscrew the screws that hold the posts and remove them.
- We put the car on its feet and we can assume that we have finished the main stage of disassembly, it remains to remove and disassemble the tank.
Disassemble the tank
Analysis of the washing machine continues, remove the tank. In this case, the tank at the Indesit washing machine is non-separable, but in order to change the bearings we need to remove and disassemble it. When removing the tank, use someone else's help, since it is not so much difficult to remove it alone as it is inconvenient. We pull off the tank from the springs and carefully lift it up, pulling it out of the case.
Note! When pulling out the tank, be careful with the wires and cuff; do not damage anything.
We put the removed tank upright so that the welded factory seam is up, then we will saw it. We take a hacksaw for metal and begin to cut exactly at the seam. Try to do everything very carefully, because then we will need to put the halves of the tank on the sealant and twist them with bolts. Say right away, parsing the tank of an Indesit brand washing machine is very painstaking work, you can spend 6 hours on a row to cut, but the result should please you.
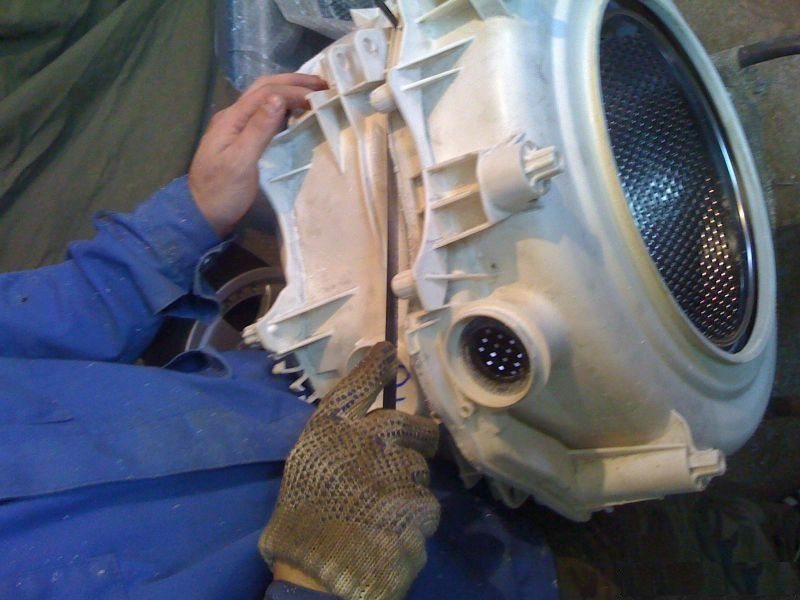
After sawing the tank, we can remove the front half and remove immediately, and the rear half will remain on the drum shaft along with the bearings. Our task is to remove the rear half of the tank.
- Unscrew the nut holding the drum pulley.
- Remove the pulley from the shaft.
- We screw into the thread a suitable bolt in diameter (only not the one that stood on the machine).
- We lean against this bolt a wooden block.
- We hit the bolt through the bar with a hammer. You need to beat quite hard so that half of the tank jumps off the shaft.
As soon as we manage to drive half the tank off the shaft, we still have a drum with a shaft sticking out from behind, on which seals are mounted with bearings. To remove the bearings, you can go in two ways: firstly, get a car puller for bearings somewhere and try to pull the bearings off yourself, secondly, you can bring a drum to a car workshop and ask local locksmiths to remove old bearings for a small fee.
As soon as you can get rid of the old bearings, you can easily press fresh bearings and seals onto the shaft, and then assemble the tank and the entire washer in the reverse order. We, in turn, really hope that the disassembly of the Indesit brand washing machine will be successful with you. Have a good repair!
Interesting:


4 reader comments
Add a comment
Headings
Washing machine repair


For buyers


For users


Dishwasher


But if the pulley nut does not loosen, what to do, how to remove it? And - is the thread in the drum shaft right or left? There is nothing about it ..
He broke two bits, then he took a soldering iron more powerful, put it on the head of the bolt so that it warmed up for about 20-30 minutes and the locking glue collapsed. Then he took a hexagonal bit with a key, actually the screw was unscrewed effortlessly, and before that he broke two bits, the thread was right, after repair he installed a hexagon bolt.
In order not to spend 6 hours, I sawed the tank with a universal machine (for some reason it is called a chisel in Leroy) with a segment nozzle at the lowest speed (with water - it is necessary, otherwise the plastic will melt). He poured literally dropwise into the cut with a syringe of 20 cubes. It took about an hour to do everything.
How to glue the tank?