How to disassemble a Candy washing machine
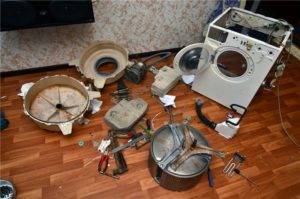 Often malfunctions of Kandy washing machines force owners to purchase new equipment. Not everyone knows that damage can be repaired with your own hands. To get to the inside of the washing machine, you need to know how to properly disassemble the device and what tools will be needed during the work process. All machines are divided into two main groups: vertical type and frontal type. Both options differ in specifications and parsing methods.
Let's prepare the tool for disassembly
At first glance, disassembling a Kandy automatic washing machine is not difficult and does not require a huge number of tools. Sometimes a regular screwdriver is enough. But for a complete analysis of Kandy, you will need a little more.
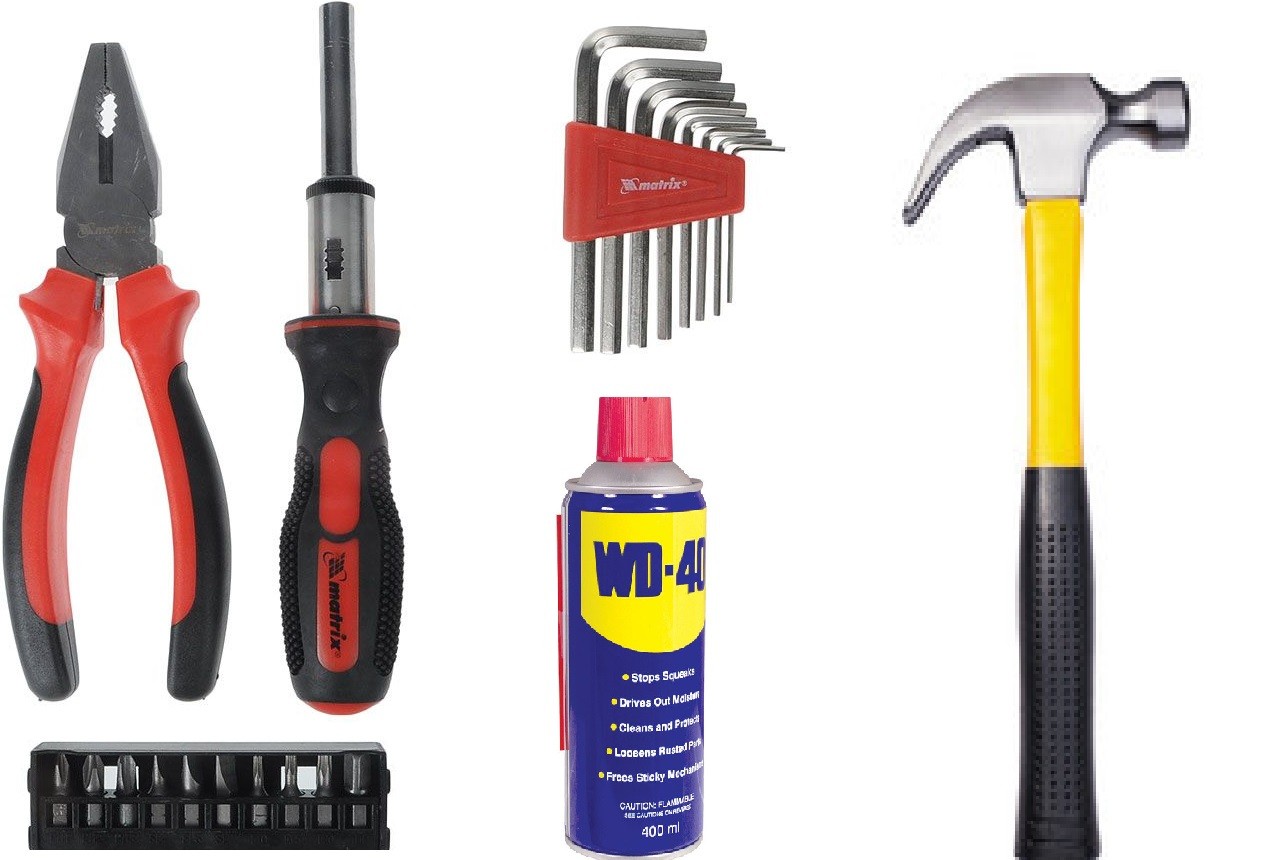
To get started, you will need a Phillips and slotted screwdriver. A screwdriver will also come in handy. Here you should add hexagons, pliers and a small hammer.
Often, most connecting fasteners are stuck. Before unscrewing one of these screws, the structure should be coated with a special liquid. This liquid is most often used to lubricate car parts, and it is called WD-40. And to make it comfortable to drain excess liquid from the hose, you will need to use a basin. You can thread a hose into it and easily drain excess water.
For those who want to disassemble the Kandy machine, you should stock up on a camera. During the disassembly process, it is better to take photographs so that later, after looking at the picture, you can easily put the device back together. This will allow you not to confuse anything and successfully start the machine after the repair stage.
Step by step disassembly
Before starting repairs, it is necessary to disconnect the machine from the electrical network. This will make the work process as safe as possible. In addition to disconnecting the unit from the power supply, you should unhook the cold water supply hose so as not to flood everything around.
How to remove the top of the hatch? First of all, you should remove the top of the device body. The cover can be fixed using various screws, which can be easily unscrewed with a Phillips screwdriver. The screws are located under the top of the panel on the back side. Once they are unscrewed, you can press lightly on part of the lid. You will need to press on the front side. Now you can lift the cover body up.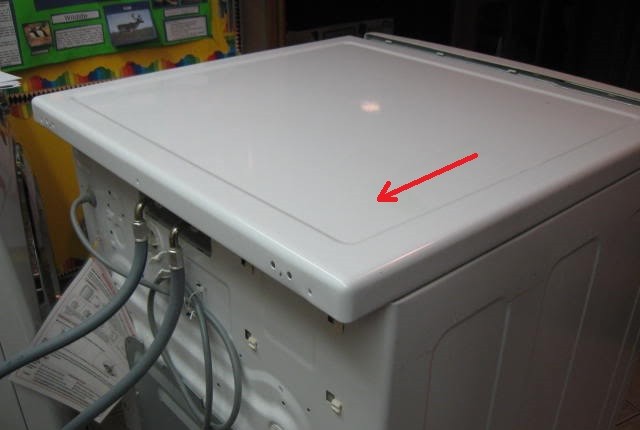
How to remove the detergent tray? The Candy washing machine has a dispenser that is easy to remove. In order to properly remove the detergent tray, you will need to find a separate plastic button by feeling. Typically the element is located in the central part of the tray. You should press the button and pull the container in your direction.
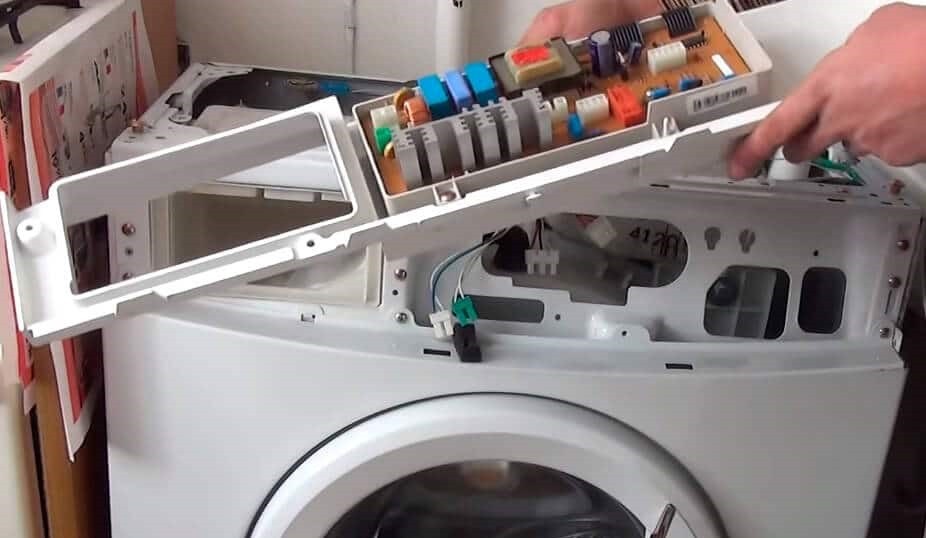
How to dismantle the control panel? The control panel is secured to the washing machine with two screws. The first screw is located under the powder dispenser. The second screw is located on the opposite side. The control panel will need to be handled with extreme care as it is very fragile. As soon as it is removed from the device, you must immediately hang it on a hook or put it away so as not to accidentally damage fragile elements.
How to remove the service panel? To dismantle the service panel, you will need to simultaneously press two locking latches, and then press the third one located in the middle.How to remove the front wall? You must first remove the metal clamp that holds the hatch cuff. The cuff is installed in the loading hatch. The metal clamp is secured with a small spring. You can push it slightly and the clamp will be removed. Now you can push the cuff inside the drum.
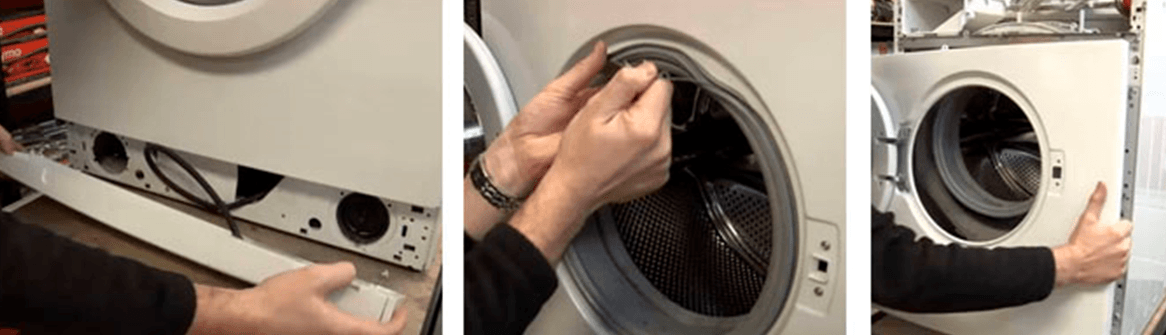
After removing the outer clamp, do not try to pull out the cuff completely, as you will certainly damage it. Why? That’s why the internal clamp also holds it tightly.
The hatch door may interfere with the removal of the front wall, so it would be a good idea to unscrew it. It is tightened with several bolts. After this, you will need to remove the front panel of the device. We unclip the latches that hold the protective cover. If you lift the panel a little, you can easily remove the additional hooks that hold it in place. Inside the control panel there are microcircuits that can be disassembled individually, if necessary.
How to remove the back cover. It is necessary to unscrew the screws using a screwdriver. Typically, screws are placed around the entire perimeter of the back wall to securely fix the elements.
Top loading machine
The principle of disassembling automatic top-loading washing machines differs significantly from the front-loading type. Control Panel. It is necessary to carefully lift the top of the control panel from four sides in turn using a screwdriver. First, pull the part up and then in the opposite direction. Now you can tilt it slightly at a certain angle. After this, access to the wiring will open.
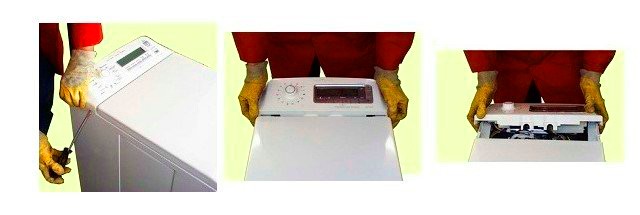
Photographs of the wire placement should be taken prior to complete disassembly. Now you can dismantle the remaining parts. How to unscrew the side wall.Before removing the side part, you will need to unscrew the screws. Once they are unscrewed, you can lightly pull the bottom towards you and then pull it down. Once the side panel is removed, you can proceed to the next stage of disassembly.
Disassembling the tank
The tank reservoir itself is non-separable. Such tanks are manufactured so that during operation the tank does not lose its tightness. When the washing machine is operating, temperature changes occur and the fastenings often become loose.
Before disassembling the tank, you should carefully inspect the external parts and look for a seam in them. Parallel to the seam, we will need to drill holes to fasten the halves of the tank, because we will need to assemble the tank later. We make holes using a drill and a drill.
It is necessary to drill 15-20 holes along the seam. After this, you can cut the seam. After cutting, you can easily get inside the tank. You can cut the seam with a special hacksaw for metal. The procedure will take a long time. It is not allowed to make a cut of more than 5 cm. Otherwise, the walls of the tank will become unusable.
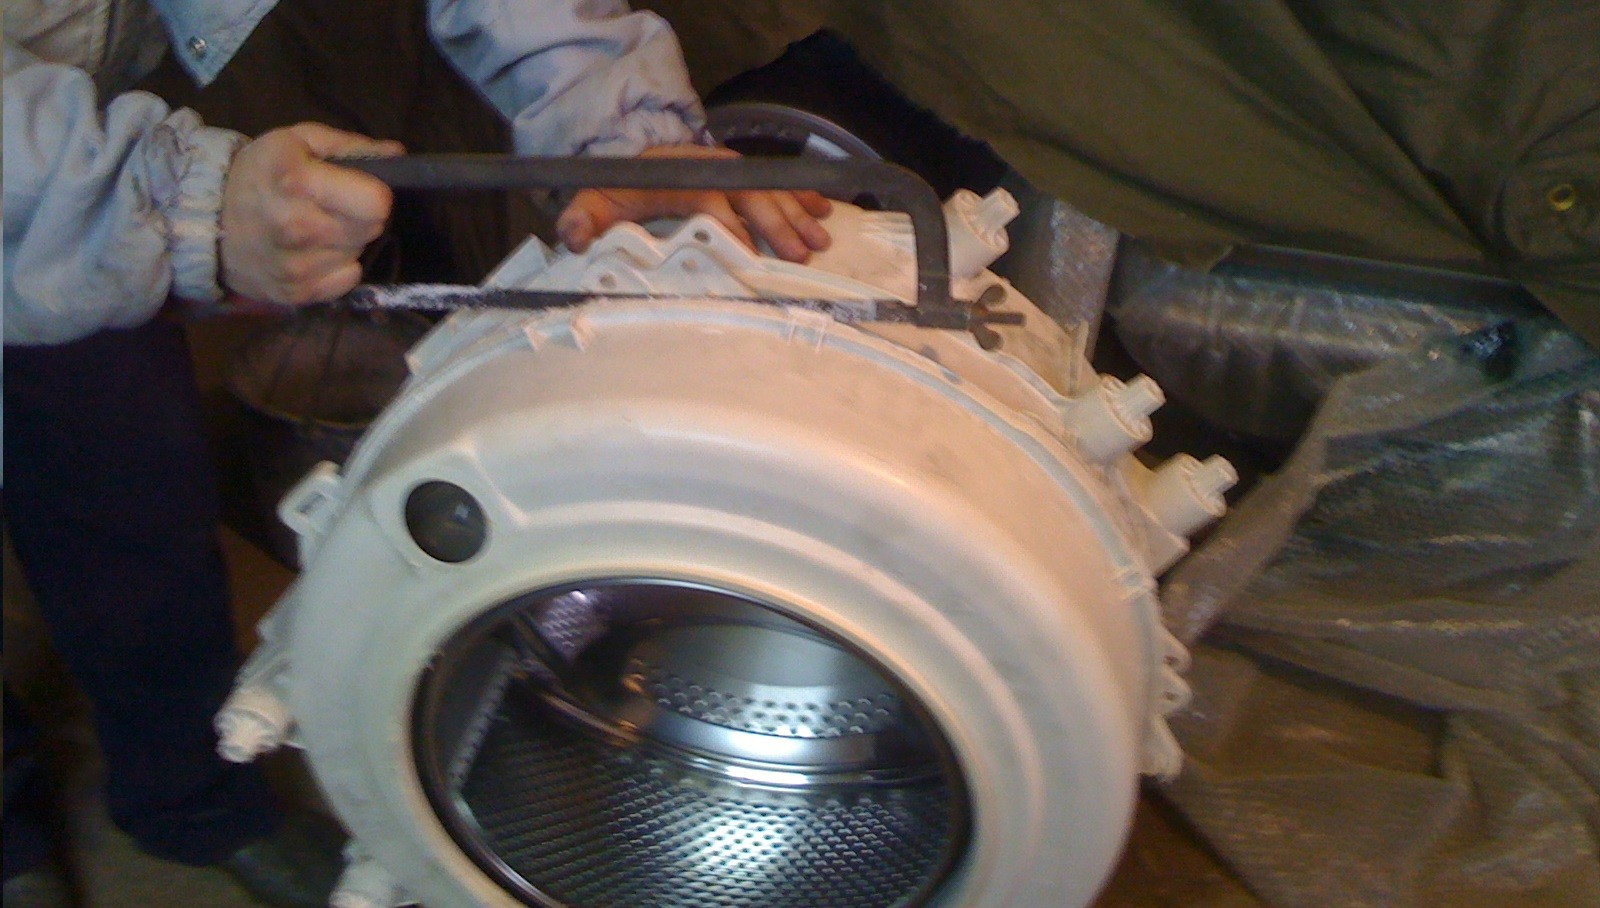
Once the sawing is completed, the tank will become a collapsible product. You will get two parts - front and back. The front part is an irregularly shaped plastic element with a hatch in the center. We won't need it for now, so we can put it aside. In the rear part we have all the main elements - the drum and the rotation mechanism. It should be removed. You need to turn the rear part over so that the drum hatch is on the bottom. Now you can start disassembling the shaft.
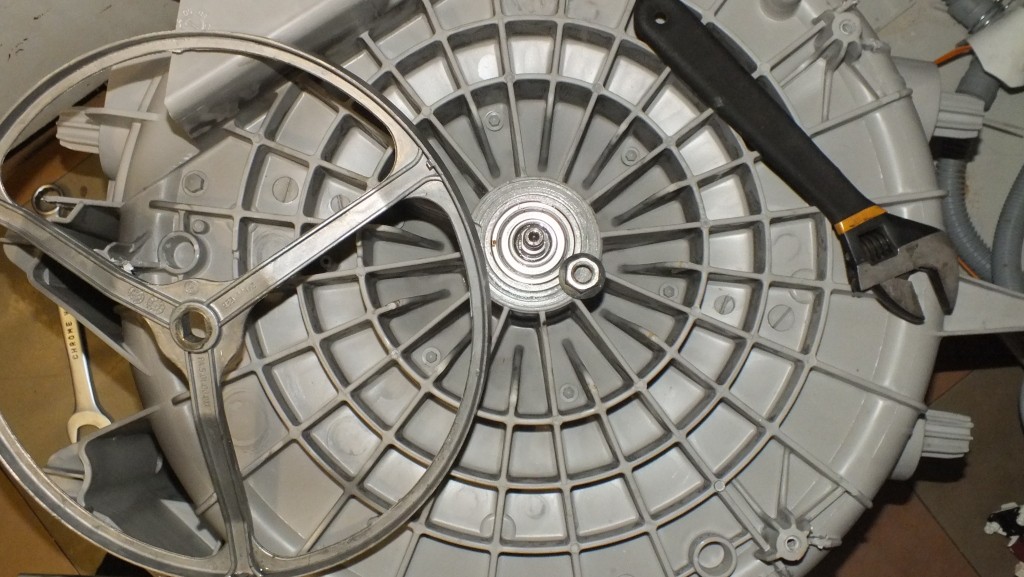
The first step is to carefully unscrew the screw located in the center.You need to attach a metal rod in the form of a small chisel and strike it with a hammer. Now you need to take a screwdriver and tighten the screw. The shaft must be removed using three pieces of wood (one small and two large). Large blocks will be used to support the tank. A small beam is placed on top of the tank in part of the rod. You need to hit a small block with a hammer.
The part can be easily damaged, so you should combine the power of the blows (first a light blow, then a heavy one).
As a result, the drum will be separated from the tank. It is allowed not to remove the bearings if they are working properly; perhaps the problem is not in them, but in the tank itself. It is checked first.
Sometimes owners need to change the oil seal or bearing. To do this, use a metal rod and hit it with a hammer along the edges of the body. It is not allowed to strike from only one side. Even if one bearing is broken, both will have to be replaced.
Interesting:


1 reader comment
Add a comment
Categories
Washing machine repair


For buyers


For users


Dishwasher


Hello!
I can’t remove the top front panel (control panel) of the Candy Aquamatic 8T machine.
Help if you can!