Replacing a bearing in a Zanussi washing machine
 An Italian-made Zanussi washing machine is a fairly reliable unit, but even it can break. If you are reading this article, it means that you have already found out that the bearings in your “home assistant” have broken. I don’t want to call a technician who repairs and maintains equipment, so I decided to carry out the repairs myself. We hope our instructions on how to change the bearing in a Zanussi washing machine will help you cope with this job.
Preparing for work
Without a good tool in your arsenal, it is unlikely that you will be able to replace bearings in a washing machine. The list of what is needed is quite impressive, and therefore often scares off a novice craftsman, who comes to the conclusion that it is cheaper to call a specialist than to buy all the screwdrivers and other accessories. That’s how it is, but if you decide to learn this kind of business, you’ll have to buy something. And these tools are necessary and will come in handy more than once later. So, prepare:
- flat-head and Phillips screwdrivers or screwdrivers;
- bits and adapter for them;
- pliers and round nose pliers;
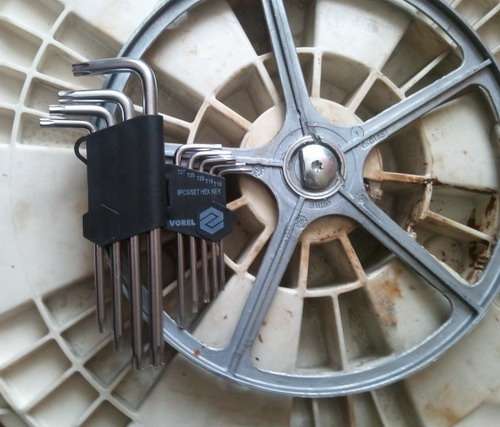
- sockets and 8 mm hex key;
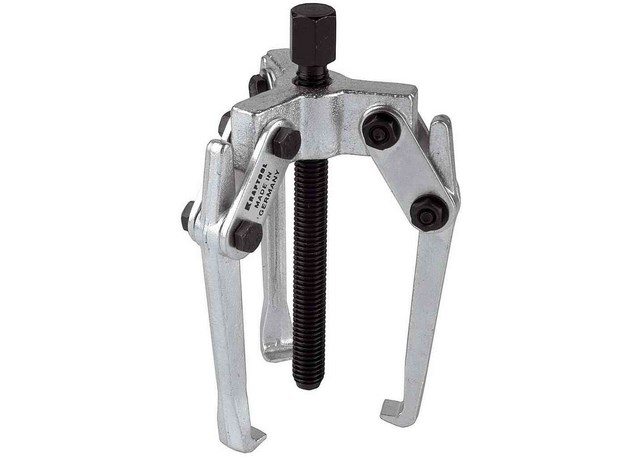
- a hammer and a bolt 14-16 mm long and 15-20 cm long, in order to knock out the bearing, but you can also get a special puller;
- sealant to seal all the cracks when assembling the tank;
- WD-40 liquid.
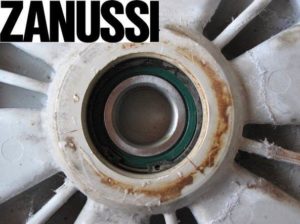
Buy bearings and seals by size. The size can be determined by the model of the washing machine, or after you knock the part out of the drum. The number and size will be written on the side.
Having collected the tools and spare parts, prepare the washing machine itself. It must be disconnected from communications and moved to a suitable place for work. You will need a lot of space, so if the equipment is in the bathroom, then it will obviously have to be taken out into the hallway or transported to the garage for the duration of the renovation.
Car repairs
Zanussi washing machines have their own characteristics that must be taken into account when replacing this part. We will describe this process in detail.
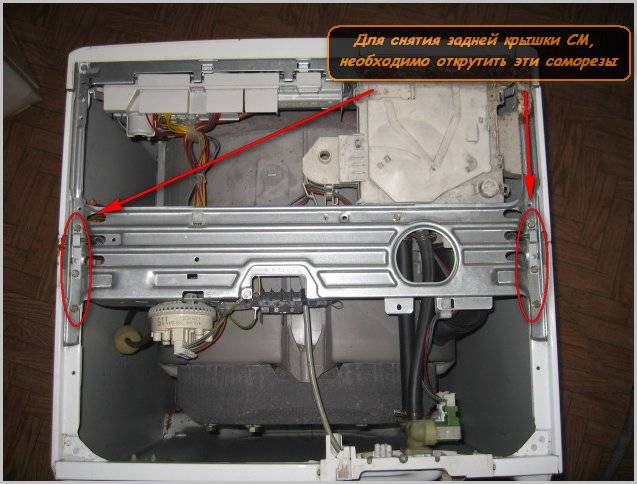
- Unscrew the bolts and remove the top cover and the back half of the case. Be careful, some bolts are hidden under decorative plugs. At this stage you will need a Phillips screwdriver and a torx bit.
- Remove the rubber cuff from the door hatch and tuck it into the drum.
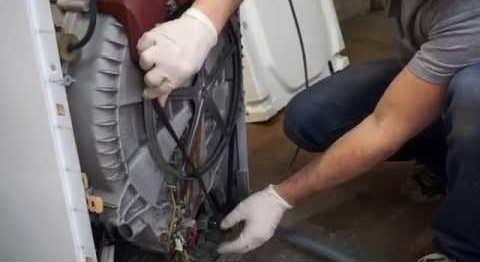
- The main goal during disassembly is to remove the tank from the car. Therefore, we disconnect all the pipes from it, first of all we need to remove the air pipe, it is simply pulled out of the tank from the top of the car.
- Remove the drive belt from the pulley and from the engine.
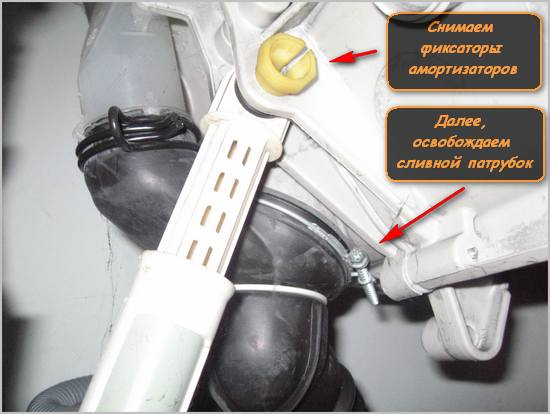
- We remove the fastening (“finger”) from the shock absorber in order to then pull out the tank. To make the process easier, take a 13 mm hex key and put it on the “finger” from the inside, and pull the head from the outside with pliers.
- Carefully, without bending the wires, remove the sensor from the tank.
- Disconnect the ground wire from the drum pulley.
- Disconnect all wires from the heating element.
- We take out the chip with the wires from the washing machine motor and unscrew the motor itself, it is quite heavy and will get in the way.
- Now we disconnect the tube going from the tank to the pressure switch.
- Disconnect the filler pipe using an 8 mm socket to loosen the clamp.
- Remove the drain pipe.
For your information! The pipe itself is secured with a bolt to the machine body, so use an 8 mm socket to unscrew it and move it to the side.
- Immediately unscrew the drum pulley using an 8 mm hexagon.To avoid breaking the fastener, lightly tap the center of the pulley with a hammer. Using the metal tube wrench lever, unscrew the nut.
- We take a 13 mm socket and unscrew the upper counterweight from the tank, moving it to the side.
- We remove the tank from the springs and pull it out of the housing.
At this stage, preparations for replacing the bearing will be completed. A lot of work has been done, so be patient, do everything in order and take your time. If possible, take photos so that you can later see how to assemble the car. Having placed the tank on the floor, unscrew the bolts along the contour, thereby disassembling the tank of the Zanussi washing machine into two halves.
When removing the drum from the rear half of the tank, be careful not to damage the shaft and crosspiece. Don't just hit the shaft with a hammer.
Next comes the direct process of working with bearings. You need to do the following:
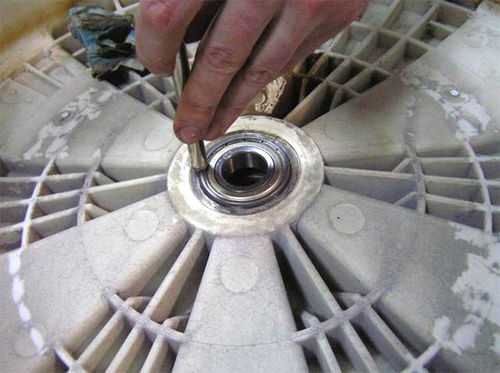
- use a flat screwdriver to pry the seal from the inside of the tank and pull it out;
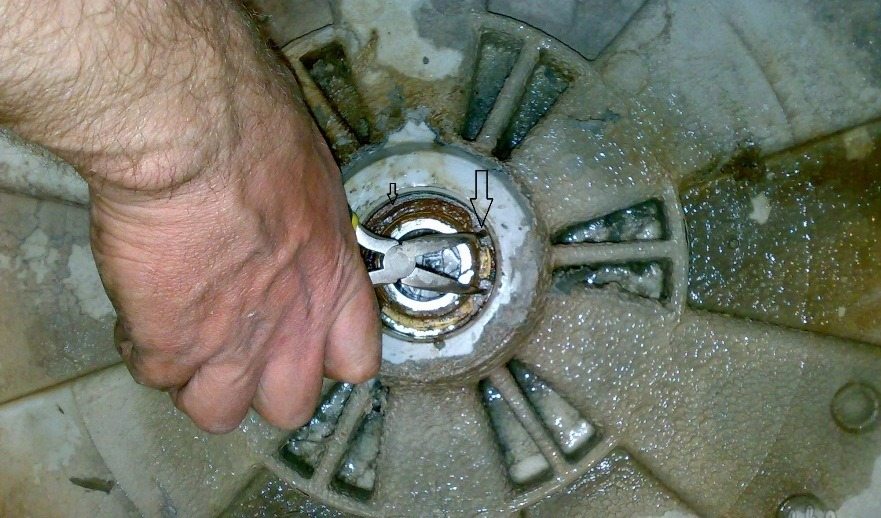
- Using pliers and a flat screwdriver, pull out the metal retaining ring;
- spray the bearing with WD-40 and leave for 10-15 minutes;
- turn the tank over and, using a hammer and drift, begin to knock out the bearing inside. We do this carefully, we apply blows alternately to opposite sides of the outer cage, the blows should be of medium strength;
- we clean the seat for the bearing and shaft;
- We take a new part, place it in its seat and, using a flat drift and hammer, press the bearing into place. We move the drift along the outer race of the bearing and hit it with light blows.
Important! Do not remove the insert from the new bearing; remove it after installing the part in place.
- lubricate the retaining ring with Lithol and install it on the bearing from above;
- remove excess grease with a napkin;
- We install a new oil seal on top with our own hands without the help of tools and coat its inner side special lubricant, lubricate the part of the bushing on which the bearing fits.
At this point, the bearing replacement will be completed; all that remains is to assemble the tank and return it to the washing machine body. If you can cope with this kind of work, then assembling the car will seem like a simple matter to you.
Difficulties in replacement
When disassembling a Zanussi washing machine to replace the bearing, difficulties may arise, which we decided to discuss separately.
The first difficult task occurs when you need to remove the rear half of the tub from the washing machine drum. The shaft is not always easy to pull out. There are times when it cannot be moved at all. What to do? First fill the shaft with WD-40 and wait about an hour. Then take a wooden block, place it on the shaft and hit it with a hammer. The second way to knock out the shaft is to first screw an old bolt into the shaft and tap the bolt.
Zanussi cars have different types of bearings. If the bearing is double-row, then its installation will be carried out together with the installation of the retaining ring, as we described above. If the bearing is single row, then there is no such ring. But there will be two bearings. They need to be knocked out one by one, starting with the outer one, the one on the side of the bushing. Then knock out the inner one, after removing the oil seal.
When knocking out a damaged bearing, be careful, otherwise it will be even more difficult to remove it.
Causes and symptoms of failure
 Why does such an important part of the automatic machine break down and how to understand it? Let's list some symptoms:
- extraneous noise and rumble during spinning;
- drum play;
- stains from oil seal grease appeared on the laundry;
- system errors appeared on the display;
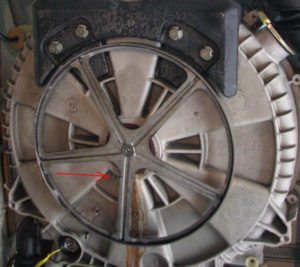
- When opening the back cover, rusty streaks were found on the tank.
Bearings in washing machines serve differently, some do not change them after 11 years of operation of the machine, while others have bearings that fail after 4 years. Situations where this part breaks down after a year of operation of the equipment are rare. What are the main reasons?
- First, wear is affected by installation. When installing the machine out of level, an imbalance occurs, which leads to excessive vibrations.
- Secondly, a violation during production. Installation of a part not intended to load the machine.
- Thirdly, defective parts, as well as lack of lubrication in the bearing.
We hope you understand the repair of a front-loading washing machine. But this manufacturer produces many models of machines with vertical loading; we will not describe whether there are any differences in operation. You can watch the video below to see how to replace bearings on a Zanussi top-loading washing machine. Happy renovation!
Interesting:


2 reader comments
Add a comment
Categories
Washing machine repair


For buyers


For users


Dishwasher


Thank you very much for the detailed information.
What if the tank is not removable?