DIY feather removal machine from a washing machine
 How many poultry farmers have not cursed the time when they have to massively chop down birds and then process their carcasses before selling. The worst process for cleaning feathers is plucking. It’s good if you need to pluck 30-40 carcasses, the whole family got together, did an unpleasant job and that’s the end of the matter, but what if you need to pluck 300-400 carcasses?
Such manual labor will remind you of hard labor. So you’ll think, willy-nilly, about making a feather removal machine with your own hands from parts of a washing machine, but it’s not the worst idea!
How does a plucking machine work?
A homemade feather removal machine works exactly the same as expensive factory equipment, only it looks, maybe a little less aesthetically pleasing. The principle of its operation is as follows.
- The spacious tank inside is completely studded with rubber beaters - special elastic pins with threads at the end.
- The bottom of the tank rotates at high speed and blows are also stuck into it.
- We throw a pre-scalded carcass of chicken, duck, goose or quail into the tank, and then turn on the feather removal machine.
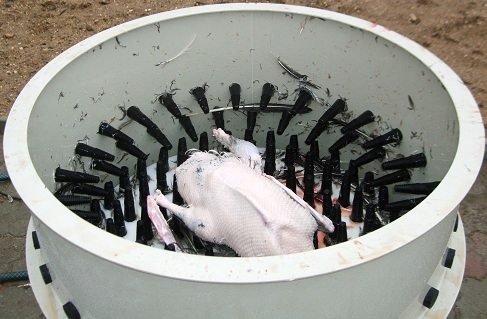
- The bottom of the tank of the car begins to rotate quickly, and the carcass inside begins to jump like crazy.
- During these races, the carcass beats intensely against rubber beaters, and the feathers fly off.
- After a few minutes of such racing, the carcass is almost completely freed from feathers; only the smallest feathers on the wings, tail and paws remain, which will have to be removed manually.
Does such a feather removal machine make the farmer’s work easier? That's not the right word. In 1 hour of operation, such a machine processes up to 30 broiler carcasses and no grueling manual labor. So take your “golden hands” out of your pockets and let’s work together to create a homemade feather removal machine, which we will make from some parts of a washing machine.
Be careful! Some people think that the bird is spoiled by being hit by blows. In fact, the presentation of carcasses that have passed through the de-feathering machine is preserved 100%.
Preparing the details
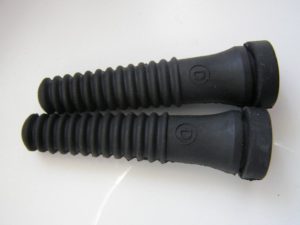 The first obstacle to making a feather removal machine with your own hands is the beaters. Where can I get such specific rubber parts or how to make them? We struggled with this issue for a long time, did not find anything suitable, and eventually agreed that it was better to order blow bars. The order will not be very cheap, but we can reassure you - this is the biggest expense in the manufacture of a feather removal machine. The rest can be obtained almost for free.
True, here you need to place your order very carefully, because the beaters for carcasses of different sizes are also different. The largest beaters are for turkeys and geese carcasses, slightly smaller beaters are for broilers. Next come the beats for smaller birds, and the smallest ones for quails.
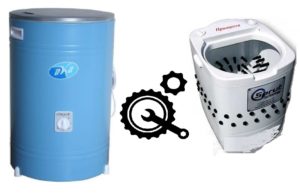
While we are waiting for the rubber parts, we can work on the washing machine. To make a feather removal machine, we will take an obsolete Oka single-tank washing machine. There is only one condition - the washing machine must be fully working. We will remodel the washing machine with our own hands to a minimum. The only thing that needs to be done is to move the engine and control electrics located under the washing tub outside the body; we will talk about this in more detail later. Let's do the following.
- We remove the washing machine motor.
- We dismantle the activator and drive mechanism.
- We take out all the electrics and put them away neatly, so that later you can understand what’s coming from.
The washing machine parts are prepared. Now you need to find a long rubber hose and put a shower head on it. This device will be useful to us later, when the feather removal machine begins to function. We also need some tools:
- open-end wrenches of different sizes;
- small adjustable wrench;
- ratchet with a set of heads from 8 to 30 mm;
- drill;
- Bulgarian;
- step drill;
- pliers;
- hammer;
- measuring tool;
- multimeter;
- marker.
Well, the beats have finally arrived, let's start assembling the feather removal machine with our own hands. We will try to describe the entire assembly process to make it easier for you to navigate when designing your own equipment.
Assembling the machine
On the Internet, various craftsmen offer to make a feather removal machine from a plastic barrel, sticking it with beaters and constructing a drive mechanism. In our case, everything is simpler, since the Oka washing machine already has a drive, an activator, which will replace the rotating bottom, motor and some kind of control. But there is a problem.
We will punch a fairly large number of holes in the bottom and activator of the washing machine into which we will insert rubber beaters. Moreover, we will drill holes between the beaters to drain water and discard feathers and fluff. Since the motor and electrics are located directly under the bottom of the washing tub, then all the water and feathers will fall directly on them - this cannot be allowed. Let's do the following.
- We make a housing for the engine from a plastic box of suitable size. We make a solid base for it from a metal corner.
- We connect the motor to the control electrics and test its operation. Read more about how to connect the motor from a washing machine (motor), you can read in the article of the same name on our website.
- We build a stable base for the washing machine tank from metal corners. The bottom of the tank should be at the same height from the ground as the tip of the motor shaft.
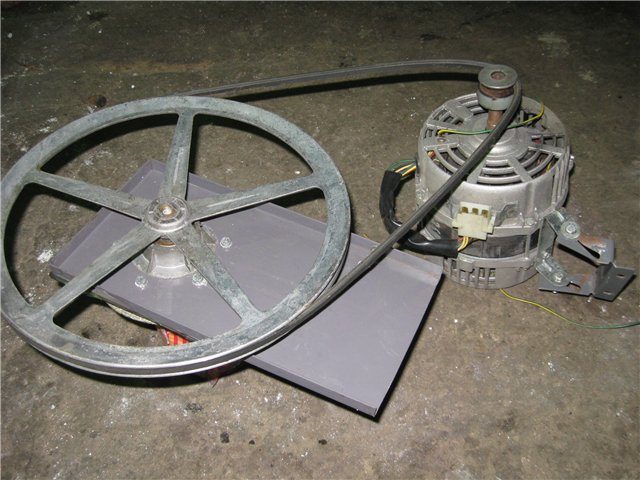
- We take two pulleys and a drive belt from an automatic washing machine. We put one pulley on the motor shaft, and the second on the activator shaft, and then connect them with a belt.
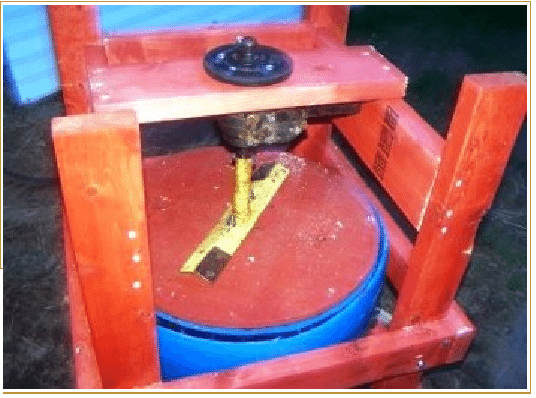
The belt should be well tensioned, and the engine box and washing machine tank should be statically fixed to the ground.
- Let's check how the mechanism will work. Our task is to ensure that the engine, through a belt drive, rotates the activator and does not fly off due to vibration. Please note that the vibration of the tank in which the carcass will rotate will be noticeably stronger.
- Now the most difficult stage of making a feather picker with your own hands is installing rubber beaters.
- Using a step drill, we make holes whose diameter is 3-4 mm smaller than the diameter of the beater.
- Between the holes for the beaters we make slightly larger holes to drain water and discard feathers. Then it will be possible to make a flat tray from tin and place it under the tank of the feather removal machine so that feathers and water collect in it, but there will still be a lot of dirt.
- We lubricate the holes for the beaters with machine oil, and then begin to insert the beaters into these holes. The work is extremely unpleasant, but the result is worth it.
- Finishing touch. We attach a hose with a shower nozzle to the edge of the tank of the feather removal machine so that the nozzle is directed into the tank.
Irrigation system: necessary or not?
Well, the homemade pen removal machine is ready.The time has come to arrange a general test and pluck the first carcass automatically, and at the same time talk about whether a watering system for the de-feathering machine is needed or whether it is better to pluck dry. Let's not talk out of the blue, but pluck two broilers of the same size, we will water one with water while the machine is running, and the second will be plucked dry.
We turn on the engine of the feather removal machine, the activator begins to rotate along with the beaters. We throw the pre-scalded broiler carcass there and turn on the water, which rushes in thin streams into the tank of the machine, pouring over the beating carcass. Literally 2 minutes pass and the carcass is almost completely cleared of feathers.
During the process of cleaning the carcass, water and feathers fly in all directions, so it is better to carry out this procedure somewhere outside.
Turn off the water and the engine, and take out the chicken carcass, cleaned of feathers. We take the second scalded carcass and throw it into the tank. This time we won't turn on the water. We start the engine and wait for the result. 3.5 minutes pass, the carcass hits the beaters, many feathers fly off, but many, even large feathers, remain on the chicken. Conclusion: watering clearly helps to better clean the carcass of feathers, which means you can’t do without it.
In conclusion, we note that it is quite possible to make a feather removal machine with your own hands from a used washing machine, especially if you get your hands on such a suitable washing machine as Oka. Good luck!
Interesting:


3 reader comments
Add a comment
Categories
Washing machine repair


For buyers


For users


Dishwasher


Please tell me where did you order these beaters? Can I have the address?
Aliexpress.
How to drill holes and what is better?