How to put an elastic band on a washing machine drum
 If you removed the drum cuff in order to replace it or this rubber band simply fell off for some reason, you need to put it back on. The rubber band of the drum ensures the tightness of the hatch; if it moves by at least 5 mm, the hatch will begin to leak, and this cannot be allowed to happen.
The cuff must be “put” into place perfectly, but this is not as easy as it seems. In this publication, we will try to explain in as much detail as possible how to put on a washing machine drum cuff no worse than what specialists do at the factory.
What materials and tools are needed?
In order to put on the cuff of the washing machine drum, you only need two tools: pliers (preferably small ones) and a small flat-head screwdriver. And the list of materials is not long, but we need to talk about materials in a little more detail.
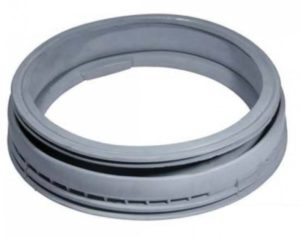
- Cuff. When purchasing a new cuff, make sure that it is identical to the old rubber band that was previously put on the drum or at least compatible with your model of washing machine.
- Internal and external clamps. If, after removing the old cuff, your “original” clamps remain intact, that’s good. If the clamps are damaged, you need to throw them away and instead buy a set of cheap plastic clamps for the hatch cuff of a front-loading washing machine.
- Fine-grit sandpaper, soap, water and sponge. These materials will help prepare the seat for the rubber band. Clean the metal edges of the hatch from tightly dried dirt and wash them with soapy water.
With the help of soap, we will not only wash the seat under the cuff, the soap will act as a lubricant that will help place the elastic where needed.Just don’t think of using WD-40 or machine oil as a lubricant - it will then get on things during washing.
Preparing the seat
To make the process of installing the washing machine cuff easier, it is better to first remove the front wall from the washing machine. Doing this on purpose is tedious and time-consuming, but if, for example, you were repairing a part and the wall was removed, it is better to first install the hatch rubber, and only then return the wall to its rightful place. The article explains how to properly remove the front wall. Disassembling the washing machine, which is published on our website.
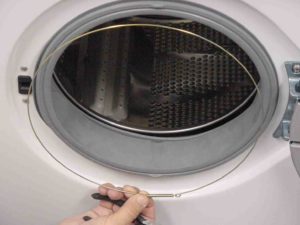
You can install the cuff without removing the front wall of the washing machine, but this will be somewhat more difficult. First, let's inspect the seat. After 3-4 years of using the washing machine, a layer of water stone, powder residues and other rubbish accumulates under the cuff. We try to wash the seat using a sponge, soap and water. Making sure that all the dirt cannot be removed in this way, we take up sandpaper. We clean off the dirt, and then wash off the remaining residue with soap and water, the preparation is complete.
Pull the cuff
The most important stage of work begins - installing the hatch rubber. Unpack the cuff and clamps. We figure out which clamp is external and which is internal and put them aside for a while. Next we do the following.
- We rub the cuff seat with a bar of soap, paying special attention to the edges of the hatch.
- Lubricate the cuff groove with soap.
Do not stain the entire rubber of the hatch with soap. The soap eraser will slip in your hands, and it will be impossible to “plant” the slippery part.
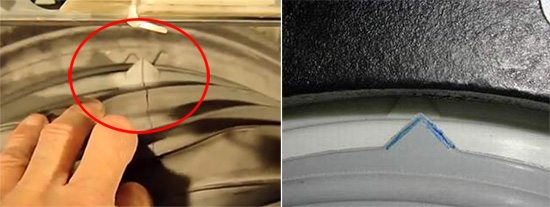
- We find a rubber protrusion in the form of an arrow on the cuff; it must be aligned with the mark on the hatch of the washing machine.
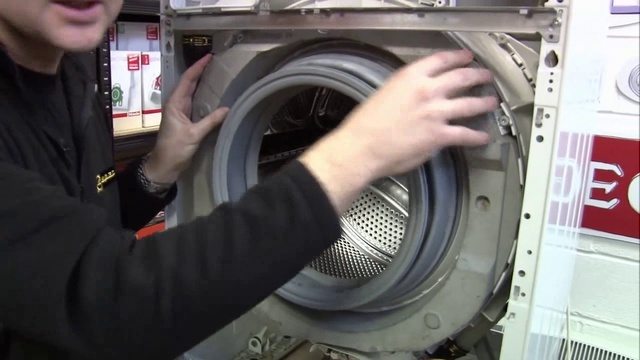
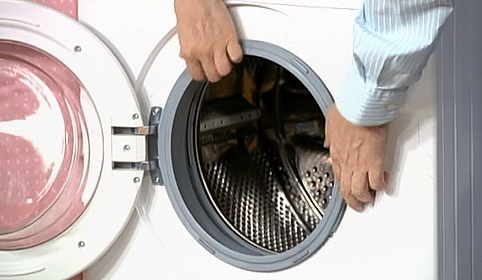
- Now the most labor-intensive stage of work - starting from the upper edge of the hatch, we pull the cuff over the edges in a circle. This will require considerable effort, so don’t be afraid to stretch the cuff to the limit, but still don’t overdo it.
- We examine the cuff. You need to make sure that the rubber part fits snugly into the seat everywhere. If necessary, the elastic band should be adjusted.
- We put on the inner plastic clamp. This part is very easy to put on; you just need to insert the free edge into the latch and tighten it.
- We tuck the outer edges of the cuff onto the edge of the hatch and tighten them with an external clamp in the same way.
The installation is complete. Now we check how the hatch closes. If the hatch does not close, it means that the cuff is installed incorrectly; you will have to reinstall the part or at least remove the outer clamp and correct it. If the hatch closes, then we are trying to start the wash, but you need to watch carefully so that water does not flow out or drip from the hatch. The new cuff should ensure absolute tightness of the hatch.
Interesting:


Reader comments
- Share your opinion - leave a comment
Categories
Washing machine repair


For buyers


For users


Dishwasher


Add a comment