How to Replace the Bosch Hatch Cuff
 The wear on the cuff of the hatch of the Bosch washing machine can almost always be detected by visual inspection of the part. Most often, damage to the hatch of the hatch manifests itself in the most unpleasant way, the machine just starts to leak. A spoiled gum lets water through, and it flows freely from under the manhole cover during washing and rinsing. Doing it yourself will help to solve the problem by replacing the cuff of the hatch of the Bosch washing machine, but how to do this work if you never had to do anything like this? Let's get it right.
Dismantling cars
Almost any repair of a Bosch washing machine should begin with a complete shutdown of the machine. We take out the power cord from the outlet and block the water. In our case, the drain hose can not be disconnected. Next, you need to extend the body of the machine a little on yourself to gain access to the rear of the case. To replace the sealing gum of the door hatch, partiallydisassemble the washing machine Bosch brands, this is our first priority. First, remove the top cover.
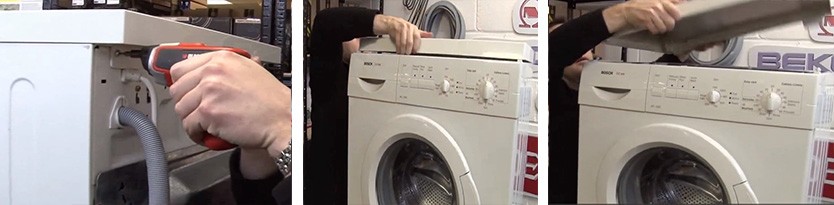
- We take a screwdriver for a hexagon and unscrew the 2 screws that are in the upper part of the back wall of the body of the Bosch washing machine, they hold the top cover.
- We pull off the lid and move it a little back.
- Lift the lid up and remove it to the side.
Now it’s worth removing the control panel. First, remove the powder receptacle by pressing on a special tab that is located above the rinse aid compartment. Next, you need to unscrew the screws that are located on the sides of the powder receiver and from the end of the control panel. After that, the panel should disconnect without any problems.
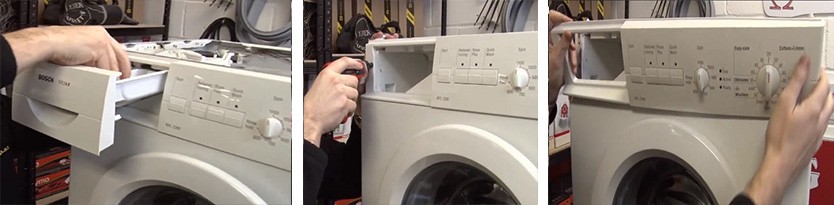
Do not forget about the wires that reach for the control panel, do not tear anything. It’s better not to disconnect them at all, and put the panel itself on top of the washing machine’s body.
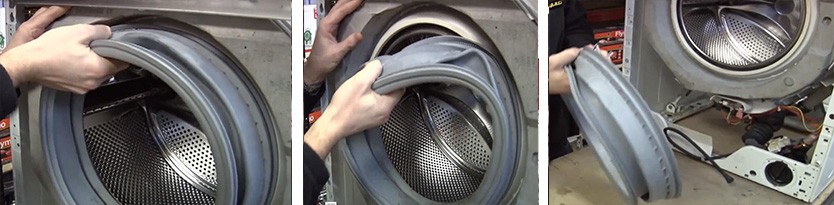
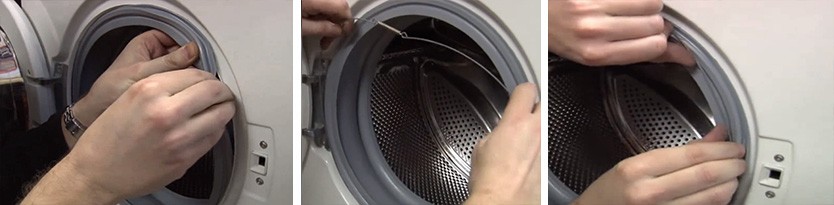
Under the front wall of the washing machine there is a narrow decorative panel hiding the emergency drain hose and trash filter, disconnect it. It is on special mounts, so disconnect it carefully without damaging the plastic latches. Next, open the manhole cover wide open, take the edge of the cuff with your fingers on top and find the spring clip. Gently cling the clamp with a screwdriver and with some effort remove it. The hatch cuff can now be tucked into the drum.
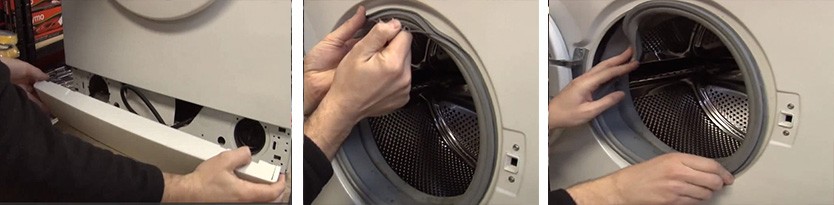
We are engaged in the dismantling of the front wall of the Bosch washing machine. First, unscrew the screws near the UBL. Next, unscrew the screws, which are located below the garbage filter and the emergency water drain hose. Lastly, unscrew the screw, which is located above the hatch. Gently pull off the front wall, not forgetting to disconnect the UBL wire.
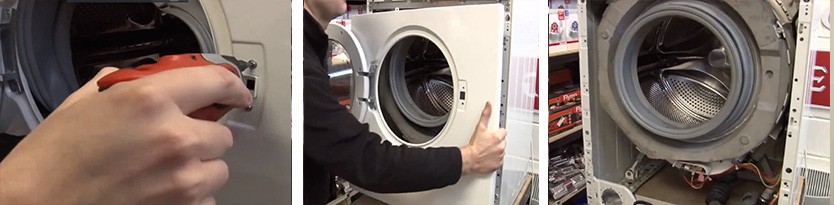
That's it, the rubber seal for the Bosch washing machine is free. Now you can begin to dismantle the damaged part, and then to install a new rubber band.
Removing the sunroof cuff
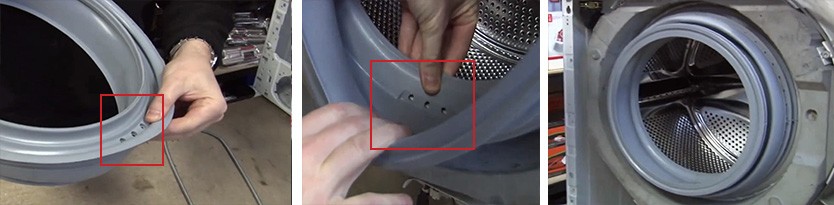
It would seem that it’s easier now to remove the cuff from the drum, because we removed everything that could hinder us. There it was. On some Bosch washing machines, the front counterweights clamp the cuff edges so tightly that it is impossible to pull the edges of the elastic out from under them. If you have such a situation, you need to unscrew the balances, and only then remove the cuff.
Most often, the rubber gasket can be released without removing the counterweight. We pry off the second spring clamp, which is located at the base of the cuff with a screwdriver, and remove the cuff along with the clamp. The old damaged cuff can be thrown away, but the clamps must be left behind, we reuse them.
Installing a new part
It's time to install the cuff. We get a new original gum and inspect it for marriage. If she is whole we pull the cuff on the edges of the hatch. Please note that there are three adjacent holes on the cuff.When tightening the cuff, the holes should be 6 hours (bottom).
We take the spring clamp, which we previously removed from the base of the old cuff and pull it onto the base of the new rubber band. We check that the cuff was fully dressed, and the clamp tightly attracted it to the base. This clamp is also called a retaining ring, but it seems to us that this information will be redundant.
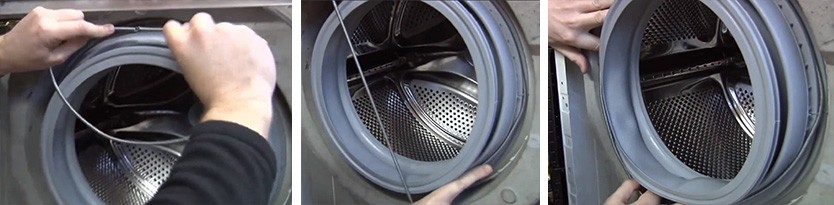
If the cuff "sits" tightly and does not hang out, you can proceed with the assembly of the Bosch washing machine. First, put the front wall, connect the UBL and fasten it to all the screws. Next, we fasten the control panel and put in place the powder receiver. We dress and screw the top cover, and then put the decorative panel in place.
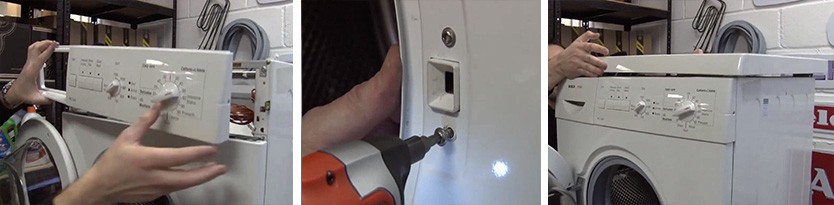
Next, we put the spring clip in place and check that it "sits" tightly. Lastly, we push the washer back into place and connect it to water and electricity. Repair can be considered complete.
As you may have noticed, cuff replacement is a relatively simple repair of the washing machine, which without any difficulties can be done with your own hands, of course, with the instructions. We tried to give this very instruction today. From our point of view, it as much as possible illustrates the repair process, so use it safely. Good luck
Interesting:


Reader Comments
- Share your opinion - leave a comment
Headings
Washing machine repair


For buyers


For users


Dishwasher


Add a comment