Dismantling a Whirlpool top-loading washing machine
 Do not repair the Whirlpool washing machine without first disassembling it, especially if a breakdown has occurred with the engine, pump or electronics. You need to know where to start and how to end, what tools to use and how not to aggravate the situation. It will be easier with front-mounted machines, as there is a lot of textual information and videos with detailed instructions on the Internet. But the owners of other washing machines should not worry - our article will help you figure it out. The main thing is not to experiment and strictly follow the given algorithm.
Preparatory stage
To correctly disassemble the Virpul washing machine with a vertical loading and get it to the pump, motor or pressure switch, it is enough to perform several actions. First of all, you should do the preparatory work, otherwise there is a great risk of flooding the neighbors, getting an electric shock, or finally ruining the machine. We are talking about the need not to forget about the following points:
- disconnect the machine from the electrical network, shut off the water and disconnect from the sewer;
- to twist connecting hoses and an electric wire, having fixed them on the case in special grooves;
- to provide free access to the washing machine from all sides, for which it is desirable to move the unit from the wall or move it to an empty room;
- prepare a container for collecting drained water;
- spread as many rags around and under the machine as possible.
Important! Be prepared for the fact that there is always water in the washing machine that must be drained to the floor before repair.
Now it remains to find in advance all the tools necessary for parsing. These include a putty knife, a set of screwdrivers, pliers, pliers, round-nose pliers, a set of socket heads and wrenches. Use insulating tape, gloves and spare retaining clamps. A detailed acquaintance with the technical user manual for the existing Virpul model will help the work. Only then can you begin to disassemble the device.
Remove the pressure switch and control panel
The further sequence of actions depends on the final goal. If you need to remove the pressure switch or control panel, then the top point of the machine will be the starting point. Step-by-step instructions are as follows.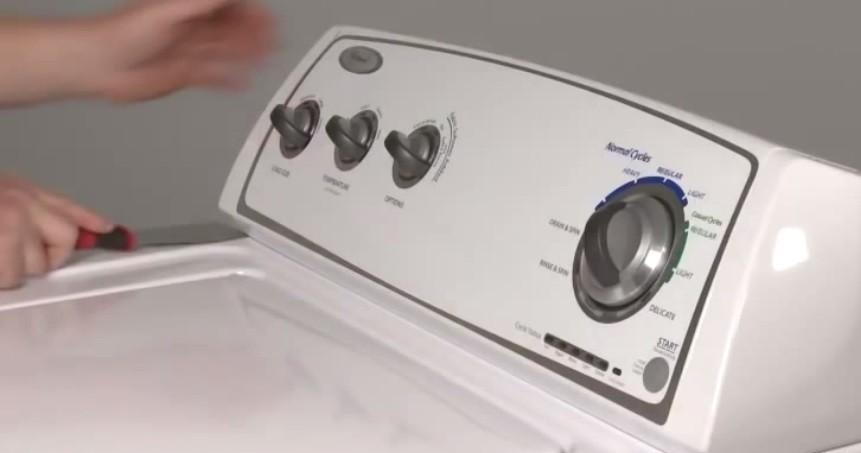
- Carefully insert the spatula under the dashboard and raise it to squeeze out two spring clips.
- Slowly pull the part towards you.
- We examine the opened selector switches and the water supply valve. When replacing the electronic board, you must remember the location of the connectors and lead wires.
- We disconnect the conductors and the power cable (for convenient uncoupling of the terminals and brackets, it is better to use a flat screwdriver or pliers).
- We remove the tube of the water level sensor.
- We unscrew the two fastening screws with a suitable head or key.
- We take out the central control module.
Now it remains to straighten the group of wires and finally remove the dashboard. In order not to get confused in the future when reassembling, it is recommended to photograph the connections and connectors or take care of their marking with a felt-tip pen or electrical tape. To penetrate even deeper into the Whirlpool washing machine, you will have to continue the manipulations begun.
Pump and motor
When the end point is a pump, starting capacitor or motor, dismantling starts from the bottom of the housing. For convenience and better visibility, the machine is placed on the “back”. It is important here not to ruin the electronic board and not cause a short circuit, which can result in the ingress of residual water into the machine. Therefore, we first drain the residues through the waste filter, and also drain the sections of the dispenser in the powder receiver. Next, proceed according to the following instructions: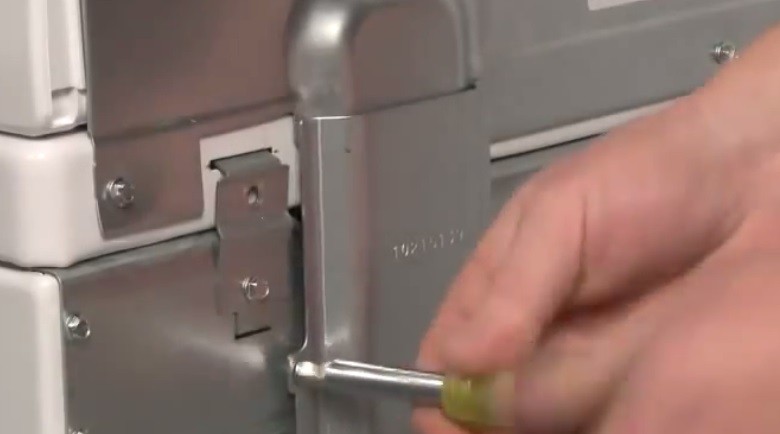
- wring out the latch at the junction and disconnect the drain hose;
- we fix the cover with electrical tape, fixing it with the case of the machine;
- slowly lower the machine to the rear panel;
- take the head by 5/16 and unscrew the screws holding the drive belt;
- remove the protective casing;
- disconnect the connector connected to the electric motor;
- remove the drive belt;
- select the 1/2 head and weaken the engine mounts;
- take out the engine.
To ensure access to the pump, remove the left wall of the housing and inspect the drain chamber. After disconnecting the hoses, pipes and loosen the clamps on the pump. All that remains is to pull the part towards you and pull out the pump.
Tank removal
In a washing machine with a vertical load of laundry, the drum is also removed in a special way. To get to it, you need to put the washer on the bottom and remove the top cover. If everyone can handle the first, then for the second procedure it is important to read the detailed instructions.
- We take a quarter inch wrench and unscrew the screws on the back that hold the cable and the protective casing.
- Remove protection.
- We screw the clamps through which the upper part is attached to the body.
- Slide the top cover forward until a click is heard, talking about the released latches.
- We raise the part, making sure that the protrusions of the rear wall fall into special grooves on the lid.
- We cling the holding chain to the holders on the body and cover.
- We release the last back and make sure of its stability.
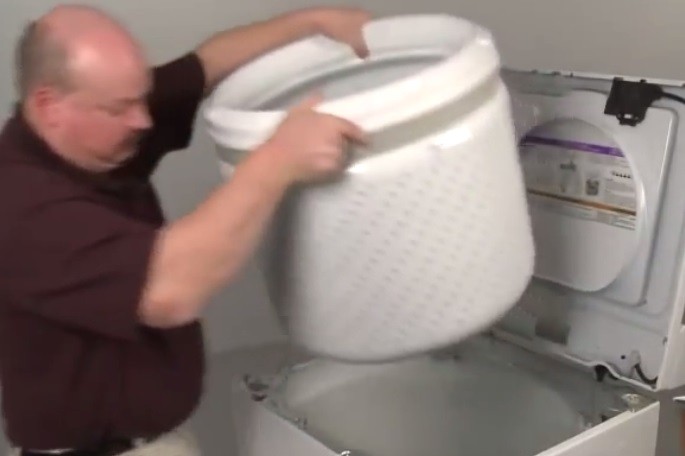
Now proceed to the direct removal of the inner drum. We press the tabs with a flat screwdriver and remove the lid from the tank. Next, unhook the detergent dispenser and unscrew the fasteners at the mixer with a 7/16 head. The next step is the tank nut, which, after turning clockwise and tapping with a hammer, loosens and is removed. If the task is to repair the outer part of the drum, go further:
- find the drive shaft;
- weaken fixation and release the shaft from the drive unit;
- unscrew the fasteners on the pump cover and remove it;
- remove the previously attached chain to hold the top cover;
- tightly close the lid of the machine;
- return to the initial position one or two screws on the rear panel;
- carefully lower the machine to the "back";
- open the cover of the drain pump;
- we disconnect the wire from the holding clamp;
- disconnect the pump hose;
- we release the drain pump from the retaining screws and remove;
- alternately unfasten the connectors from the capacitor, drive, electric motor and gearbox;
- remove the gearbox;
- we release the base of the tank from the wiring harness.
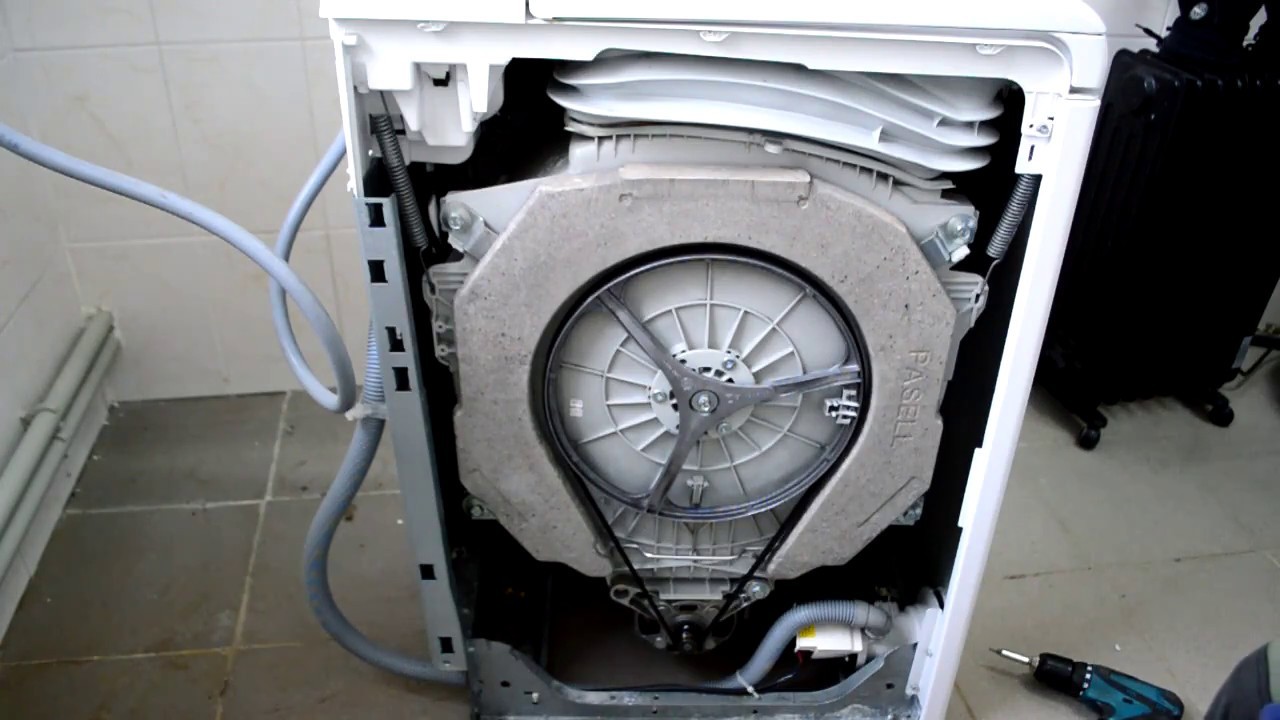
We repeat the procedure again with the opening of the top cover: set the washer to its original position, loosen the rear screw and return to the internal device. Here we remove from the tank all the hoses fixed on it (air pressure sensor tube, harness with wires), disconnect the suspensions and ball bearings. All that remains is to exert some effort and pull out the outer tank.
After practicing removing and disconnecting the pump, pressure switch and all levels of the tank, it is easy to understand the principle of disassembling and other internal parts of the vertical washing machine from Virpul. It is recommended only to record with records or photographs all the actions taken so as not to get lost during reassembly. In addition to accuracy and consistency, safety must be remembered - then independent repair of the washing machine will not cause difficulties.
Interesting:


Reader Comments
- Share your opinion - leave a comment
Headings
Washing machine repair


For buyers


For users


Dishwasher


Add a comment