Disassembling a Bosch washing machine
 In our country, as always, prices are rising, but the income of the population either remains the same or decreases altogether. In such a situation, you are forced to resort to saving mode, and if the washing machine suddenly breaks down, then this is truly problem number one.
Buying new equipment in a crisis is not an option, and repairing old equipment with the help of a specialist is also expensive. There is only one thing left to fix with your own hands, but to fix the washing machine, you first need to disassemble it. We’ll talk about how to do this quickly and correctly.
Preparation
Before disassembling the washing machine, it is necessary to at least briefly study its design, disassemble Bosch washing machine device and note for yourself which components and assemblies will have to be removed in order to achieve what you want. To completely disassemble a Bosch washing machine, you will need to dismantle:
- the back metal wall of the machine and the top cover, as well as the front panels;
- powder receiver with cuvette;
- control Panel;
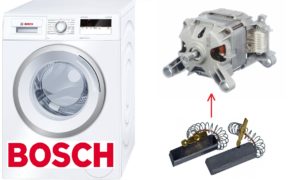
- electric motor, pump, heating element;
- pulleys and drive belt;
- counterweights and shock absorbers;
- inlet valve, pressure switch and pipes;
- garbage filter and pipes;
- hatch and UBL device;
- finally, the tank and drum.
But all this is still very far away. First, you need to thoroughly prepare for disassembly, so that, firstly, it will be convenient to work, and secondly, parts will not get lost, because disassembling a car is easy, but reassembling it later is not so much! First, let's prepare a small set of tools. We will need: a large and small hammer, keys and wrenches with heads of 6.8, 10.12, 14, 18 mm.A screwdriver or star screwdriver bit, as well as a Phillips and flathead screwdriver. You also need to prepare wire cutters, an awl, pliers and colored markers to mark the wires.
Having prepared everything we need, we disconnect the washing machine from all networks: electrical, sewer and water supply, and then take it to a place where it will be easier for us to work with it, where there is a lot of free space. If you have nowhere to carry it, you can simply drag it out to the entrance to the site or leave it right in the apartment, having first laid rags under the car on the floor.
Now we need to remove from the washing machine all the walls and panels that may interfere with the disassembly of the Bosch washing machine. Take a Phillips screwdriver or an asterisk (depending on the Bosch machine model) and unscrew the two small screws holding the top panel (cover) of the washing machine. Next, move the panel back relative to the machine body and remove it. Unscrew several screws holding the back metal wall and remove it.
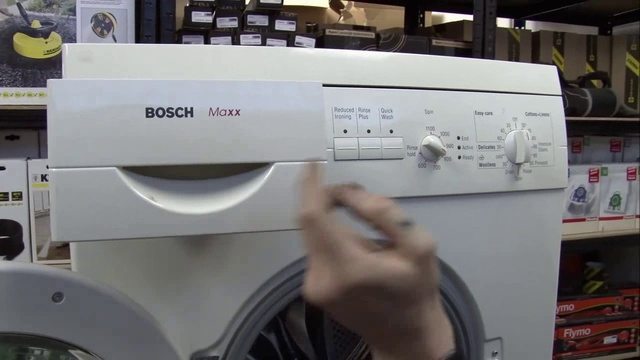
We take out the powder cuvette and unscrew the screws that hold the control panel (three screws near the niche for the cuvette and two on top at the end of the body). We remove the control panel and dismantle all the wires.
Attention! Be very careful when removing the control panel, as there are several rather short bundles of wires leading to it. Pull too hard and you'll tear it off!
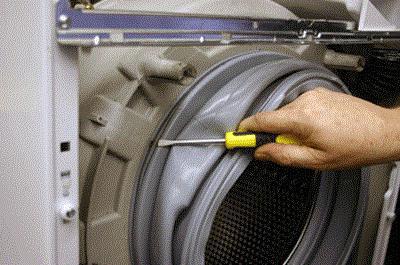
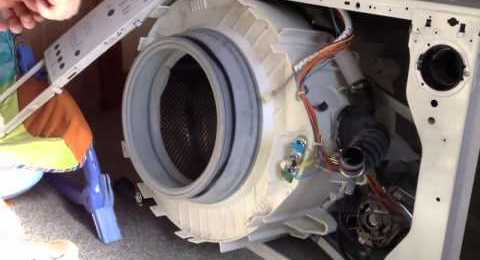
Remove the lower narrow front panel. It itself is attached with latches and covers the garbage filter and fasteners of the central front panel. Unscrew the screws of the central front panel of the Bosch washing machine. Next, using a thin flat-head screwdriver, we find the clamp that secures the hatch cuff, and remove it by disconnecting the fasteners.We tuck the cuff inward, and then pull off the front center panel.
Removing the main components
So, what do we have at this stage of disassembling the Bosch washing machine? We see that after removing the walls and panels, the machine exposed all the parts and components that interest us; all that remains is to dismantle them correctly. How to do this, where to start? Let's start from the top.
- Immediately under the top cover we can see a metal strip connecting the left and right walls of the Bosch washing machine body. Unscrew the screws and remove this bar.
- Using a 14 mm wrench, unscrew the two bolts of the upper counterweight. We take out the counterweight.
- A little earlier we took out the cuvette for the powder and unscrewed the dispenser body, now it hangs from us, held only by the pipes. Our task is to move the dispenser a little, “crawl” under it and remove the clamp with which the pipe is attached to the dispenser. It is detached using pliers. In the same way, we dismantle the pipe going to the filling valve and remove the dispenser.
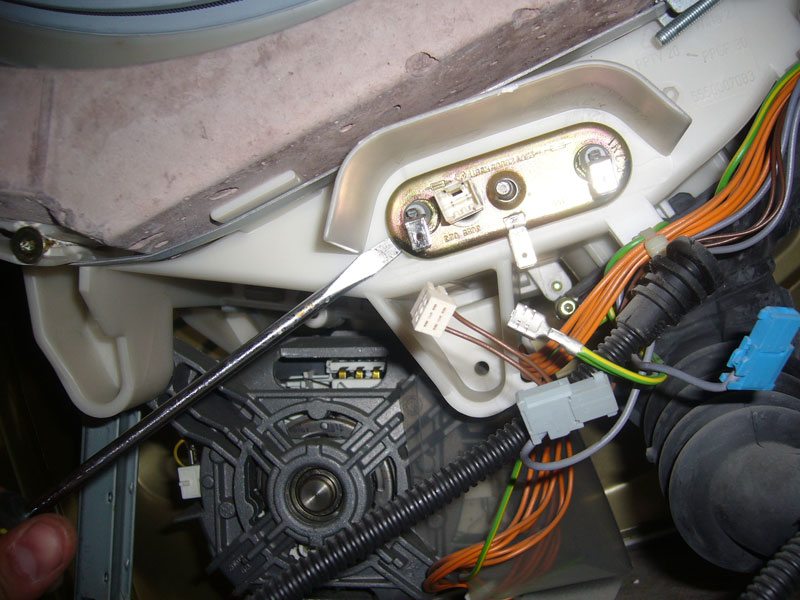
- In the upper half of the body of the Bosch washing machine we can find a pressure switch and a tube with wires going to it. In addition, we also have a network cable with an interference filter coming in there. Disconnect the wires from these parts and carefully remove them. That's all for now!
Now unscrew the garbage filter and drain the water. In an amicable way, this can be done at the very beginning, but if you act as we suggest, nothing bad will happen. Quite a lot of water can leak out, so place some container or throw in more rags. Next, unscrew the screws holding the hatch door hinge and remove the door. We remove the two screws that are located to the right of the hatch to remove the locking device.
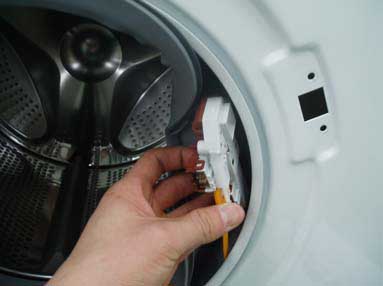
Important! There are wires connected to the hatch locking device; they cannot be torn off, so remove the UBL carefully.
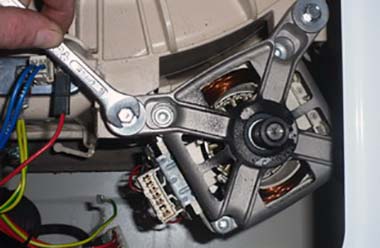
We come in from behind. We remove the narrow drive belt from the pulleys and pull the wires off the engine. The engine needs to be removed. Take a 12 mm wrench and unscrew the motor screws. We push the engine forward and down, while holding it with our hand from below. The motor should come off safely.
Now we will be interested in the lower part of the body of the Bosch washing machine. If your model does not have a tray, then you can immediately begin dismantling the pump and pipes. If there is a pan, then you need to unscrew it.
- Place the Bosch washing machine on its left side.
- Unscrew the screws holding the tray.
- We pull the pan off the plastic clips, but do it carefully so as not to tear off the leak sensor wires.
- Disconnect the leak sensor wires and move the pan aside.
- Remove the clamps from the drain pipe and pull it off the pump.
- We pull the wires off the pump, and then unscrew and remove the pump itself.
- We unscrew the fasteners connecting the racks to the body of our semi-disassembled washing machine.
We have very little left. We unscrew the front counterweight; it will prevent us from removing the tank and drum from the washing machine body. Disconnect the wires from the heating element.
We won't touch it for now. Now all we have to do is remove the springs on which the tank and drum hang and we can finish this stage of disassembling the Bosch washing machine.
In new models of Bosch washing machines, the heating element is located in front, and not behind the tank, like many other automatic washing machines.
Let's remove the tank
After we have removed all the important and not so important parts from the washing machine body, we can begin to remove the tank.Now you can pull out the tank quite simply, because we pulled it off the springs, which means it dropped 30 cm down. We take hold of the edges of the hatch and pull the tank along with the drum towards us. The knot should just fall out through the front and out.
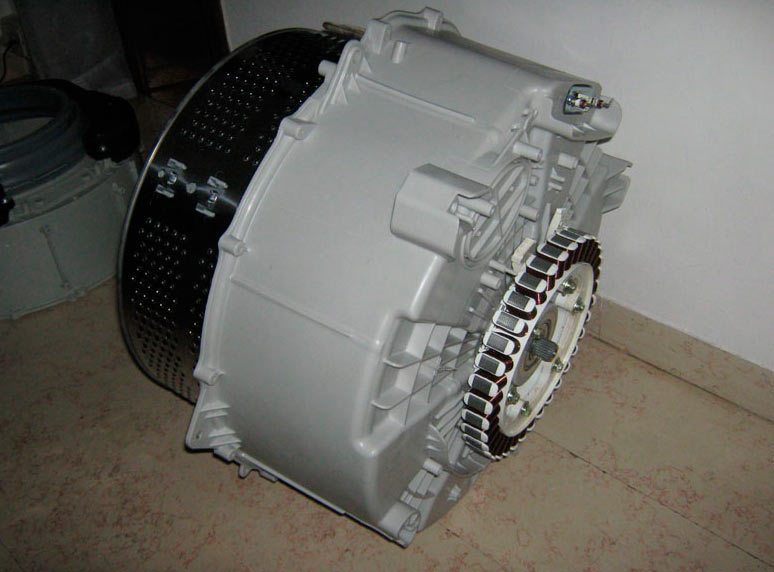
Next, we need to disassemble the washing machine tank to check and replace the seals and bearings. Bosch washing machines have collapsible tanks, so you don’t have to cut anything. You unscrew several dozen screws and disassemble the tank into two parts. Next, disassembling and repairing the tank is carried out in the same way as on all other washing machines. If you need details, read the publication How to disassemble a Zanussi washing machine. On Boches everything is done the same way, I don’t want to repeat it.
In conclusion, we note that if you set out to disassemble a Bosch washing machine, do not be alarmed ahead of time. Be more decisive and you will certainly succeed. Good luck!
Interesting:


1 reader comment
Add a comment
Categories
Washing machine repair


For buyers


For users


Dishwasher


Hello, I have a bosch maxx 4 wfc 2060 washing machine, I removed the control unit and forgot to mark the chips, and removed them. Now I don’t remember where to connect them correctly. Help, please!