Instructions for the Bosch Logixx 6 Sensitive washing machine
 The Bosch Logixx 6 Sensitive machine is a well-known branded and very reliable top-loading model from a German manufacturer. You can operate it without any instructions, as many housewives are accustomed to doing. However, sometimes situations arise that are simply impossible to resolve correctly on an intuitive level. This is where the instructions will help, a short version of which you can read in this publication.
Getting ready to connect
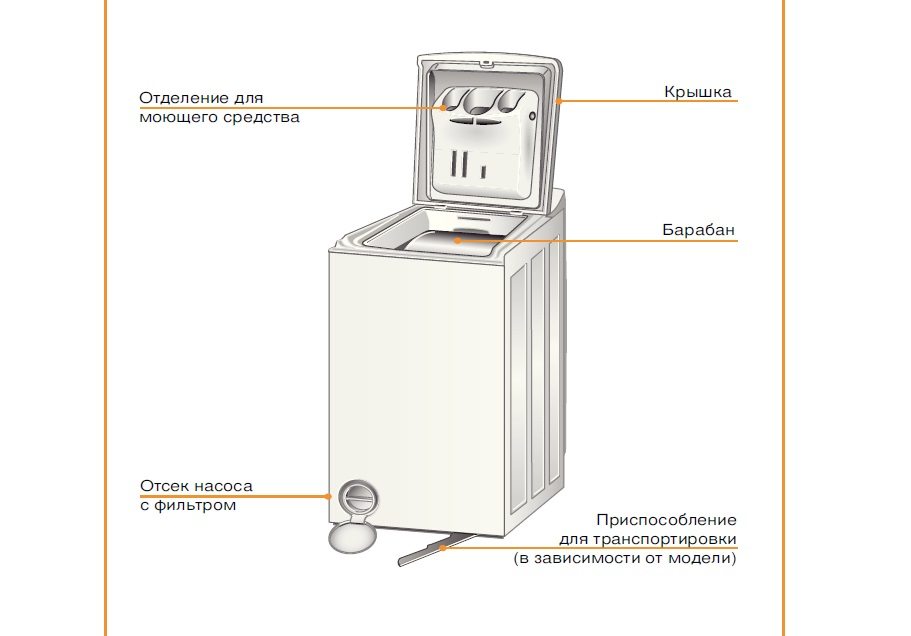
Before packing a washing machine of this brand, the company prepared it for transportation, namely, secured the necessary components to the body and screwed in the shipping bolts. This means that at the first stage, our task is to free the washing machine from the packaging, check that all the stated components are in place and, of course, unscrew the specified fasteners, the task of which is to fix the moving parts of the washing machine.
Note! After unscrewing the transport bolts, do not forget to close the resulting holes with plugs so that dirt and dust do not get inside.
Now about the installation location. Install the machine taking into account the requirements contained in the factory instruction manual.
- The place for the washing machine should be convenient, in the sense that there should be a free approach to it that is not blocked by any interior items.
- There should be a gap of at least one centimeter on the sides of the machine body, and 10 cm should be left at the back. There should be nothing on top.
- Bosch Logixx 6 can only be placed on a flat and hard surface; there should be no fabric flooring.The “playing” floor should be properly strengthened. It is not advisable to lay parquet and laminate under the body of the washing machine. Although this machine protected from leaks, there is still a possibility of such a problem occurring, so do not risk expensive floor coverings.
- Water, sewerage and electricity must be supplied to the intended installation location of the washing machine. There are certain requirements for communications connections, which we will talk about a little later.
We drag the washing machine to a previously prepared place and release the hoses from the fastenings. Be extremely careful not to carry the machine alone, as it is very heavy. After moving the machine to the installation location, take a building level and, alternately twisting the legs of the washer, level it as best as possible. The permissible difference is no more than 2 degrees.
We connect to water and sewerage
We take the inlet hose equipped with the Aqua Stop system and connect it to the outlet of the inlet valve of the washing machine, which is located in the upper part of the body. When screwing the hose, do not forget to put in the rubber O-ring that is included in the kit.
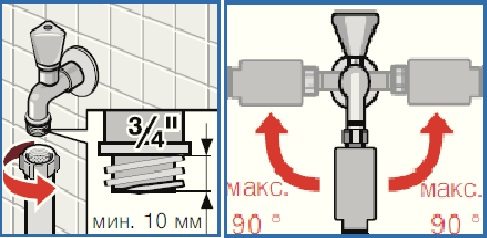
Next, turn off the water and unscrew the hose that goes from the water pipe to the cold water tap of the mixer. We install a tee-faucet with ¾-inch outlets, screwing one end to the water pipe, screwing the mixer hose to the other end, and leaving the third free. It is to the free outlet of the tee that we screw the second end of the inlet hose of the washing machine, not forgetting to insert the O-ring. Screw the hoses securely, but try not to overtighten.
When installing a tee tap, do not forget to wind the thread against the thread so that the connection is as tight as possible.
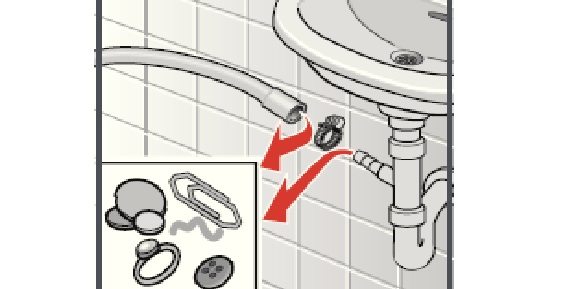
Now connect the drain hose to the sewer. There are several connection methods. You can simply throw the free end of the hose into the sink, toilet or bathtub. This drainage option is not aesthetically pleasing and will force you to wash your plumbing more often. You can remove the sewer pipe outlet and insert the hose into it. In this case, the connection must be sealed so that water does not splash out onto the floor while the pump is running.
The third option is the most aesthetic and relatively simple. You just need to install a siphon with a side outlet for the washing machine, to which the drain hose will be connected. We pull the hose onto the side outlet of the siphon, secure it with a clamp and that’s it. It is done!
Connect to the power supply
 The simplest stage of installing a washing machine is connecting it to electricity, but provided that all electrical communications are properly prepared in advance. What is it about?
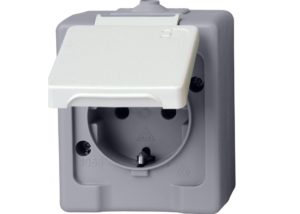
- Firstly, a moisture-resistant outlet must be installed, since the washing machine is an appliance that is used with water.
- Secondly, the outlet must be grounded.
- Thirdly, the socket must be powered by a three-core copper wire with a cross-section of 2.5 mm.
- Fourthly, the outlet must be protected by a circuit breaker.
If you experience serious voltage drops, it is better for your Bosch washing machine to be powered from a special stabilizer.
If you do not have experience working with electrical networks, do not undertake this task yourself. It is very dangerous. Invite an experienced electrician who will arrange an outlet for you quickly and professionally.
Specifications
Now, briefly about the technical characteristics of the Bosch Logixx 6 washing machine. According to the factory instructions, the dimensions of the machine body are W x D x H - 40 x 65 x 90, taking into account protruding parts. Weight is about 58 kg. Power is about 2.3 kW. Voltage 220-240 V, 50 Hz. The minimum water pressure is about 1 bar, the maximum is 10 bar (100-1000 kPa).
That's the entire shortened version of the instructions. There is very little information, but we have collected all the most important things here. If this does not seem enough to you, read the factory instructions that are attached to this article. Good luck!
Interesting:


Reader comments
- Share your opinion - leave a comment
Categories
Washing machine repair


For buyers


For users


Dishwasher


Add a comment