DIY grinder from a washing machine motor
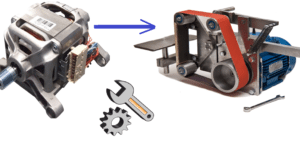 Some people are confused by the word grinder, but there is nothing unusual in this word. A grinder is a kind of grinding machine that is designed for finer finishing grinding of any part. In this article we will talk about how to make a homemade grinder grinder with an engine from an automatic washing machine, we hope this information will be useful to you.
Areas of application of the machine
Before you start assembling a machine using a washing machine motor, remember the safety rules. The process of assembling and further using a homemade machine can be dangerous to your health. Be prudent and careful, if you are not confident in your skills, it is better not to take on making a homemade machine.
So, where is the grinder used, why is it even needed in the household? Most household needs require sandpaper. By the way DIY emery from a washing machine It’s even easier to do than a grinder; if you’re interested, read the publication of the same name posted on our website. A grinder, unlike an emery machine, is required in cases where you need to quickly and accurately sand a surface.
For your information! Belts (75x457 mm) with any working surface are sold for grinders, so there shouldn’t be any problems in the future.
For example, if you are making a handle for agricultural implements or slats for bee frames, you need to sand these parts at the end so that there are no problems later.You can do this work with your hands, but then a lot of effort and energy will be spent. The grinder will make the sanding process simple and straightforward.
We make the mechanism
The most important element, in addition to the motor from the washing machine, is a homemade movable unit, with the help of which the belt is tensioned and its position is adjusted. You can buy a ready-made moving mechanism for such a machine or order its production from craftsmen, but then the cost of the finished product will be close to the price of a factory grinder, which, of course, is unacceptable. So we will try to make this important part with our own hands. What materials will be needed:
- several pieces of corner 30 mm, one long - 40 cm and two short ones 15 and 25 cm;
- two long bolts and a dozen nuts;
- hairpin;
- bolt spring;
- metal strip 30x100 mm;
- short bolts, washers, nuts.
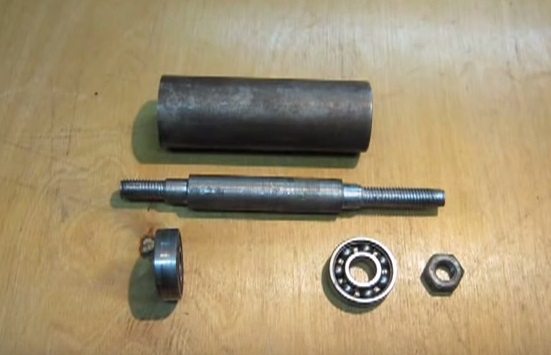
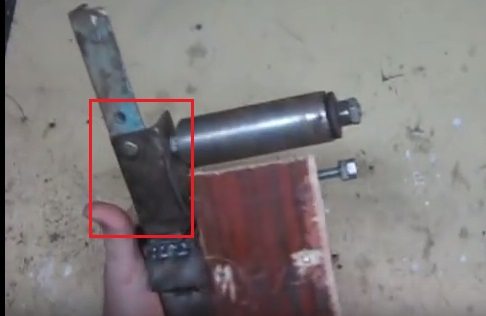
The roller parts had to be turned on a lathe. You can see them in the picture below. Two bearings, a nut, the roller itself and a kind of shaft.
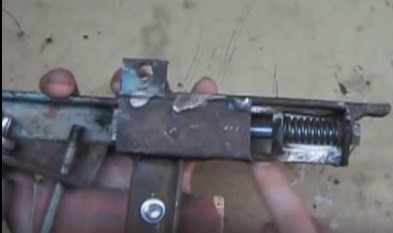
Accordingly, the tools we will need are: a lathe, an angle grinder, a drill, electric welding, wrenches, pliers and “angelic patience.” Let's do the following. We weld the corners and plates to each other as shown in the figure below. We insert a bolt with a spring into the end of the structure. We will need this bolt to adjust the tape tension.
! The main bolt will be held by two small plates with holes and threads, which are welded at the bottom of the angle perpendicular to it.
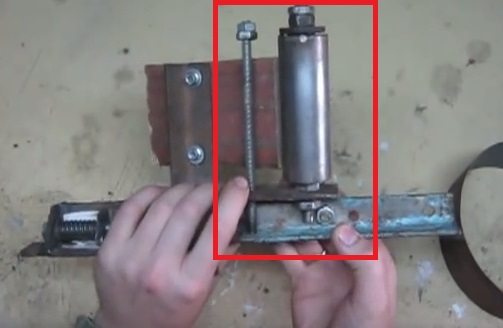
Next, drill a hole in the upper part of the main corner, insert a short bolt into it and screw on a short piece of the corner.This piece should move slightly from side to side and a roller with a bearing mechanism will in turn be attached to it. The movement of this piece of corner will subsequently allow you to adjust the position of the tape.
We assemble the roller mechanism and screw it to the corner. You don’t need to tighten it too much so that the roller rotates freely, but the roller and bearings shouldn’t come off either, so we weld the bearings to the roller and tighten the locknuts onto the ends of the shaft. Under the roller, in the corner, you will need to drill another hole and fasten a pin in it, at one end of which you need to tighten two nuts, and the other end will rest against the main corner. It is very important that the stud twists and unscrews along the thread.
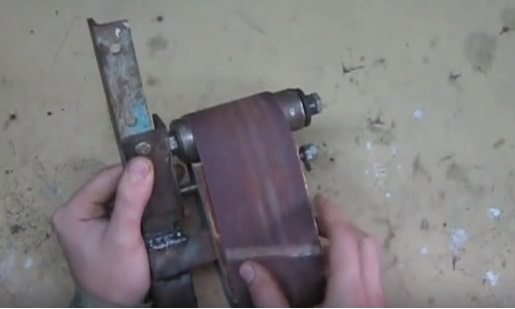
A short corner welded perpendicular to the main corner with a piece of chipboard screwed to it serves as a guide, and most importantly protects the master’s hands while adjusting the movement of the tape. This is important for safety, since the homemade grinder is adjusted by a pin, which is located dangerously close to the actively moving belt. Well, that’s all, the mechanism is ready, now you can connect the motor, put a bushing on its shaft, connect it all to the moving mechanism and begin testing.
Motor and shaft
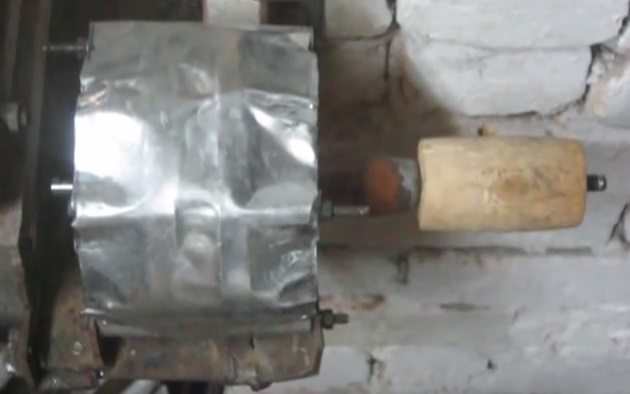
About, how to connect the motor from a washing machine We have already said quite a lot and will not repeat ourselves. Let's move straight to the next and final stage of assembling the grinder. Let's connect the motor from an old semi-automatic washing machine. Protect the motor housing with a sheet of thin sheet metal and secure it to a suitable frame.. In our case, we welded the frame from angles, but you can mount the engine directly on the workbench.
! The capacitor that controls the engine start can be taken from the same semi-automatic washing machine.
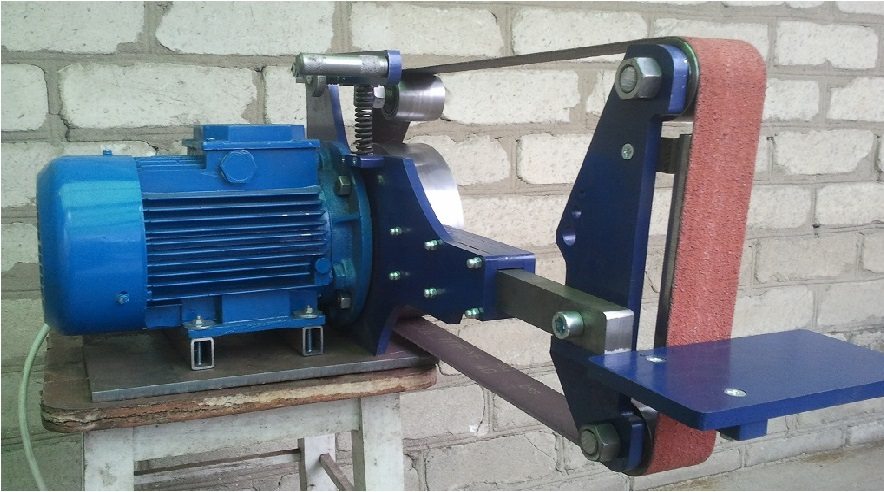
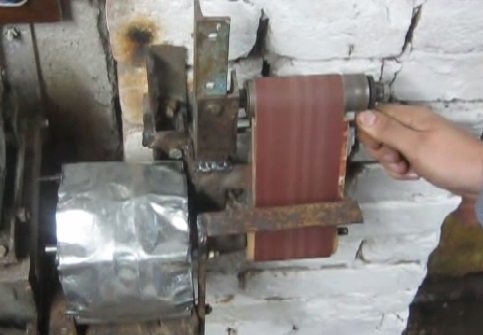
As you can see, we took the motor with a long shaft, but if you have a regular motor from a washing machine with a short shaft, you will have to come up with something and increase its length. In the picture above you see that the motor shaft is fitted with a special wooden bushing, which we turned on a machine. We will put the grinder tape on this sleeve. We will attach the moving mechanism that we made earlier just above the engine. The result is a machine that you can see in the picture below.
In conclusion, we note that it is not easy to make a grinder from a washing machine engine, but if you have the desire and your hands are itching, then you can spend a couple of days and make something similar to what was presented to your consideration in this publication. The main thing is not to rush and remember about safety precautions, good luck!
Interesting:


Reader comments
- Share your opinion - leave a comment
Categories
Washing machine repair


For buyers


For users


Dishwasher


Add a comment