Potter's wheel from a washing machine
 A potter's wheel is an expensive pleasure for a beginning craftsman. The simplest circle from a foreign company costs about $500. That is why our craftsmen were given the task of making a pottery wheel from a washing machine so that the project could then be implemented with their own hands at home. As a basis, you can take either an activator-type or a drum-type machine. But first things first.
We prepare everything you need
Let's look at making a potter's wheel with our own hands using the example of an activator washing machine. You can even buy such a machine, and if you have an old washing machine that still works, you will save about another $15.
Important! The activator in the washing machine must be located on the bottom of the machine strictly horizontally, without tilting.
In addition to the washing machine, we will need a dozen more necessary parts, without which we will not be able to make a pottery wheel with our own hands. Namely:
- a piece of moisture-resistant plywood;
- a simple microcircuit that regulates engine speed with a switch;
- moisture-resistant varnish and paint;
- White Spirit;
- wheel machined to size;
- plastic medicine bottle;
- any switch;
- insulating tape;
- silicone sealant;
- soldering tin;
- bolts, washers, nuts and self-tapping screws.
In addition to materials, you also need some tools; it is also better to prepare them in advance. Nothing special just:
- felt-tip pen;
- wooden ruler;
- a hacksaw with fine teeth, suitable for metal;
- sharp knife;
- set of screwdrivers and keys;
- pliers;
- multimeter;
- soldering iron
Making a circle and protecting
We are starting to remodel our primitive washing machine with our own hands.The alteration is not God knows what, but the result is a saving of several hundred dollars. So, let's start by partially disassembling the body of the activator washing machine in order to determine the location of the most important parts - the motor, electrics and drive mechanism. Let's remove the drive belt, pulley and other parts with our own hands to expose the shaft.
At this stage we have the first difficulty, namely, we have a shaft, some drive mechanism and a motor, but we do not have an impeller on which the rotating circle will be fixed. What to do? We have no choice but to take the dimensions of the shaft and order an impeller from a turner. The turner should turn something similar to the part shown in the picture below.
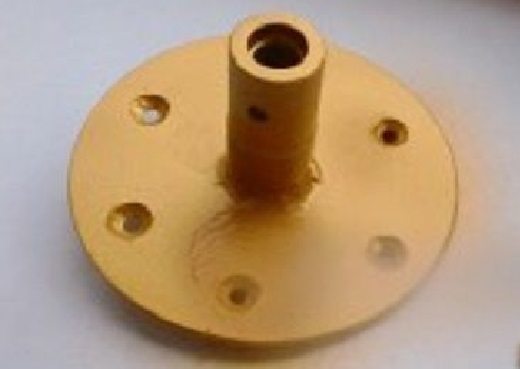
We will not indicate the dimensions, since they are purely individual and will depend on the size and type of washing machine that will be taken for remodeling. We carefully paint the turned part and then put it aside for a while.
Before painting, the part must be thoroughly sanded with your own hands, removing traces of rust and dirt.
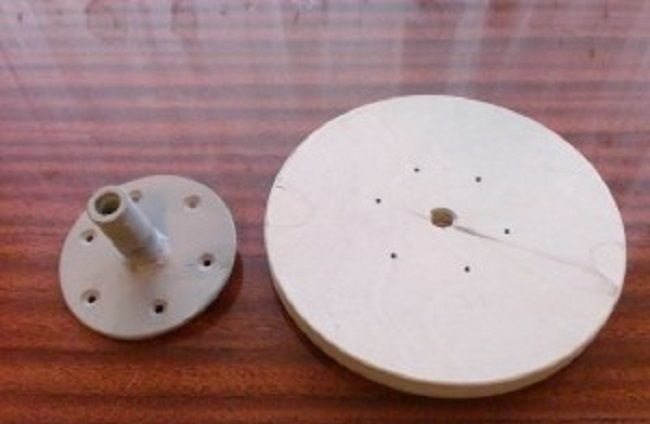
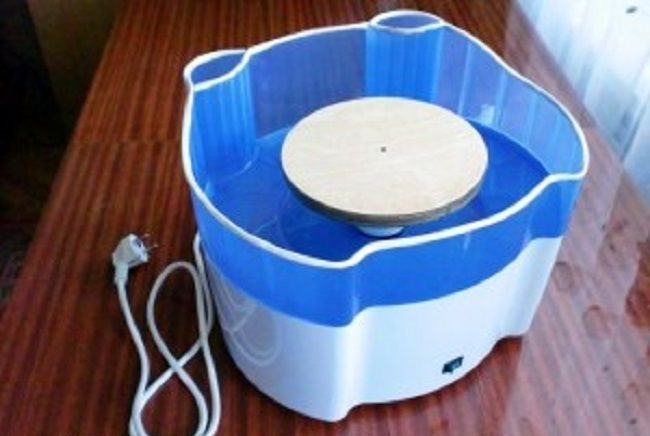
Now we need to cut a circle from a piece of moisture-resistant plywood, as shown in the figure below. We impregnate the circle with varnish, which we mix in advance with white spirit; on this circle we will place the clay blank.
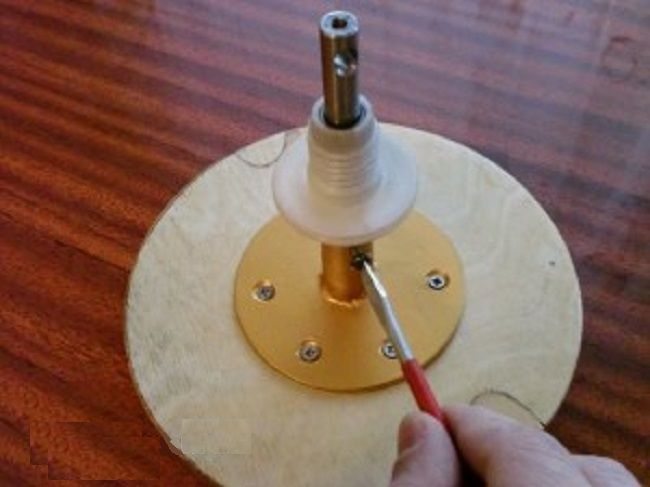
Let's assemble two parts of the impeller, put the wheel on the shaft with our own hands, thus preparing a part for installation on the drive mechanism. The working part of the circle, which will hold the rotating workpiece, must be well centered. Otherwise, the workpiece will rotate unevenly, which will lead to problems when making clay objects.
Next, we need to protect the drive mechanism from moisture and corrosion. To do this, we take an ordinary plastic bottle of vitamins or medicines and put it on the shaft, after which we securely fasten the improvised part with a nut. At this point, you can stop the assembly of the working part of the pottery wheel; let’s move on to the body of the washing machine.
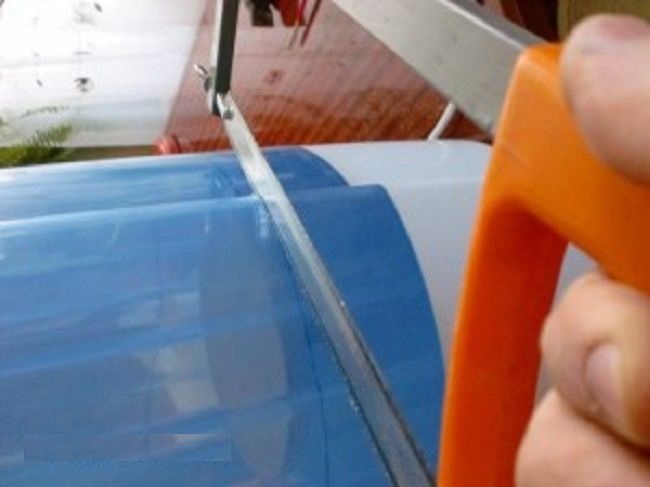
We don’t need most of the washing tank, so we take a hacksaw and cut the tank without any mercy, leaving only the bottom with the activator and low sides along the edges. With the body of the potter's wheel and the moving mechanism done, now the most difficult part is connecting the motor and electrician.
Connecting the engine
About, how to connect the motor from a washing machine We have written repeatedly in other publications on our site. However, we will once again describe this process, taking into account the features of converting a washing machine into a household pottery wheel.
First, we need to determine the identity of each wire protruding from the motor of an activator-type washing machine. It is better to do this, guided by the electrical circuit diagram, but if it is not at hand, you will have to act at random. We need to find the wires:
- engine speed controls (if any);
- going to the stator winding;
- two wires going to the brushes.
We disconnect the supply wire and install a switch on it. We cut a groove for the switch in a convenient place on the body. All wires are carefully insulated. If possible, you need to put a rubber casing on each wire or, at worst, wrap each wire with electrical tape.
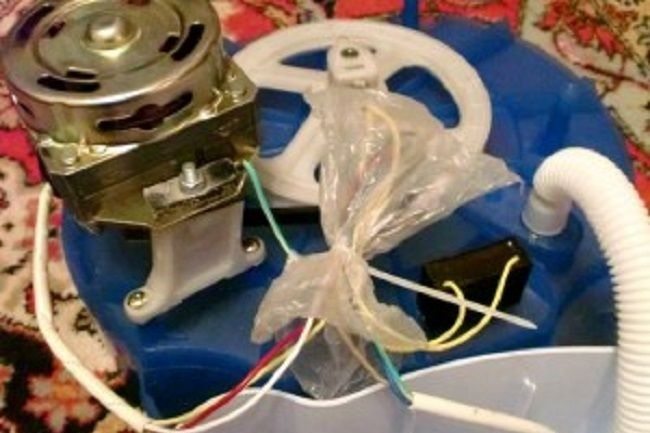
Next, we mount and connect the device that regulates engine speed.Such a device is connected to the power wire and two wires that control the engine speed. After this, we put the pulley in place, put on the drive belt, insert and fasten the shaft with the impeller. Then we assemble the body, fill the groove with sealant so that water does not get into it again, and that’s it, the assembly of the electric potter’s wheel can be considered complete.
In any case, the engine speed will have to be reduced, otherwise, at a speed of 500-700 rpm, the clay workpiece, under the influence of centrifugal force, will fly into the wall.
In conclusion, we note that you can assemble an excellent electric pottery wheel for beginners with your own hands without special tools and special technical knowledge. The main thing is that there is desire, tools and materials and, of course, hands that are not used to getting bored. What happens next is a matter of technique, good luck!
Interesting:


Reader comments
- Share your opinion - leave a comment
Categories
Washing machine repair


For buyers


For users


Dishwasher


Add a comment