Homemade lawn mower with an electric motor from a washing machine
 A lawnmower with a washing machine engine sounds more than strange at first glance. But if you think carefully, there is nothing strange about this. A lawn mower is essentially a fairly simple device, which, however, is incredibly expensive in the store. Yes, it’s not even a matter of money, but of principle. If you are an experienced DIYer or want to become one, then why pay someone for a ready-made lawn mower when you can make it yourself, especially since you have a garage full of the necessary spare parts.
About the functionality of the homemade product
 Some will say: “ugh, a homemade lawn mower, it’s not safe, and it will be less useful than a branded product!” In fact, these statements are nothing more than the prejudices of slackers who are afraid to once again pick up a screwdriver and pliers, let alone a more or less serious tool. If you do everything correctly, a homemade lawn mower will be no worse, and in some ways even better than factory models - for the price, that’s for sure.
The power of the lawn mower will be enough to mow the grass without any problems, and the body can be made very compact, so that in the future it will be easier to store such a self-made unit. Issues of operational safety can also be called into question, because even when using a factory lawn mower you can get hurt. Much here depends not on the device, but on the person who uses such a device.
A homemade lawn mower, the design of which we will propose in this publication, is no more dangerous than equipment from the world's leading companies.
Required parts and tools
So, if you are determined to make your first lawn mower yourself, you need to remember that you first need to collect the necessary parts and tools, and only then craft your plan. First let's talk about materials.
- A commutator motor from an old washing machine. This is the main part of the lawn mower. Experts advise taking the engine as powerful as possible. Better not even from a washing machine, but from a Soviet-style centrifuge.
If you don’t have a powerful engine, it doesn’t matter, the lawn mower will still be quite functional.
- Any durable wheels of small sizes. Those from baby strollers or wheelbarrows are suitable. If there are no wheels on the farm, they can be cut out of plastic profile sheets.
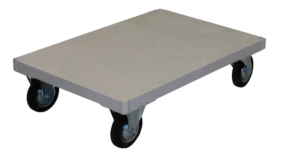
- An old lid from a large metal pan or a steel sheet, at least 3-4 mm thick and 600x600 mm in size (or approximately that). Some people use old shallow steel basins or large bowls as a base; everyone’s personal imagination works here, the main thing is that the base is strong and not too deep.
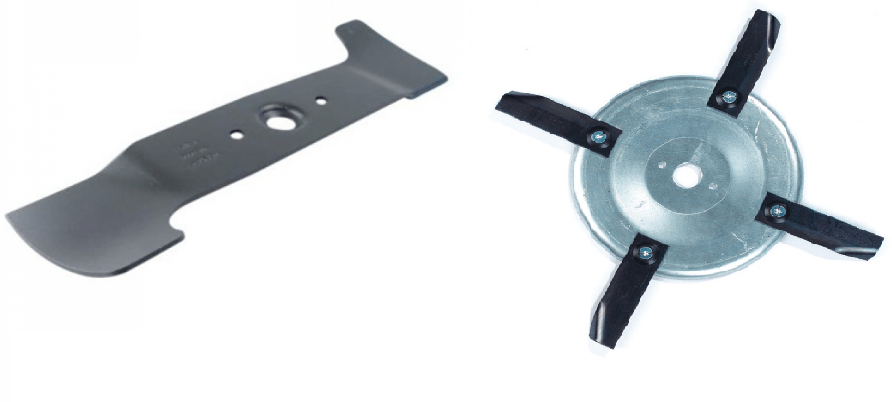
- Blades or cutting discs from a factory lawn mower. Even if you make a lawn mower with your own hands, it is better to take the consumables from the factory. The better the quality of the lawn mower disc or blade you purchase, the fewer problems there will be in the future. Well, you decide for yourself what exactly to put a knife or disc on your lawn mower.
- Thin profile pipe to make a lawn mower handle. Here you can also use whatever is suitable at hand. You can even make a handle from a water pipe, however, such a pipe will greatly burden the structure.When our craftsmen made a lawn mower with their own hands, they remade the handles from an old wheelbarrow, connecting them using a curved pipe.
- Small pieces of angle steel from which we will make a frame for the engine. You can take any corner, no matter how thick or thin.
- Three-core copper wire with insulation and plug. Since our lawn mower will be powered by electricity, a fairly long power cord will be required. The larger the lawn, the longer the wire is needed.
- Switch from a semi-automatic washing machine. In order not to invent anything special and not spend money on electrical “guts” for the engine, it is better to take the motor itself and the switch from a semi-automatic washing machine. Then all that remains is connect the motor from the washing machine and “it’s in the bag.”
In addition to the main parts, you will need a certain number of fasteners: studs, bolts, nuts, washers, well, everything as usual. Now let's say a few words about the necessary set of tools.
- Various open-end and socket wrenches.
- Electric welding.
- Drill.
- Measuring tools.
- Multimeter.
- Bulgarian.
- Marker.
- Hammer.
- Pliers.
- Screwdrivers.
- Soldering iron.
Progress
 Well, let's get started. If, in the process of making a lawn mower with your own hands, you realize that some parts are missing or it is better to take others instead of some parts - it doesn’t matter, this is normal. After all, when you make something with your own hands, you get involved in the creative process and don’t even notice how you’re improving the original project. The exact same thing will happen in your case. But let’s not “go deep into philosophy,” but let’s get down to business.
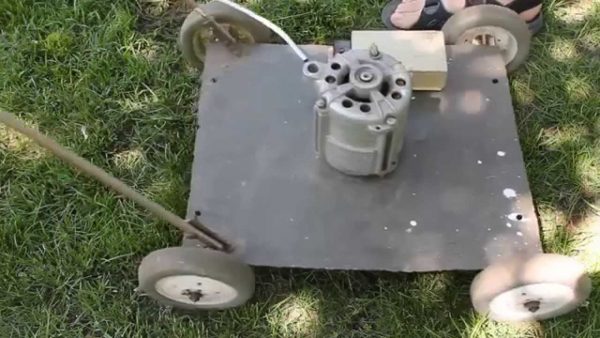
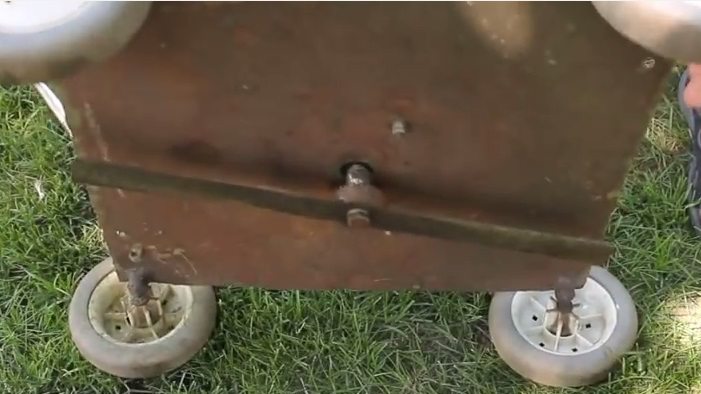
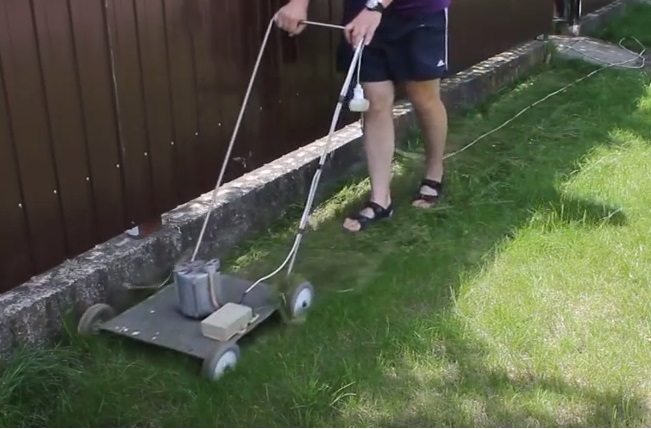
The first thing we will do with our own hands is to make a cart chassis to which we need to attach wheels. The chassis should be located low from the ground, we are making a lawn mower, not a cart for removing garden waste.
We cut a round hole in the center of the platform so that the motor shaft passes through it and leaves some clearance. We place the engine with the shaft down so that the shaft fits into the prepared hole. We mark a place on the platform for the engine frame.
When the engine is installed on the platform, it is easier to mark the place for its frame.
We fold the corners into a frame and weld them to each other. To ensure that the engine sits securely in this frame, you can additionally fasten it with a special clamp - there is no need to weld the engine housing to the frame. Next, install the lawn mower handle. It can be welded, but it is better to bolt it to the corners so that the lawn mower can be disassembled later if the need arises.
Now we need to connect the motor. In this case, it is better to install the starting capacitor and other electrical components in a special plastic box. If you don’t have a box at hand, you can take a regular plastic bottle. Such a bottle can be attached to the engine itself, but it is better to place the switch on the handle of the mower for greater convenience.
Now we attach a suitable bushing to the motor shaft, put a knife or cutting disk on it and secure it. In this case, it is important that the knife is located at the desired height and is securely fastened. In order for the knife to fit onto the sleeve, you may have to drill a hole in it - see for yourself. That's it, the electric lawn mower is ready, now all that remains is to connect it to the network and arrange the first mowing of your lawn.
Security measures
When using a homemade lawnmower, be careful. Do not turn on the device in the rain or when the grass has not yet dried. Factory lawn mowers have all electrical wires securely insulated, and the engine is enclosed in a waterproof casing. In our case, if we decide to mow the grass in the rain or after it, electric shock cannot be avoided.
Do not share the lawn mower with children or use it near children or pets playing. Before mowing the lawn, make sure that there are no foreign objects in the grass: children's toys, stones, garden hoses, etc. If the blade jams during operation, do not touch it until you have turned off the power to the mower. Be reasonable and everything will be fine!
Interesting:


Reader comments
- Share your opinion - leave a comment
Categories
Washing machine repair


For buyers


For users


Dishwasher


Add a comment