The engine from the washing machine to the bike
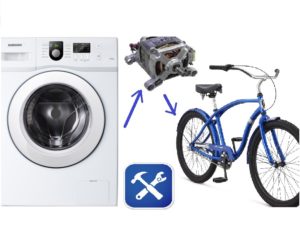 Among the unusual applications of the engine from the washing machine, turning it into a motor for a bicycle can be considered the most unusual. A motor for a bicycle from a washing machine - sounds more than extravagant, but looks completely exclusive. About whether it is possible to make this "technical artifact" and how to do it, read this publication. We warn you right away, the project is technically complex and quite expensive, so if you are not confident in your abilities, it is better not to start.
Drive gear
Before proceeding with the conversion of a conventional bike into an electric bike, evaluate the technical potential of your iron horse from the side. The bicycle must have a sufficiently powerful frame, since it must at least support the weight of the rider and the weight of the equipment that will be installed on it. If everything is in order with this, you can proceed to alter the bicycle and install the engine on it from the washing machine, drive mechanism, control system and power sources.
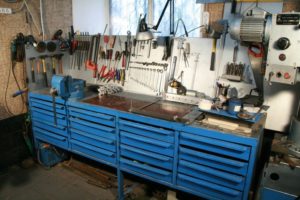
Let's start with the development and installation of parts of the drive mechanism. We note right away that in order to make a homemade electric bike from the engine of an old washing machine, we need a full-fledged locksmith workshop. Well, or at least a lathe, a drilling machine, a welding machine, as well as an impressive set of materials and tools, including a rather spacious room where you can conduct experiments.
 The drive mechanism will consist of the following elements:
- modified bicycle sleeve;
- large pulley;
- drive belt from the washing machine;
- small engine pulley
- motor shaft.
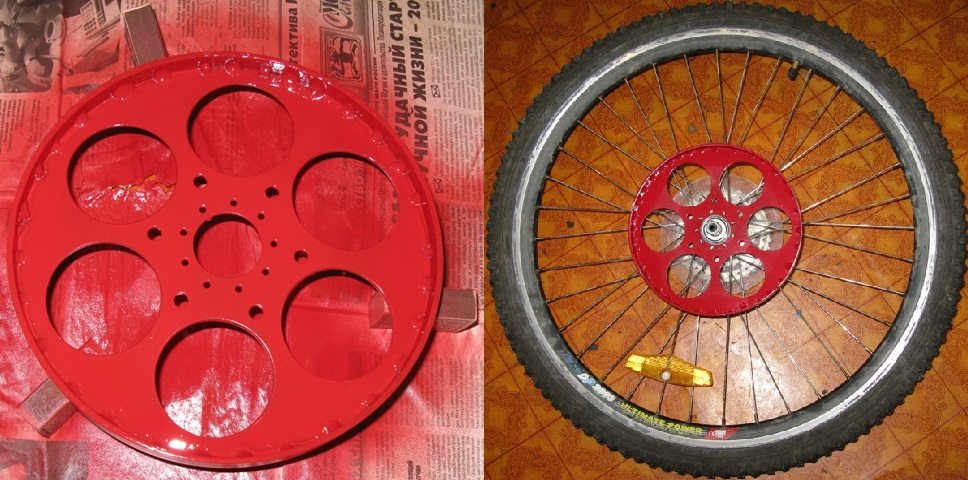
The most difficult thing here is perhaps the manufacture of a large pulley. It’s almost impossible to find a regular-sized part that is suitable for size, so you have to do it.
- From a steel sheet (2 mm), we cut out a perfect circle.
The recommended pulley diameter is 22 cm, but if the lathe can cut a circle of a larger diameter, then do more, the more reliable the drive mechanism will be.
- In the hub of the rear bicycle wheel, between the spokes, we drill small holes. Similarly, we drill holes in the steel circle.
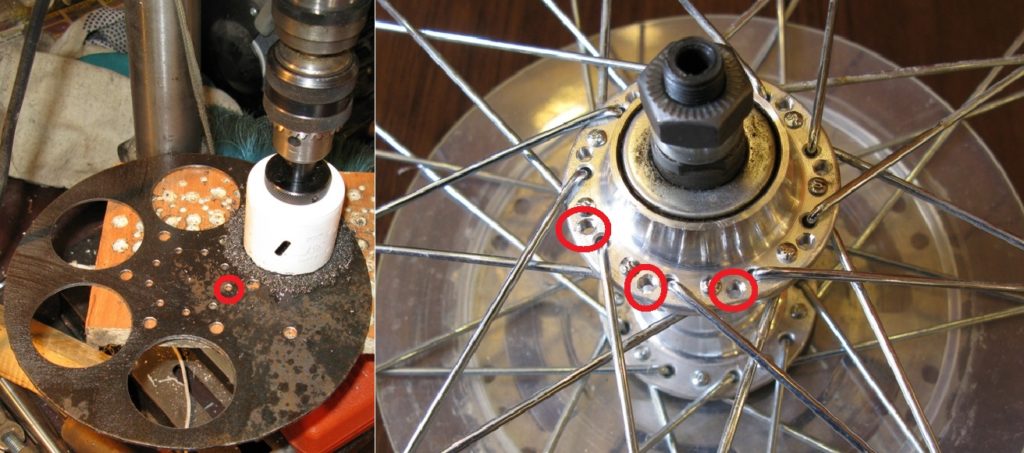
- At the edges of the steel circle we drill large holes, elementary in order to reduce the weight of the part. Because, as noted above, all equipment together with the rider will weigh a lot, and you need to unload the bike frame as much as possible, having gained at least a few pounds.
- Next, a crucial moment, it is necessary to weld a steel strip of 20x4 mm to the edge of the disk. You need to weld gradually bending a strip of metal exactly along the edge. This is not the easiest thing, because the welded joint should turn out perfectly smooth.
- After that, we charge the part into the lathe and process it again, removing all irregularities and roughness.
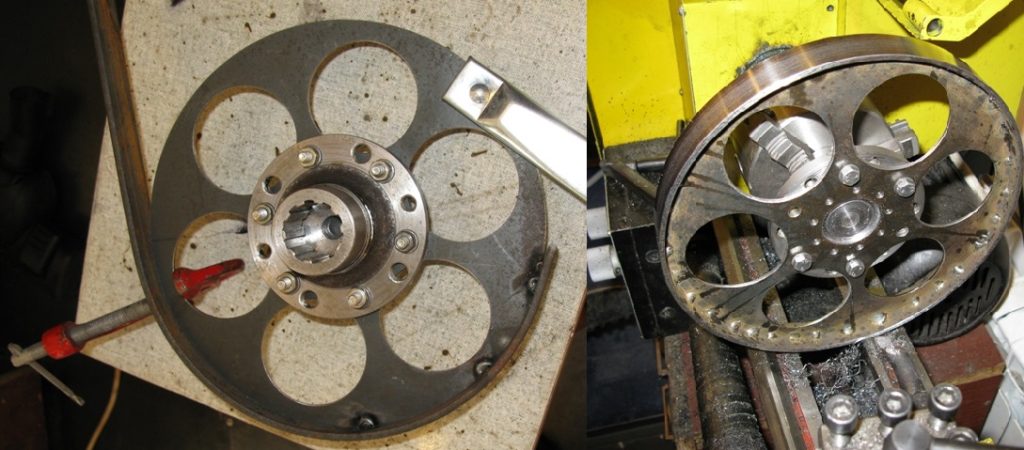
- Here is our detail and turned into a full-fledged pulley. Now we just have to paint and screw the main part of the drive mechanism to the rear bicycle wheel.
Important! The thickness of the large pulley will not allow the bicycle wheel to rotate after installation, since the part will touch the frame. You must either bend the frame or modify it somehow differently, depending on the design of the bike.
Frame modification
We made a large pulley, adapted the remaining parts of the drive mechanism. By the way, the rest of the drive mechanism does not need to be redone. A small pulley is already standing on the motor shaft from the washing machine, there is also a drive belt, so that, with a clear conscience, we can proceed to alter the bicycle frame. When modifying the frame for a new electric bike, we must take into account that the engine on it should be located as rigidly as possible. To do this, do the following.
- If the bicycle has a standard boot, we weld additional transverse tubes to it to strengthen the structure.
- If the trunk is not provided, then you need to weld the engine mount from the tubes, resembling what is shown in the figure below.
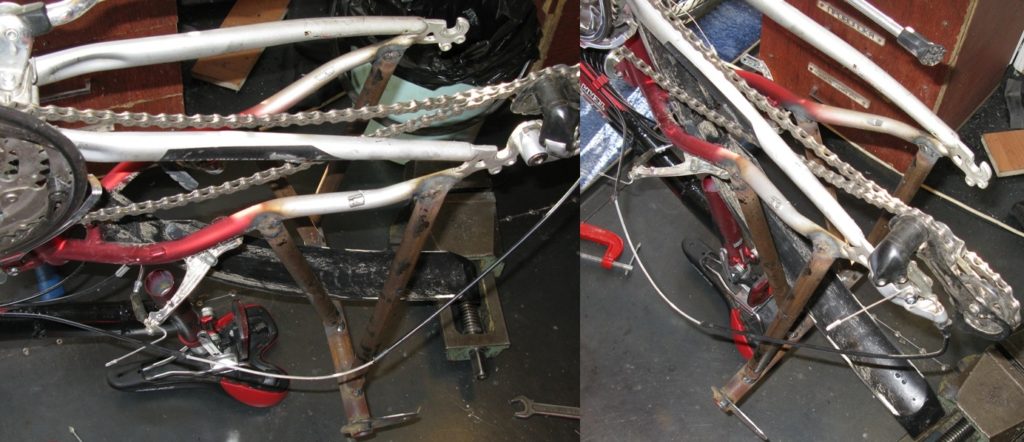
- New frame parts need to be sanded, painted and dried.
Attention! When welding the engine frame, consider the height of its seat. It is necessary that the distance between the small pulley of the engine and the large pulley of the bicycle wheel is ideal for belt tension.

We continue to assemble the electric bike. We install the engine on the frame, put the rear wheel, with the pulley screwed on, check the rotation of the wheel. We tighten the drive belt, give small turns by hand, checking if it jumps off. If everything is normal, we begin to engage in connecting the washing machine motor and organizing its autonomous power supply.
Motor Power Management
 About, how to connect the engine from the washing machineTo make it work, we wrote and talked repeatedly. So we will not again focus on this issue, but proceed straight away to the organization of the autonomous power supply of our collector motor. Otherwise, our homemade electric bike will be driven by the muscular strength of the legs.
To begin with, let’s figure out whether the collector motor from the washing machine can work on direct current? After all, rechargeable batteries, which will become the main source of power for the motor of an electric bike, give out direct current, and the washing machine and its units operate from an alternating current network (220V household network). It turns out there are no problems with this, moreover, the engine from the washing machine with direct current works much better than with alternating current, which, of course, is only at hand.
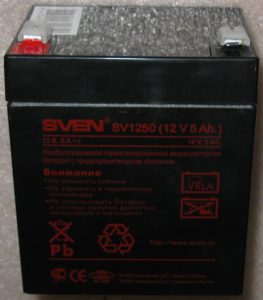
Choose the right batteries. This can be difficult, since we need several rather massive batteries, which are difficult to mount on a bicycle because of their size and weight. The best option - eight compact motorcycle 12-volt batteries, which together produce a voltage of 96V. But there is a problem - even such batteries take up a lot of space and weigh quite a lot, and it is unclear how to place them on the frame of an electric bike.
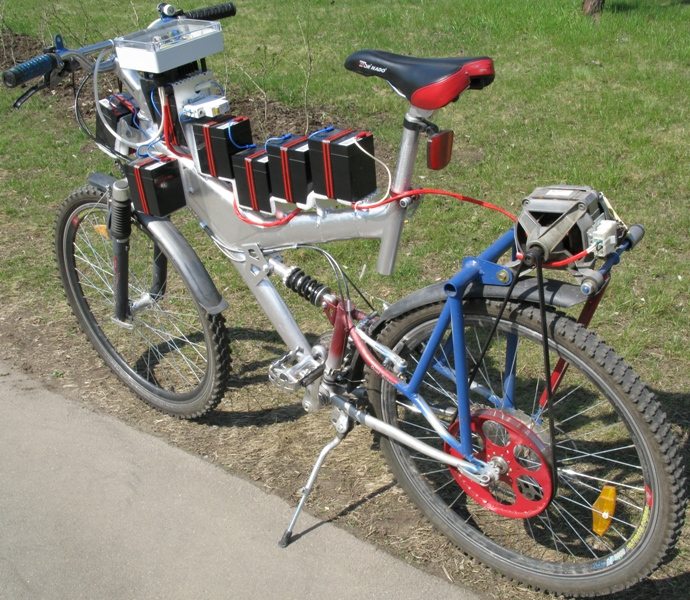
After much deliberation and a series of unsuccessful experiments with battery boxes, it was decided to distribute the batteries evenly throughout the frame, hanging them with an electric bicycle like a Christmas tree with toys.
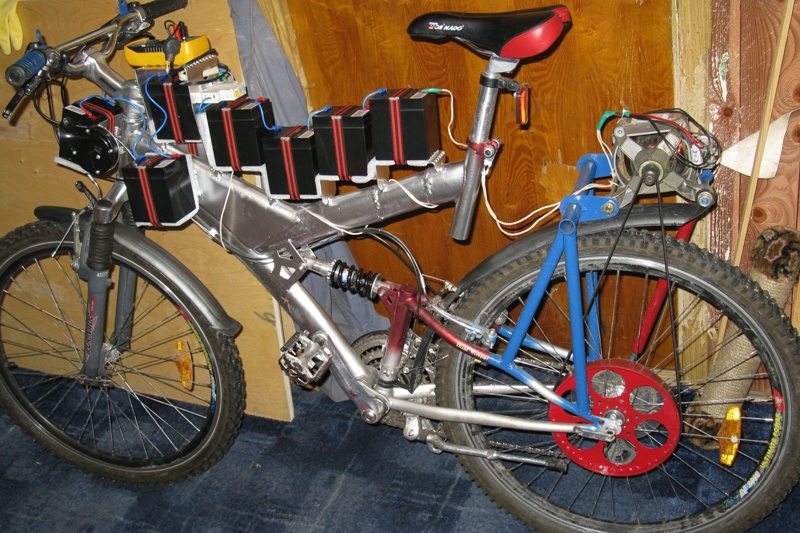
This technical solution has added problems.
- Firstly, as can be seen in the figure above, it was necessary to reinforce the frame of the bicycle once again to withstand the additional load. This, unfortunately, has led to the fact that the weight of the “iron horse” has once again increased, but nothing can be done about it.
- Secondly, I had to weld 8 separate battery mounts to the frame so that they could be fixed securely.
- Thirdly, I had to literally hang the entire frame with wires to connect the batteries to each other and to the engine.
- And fourthly, I had to re-establish aesthetics once again by repainting the bicycle frame almost completely.
Control block
There are still a number of technical difficulties that we have not yet considered - how to control the engine speed, how to prevent the current from rising to maximum values at the start of the electric bike and during its acceleration, and how, finally, to monitor the battery charge during movement. To solve these difficulties will help the electric bike control unit, which we need to assemble. We will need:
- 32.5 kHz pulsed buck converter.
- Variable resistor.
- Microcontroller ATtiny26.
- Measuring resistor.
- Chip IR2127S.
- Three power transistors type IRFB33N15D.
- Three diodes type 10CTQ150.
- Charging from a mobile phone.
- DC-DC converter P6AU-1215ELF.
- Red and green LEDs.
- Automatic 6A.
- Plastic housing suitable sizes.
- Metal radiator from the computer motherboard.

We will not describe the process of assembling the control module, and this is not necessary, since all the necessary information is presented in the diagram above. You only need to read this diagram, understand and reproduce on several printed circuit boards. The result should be something similar.
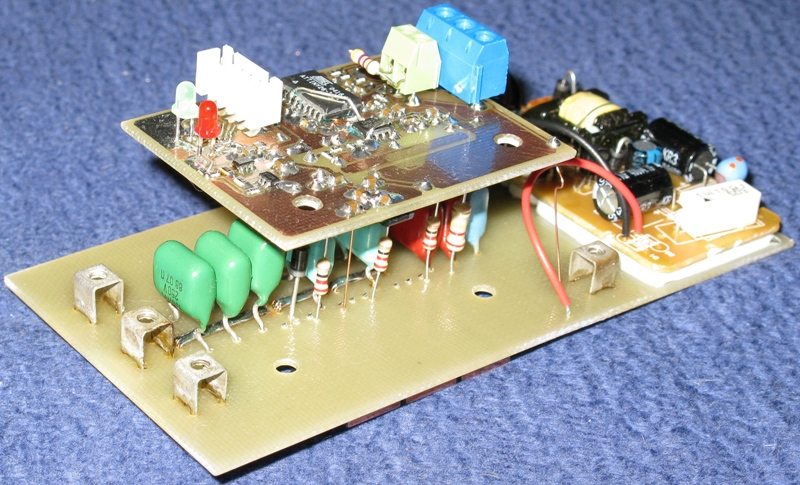
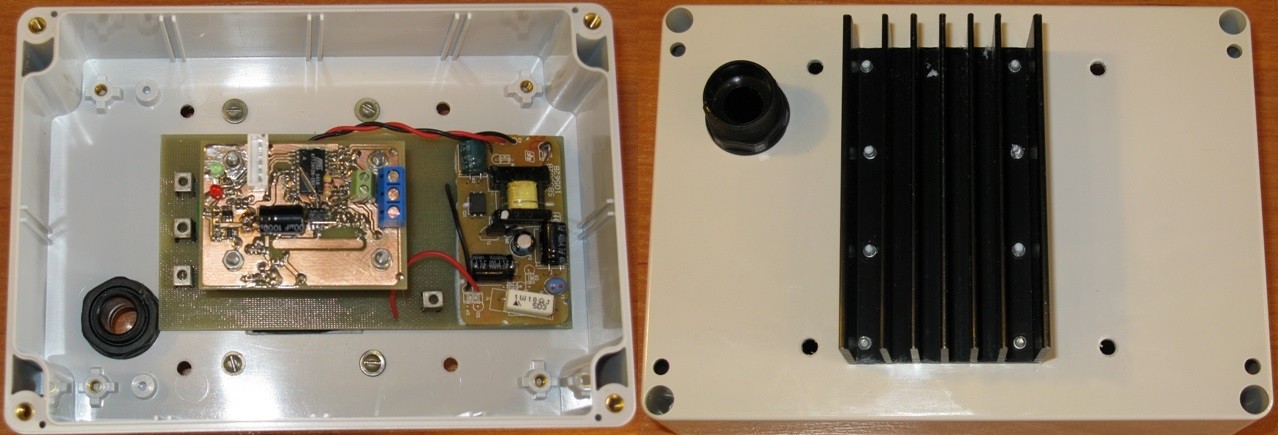
The board must be placed in a compact waterproof plastic case, screwing the radiator to the bottom.
We did not find a suitable housing for the module, so I had to use what is. In order for the control module to start working, it is necessary to turn on the machine, turn the “throttle stick”, that is, a variable resistor mounted on the handlebar of the electric bike. After which the engine will begin to smoothly gain momentum, and the green LED on the module will light up.
If the batteries are completely discharged or their capacity is insufficient, the red LED will turn on, after which the circuit will be de-energized after a few seconds. You will have to go "on your own two" until you manage to recharge the batteries.
Tests and their results
It is time to try out the “hellish machine" that took so much time, labor and money. We approached the tests no less scrupulously than to make a homemade electric bike and conducted them in three stages:
- Riding on a normal relatively flat road (half asphalt, half primer) at a speed of 18 km / h.
- Riding on smooth asphalt with small ascents and descents at a speed of 25 km / h.
- Riding at maximum speed on smooth asphalt without ups and downs.
As a result, in the first case, having accelerated to 18 km / h and maintaining this speed, we managed to drive along the dirt road and broken asphalt on a single battery charge of 27 km. The muscular strength of the legs was almost never used. There were no ascents and descents along the way.
Having rode an electric bike on smooth asphalt with small descents and ascents at a speed of 25 km / h, we managed to set a record of 19 km on a single battery charge. ANDfinally, tests at maximum speed showed that our homemade electric bike can accelerate to 30-35 km / h, it is, of course, on smooth asphalt, without descents and ascents.
Note! The weight of the rider who tested the bike was 96 kg.
It is noteworthy that if we help the engine by turning the pedals, we can relatively easily reach a maximum speed of 45-50 km / h, and if you try, you can squeeze 60 km / h. In this case, the batteries discharge faster, after about 10-15 km of such a sprint.
In conclusion, we note that in order to make an e-bike from a washing machine on your own, it will take at least several months, a workshop, an enormous amount of strength and patience, as well as money. By the way, we spent about $ 700 on the project, provided that we did not have to purchase a bicycle and parts of an old washer. If you are determined to make your own electric bike - go for it, we can only wish you good luck!
Interesting:
 How to make a machine from the engine from a washing machine
 Homemade honey extractor from a washing machine
 What can be done from an old washing machine
 Homemade wood splitter with an electric motor from the washing machine
 Washing machine pottery wheel
 Wood lathe from the engine from the washing machine
11 reader comments
Add a comment
Headings
Washing machine repair


For buyers


For users


Dishwasher


So what were the $ 700 spent then?
But it’s not easier with such a weight to install a compact generator on gasoline, squeeze all the power of the engine, and put your brains from the washer.
It’s easier to put the engine from a chainsaw, for example, rather than a generator.
For 700 bucks you can buy a motor wheel with the whole stray, even cheaper.
On the contrary, a large pulley must be placed on the engine, and a small one on the wheel.
If so, the engine will run under load
What a horror. For that kind of money, it’s easier to take a ready-made motor-wheel, and eight batteries cost a lot.
In fact, such things are done for the soul. The author ruined the bike because he wanted creativity. But in my opinion it is better to take lithium-ion batteries. They can be placed like finger batteries in a tube and the voltage raised to 170 volts. At the same time, the value of watts / hour will also increase. To increase a pulley on a back wheel, or to apply a grinder. She has a gearbox and the engine type is the same. It will also spin from DC. Only the regulator should not use a current stabilizer, but a PWM. In this way, current losses due to heating of the key element can be avoided. But in general, I think the author proceeded from what was available. By the way, the drive can be made to the front wheel, so as not to disfigure the rear. And install an overrunning clutch in the area of the wheel hub to avoid mechanical losses.
Easier - 12 volt battery - 220 inverter - engine - additional circuits - ready.
Why not use lithium batteries?
Even easier, do not hang this crap on the bike, but use the muscular strength of the legs. Then the mileage is limited only by the presence of alcohol to maintain tone and relieve stress from high speeds.