Backlit mouse pad
Hello, my little creative lovers, today I will tell you a fairy tale about how to make a backlit modder mat. I'm sure this won't be news to you, but I believe that every self-respecting modding site should contain its own article about the rug =).
As in any other guide, to realize our idea we will need some tools, materials and parts. In this case we will need:
* If you take less, they most likely won’t fit LEDs, and more - there will be a large difference in heights, which in itself is quite inconvenient.
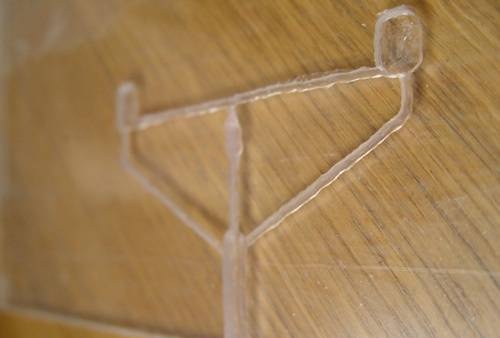
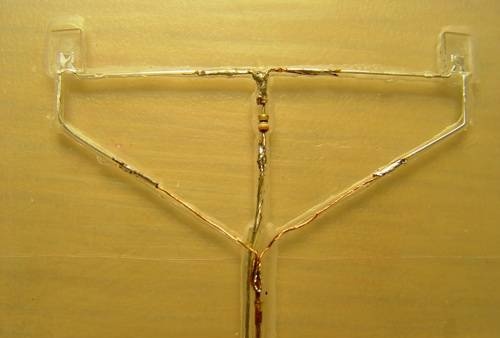
We will start with the base of our future rug - we take plexiglass and, if necessary, cut it to the desired size and shape. Next, we will take care of the places for installing LED lighting and wiring - for them we need to make recesses on the back side of the plexiglass. To do this, we use a Dremel with cutters, I used a 3 mm ball, and I made flat areas for the diodes with the end of a cylindrical attachment of the same diameter. Don't forget to also make recesses for the resistors. The groove configuration depends on the quantity you choose LEDs and the method of their fastening. My diodes will shine vertically downwards, as you will see later, while the side ends are tolerably illuminated, but you can position them as you please. I got grooves of this configuration.
List of necessary items
As in any other guide, to realize our idea we will need some tools, materials and parts. In this case we will need:
- Straight arms
- A piece of plexiglass in a suitable format with a thickness of 4 to 8 mm
- LEDs desired color and quantity. Two white ones were enough for me
- Resistor(s) of the required value
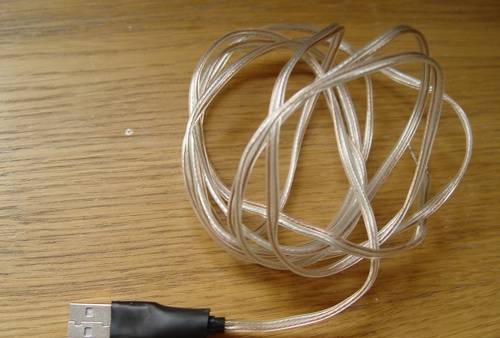
- Two-core wire of the required length from the location of the mat to the USB port
- The USB plug itself, for example removed from a banal extension cord
- Soldering iron
- Heat-shrink tubing
- Dremel with a set of cutters and sandpaper
- Metallic paint, chrome paint or thin foil, preferably self-adhesive
* If you take less, they most likely won’t fit LEDs, and more - there will be a large difference in heights, which in itself is quite inconvenient.
Working with plexiglass
We will start with the base of our future rug - we take plexiglass and, if necessary, cut it to the desired size and shape. Next, we will take care of the places for installing LED lighting and wiring - for them we need to make recesses on the back side of the plexiglass. To do this, we use a Dremel with cutters, I used a 3 mm ball, and I made flat areas for the diodes with the end of a cylindrical attachment of the same diameter. Don't forget to also make recesses for the resistors. The groove configuration depends on the quantity you choose LEDs and the method of their fastening. My diodes will shine vertically downwards, as you will see later, while the side ends are tolerably illuminated, but you can position them as you please. I got grooves of this configuration.

Installing the backlight
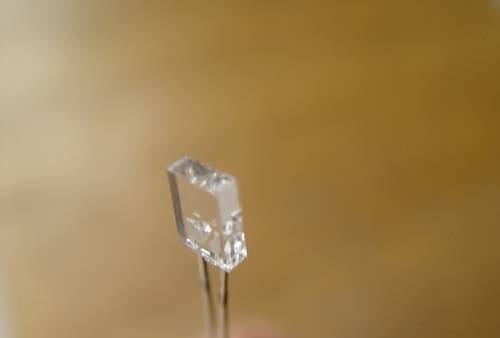
Now it's time to install lighting in our rug. You will make your life easier if you find LEDs with a rectangular lens, otherwise you will have to grind them to the same state by hand.
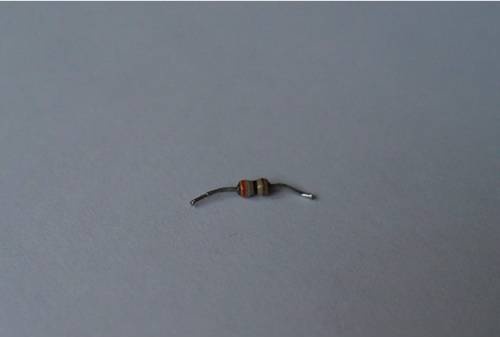
I connected LEDs in parallel through a common resistance using such a resistor.
We provide food
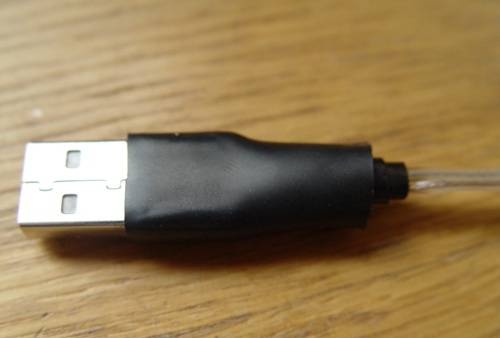
We take power from the USB port. To do this, take a USB plug, cut off the outer rubber shell, disassemble it, pull out all the wires, and solder our two wires to the two outer contacts. We assemble the connector and shrink it on the outside with heat shrink so that our structure does not fall apart.
Assembly
Now we try on all the components to the grooves and solder them, not forgetting about the polarity. Naturally, it is better to solder outside the grooves, having previously measured all dimensions. It should look something like this.
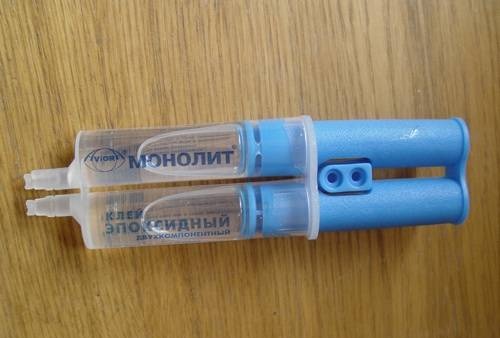
To secure all this goodness in place, I used transparent epoxy glue - after hardening, it is very reminiscent of plexiglass and does not disturb the internal structure of the glass, allowing light to pass through perfectly.The entire system appears to be inside one piece of acrylic.
First, pour a little glue into the grooves so that there are no voids under the wires, then put everything in its place, and pour it on top flush with the glass. Make sure that the parts do not bulge outward. If you overdo it with glue, don’t rush to try to remove it in a liquid state - you’ll get it all dirty. It is better to wait for the glue to dry and remove the excess with a tool. I advise you to work quickly, because after 5 minutes my glue, although it did not harden, did not spread anymore and was inconvenient for spreading. Excess sticking out is removed either with a sharp blade after drying, but not completely hardening (be careful, with a dull blade you can simply tear out everything poured out of the grooves), or with sandpaper after complete hardening - this side still faces down and will be closed, so there’s no harm will happen if you scratch it slightly.
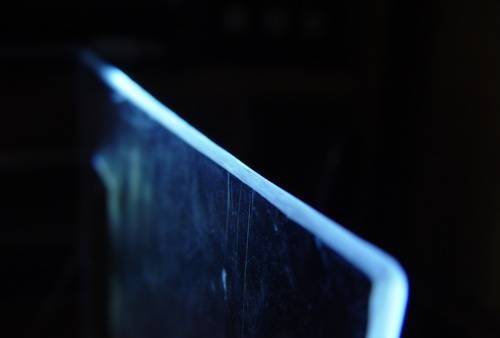
Next, I worked on the ends (although I’ll say right away that it’s more convenient to do this before pouring - so that the wire doesn’t interfere with you). Using sandpaper, we remove the chamfers: you can remove them at 45 degrees, or you can do it like I did - rounded. Remember that if the ends are perpendicular, the glow will be difficult to see from above.
End processing
Next, I worked on the ends (although I’ll say right away that it’s more convenient to do this before pouring - so that the wire doesn’t interfere with you). Using sandpaper, we remove the chamfers: you can remove them at 45 degrees, or you can do it like I did - rounded. Remember that if the ends are perpendicular, the glow will be difficult to see from above.
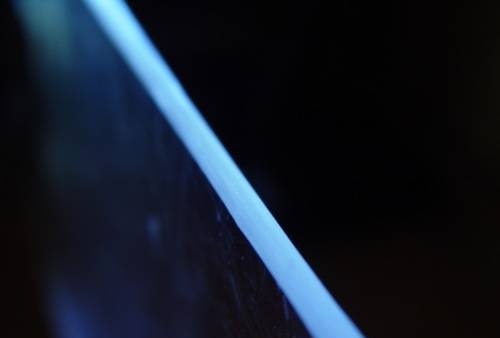
We optimize light fluxes
The next problem awaiting us is that we need the ends to glow, and not the surface, and even fairly dense material can be seen through at the location of the diodes. Therefore, we need to cover the LEDs with something. There are two options to solve this problem. The first option is to stick self-adhesive foil over the LEDs, which will easily interrupt the flow of light. However, no matter how thin it is, its outline may appear on the surface with which the rug will be covered.The second option is to paint the surface of the mat above the diodes with paint that contains metal particles (for example, metallic paint, chrome paint, gold paint). I found gold paint and it fit perfectly.
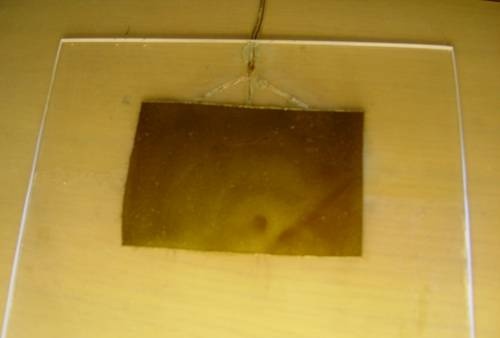
I hope you didn't remove the protective film from the entire piece of plexiglass. Because it makes no sense for us to paint the entire surface, and gluing the entire piece is not a rewarding task. So, using a utility knife, we carefully cut out a piece of film above the diodes, and seal the rest of the surface that is without film, including the ends, with masking tape.

We paint - put one layer at a time, dry it and check whether the LEDs illuminate the paint layer or not. It is not necessary to achieve complete dimming of the light, because we will have another picture on top that will dim the residual light. I only needed two layers.
Installing the covering
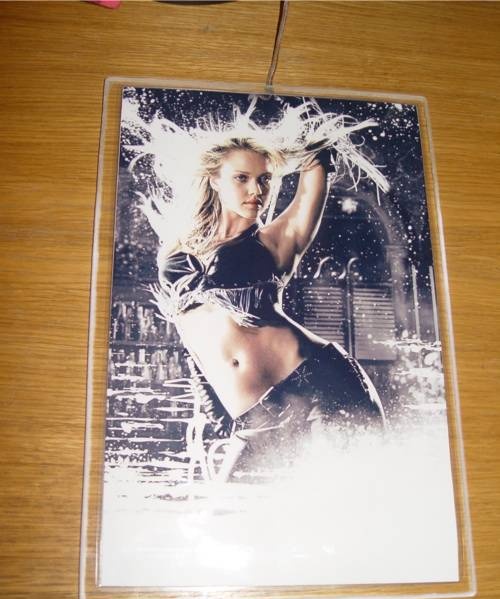
The only thing left is the coating. One of the most spectacular types of surfaces is a full-fledged pattern on the rug. It’s all very simple: take a picture you like, for example, cut it out of a magazine, although it would be much better to take a digital version and print it on thick paper. We customize it to the desired format and run to a lamination company - we do double-sided lamination, paying a fairly affordable amount for it. And voila, now we have a picture that is covered with a fairly dense layer of polymer - it will not suffer from the mouse rubbing against it, and the latter will slide well over such a surface. We trim the edges of the film and glue it to the mat. You can glue it with glue, or with double-sided tape with the possibility of subsequent replacement. That's it, the job is finished!
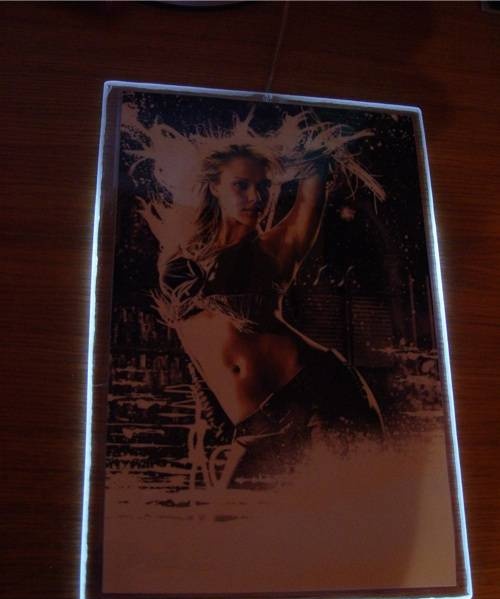
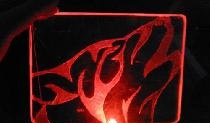
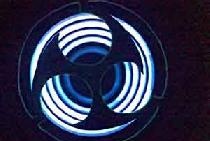
The result of the work
In the light of day
In the dark
P.S: Later it turned out that my mouse doesn’t really like a glossy white surface, and there were a lot of them in the picture I chose, so the picture would have to be changed. So my advice to you is to first check if the mouse works well on your drawing before sculpting it on the mat.
Similar master classes


Particularly interesting

Comments (1)
