Do it yourself
Life hacks, master classes, useful tips, recipes.
home » Handicraft techniques » Modeling » Polymer clay master class » Transferring an image to polymer clay
I’ll tell you about an interesting and now very popular method of transferring an image onto polymer clay. With its help, you can make completely unique and very beautiful jewelry for yourself or for present.

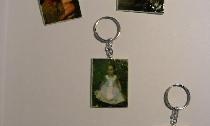
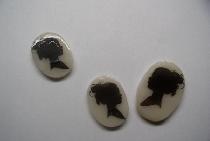
First you need to choose a suitable image. It is desirable that it be black and white (I just haven’t tried it with color images yet). The picture needs to be printed on a laser (!) printer and cut to the required size. Now take a small piece of polymer clay. For such products, it is better to take high quality clay (Fimo, Premo, etc.).

Transferring an image to polymer clay


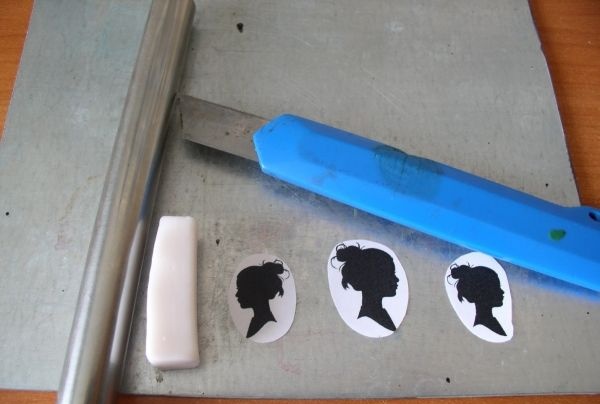
Roll out the clay to the required thickness, apply the cut out picture and trim off the remaining clay around the edges. Having prepared all the blanks, you need to take formic alcohol (sold in pharmacies), wet a cotton swab with it and blot the image. Repeat this action 5 – 7 times, pressing quite hard.


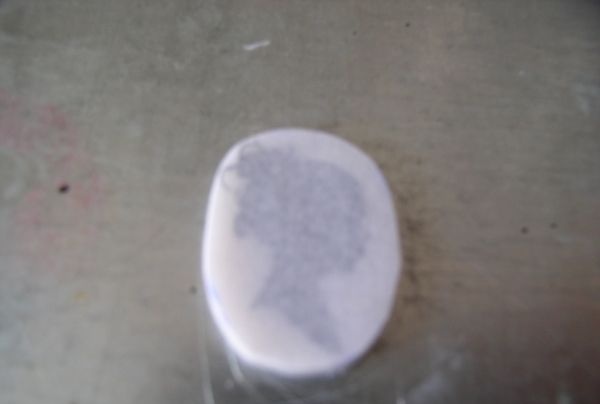
Then you can proceed in different ways: either try to immediately carefully remove the paper (the image should be transferred to the clay) and then put the product in the oven, or bake it together with the paper.Both options are suitable - whichever is more convenient for you. The pieces should be in the oven for about 10 - 15 minutes at a temperature not exceeding 140 degrees.


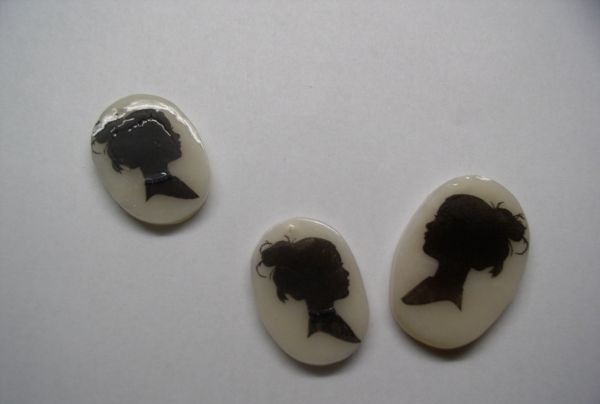
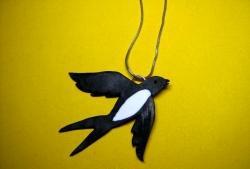
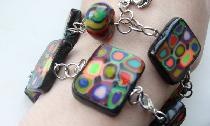
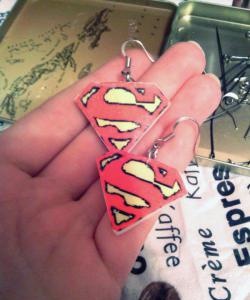
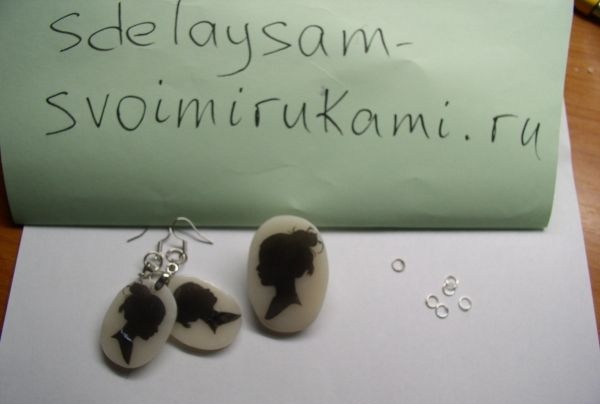
We coat the finished products with a special varnish and bring them to the desired look using jewelry rings, earrings, etc. These are the amazing things you get in the end - a set of earrings and a brooch!


To be honest, it took me a while to be able to accurately and efficiently translate images. It is important to ensure that the entire picture adheres tightly to the clay!
come back
Comment
  • bowtiesmilelaughingblushsmileyrelaxed relaxedsmirk
    heart_eyeskissing_heartkissing_closed_eyesflushedrelievedsatisfiedgrin
    winkstuck_out_tongue_winking_eyestuck_out_tongue_closed_eyesgrinningkissingstuck_out_tonguesleeping
    worriedfrowninganguishedopen_mouthgrimacingconfusedhushed
    expressionlessunamusedsweat_smilesweatdisappointed_relievedwearypassive
    disappointedconfoundedfearfulcold_sweatperseverecrysob
    joyastonishedscreamtired_faceangryragetriumph
    sleepyyummasksunglassesdizzy_faceimpsmiling_imp
    neutral_faceno_mouthinnocent
4 minus one =
Comments (1)
  1. Angel
    #1 Angel Guests 24 March 2013 16:57
    0
    :love: :love: super :love: :love: I'll try smile :love:

Bouquet of sweets "Sweet Life" | Do it yourself

3D glasses | Do it yourself

Beautiful jars for the kitchen | Do it yourself

How to make an electric drive for a bicycle with your own hands

«Do it yourself - with your own hands» - a site of interesting homemade products made from scrap materials and items at home. Step-by-step master classes with photos and descriptions, technologies, life hacks - everything a real master or just a craftsman needs for needlework. Crafts of any complexity, a large selection of directions and ideas for creativity.

We recommend reading

Washing machine error codes