DIY do it yourself
Master classes, instructions, useful tips, recipes.
» » »Electronic pass-through switch with any number of switches
Electronic pass-through switch with any number of switches

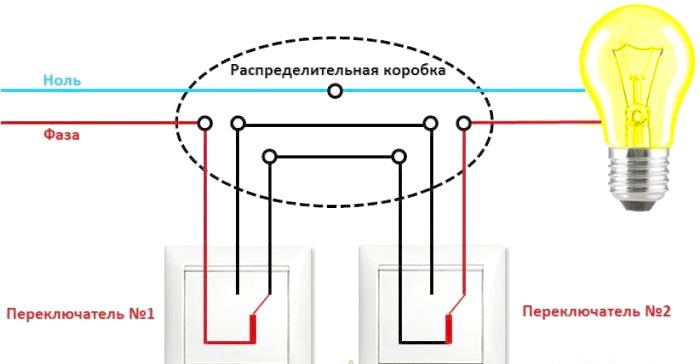
Walk-through switches are usually used in long corridors or at large distances when you need to turn on or off in one place and turn on or off in another lighting or electrical appliances. In this case, you have to pull 3-wire or more cables.
Below is a diagram of a standard feed-through switch:
Electronic pass-through switch with any number of switches

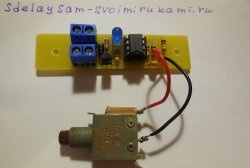
The proposed electronic switch is free from these shortcomings, it is installed in the junction box and buttons (switches) are connected from it in parallel with the signal wires, which can independently turn the lighting or other devices on and off.
Buttons from the bell or any other buttons without locking are used as switches (they pressed release, turned on the light, pressed once again released and turned off the light), there are also non-locking switches on sale.

Will need


For the manufacture of necessary:
  • Klemnik in a payment with a step of 5 mm. 3 pcs. (you can not put, but just solder the wires)
  • Resistor 1K 1206 - 2 pcs.
  • 100K resistor 1206 - 6 pcs.
  • Resistor 470 K 1206 - 1 pc.
  • Resistor 10K 1206 - 1 pc.
  • Capacitor 0.01 uF 1206 - 1 pc.
  • Capacitor 0.1 uF 1206 - 2 pcs.
  • 10 uF capacitor 1206 - 1 pc.
  • Diode 4007 (any 600-800 V suitable size) 1 pc.
  • 12 V Zener Diode BZV55-C12 (2 pcs at 5.6 V possible) 1 pc
  • DF10S diode bridge (any suitable size for 1 A 600-1000 V) 1 pc.
  • IRF840 Transistor - 1 pc.
  • ICM7555 microcircuit (analogue of ALD555, LMC555, TS555, TLC555) - 1 pc.

All SMD components because the circuit board is made for them.
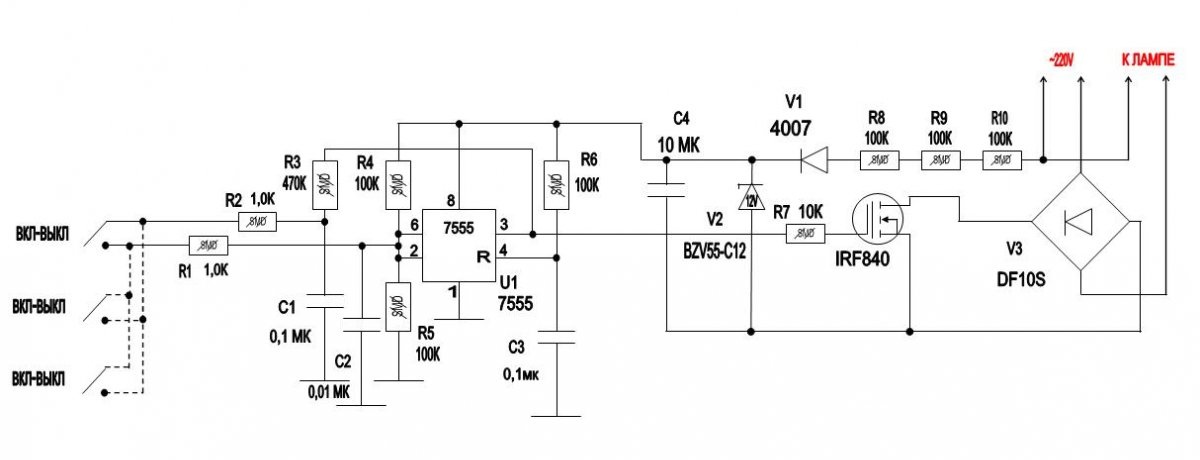
Scheme


Here is the actual device diagram:
Electronic pass-through switch with any number of switches

Electronic pass-through switch with any number of switches

Description


a trigger is created on the microcircuit, R1, R2 can be set to 470 Ohm-1.5 K, they are needed to improve noise immunity and partly safety (the design has galvanic connection to the network).
The circuit R6, C3 is needed so that the trigger is always off when the power is turned on.
Capacitor C4 is a power filter, a Zener diode V2 limits the power supply to 12V / there is a place on the board for installing 2 zener diodes of 5.6V in series, and when using one at 12 V, you need to put a jumper in the place of the second one, it is indicated on the board by V2 *.
Resistor R7 can be installed with a nominal value of 470 Ohm -20 K, it is needed to stably open the transistor and suppress its self-excitation at the time of opening / closing.
R8-R10 suppress the mains voltage (why are there 3 in series? Because 1 resistor in the 1206 housing is designed for a voltage of not more than 200V and 3 are installed for safety and reliability)
A voltage of approximately 12 V comes to the buttons or switches without fixing, and you can use any of the most low-voltage ones, but the circuit is connected to the network, be careful when checking!
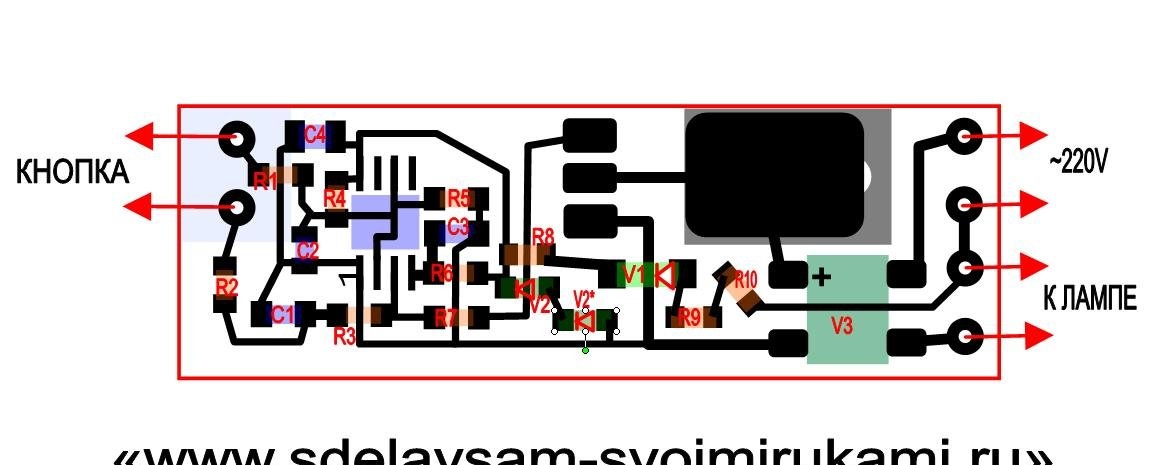
Board Assembly:


Electronic pass-through switch with any number of switches

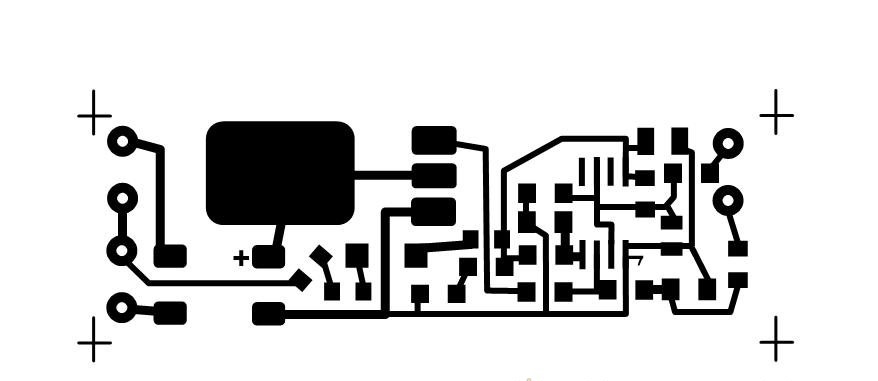
We cut out a board with a size of 20x60 mm from a single-sided foil fiberglass, clean it with a fine sandpaper, degrease it. We print a board on a laser printer without saving ink on glossy magazine paper.
Files of the PCB can be downloaded here:
[113.48 Kb] (downloads: 122)

Using the LUT method, we apply a pattern and etch in ferric chloride. Wash off the toner with acetone and clean with a fine skin. We serve the tracks and wash off the remnants of the flux. Solder all the components from the side of the tracks.
Wash off the flux! it is very important! The microcircuit is quite high resistance and if the active flux may not work!
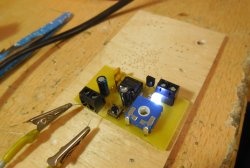
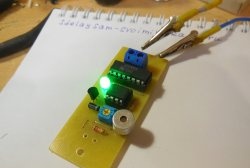
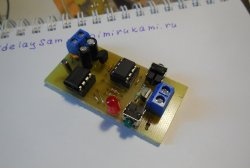
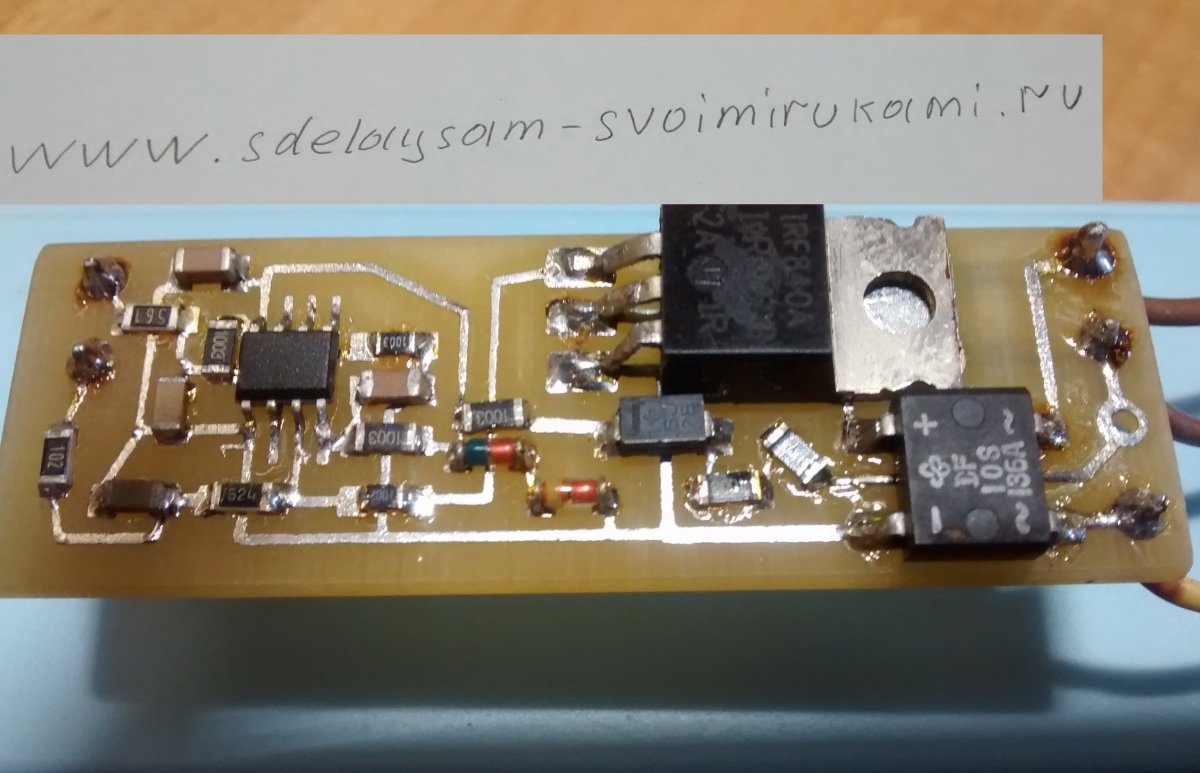
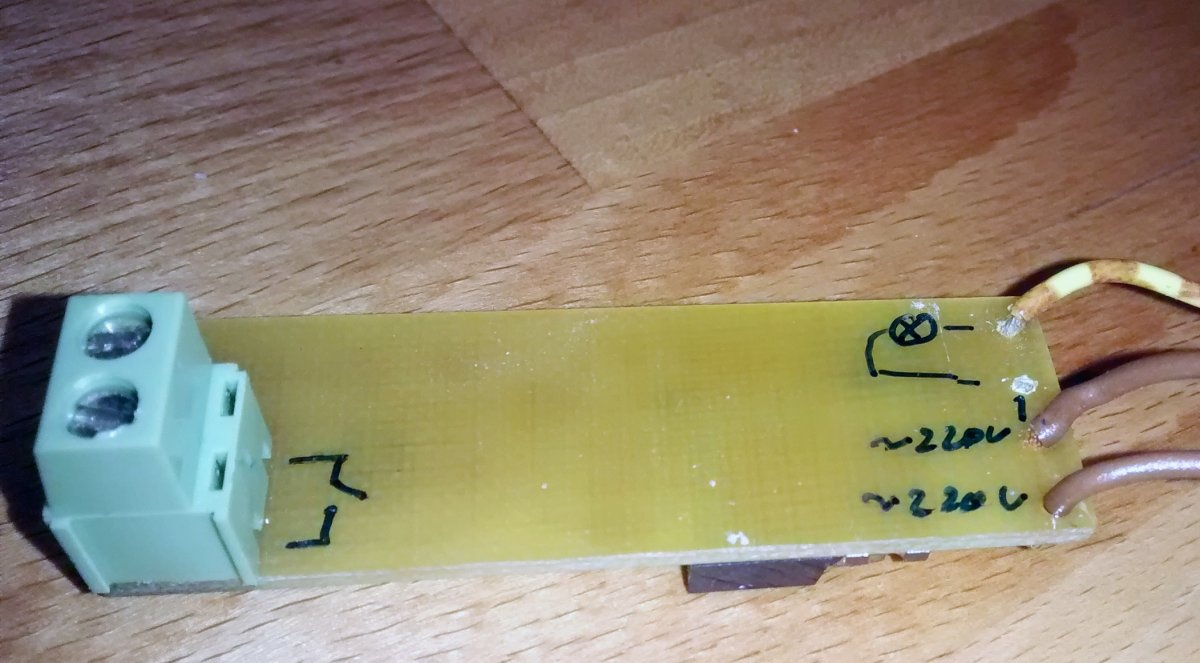
It should look something like this:
Electronic pass-through switch with any number of switches

Electronic pass-through switch with any number of switches

Be careful - the design is connected to a 220 V network! Observe precautions!

Check installation!


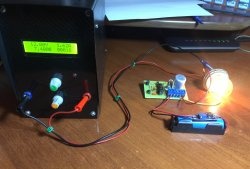
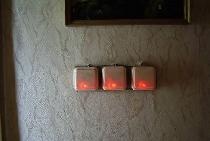
We connect a light bulb, a button, a power cord. We plug in 220 V.Be careful - the design is connected to a 220 V network! Observe precautions!
We check the performance. If everything works fine, we take a heat-shrink tube of a suitable diameter and pack the board there for safety.

Characteristics:


The maximum load is -150 W (limited by the diode bridge and the transistor when replaced with more powerful loads, you can increase it).
Supply voltage -180-250 V.
Power consumption off -0.1 watts.

Watch the video


The video below shows the operation of the device.

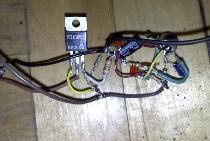
You can not do a board at all if you take a breadboard and solder on it the usual DIP elements with the outputs by connecting them with a wire.
Only it will be a little more. Any questions - write I will answer.
come back
Comments (16)
  1. Gregory
    #1 Gregory Guests June 25, 2019 19:09
    1
    WHY TO CITY SUCH A GARDEN A SIMPLE THROUGH SWITCH
    1. ozi
      #2 ozi Guests July 3, 2019 6:55 p.m.
      0
      Tunnels and impulses have their pros and cons.
      Drivers are cheap and easy to fit linearly. If the load configuration is with star-tree “buttons”, an impulse is preferable, albeit more expensive.
  2. Andrey
    #3 Andrey Guests June 25, 2019 9:32 p.m.
    0
    Impulse relay on a DIN rail. No, not heard ...
    1. Guest eva
      #4 Guest eva Guests June 26, 2019 7:24 PM
      0
      Size doesn’t matter everywhere you can just put it if you can shield it, it won’t fit into the terminal box, the pulse relay clicks quite loudly ... The price also matters - there are parts 150p and a relay 1500r ..
    2. ozi
      #5 ozi Guests July 3, 2019 18:52
      0
      That's right. No walk-through.
  3. Guest Yuri
    #6 Guest Yuri Guests June 26, 2019 9:48 p.m.
    6
    The circuit breaker circuit diagram shown above is incorrect. If switch # 2 is set to the left position, switch # 1 will not work. In the standard scheme, the movable contacts connect: one to the phase, the second to the lamp, fixed-between No. 1 and No. 2 in any order. Well, if there is a mistake in such elementary society, then at the expense of electronics ... Well, better not say anything.
    1. Guest eva
      #7 Guest eva Guests June 27, 2019 8:32 p.m.
      1
      Yes, the error really didn’t pay attention, and the circuit board is working and the video shows that it has been working a couple of years already.
  4. Guest Samodelkin
    #8 Guest Samodelkin Guests June 27, 2019 06:28
    1
    There are more wires
    1. Guest eva
      #9 Guest eva Guests June 27, 2019 20:35
      0
      board in the box, and 2 wires to the buttons. Where is more?
  5. Sergey K
    #10 Sergey K Visitors June 27, 2019 11:34
    0
    The circuit-breaker circuit diagram has the main minus - additional wires in the circuit. This decision is not new, similar schemes met in magazines of the 60s, on a different elemental base. Of course, I would like to see how the author pushes the board into the box, but not the point, you can place the circuit in the lamp itself. But the bundle of wires from the box or lamp will not go anywhere!
    There is a second minus for the through-switch - in the case of turning off the light, determining whether the load is on or not is quite problematic

    Today there is a more elegant solution - wireless relays. In Bangkok, I somehow bought a 4-channel with two remotes for only 5 with something bucks. Place the remotes in the switch housing, and the board with the reels in the lamp housing. And that’s all!
    1. Guest eva
      #11 Guest eva Guests June 27, 2019 8:39 p.m.
      0
      Great topic for an article - write and earn! / yes batteries for remote controls are needed, and the relay does not fit into every lamp /
      1. ozi
        #12 ozi Guests July 3, 2019 6:58 p.m.
        0
        Let there be a room with a lamp and a bunch of doors around the perimeter. How people who enter and leave this room with the remote control / panels will use it and what words the developer will remember.
    2. Guest Yuri
      #13 Guest Yuri Guests July 1, 2019 08:24
      0
      In the case of turning off the light, determining whether the load is on or off is quite simple. It is enough to connect the fixed contacts so that with the same position of the keys the light will be turned off.
  6. Guest alexander
    #14 Guest alexander Guests July 2, 2019 18:37
    0
    too complicated, and not for 150r
  7. Guest Alexander
    #15 Guest Alexander Guests August 7, 2019 4:46 p.m.
    0
    why IRF840 and not BT137?
    1. Guest EVA
      #16 Guest EVA Guests August 17, 2019 10:56
      0
      BT137 has a large opening current, it will be necessary to reduce the R8-R10 and increase their power, everything will get very hot or use another way to power the circuit.

Read also

Error codes for washing machines