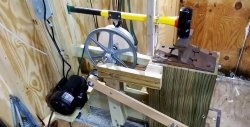
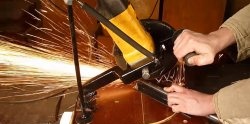
This tool with a flexible shaft, which is also called a mini-drill, can perform various types of processing of wooden and metal parts and assemblies in hard to reach places. What to do if the electric motor fails, or the drive is dremel? Let's try to replace it with an ordinary grinder.

We remove the flexible shaft from the failed tool and rearrange it to a working grinder. But the problem is that the angle grinder spindle does not contain a flexible shaft connection unit. Our task is to create it. What is needed for this?
Would need:
- elongated hex nut and bolt, matching thread with the grinder spindle;
- bench vise;
- working angle grinder;
- flat blade screwdriver;
- manual tap with square shank;
- hammer, pliers, pliers;
- emery wheel with a mechanical drive;
- 2 mm thick metal strip of required length;
- copy tubes for the manufacture of clamps;
- drill with drills;
- two sets of bolted connections;
- two plates for connecting clamps;
- welding machine;
- spanners.
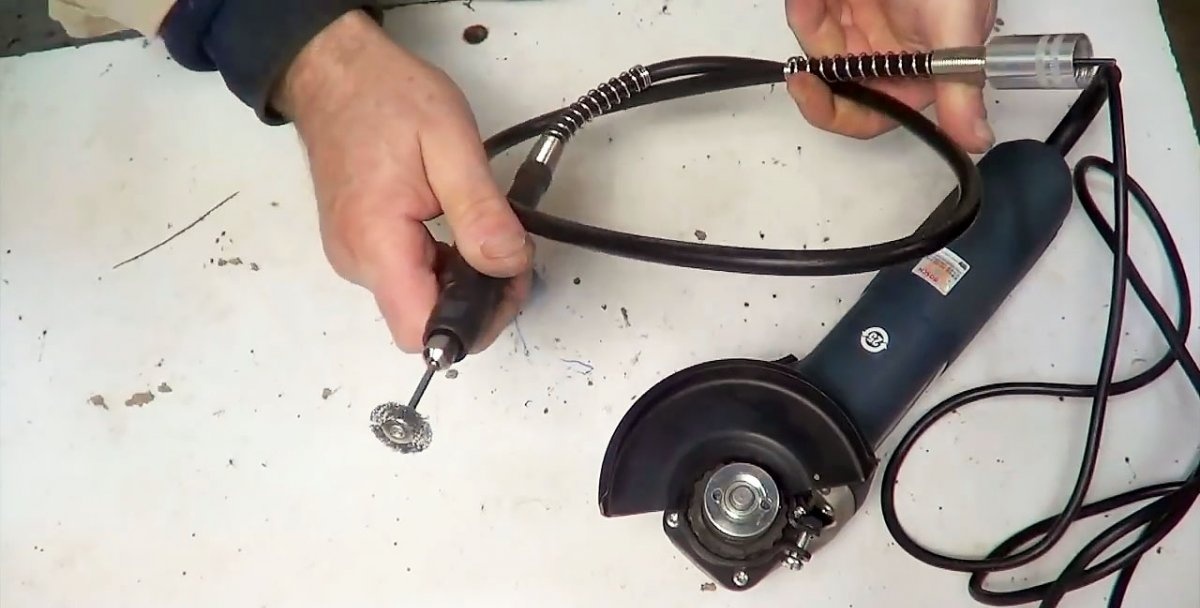
Installation of a flexible shaft on the grinder
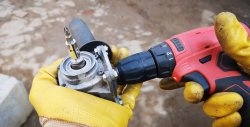
We unscrew the union nut, by which the flexible shaft, together with the braid, is fixed on the body of the dremel. We loosen the shank attachment on the mini-drill spindle with a special key and pull it out.
The main parts of the attachment of the flexible shaft to the new drive will be an elongated hex nut and a bolt corresponding to its thread.

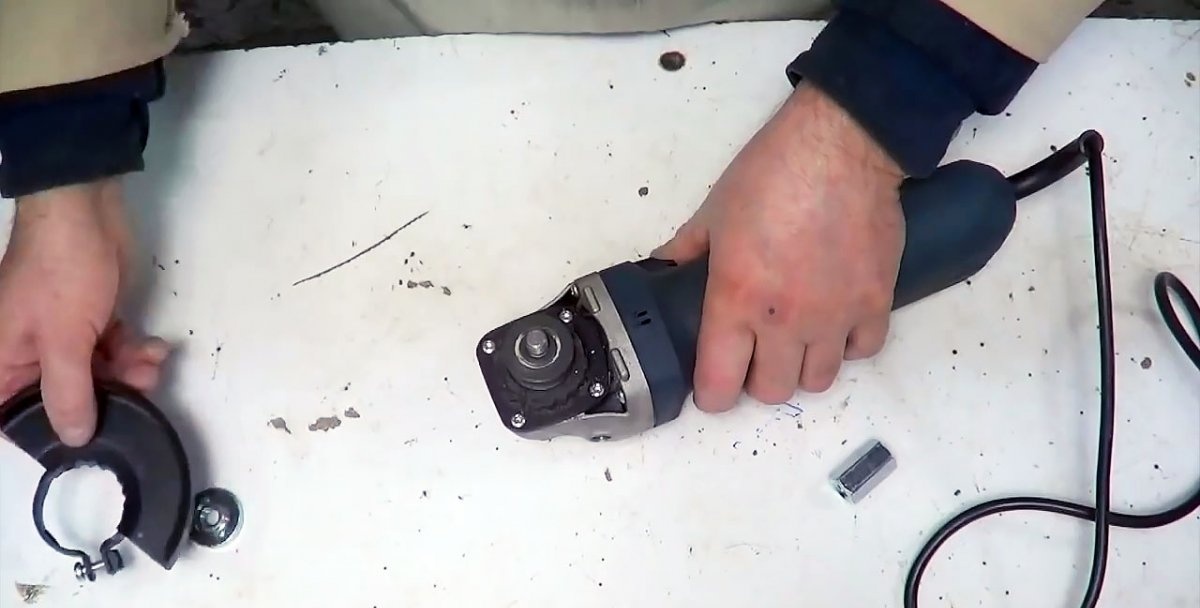
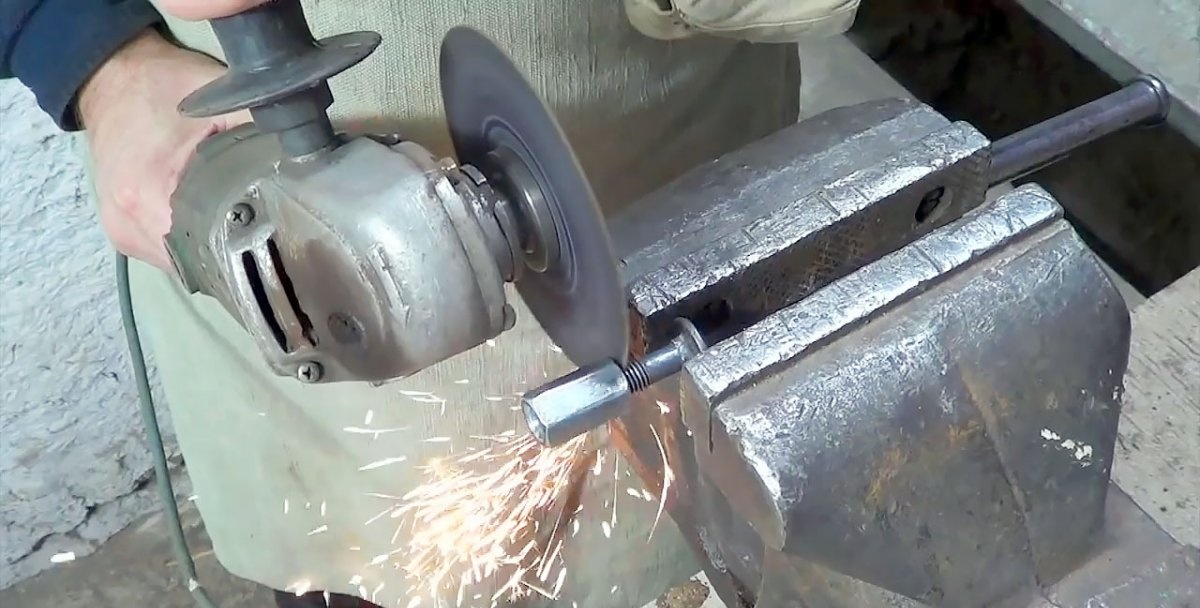
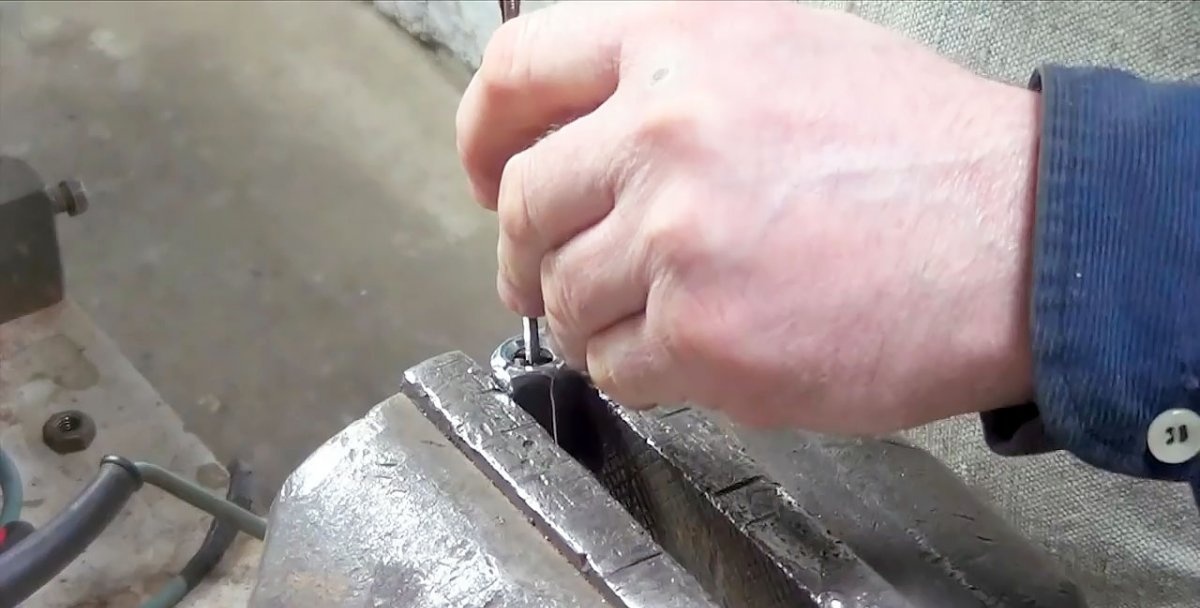
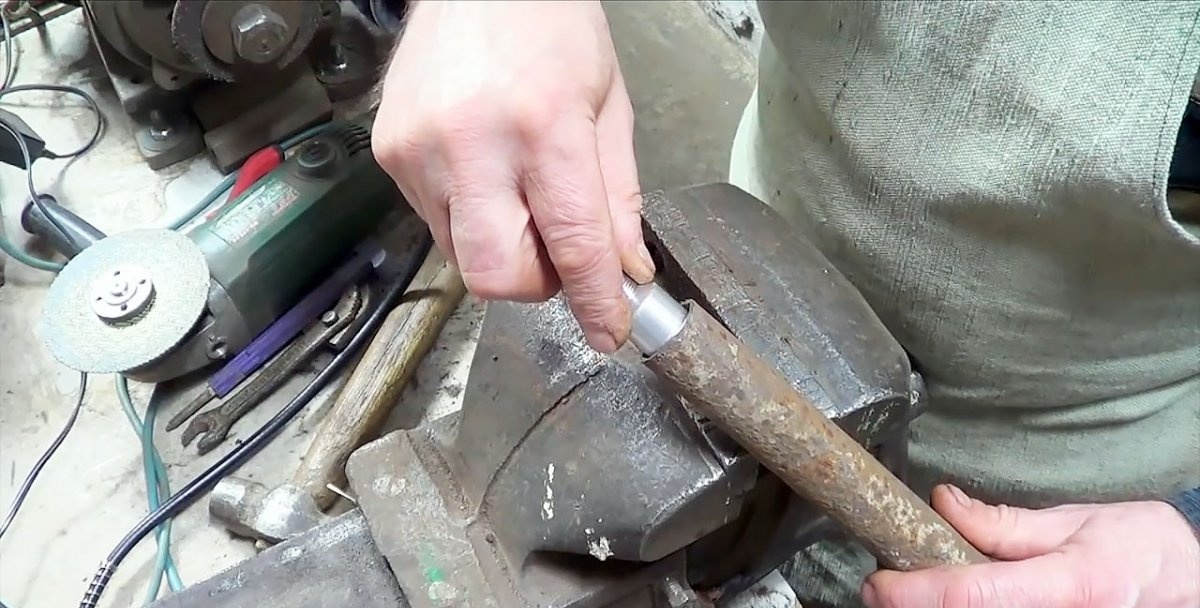
Unscrew the round nut from the angle grinder spindle and remove the protective casing, after loosening the retaining clamp.
Screw the hexagonal elongated nut onto the grinder spindle and screw the bolt into it until it stops.
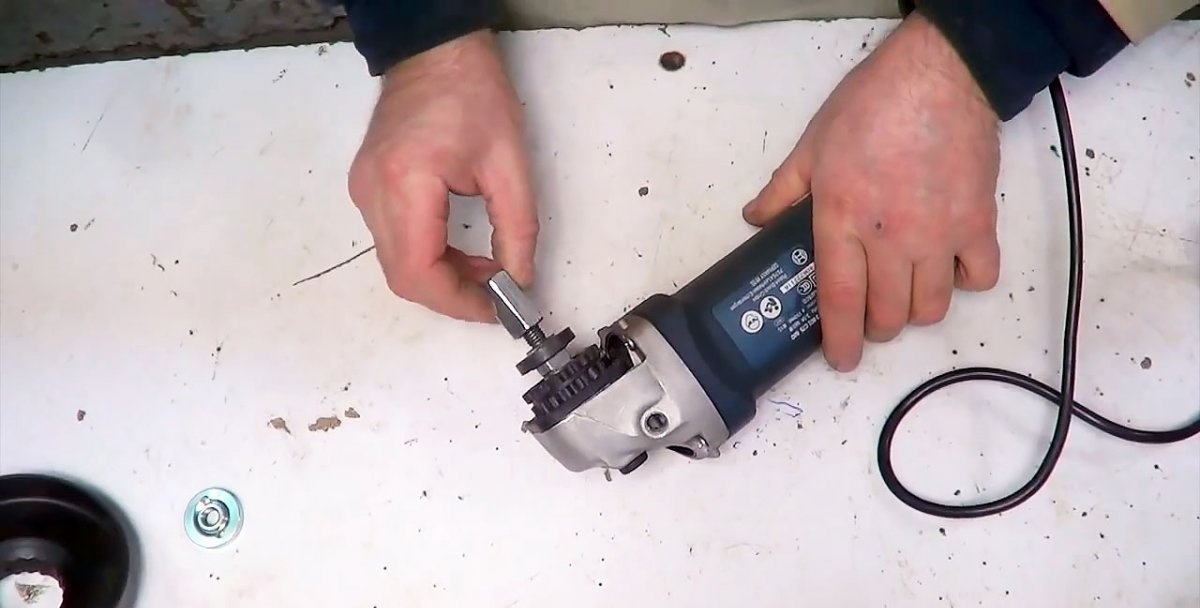

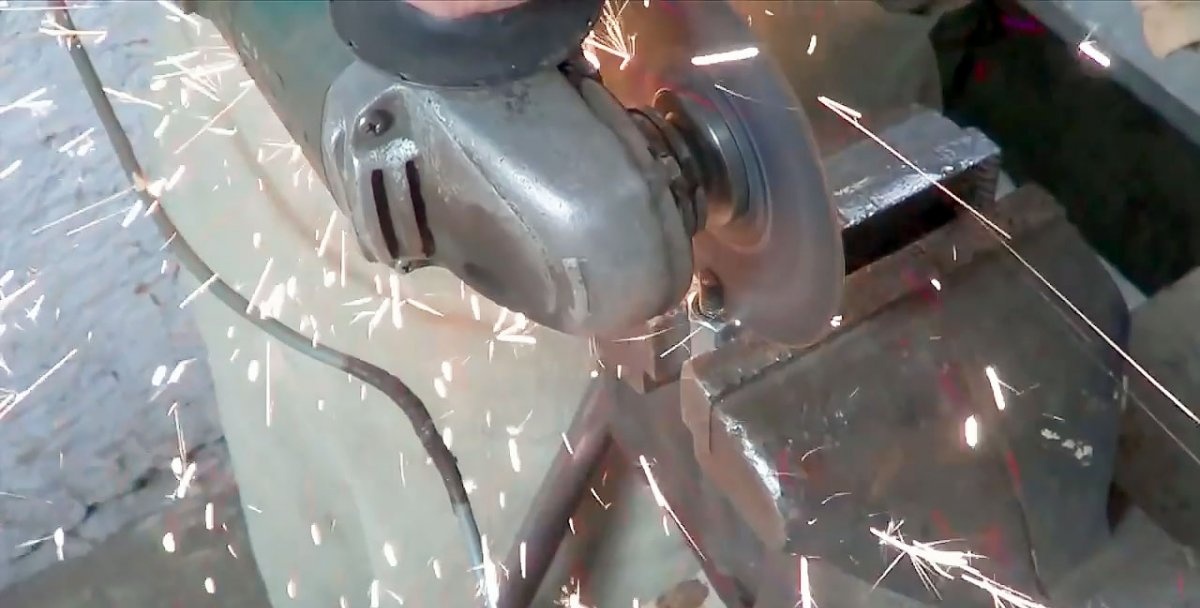
Mark on it the screwing depth with a marker. Clamp the bolt head in a vice and working the angle grinder cut the rod at the marked place and turn the part of the rod remaining in the nut, but not to the end.
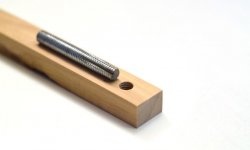
We cut the bolt rod from the end in the longitudinal direction crosswise along the perpendicular diameters. With a flat screwdriver, twist the rod into the nut flush with its upper plane using the slots made.
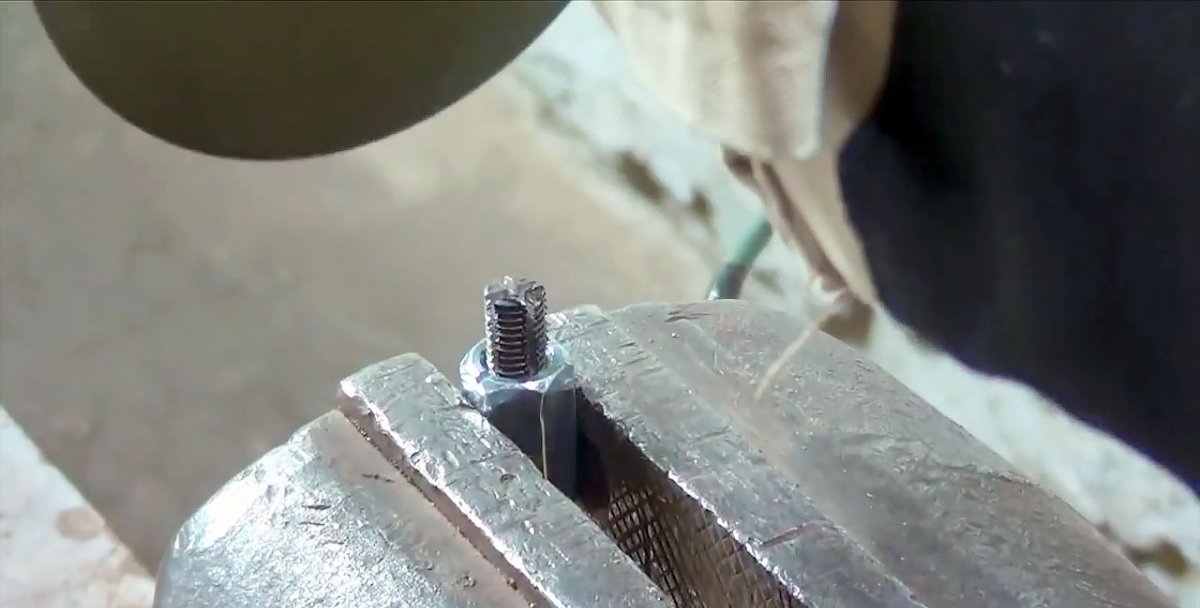
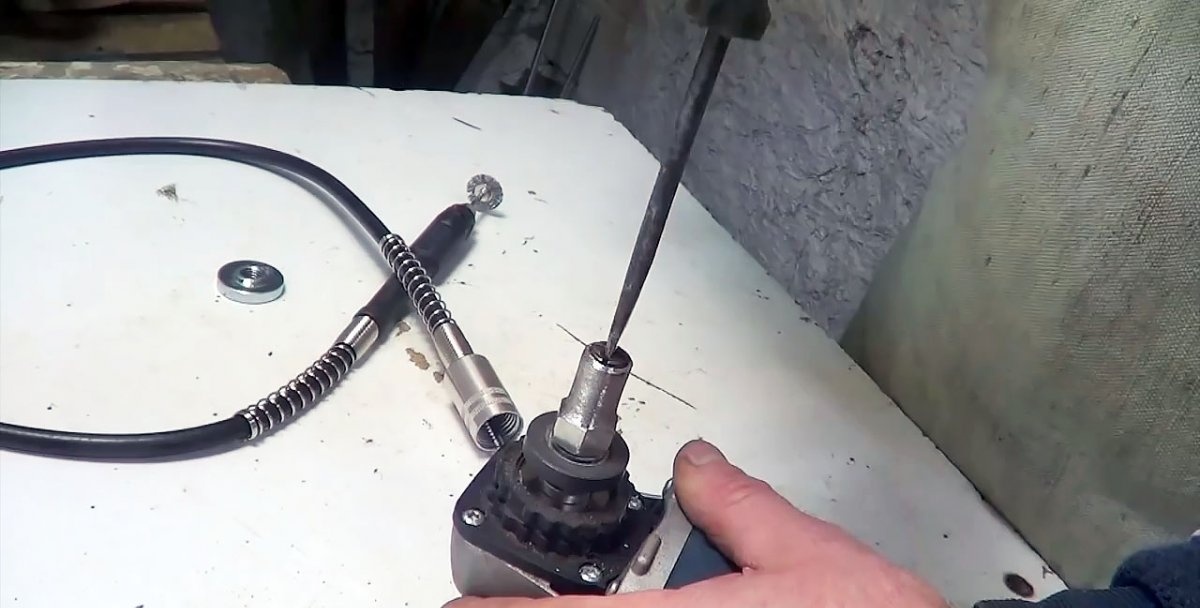
Next, we use a hand tap with a square shank, the dimensions of which correspond to the square of the shank of the flexible shaft, but not for its intended purpose, but quite the opposite.
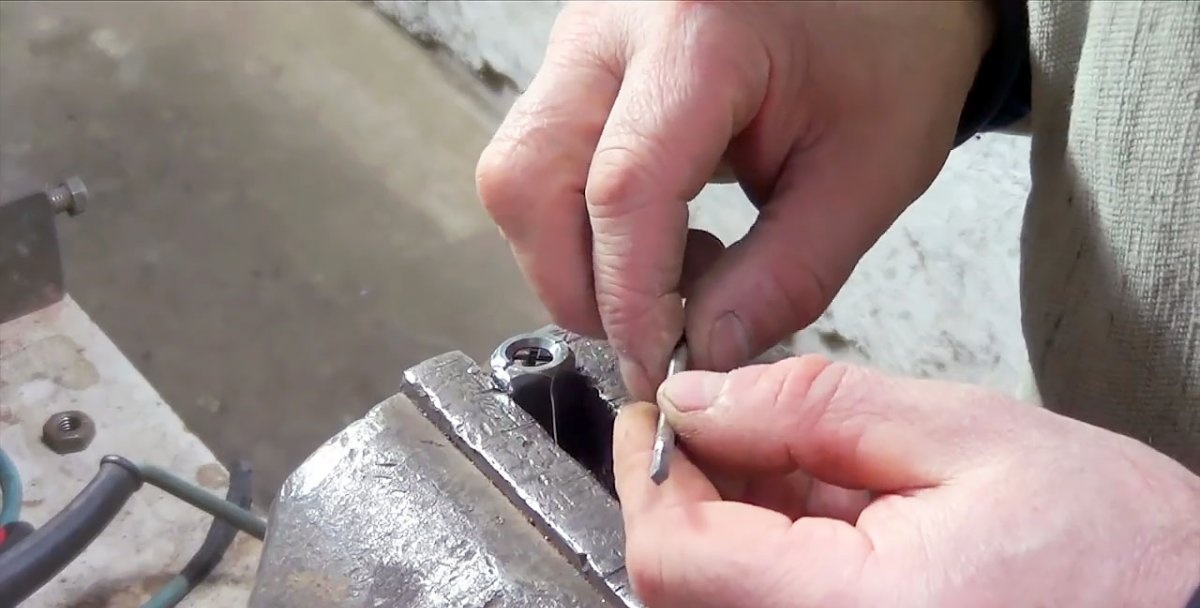
Using a hammer, we drive the tap shank to the point of intersection of the slots on the bolt, then pull it out of the hole using pliers to make a socket for the shaft end of the flexible shaft. We repeat this operation as many times until the required size socket is fully formed.
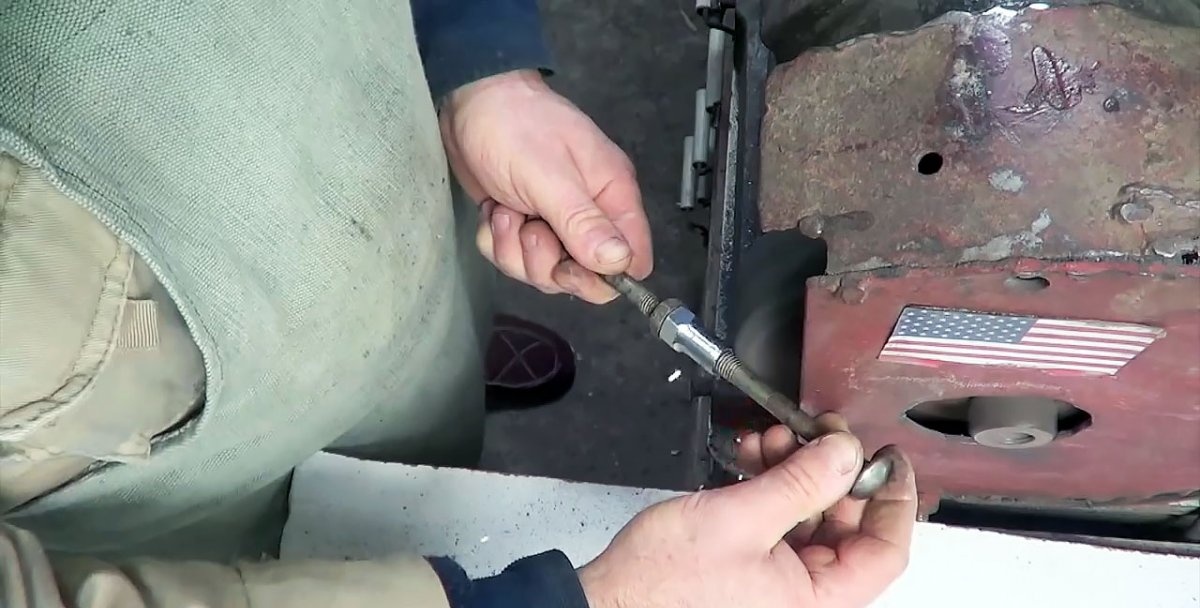
We unscrew with the help of a flat screwdriver the modernized segment of the bolt rod and for now put it aside. Screw the elongated nut tightly onto the grinder spindle and screw the deferred part of the bolt shaft into it again until it stops with a flat screwdriver.
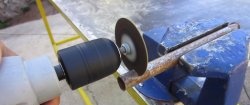
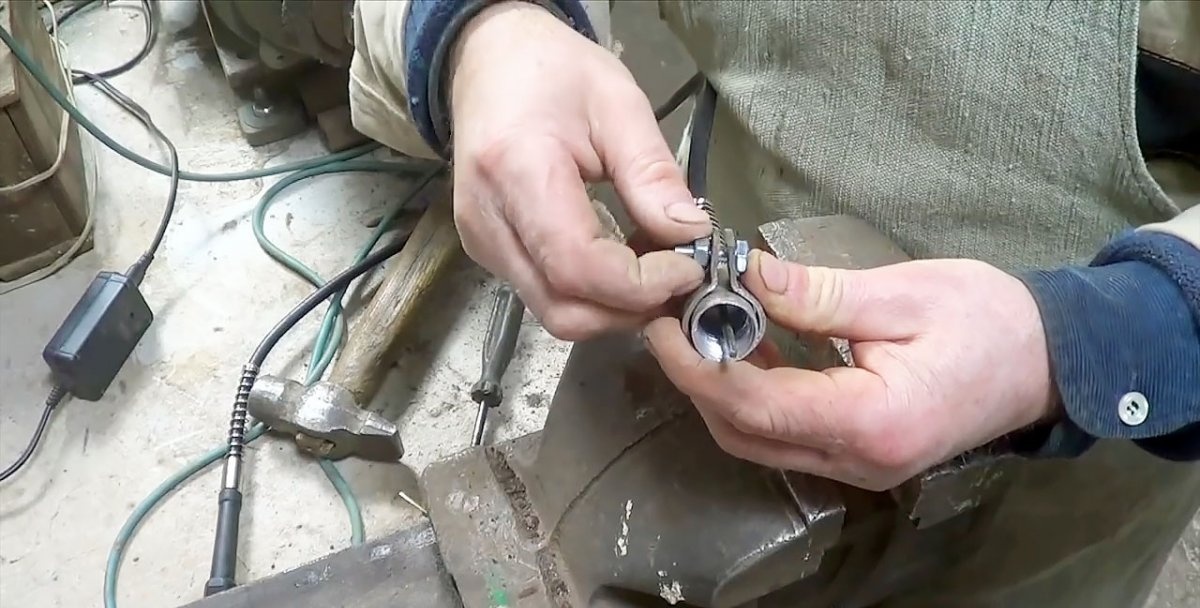
We insert the shank of the flexible shaft into the slot of the bolt rod and make sure that it “sits” there tightly without a noticeable gap. Slide the union nut and note the size of the turning according to the diameter and height of the elongated nut.
We unscrew the nut from the spindle of the angle grinder, unscrew the bolt rod with cross-shaped slots from it, and instead of it we screw the bolts on both sides, for which we will hold this hardware during its processing.
Turning in accordance with the marking is carried out on an emery wheel with a mechanical drive. We make sure that after turning, the union nut of the flexible shaft slides freely over the machined part of the hardware and does not reach the untreated belt.
Screw the modified nut onto the grinder spindle. We screw the shank holder of the flexible shaft into it with the help of a flat screwdriver and try on the shank and union nut again for their “fit” in place.
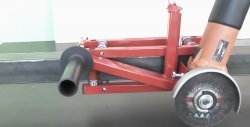
Now it is necessary to firmly and without displacement fix the union nut of the flexible shaft (which, in fact, turned out to be “hanging” in the air) with respect to the base of the angle grinder spindle. This can be done using a rigid frame of two clamps of the corresponding diameters and jumpers between them, interconnected by electric welding.

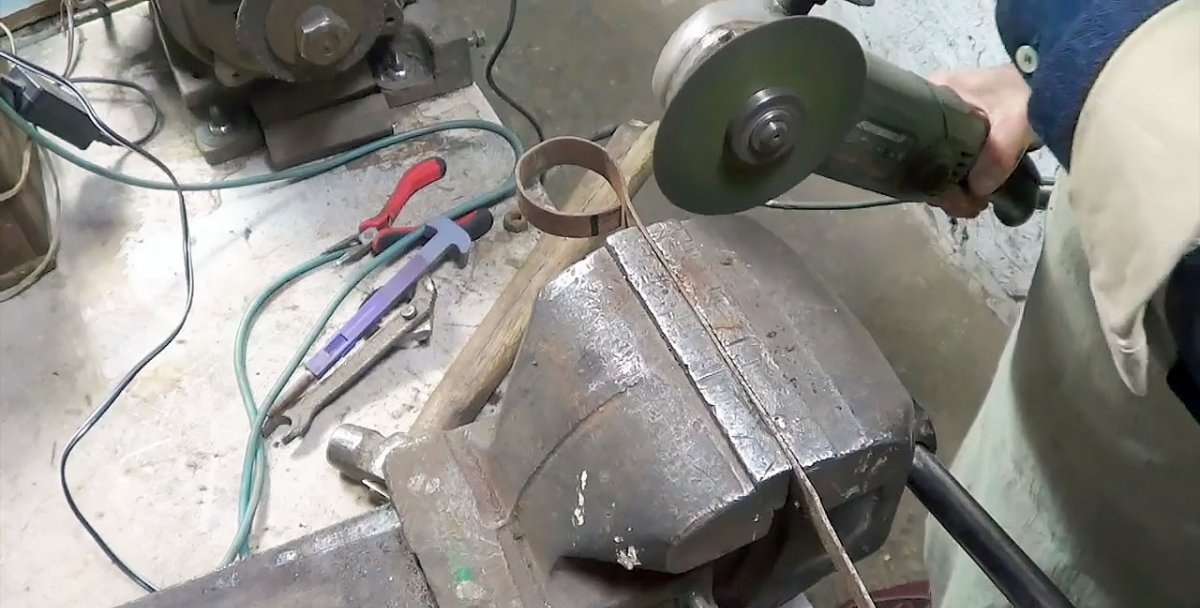
Using a caliper, a metal ruler and a marker, we note on the old metal strip of suitable length the required width sufficient for the manufacture of clamps.
Clamp the marked strip in a bench vise to cut it along the intended line with a working grinder.
We grind the strip of the required width on an emery wheel with a mechanical drive to remove the burrs and complete the planned assembly as accurately as possible.
Using a caliper, measure the diameter of the base of the grinder spindle and select a piece of pipe of the same size that will serve as a template for the manufacture of the corresponding clamp.
We clamp one end of the strip vertically, and the pipe horizontally in a bench vise and, striking the strip with a hammer, bend it around the pipe.
We try on the obtained ring to the base of the spindle of the grinder and mark the places of the bend and the segments, taking into account the length of the "ears" under the bolts for the screed.

Again we clamp the strip in a vise and produce a cut along the marking. Next, we form the "ears", we straighten the bandage with a hammer to give it a cylindrical shape. For reliability, we again try on an almost finished bandage with ears to the base of the angle grinder and make sure that it matches the intended place.

We select a template pipe for the manufacture of a girth piece for a flare nut of a flexible shaft, and in the same way as in the previous case, we form it using hand force, a hammer, a vice, a marker, a working grinder and pliers.
We make sure that the clamp is suitable in size and shape to the corresponding part of the flexible shaft, after which we outline a place for drilling holes for the coupling bolt.

We install the finished clamps in their places, like the shank of the flexible shaft. Tighten the clamping bolts on the clamps to their complete immobility.
We attach a metal strip to them, we mark out the places of bending and segments. Using a working angle grinder we cut two pieces of the required length.

Then we bend them in accordance with the diameters of the joined bandages and carry out the final fitting, applying already curved strips to the clamps and marking the welding spots.
First, on the marks we weld the strips to the bandage of a larger diameter from the outer sides opposite to each other and symmetrically with respect to the "ears".
Then we clamp in a vise between the two free ends of the strips a smaller clamp and we also connect them using welds.

After welding is completed, we process the seams on an emery wheel with a mechanical drive, on the one hand, for safe work in the future, on the other, to give the product aesthetics.
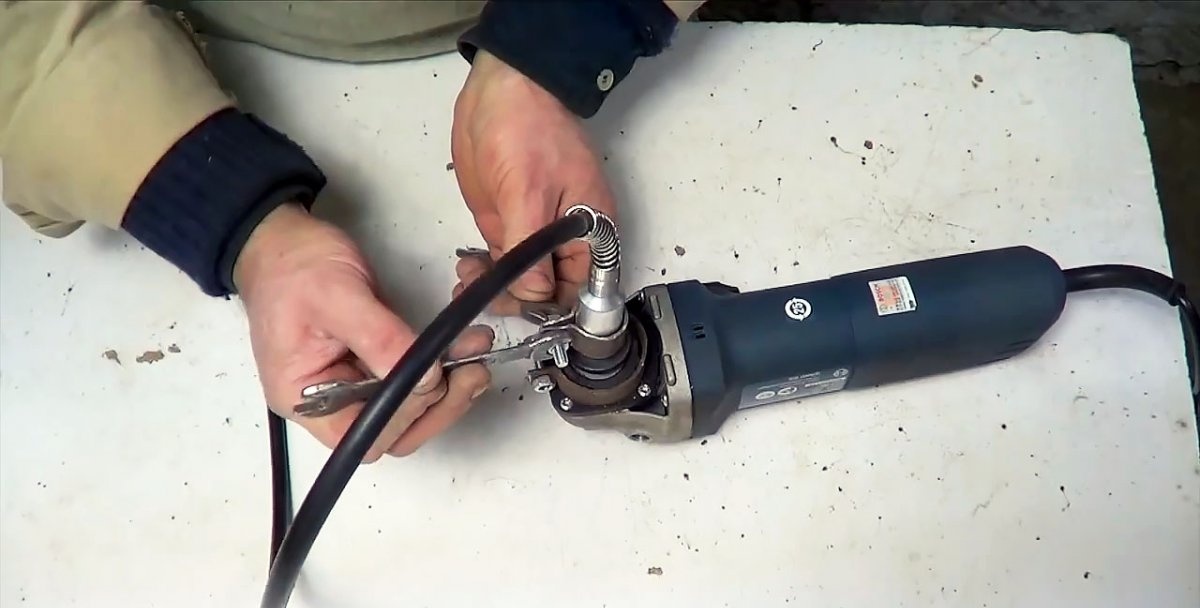
It remains to install our frame in its place, first reliably securing the clamp on the base of the Bulgarian spindle by tightening the coupling bolt with wrenches.
Then, in the cross-sectional view of the threaded insert, install the shank of the flexible shaft, push the union nut and, finally, tighten the clamp on the union hardware with the keys.
Result
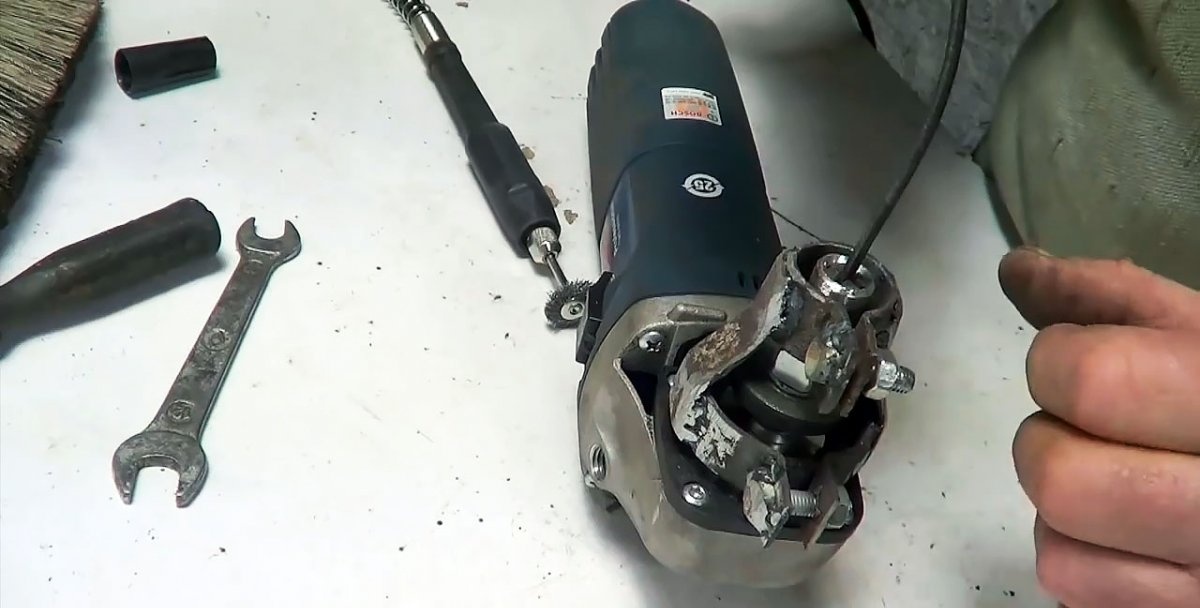
Once again, making sure that the clamps are firmly and reliably fixed in place, we turn on the Bulgarian drive and see how the working body at the end of the flexible shaft came into rotation. Our work has been successfully completed.

The resulting tool can now be used for processing both wooden and metal blanks and parts.