Thermal energy can be obtained by rotating one part while the second is stationary, or rotating in the opposite direction. Moreover, the parts must simultaneously be pressed against each other with a constant or increasing force from beginning to end. The process ends with upsetting and rapid stopping of the rotating part.
In comparison, say, with electric butt welding, the process based on friction has a number of operational advantages:
- energy costs are greatly reduced;
- the welded joint is always reliable, since it depends only on the thermophysical characteristics of the products being welded;
- no special preparation is needed for the joint to be connected, since scale, rust, grease and grease burn out or are squeezed out into a flash at the beginning of the process;
- the quality of the connection is not affected even by violation of the parallelism of the workpieces up to angles of 6±1 degrees;
- absence of negative factors in the form of ultraviolet radiation and harmful gas emissions;
- simplicity of technological equipment, easily amenable to routine maintenance, mechanization and automation.
Friction welding process on a lathe
Welding steel rods
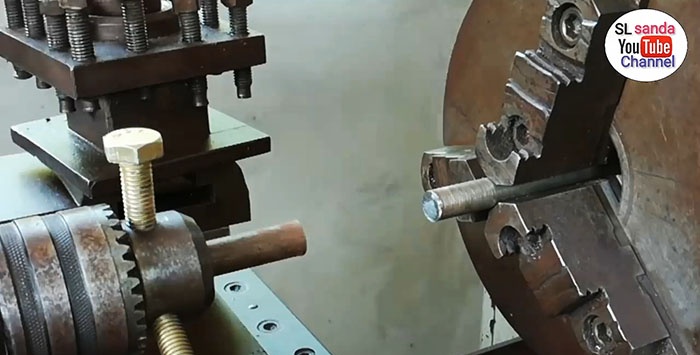
In the chuck and headstock of the machine we clamp a metal rod, the diameter of which should be more than 3.5 mm, but less than 200 mm. They can be both steel, aluminum, copper, bronze or different metals:
- steel and aluminum;
- steel and copper;
- aluminum and bronze, etc.
Combinations of materials can be very different, even those that cannot be welded in the usual way. There are no restrictions in this regard for friction welding.
In our case, we secure the rod in the headstock using three bolts screwed into the holes of the chuck, evenly spaced around the circumference at 120 degrees. With their help, we carry out alignment relative to the rod clamped in the chuck by tightening or loosening one or another bolt.
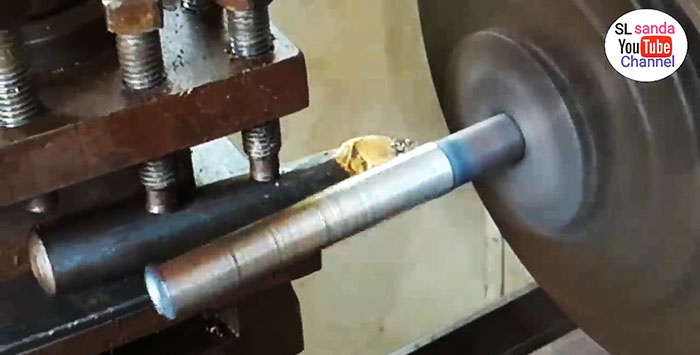
We bring the headstock until the rods stop end to end and fasten it or hold it by hand in order to increase the clamping force during the welding process, which is required by the technology of this welding method.
We turn on the machine, as a result of which the rod clamped in the machine chuck begins to rotate. In our case, the rod fixed in the headstock is motionless, but in principle it can rotate in the opposite direction, which would reduce the process time.
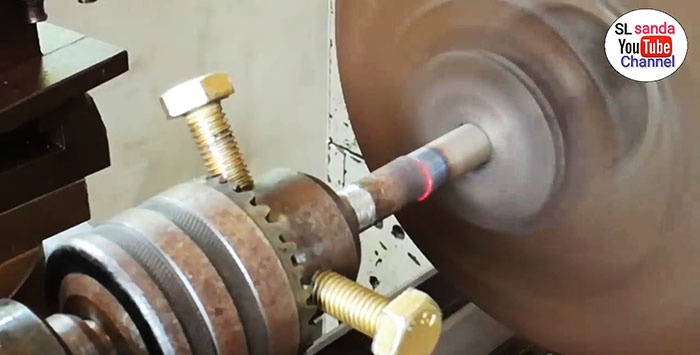
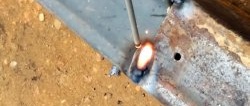
We will soon see tarnished colors starting at the point of contact of the rods and spreading along them in opposite directions, which is a direct sign of the rapid heating of the metal as a result of friction.
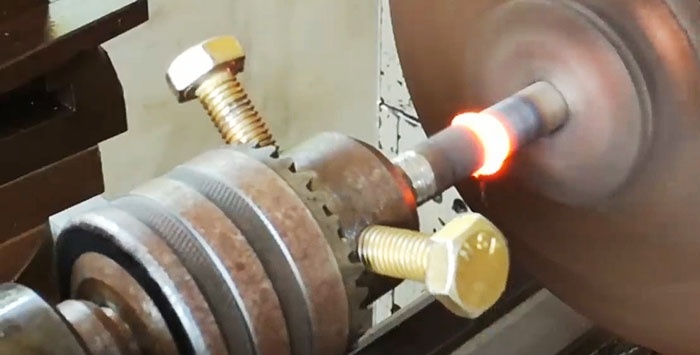
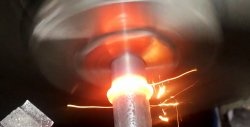
After another short time, the metal in the contact zone will glow brightly and begin to be squeezed out in the form of a ring formation beyond the dimensions of the rods.This ring will also contain burr: scale, unburnt grease, solid non-metallic inclusions, etc.
At the moment of the brightest glow at the contact point, the machine must be turned off sharply so that the metal of the two rods sets. At the same time, if the headstock has not been secured, it is necessary to gradually increase the pressure on it in order to compensate for the volume of displaced metal in the contact zone and obtain a stronger and higher-quality connection.
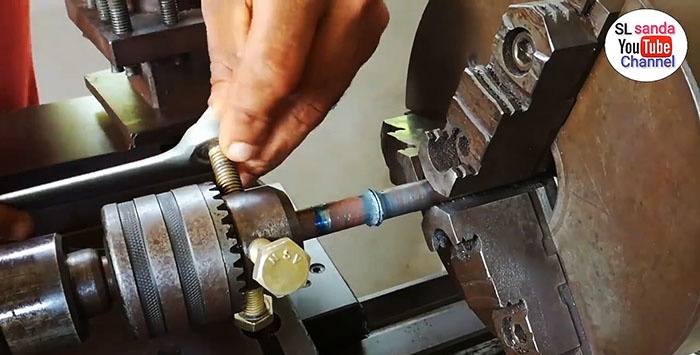
After waiting until the glow stops (and this is a sign that the metal has completely set), you can loosen the fastening bolts and remove the headstock. Now all that remains is to check the quality of friction welding.
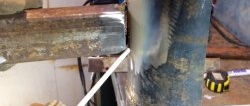
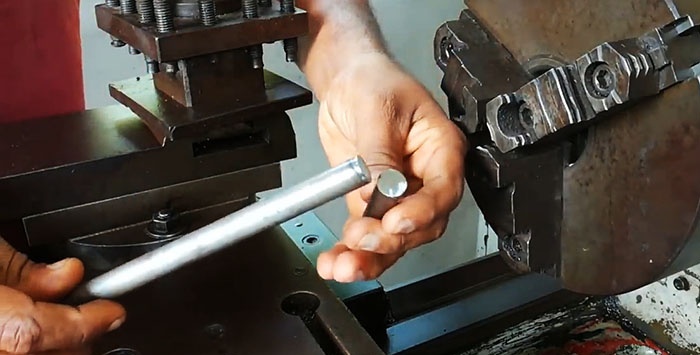
To do this, turn on the machine again and detect a slight runout of the welded rod - a consequence of inaccurate alignment during installation at the beginning. This defect can be eliminated by turning and removing the extruded burr in the contact area.
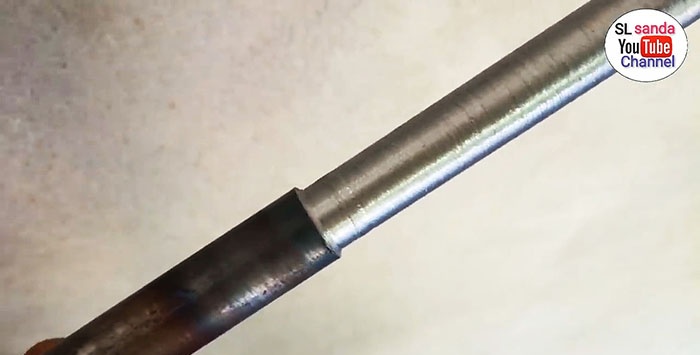
A deeper penetration of the metal shows that no features are visible in the welding area of the two rods. It seems that this is not the point of contact between two rods, but the body of one of them.
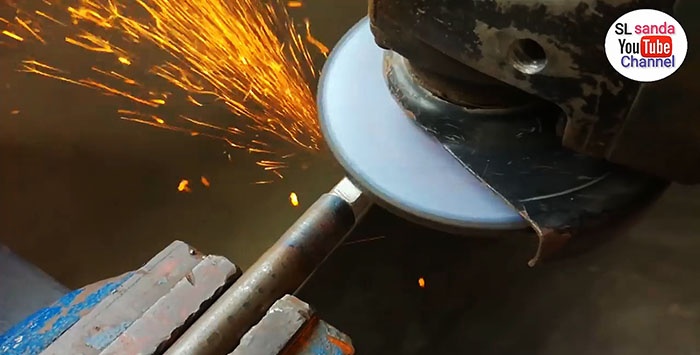
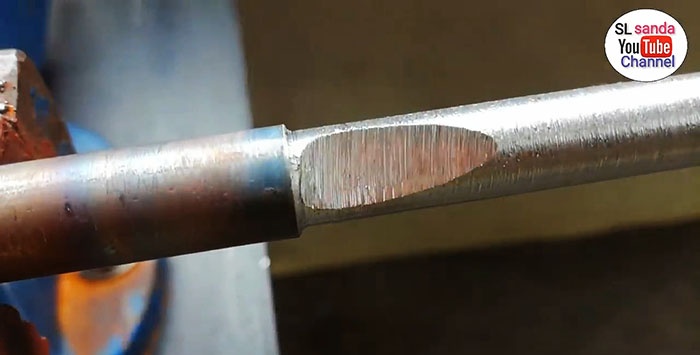
We carry out the following quality control of friction welding. We clamp the rods connected in this way in a vice and use a grinder disk to create a “shelf” in the contact zone, and again we are convinced of the homogeneity of the metal, which also indicates the quality of the welding.
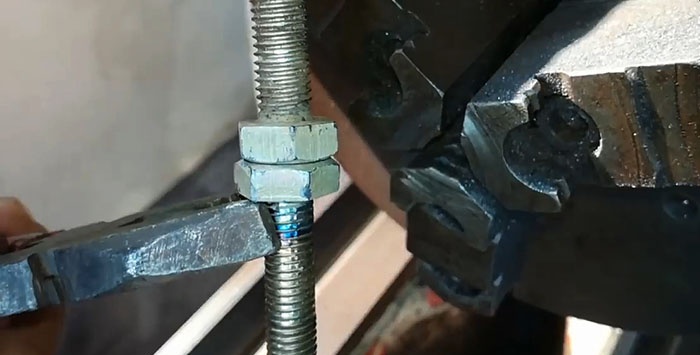
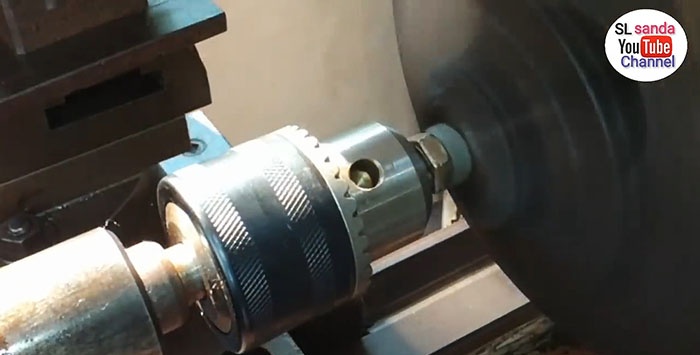
Bolt connection
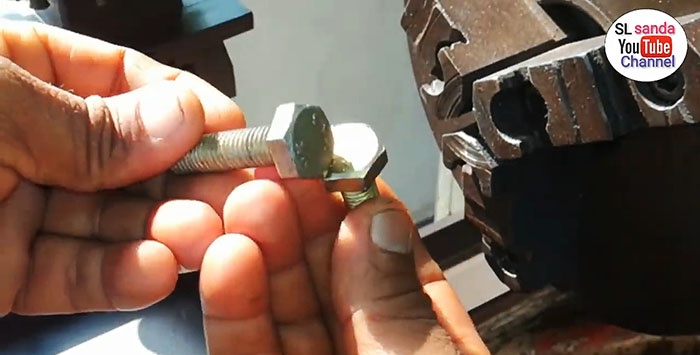
Friction welding can be used to join mass-produced heads and bolts. The process is no different from the process with rods: one bolt is clamped into the machine chuck, the other into the headstock.
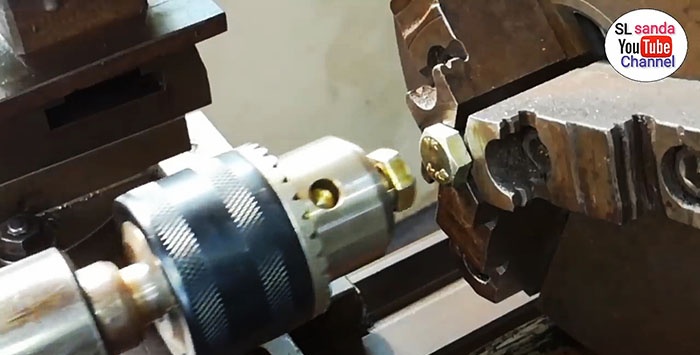
With the help of the latter, the bolts are brought into contact with the heads, and the machine is started. It is also necessary to increase the clamping force and catch the moment of welding in order to turn off the drive in time.
Friction welding can be used to join materials that are difficult or impossible to weld with other types: steel and aluminum, austenitic steels and pearlitic ones. It can also be used to easily join plastic workpieces.
Calculations and practice using friction joining demonstrate that this method is better suited for workpieces whose diameter lies in the range of 6-100 mm. Welding rods with a diameter greater than 200 mm is not economically profitable, since the process will require more power (0.5 thousand kW) and axial force (3 × 10⁶ N). It will not be possible to connect rods with a diameter of less than 3.5 mm using this method due to the need to provide high speeds (200 rpm) and the difficulty of determining when to turn off the drive.