Among detachable connections, threaded connections are especially common. If necessary, they allow you to disassemble the assembly into parts without damage, and then reassemble them together. For this reason, various thread-cutting devices are designed and produced in large numbers, both by industry and by numerous craftsmen.
Below we consider a variant of a thread-cutting machine based on an electric motor and, mounted on its axis, a frictional unregulated drive in the form of a rubberized sleeve.
Essential Accessories
In order not to be distracted from work, you should purchase, find and prepare:
- two ferrous metal plates measuring 150 × 120 × 20 mm with a hole in the center from the top with a diameter of 30 mm;
- two steel disks with a diameter of 200 mm, a thickness of 10 mm with a one-sided hub with an outer diameter of 40 mm and an internal hole of 25+ mm with three radial holes with M8 thread;
- two copper or brass bushings with an outer and inner diameter of 30+ mm and 25+ mm, respectively, for pressing into the holes of the plates 150 × 120 × 20 mm;
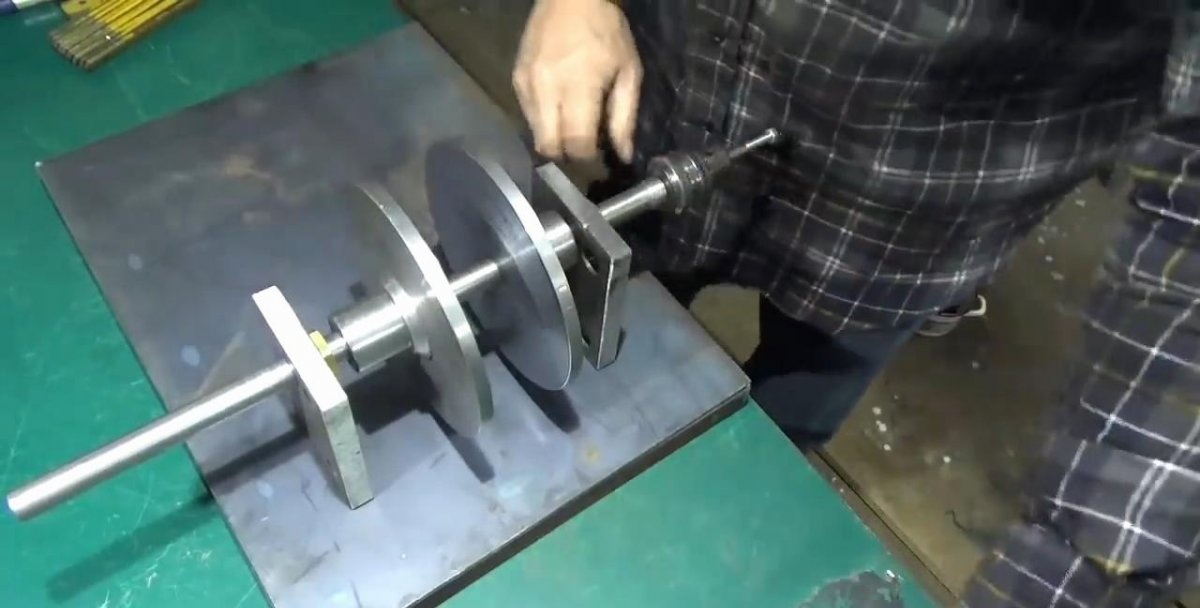
- billet for the main axis made of steel with a length of 400 m and a diameter of 25+ mm after turning;
- two pieces of pipe 100 mm long and with a diameter: external - 40 mm, internal - 25+ mm;
- two steel rods 300 mm long and 25 mm in diameter (final size) with a blind hole at one end with M10 thread;
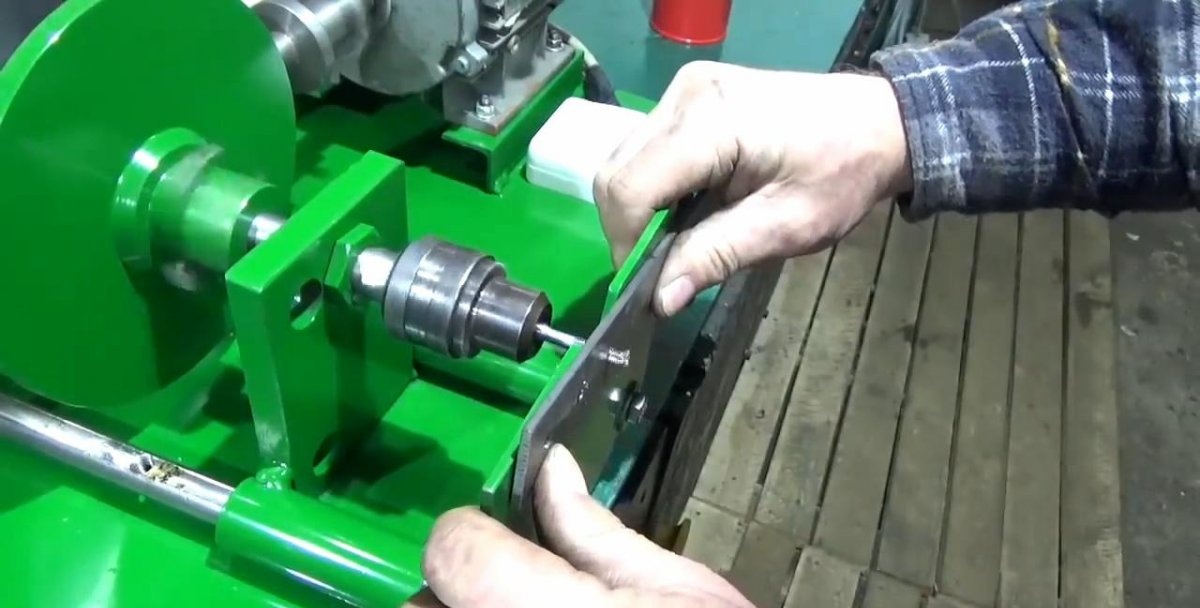
- one steel plate with a width of 180 mm, a height of 150 mm, a thickness of 8 mm with a triangular recess in the center at the top for the tap to exit and two holes along the edges from below for M10 bolts;
- two steel corners 35 × 35 mm 150 mm long with two holes at the edges under the M8 bolt;
- two steel corners 35 × 35 mm 500 mm long with beveled ends at 45 °;
- the same length is 400 mm;
- steel sheet 500 × 400 × 3 mm in size;
- motor switch;
- chuck collet chuck from an electric drill;
- hardware (bolts, nuts, washers on M8 and M10).
Equipment and tools
To prepare the parts and assembly of the threading machine, we need:
- lathe;
- grinder;
- vice is metalwork;
- welding machine;
- wrenches;
- punch and hammer;
- oiler with lubricating oil;
- liquid for degreasing surfaces;
- paint;
- spray gun, etc.
The process of preparing parts and assembling the machine
Some parts are fully ready for assembly, others still require some refinement.
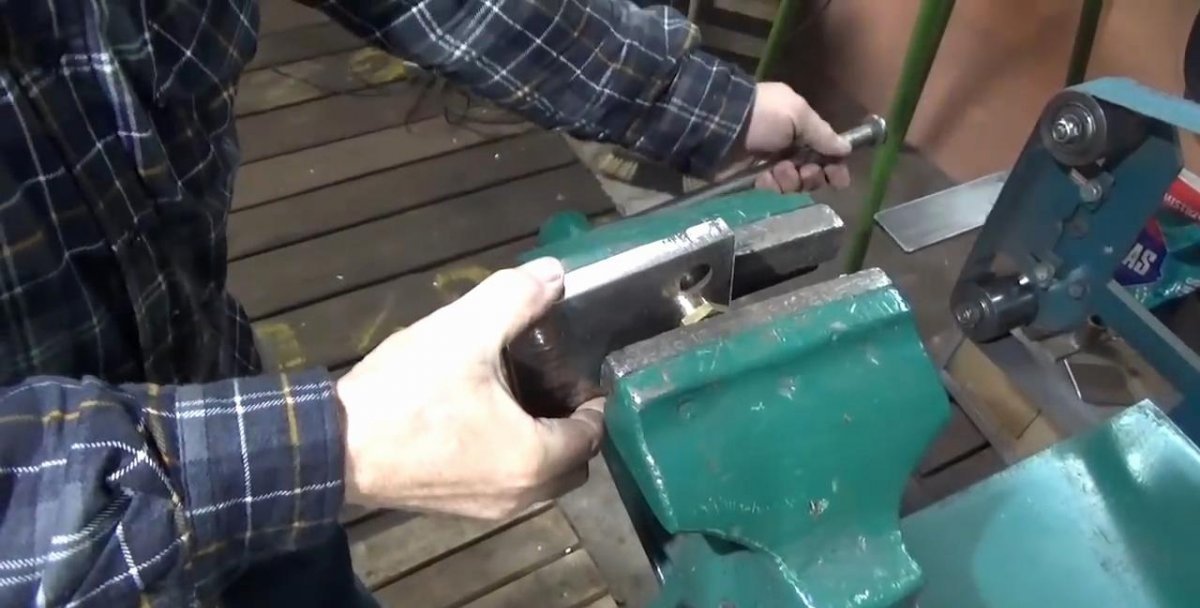
1. On the grinder, we finally finish (remove burrs, round and grind) all the faces and surfaces of the plates 150 × 120 × 20 mm, which will perform the main power function in the machine, giving constancy to size and the necessary rigidity of the system as a whole.
2. We clamp the copper bushings into the lathe chuck and adjust the bore diameter to a size that is guaranteed to secure them with an interference fit in the holes intended for them.
3. We press in the bushings using a bench vise, ensuring that they are fully seated in the holes intended for them, until the shoulders of the bushings abut against the surface of the plates.
4. Set the workpiece for the main axis of the machine on the lathe.To ensure the minimum radial runout of the workpiece during turning, we remove the back support of the lathe and temporarily put a chuck with a center drill in its place and, turning on the machine, we make a recess at the end of the workpiece for the back support of the lathe.
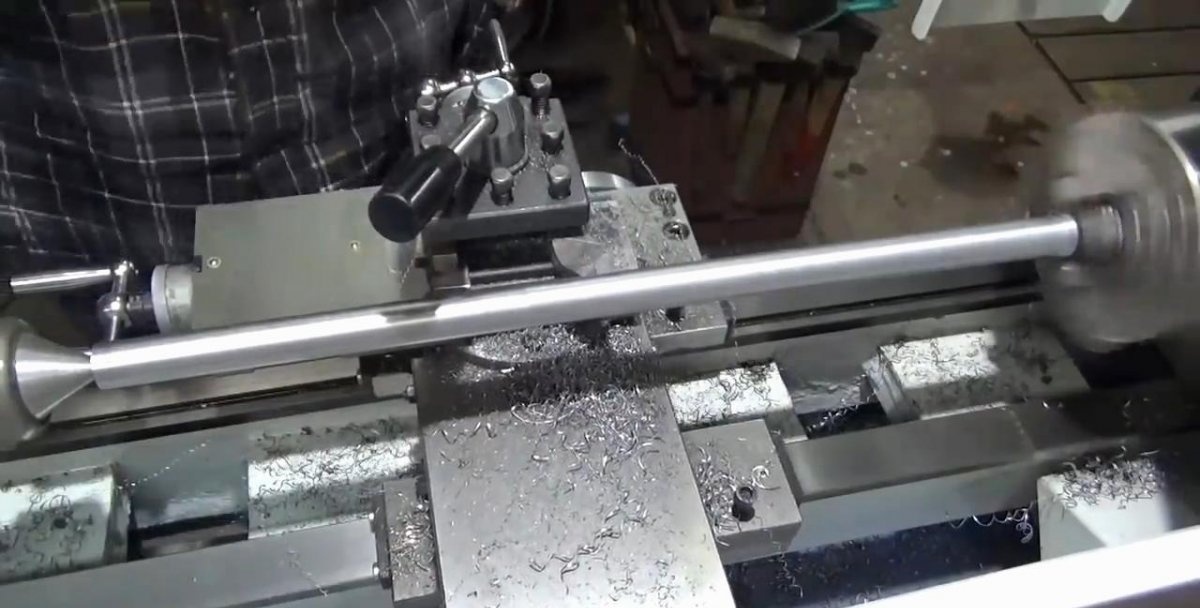
5. We make the external turning of the workpiece by controlling the diameter with a caliper so as not to weaken the future main axis. Having achieved a given size, we check the free sliding of the axis along the sleeve of the power support of the threading machine. If it is insufficient, turn on the lathe and grind the sleeve to the axis.
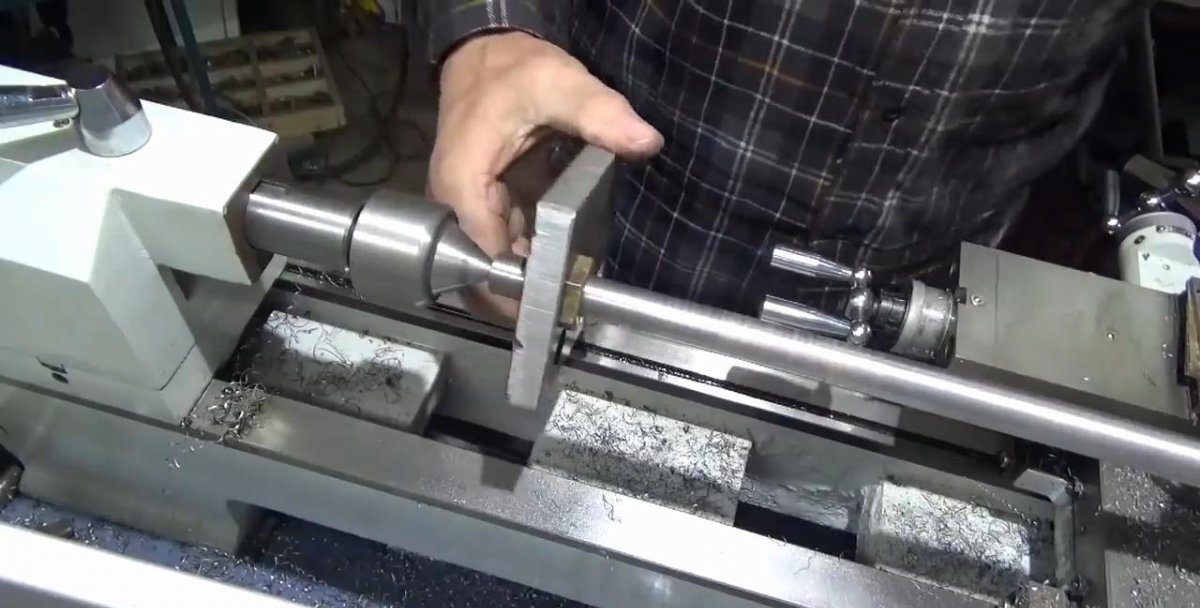
6. We grind the working end of the axis under the seat of the collet cartridge, degrease it with the appropriate fluid and fix the cartridge.

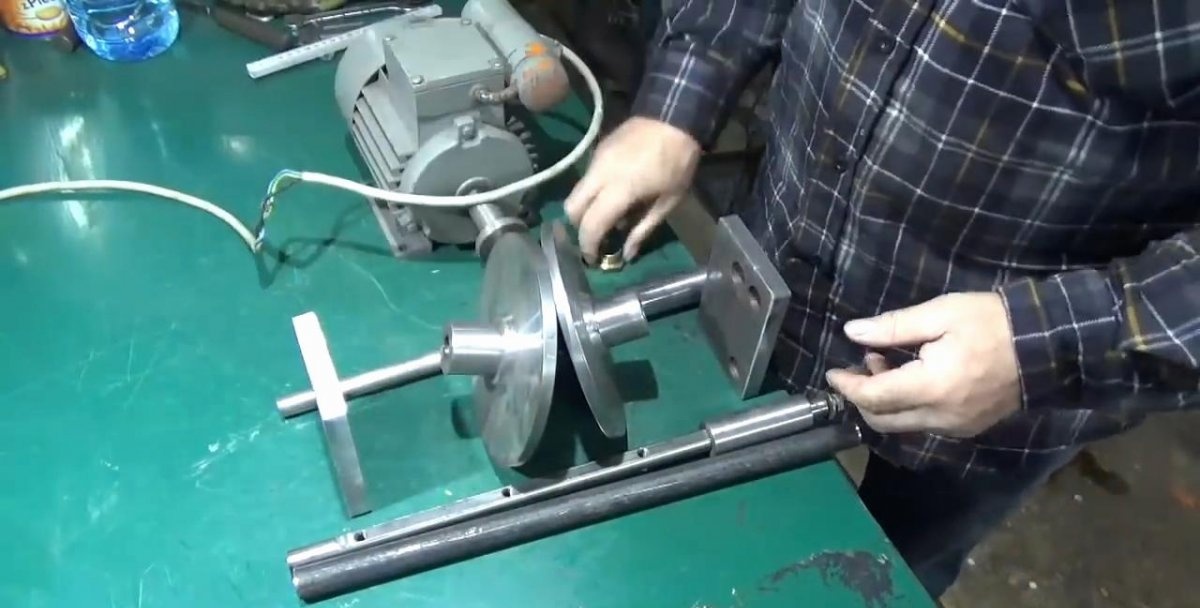
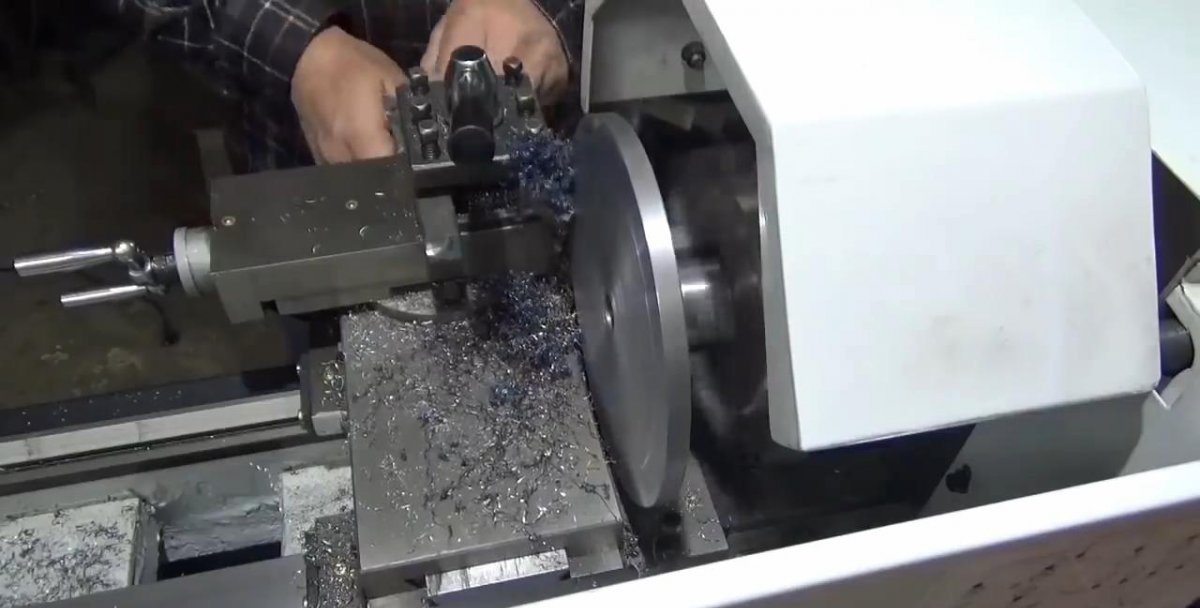
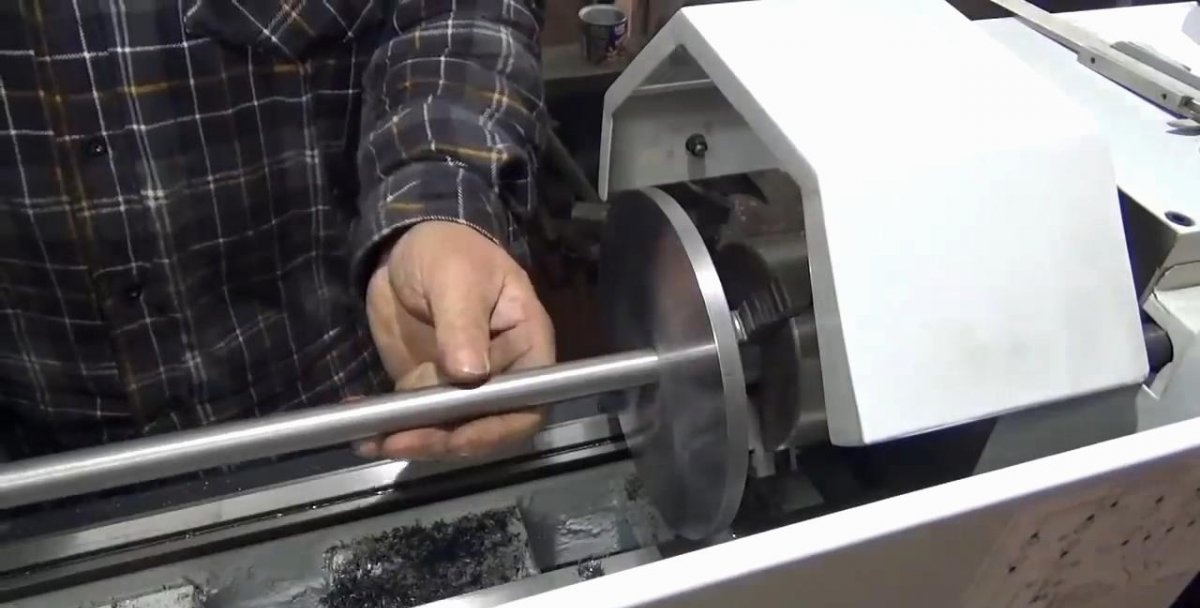
7. We align the surface of the disks that will interact with the rubberized drive bush with a turning on the lathe and achieve the required hole diameter in the hub. We check the accuracy by inserting the axis and turning it with simultaneous axial movement. These movements must be performed without jamming or jamming.
8. Along the perimeter of the base of the machine we lay corners, join them in the corners and weld between each other and to the base sheet.

9. On one edge of the base we install the main axis with two supports, between which are two driven discs for working and idling. We try on guides with tubes and an electric motor with a friction (rubberized) bush mounted on its axis.
10. Once again we check the correctness and accuracy of the layout and with the help of a welding machine we weld the power bearings of the main axis to the base of the machine. After that, we once again check the freedom of rotation of the axis in the supports and its progress back and forth.
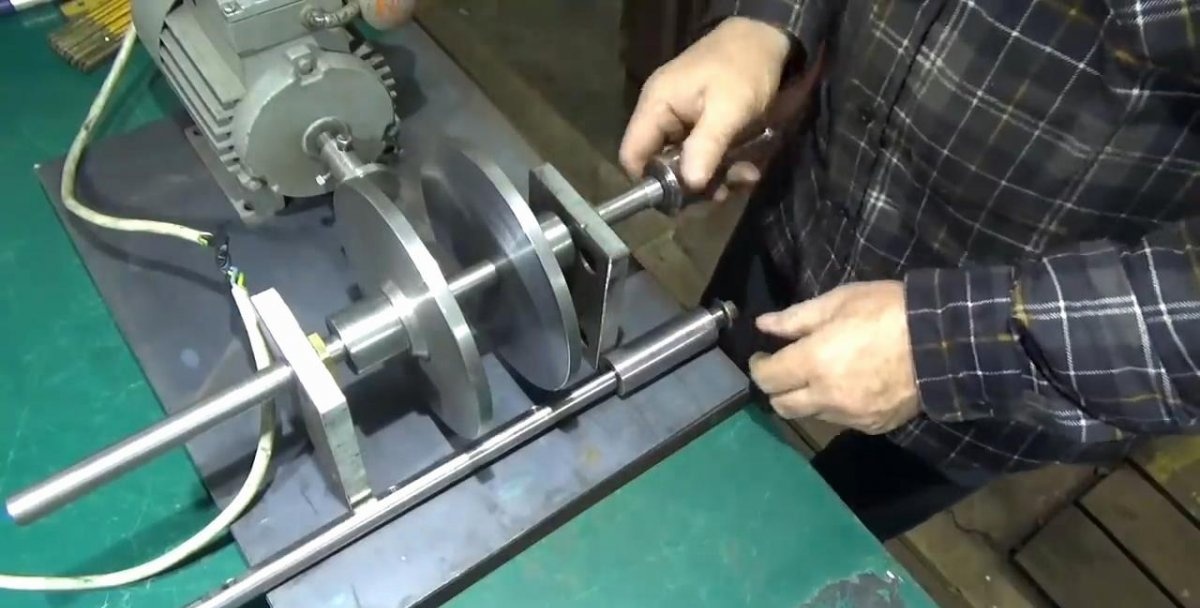
11. On the outside of the front power support at the interface with the base flush with its front edge, we weld cylindrical guides along which the guide rods will move.

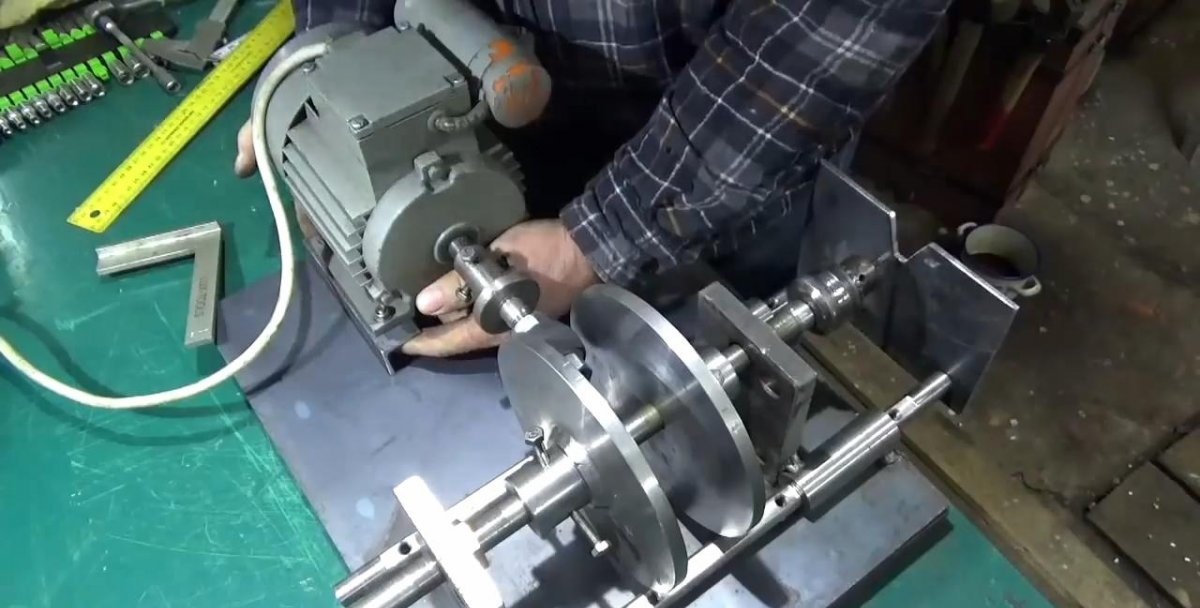
12. We mark the shelves of the corners for the electric motor, mark the place of the holes for mounting the motor with a center punch and drill them under the M8 bolts. We install the corners with the engine mounted on them, verify the installation accuracy (perpendicularity of the motor axis to the main axis of the machine) and weld the corners to the base.
13. Then we again disassemble the layout of the machine and paint the parts, excluding interacting with each other (axis, bushings, guides, working surfaces of the disks, etc.). Let the paint dry and proceed to the final assembly of the machine, lubricating the friction surfaces with machine oil.
14. We fix the electric motor in a calibrated place, install the guides in place. We fasten a panel with a slot for a tap to their front ends. Tighten the disc mounting bolts to the main axis from the longitudinal displacement, slightly pressing them to the leading friction sleeve.
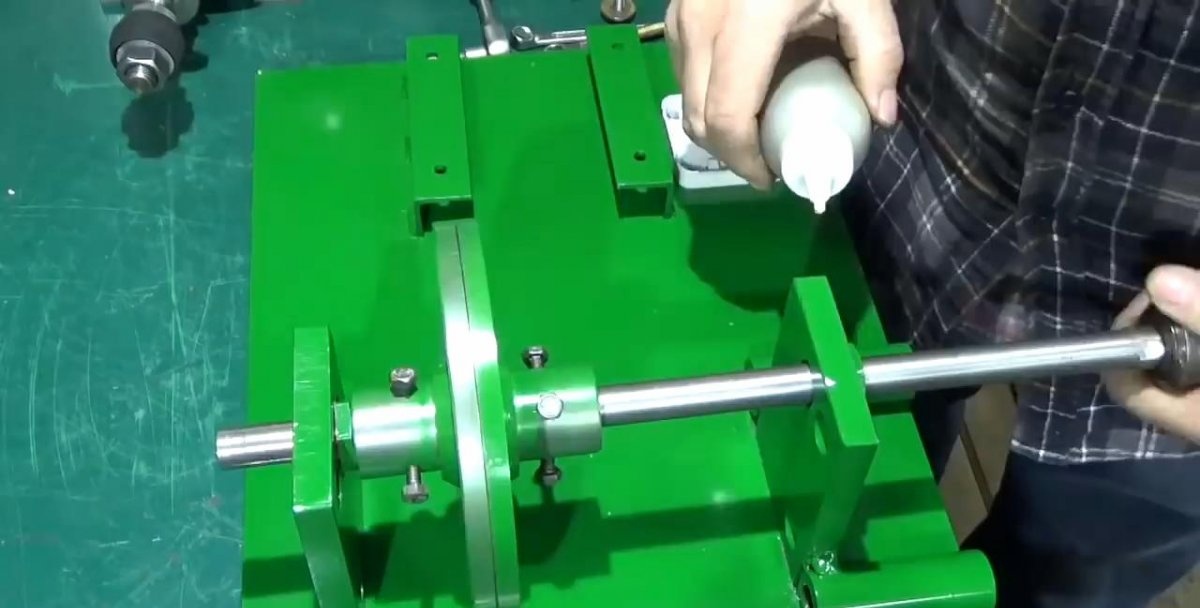

15. Assemble and close the cover of the motor switch. The threading machine is fully operational.

16. We check its performance by alternately cutting the threads in the holes for M5, M6 and M8, pre-lubricating the taps. When pressing on the supporting surface with the part in which the thread is drilled, the tool rotates to the right and cuts the thread. When pulling a part with a threaded thread, the tap starts to rotate to the left and disengages from the resulting thread.


Watch the detailed video
See the detailed video tutorial on making a threading machine with your own hands.