Do it yourself
Life hacks, master classes, useful tips, recipes.
home » Different » Crafts » Wood crafts » Assembling a chisel with an electric drive from a drill
Assembling an electric chisel from a drill

There was a need to process a large piece of wood, for example, to create a sculpture for the garden or a chair from a stump.
With a regular chisel, all this will take months to do. A branded instrument is not cheap, you have to go somewhere and buy it. After the work is completed, it will lie uselessly and gather dust for years.
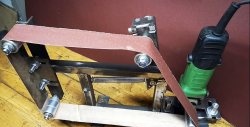
But in a home workshop, you can make the necessary tool yourself. If you have a medium-power drill, welding, emery and a grinder with a cutting disc, then go ahead and get to work!
Assembling an electric chisel from a drill

Let's start making an electric chisel


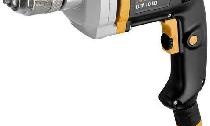
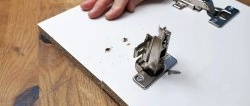
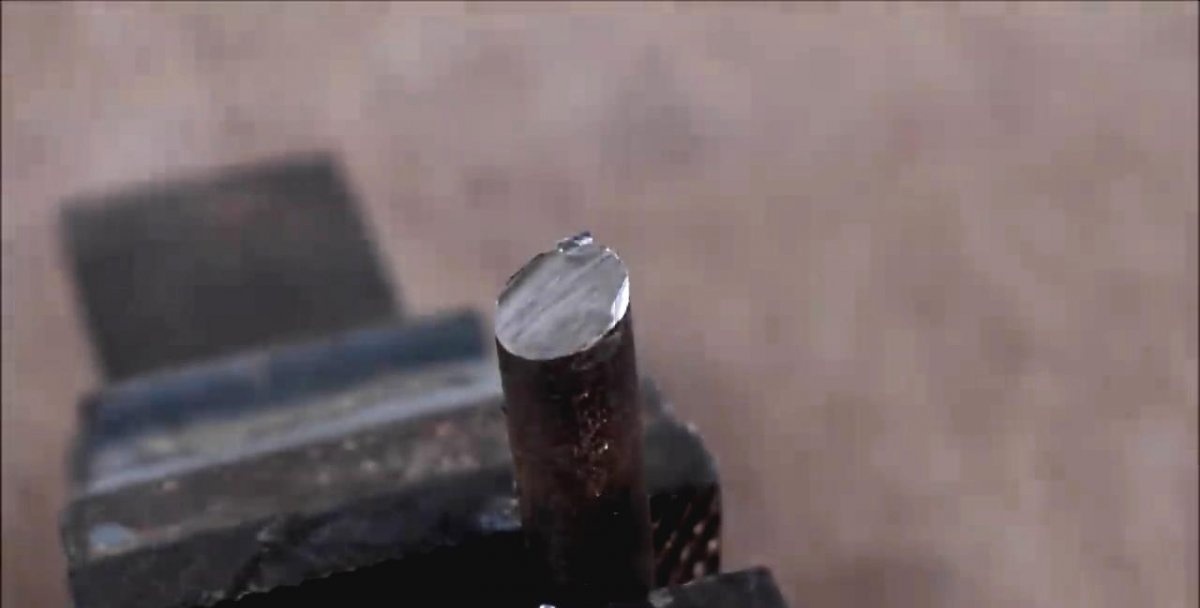
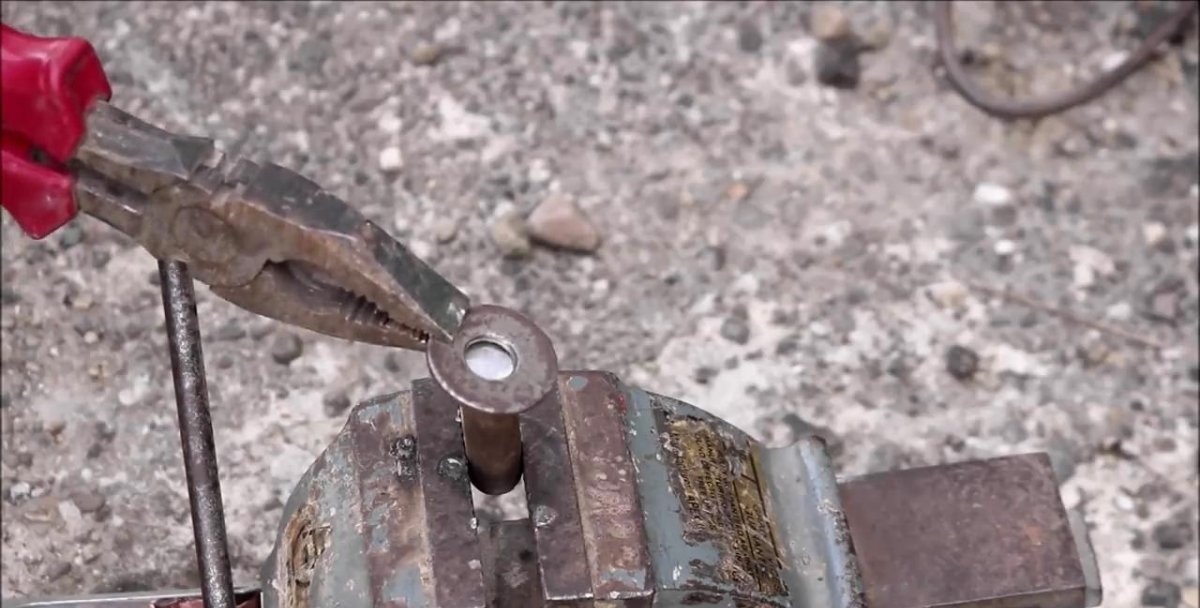
We take a steel bar with a diameter of 12 - 14 mm, the main thing is that it is clamped into the chuck of an existing drill.
Assembling an electric chisel from a drill

Use a disk to cut a workpiece 45–55 mm long. At one end we make a flat cut at an angle of approximately 60 degrees to the longitudinal axis of the rod.
Assembling an electric chisel from a drill

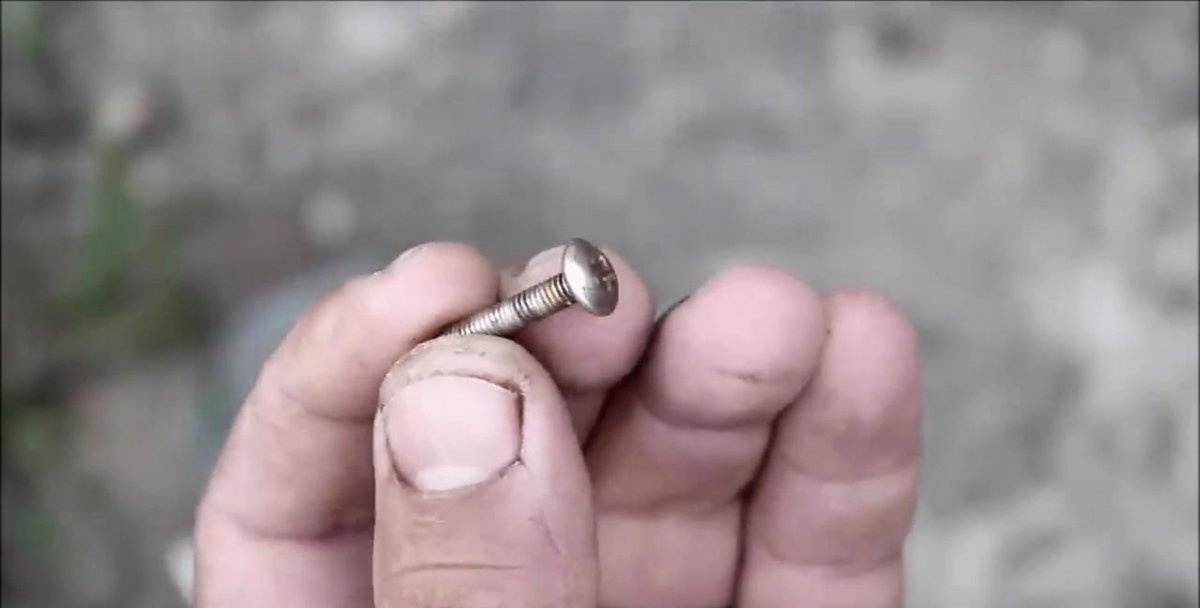
We select a washer with a thickness of 3 - 5 mm, with an outer diameter of 22 - 28 mm. and internal 10 - 16.
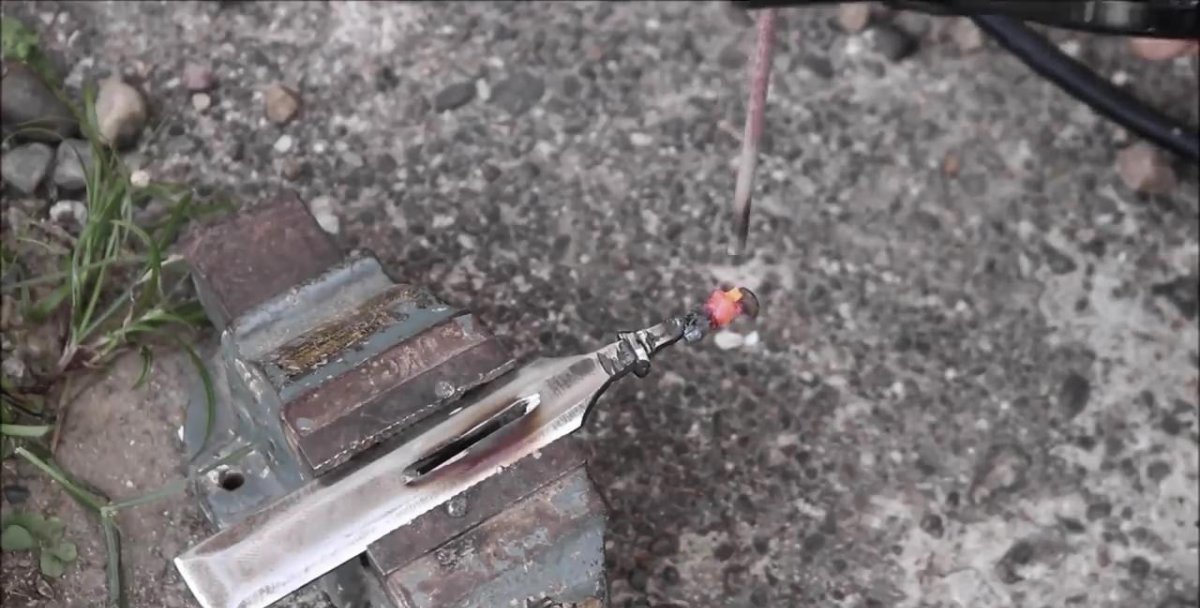
We weld the washer symmetrically through its hole to the cut oblique end of the rod. To be safe, you can also scald the washer on the opposite side.
Assembling an electric chisel from a drill

Assembling an electric chisel from a drill

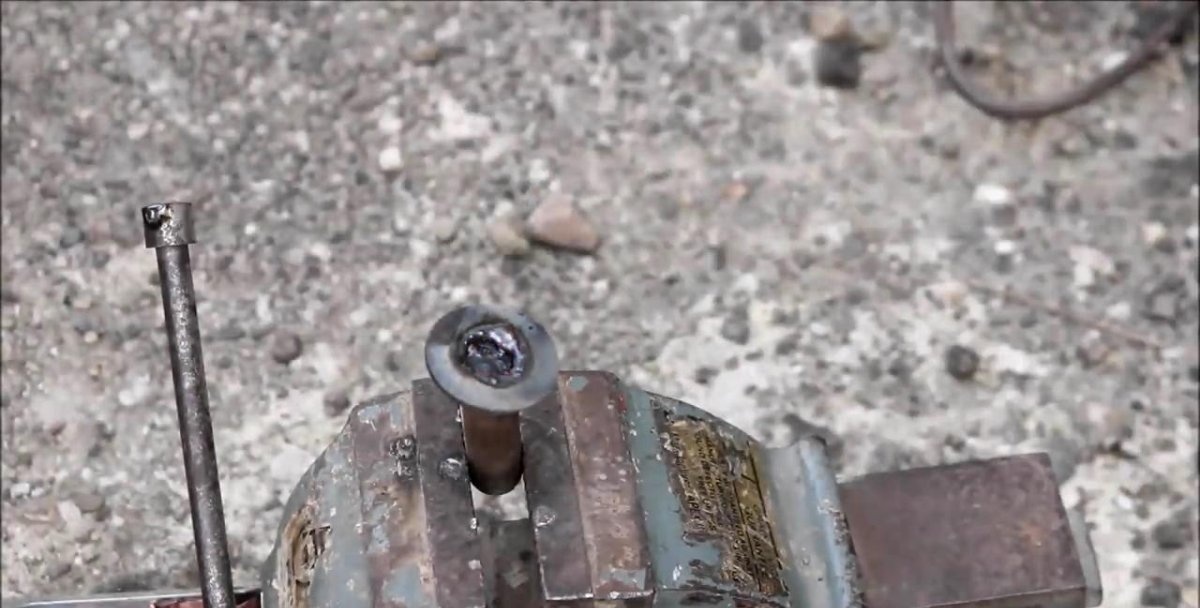
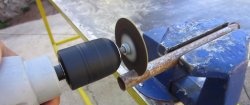
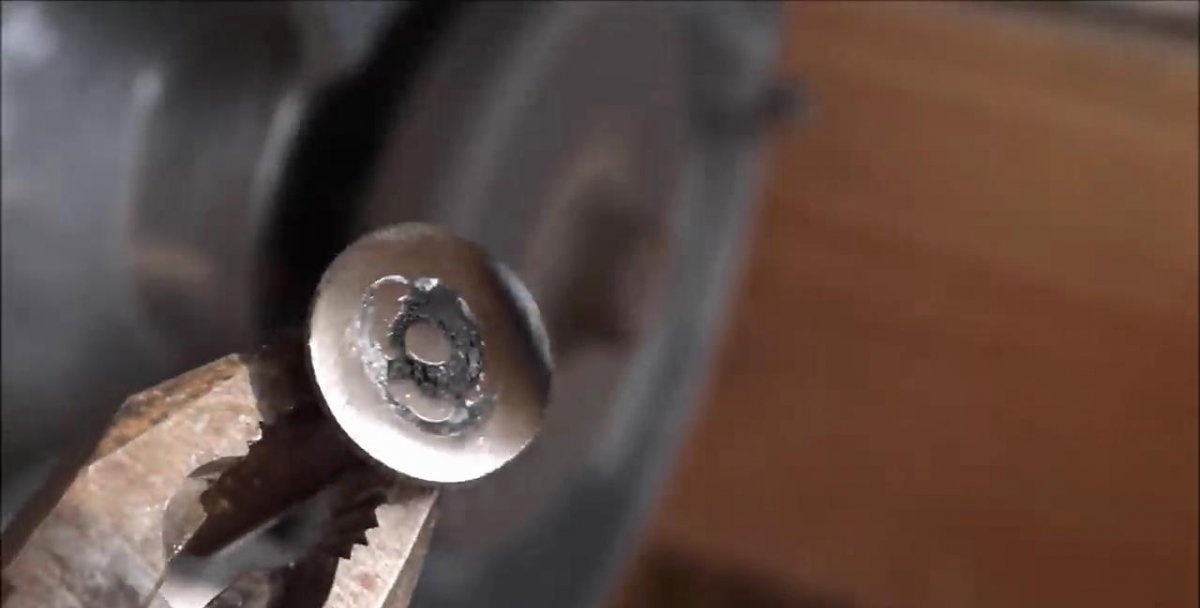
Immediately after welding, it is advisable to heat the part by dipping it in water.We sand the end surface of the washer - it will be working, so the operation must be done as carefully and cleanly as possible.
Assembling an electric chisel from a drill

Assembling an electric chisel from a drill

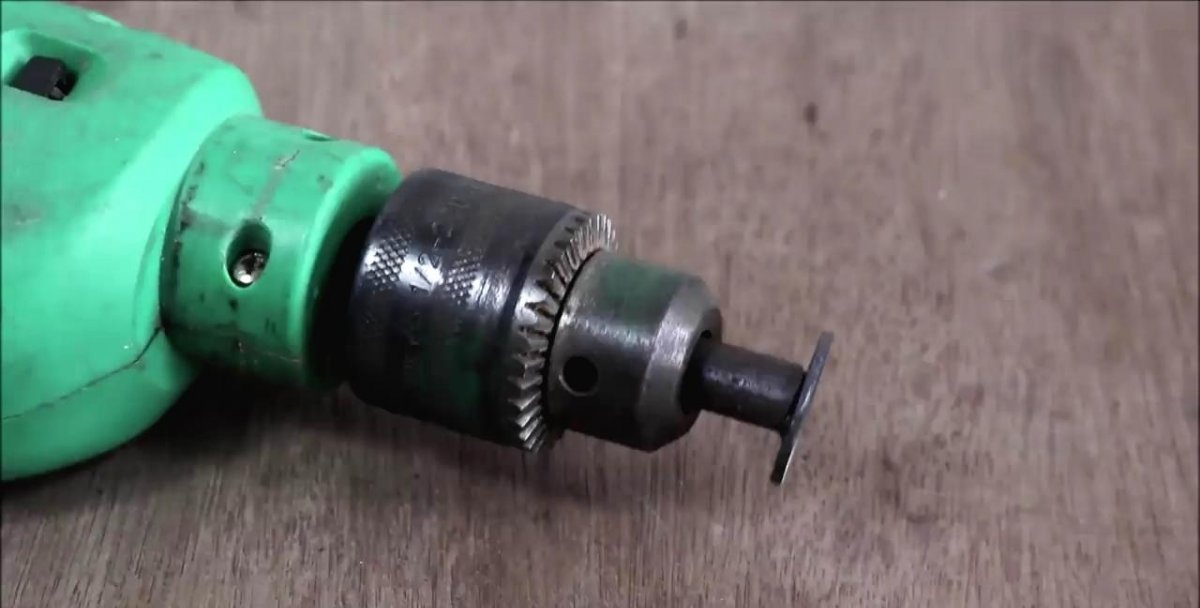
We install the resulting part into the drill chuck and clamp it tightly.
Assembling an electric chisel from a drill

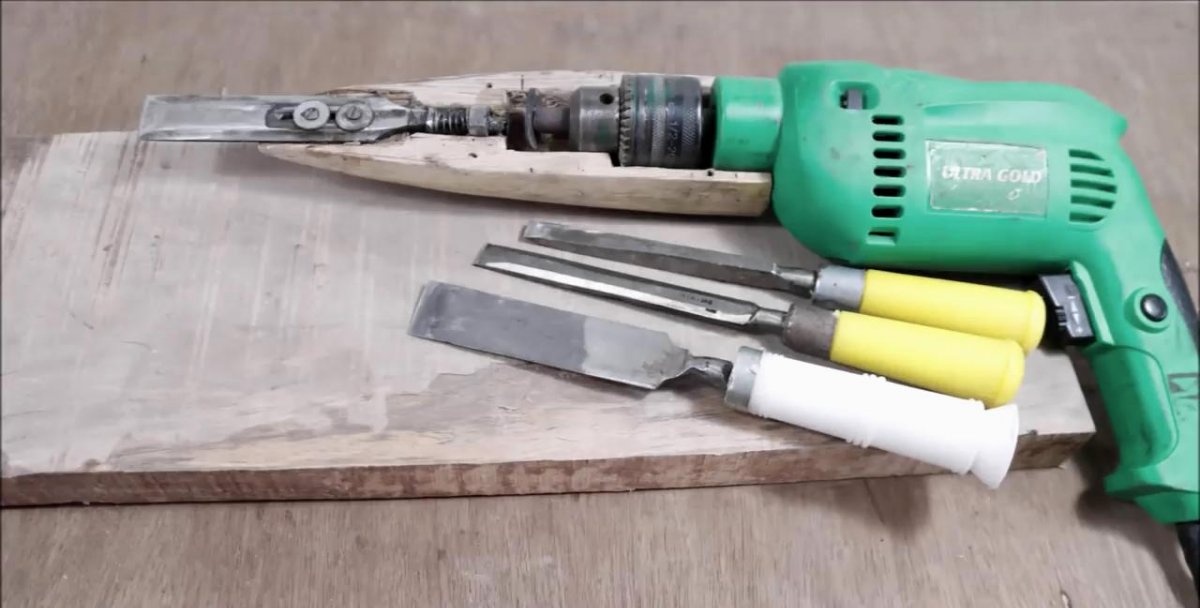
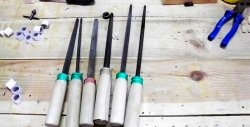
We fix an old, but working and sharpened chisel in a vice.
Assembling an electric chisel from a drill

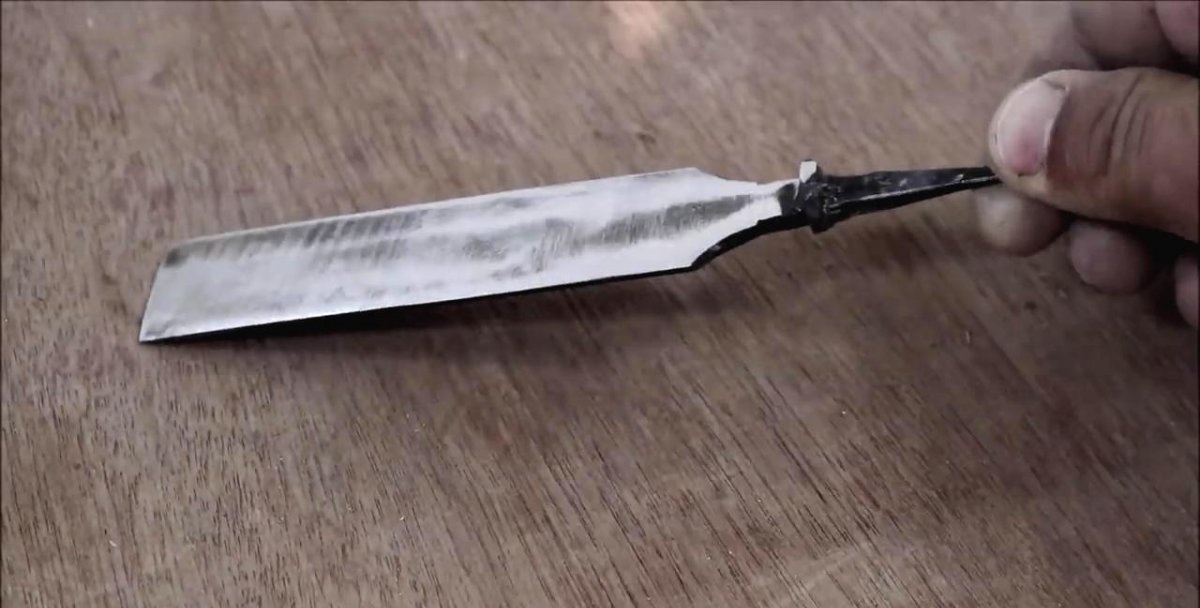
In the middle of the blade, closer to the shank, we use a cutting wheel to make a longitudinal groove, 40 - 50 mm long, 3.5 - 4 mm wide.
Assembling an electric chisel from a drill

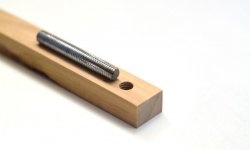
For the body of the tool being created, we take a wooden block with dimensions 80 x 80 x (250 - 300) mm.
Assembling an electric chisel from a drill

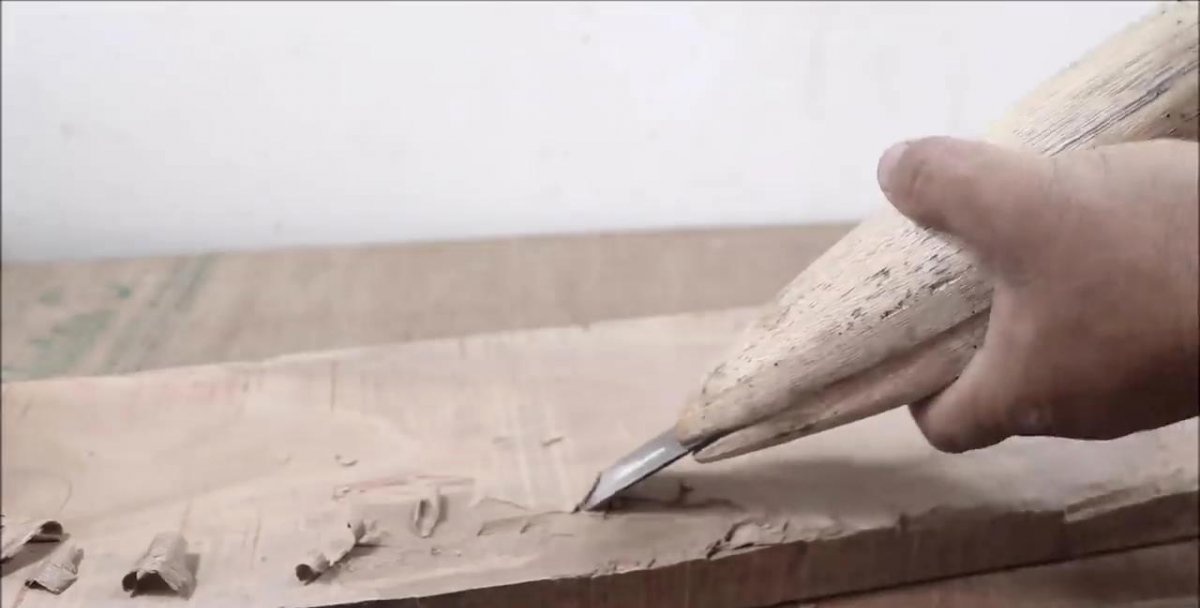
Using a pencil or marker, draw the outline of a drill with an oblique washer fixed in the chuck onto a wooden workpiece.
Assembling an electric chisel from a drill

Then, first with a chisel, then with a cutter or a graver, we adjust the resulting internal cavity under the drill.
We repeat the operation on the second half of the workpiece for the body. Ideally, the cylindrical front of the drill should be clamped tightly between two blocks, with the chuck and washer rotating freely inside.
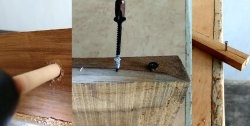
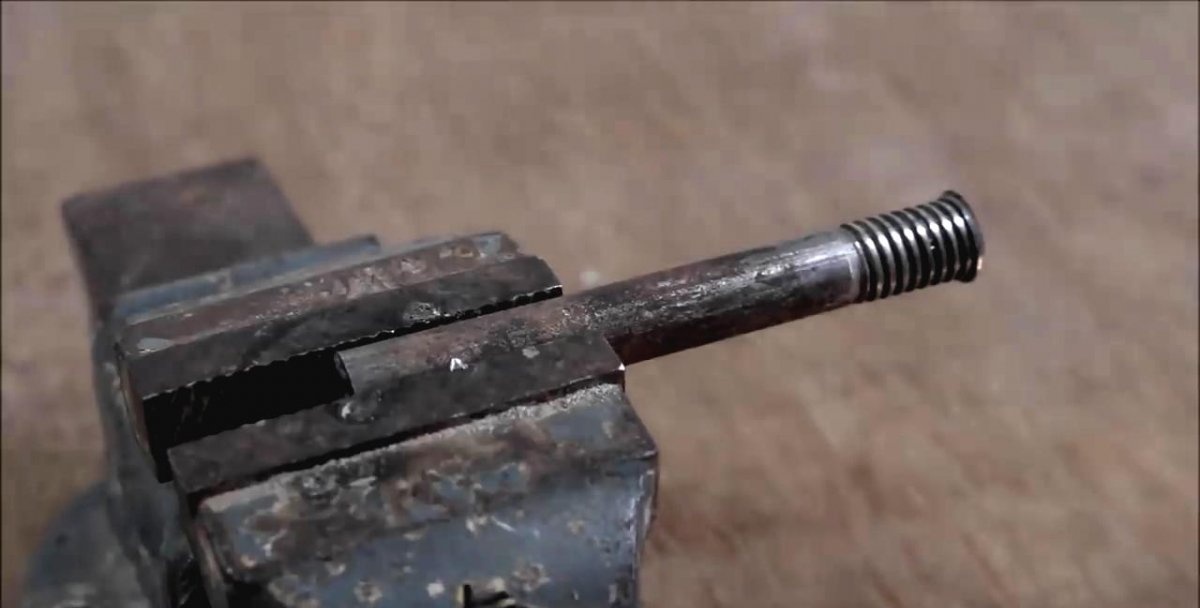
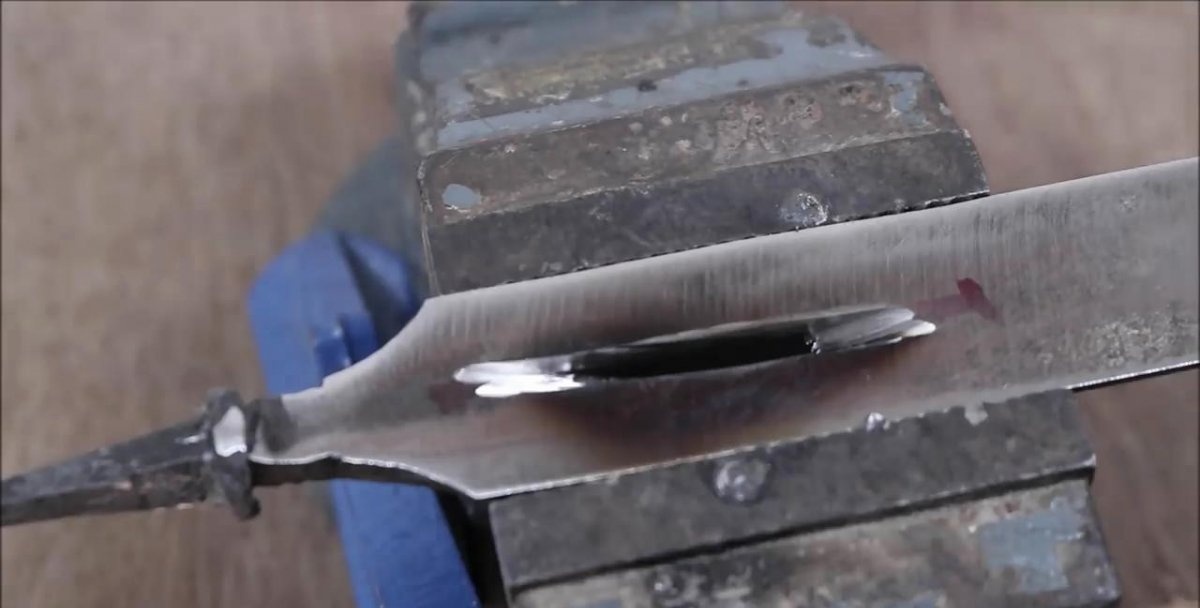
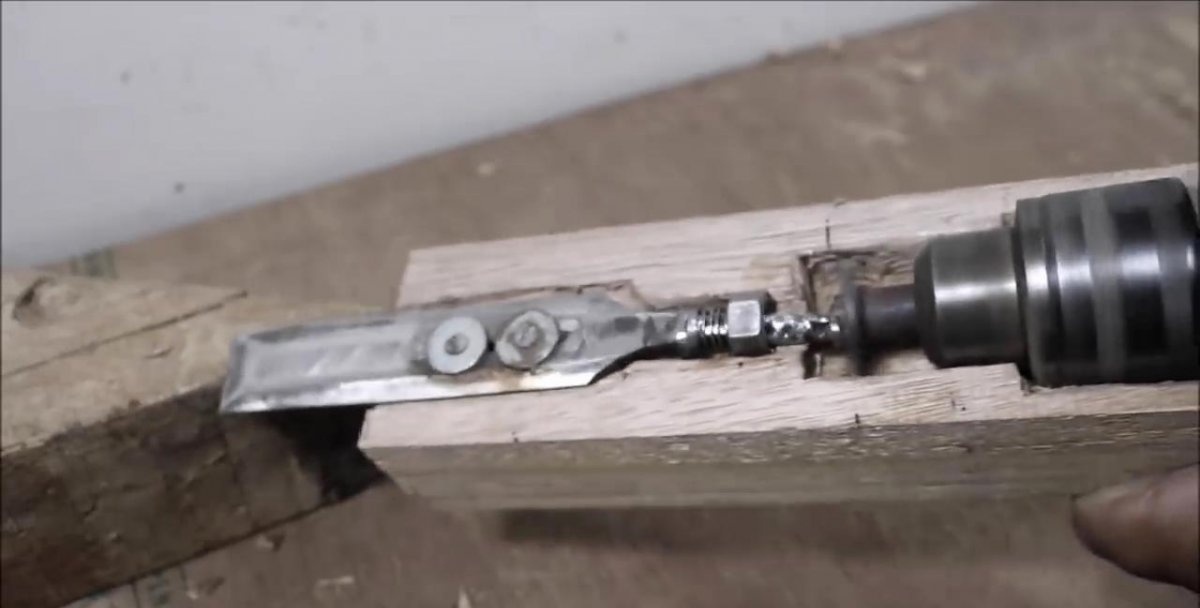
We select a bolt with a hemispherical head, with a rod diameter of 4 - 6 mm, and a length of 25 - 40 millimeters.
Assembling an electric chisel from a drill

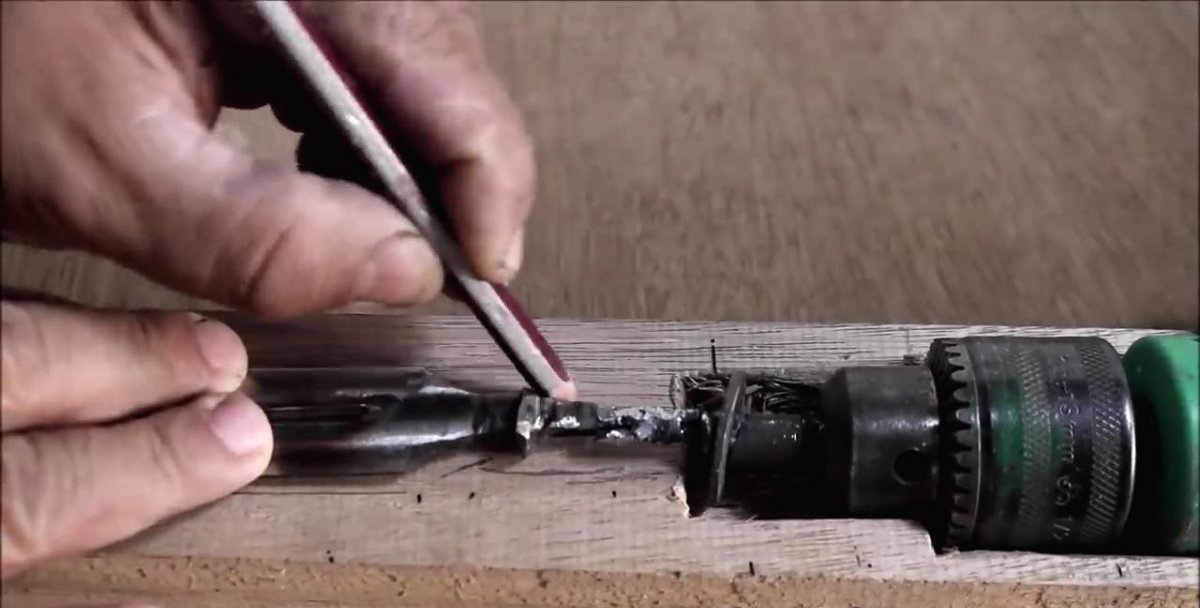
We weld the bolt and the shank of the chisel, quench it in water. Afterwards, we clean the weld seams using sandpaper.
Assembling an electric chisel from a drill

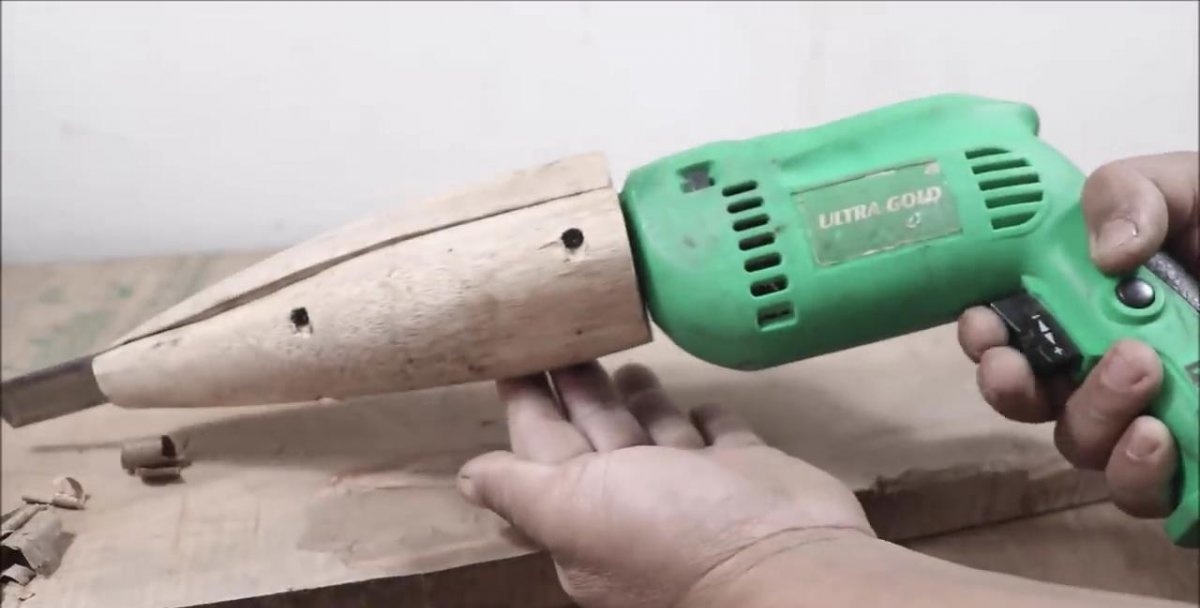
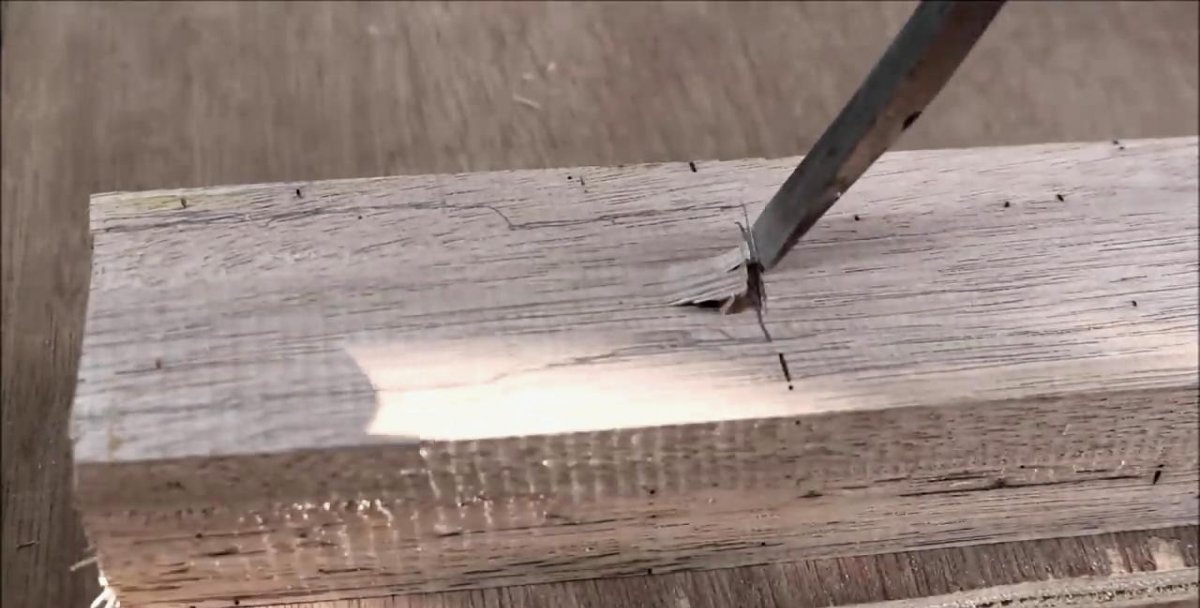
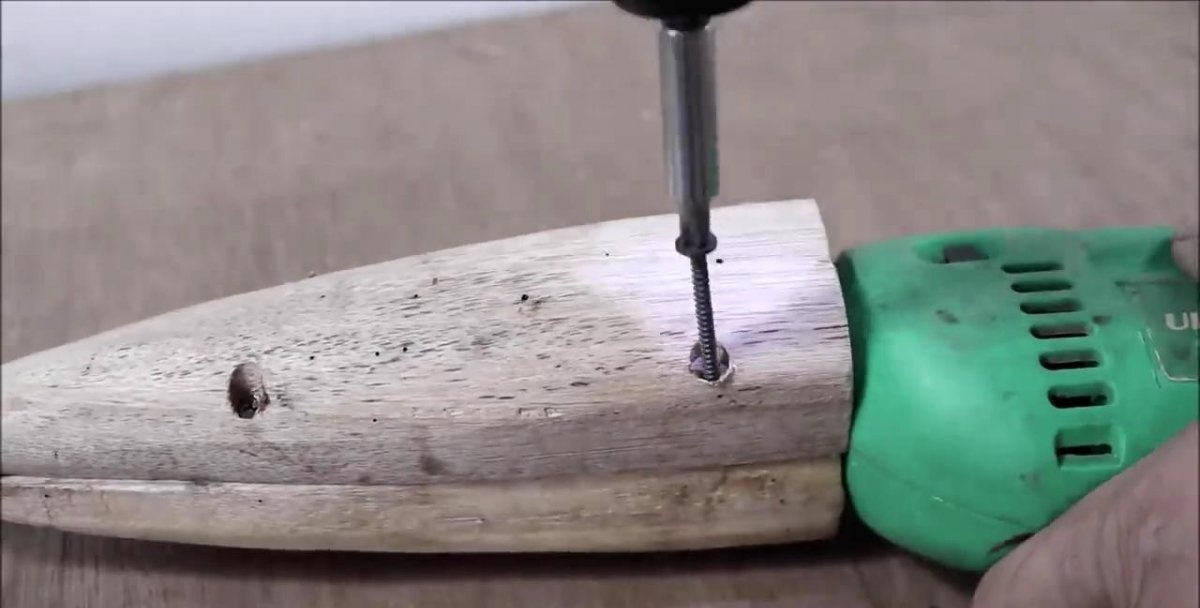
Then use a chisel to select a groove for the chisel in the wooden body.
Assembling an electric chisel from a drill

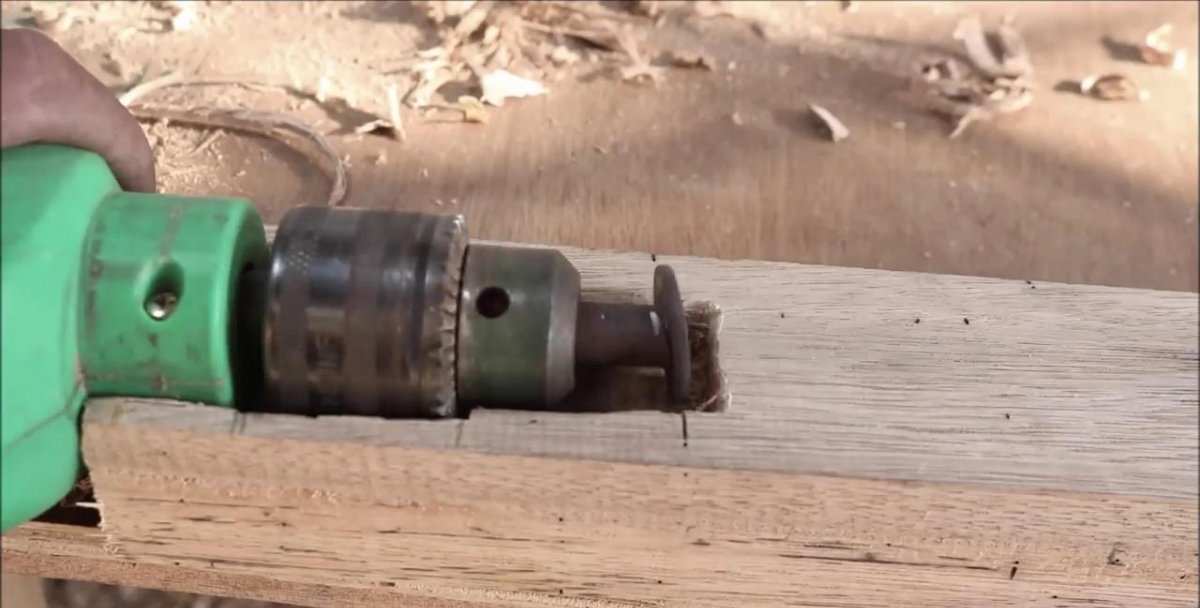
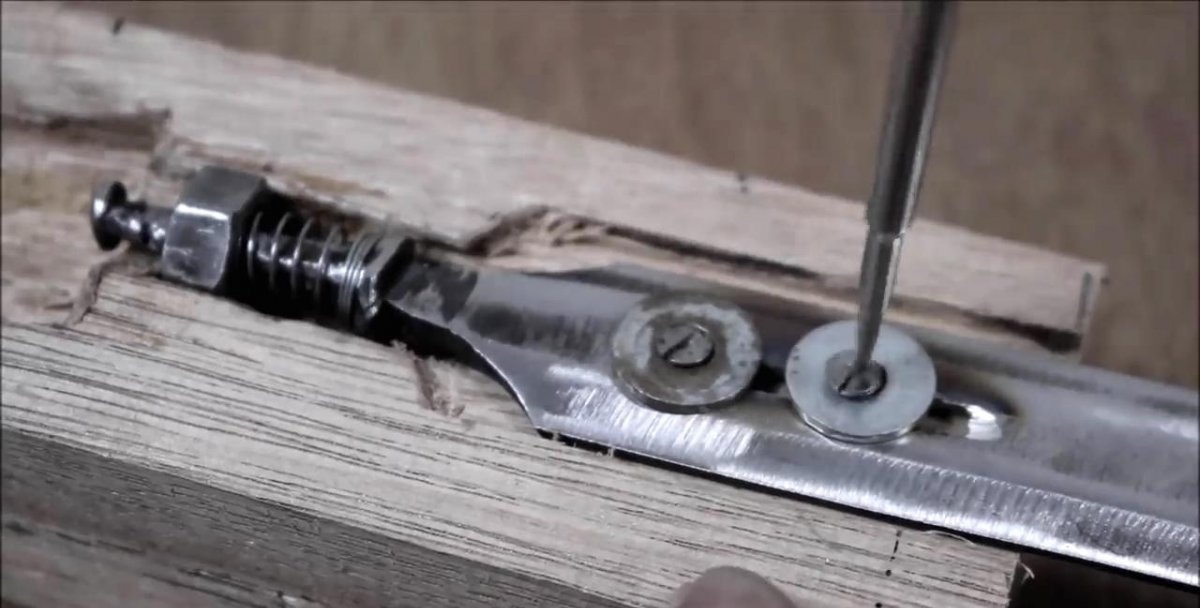
We put a spring of suitable size and stiffness on the tool shank. We select a washer or nut as a support for the second end of the spring. We are modifying the wooden body for support.
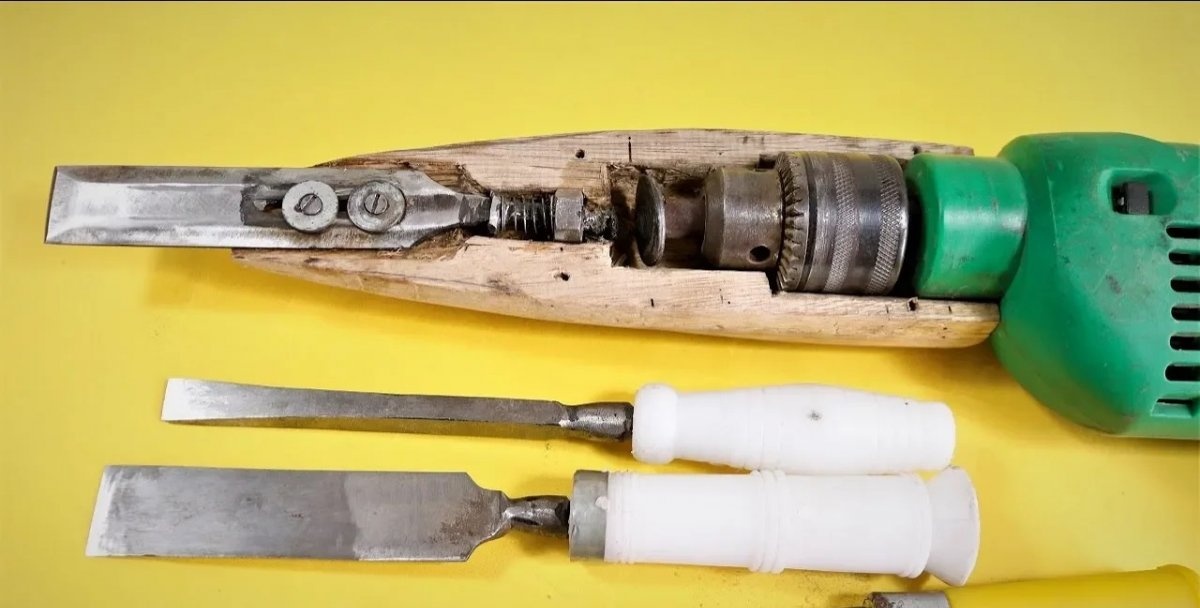
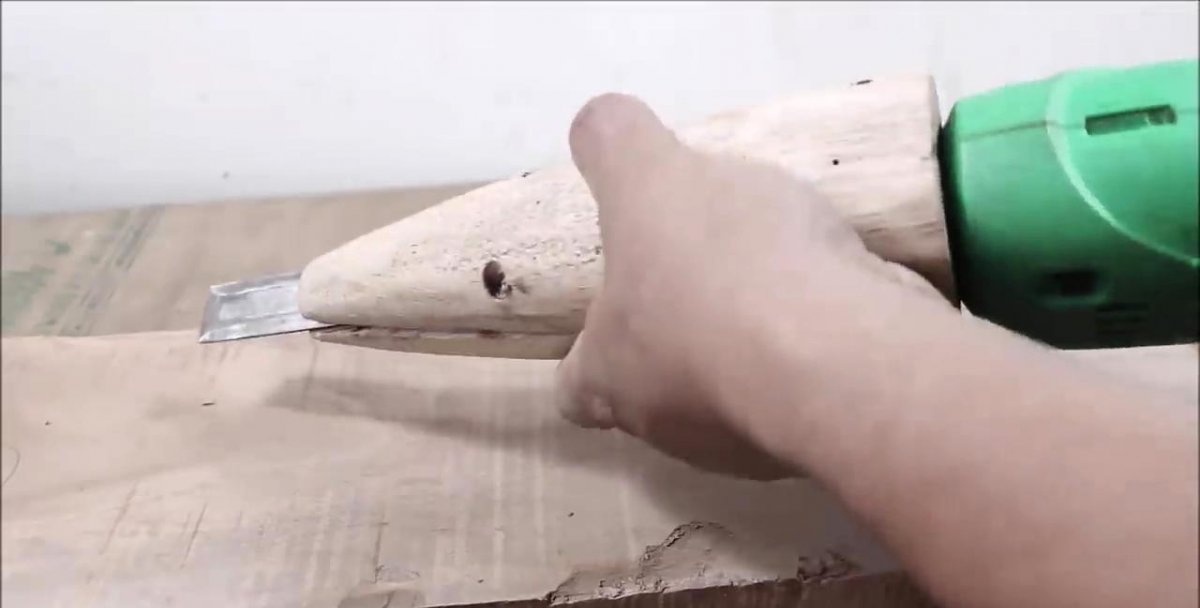
We secure the chisel blade in the body with two self-tapping screws or screws with washers. The chisel should have a free longitudinal movement of about 10 - 15 mm, and not dangle in transverse directions.
Assembling an electric chisel from a drill

We install a drill in a wooden case. We check the operation of the mechanical part.
Assembling an electric chisel from a drill

Everything is working properly!
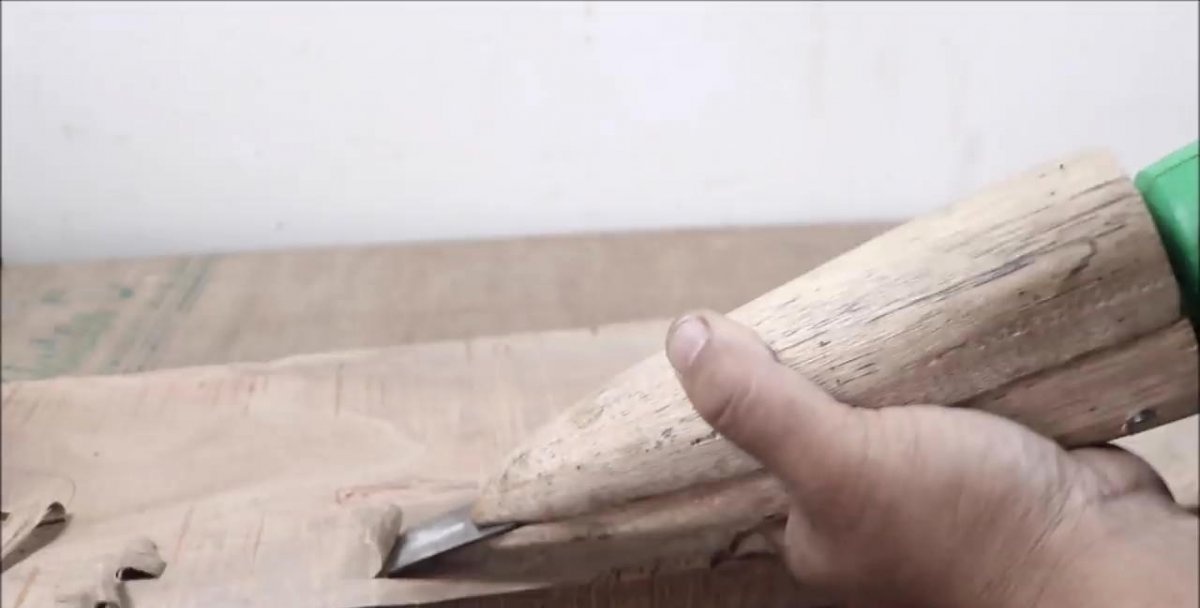
We adjust the second part of the tool body. Then we refine the outer surface of the case.We remove excess material and sand the surface of the wood. We carry out the final assembly of the tool. It is advisable to “plant” the self-tapping screws securing the chisel blade with glue. This ensures that in the future, the fasteners will not come loose when the tool is used.
Assembling an electric chisel from a drill

We clamp the drill in the body of the resulting tool with four self-tapping screws or bolts with nuts installed in the mating part of the body.
Don’t forget about safety precautions, we wear gloves, protect our eyes and face with a mask!
Turn on the electric chisel. Works great, easily removes chips and goes deep into the wooden workpiece! It is possible that her appearance is somewhat rough, but she is comfortable and productive to work with.
Assembling an electric chisel from a drill

Assembling an electric chisel from a drill

With such a tool, Vovka from the cartoon about the Far Away Kingdom would definitely make the old woman a new trough!
Assembling an electric chisel from a drill

Assembling an electric chisel from a drill

Watch the video


come back
Comment
  • bowtiesmilelaughingblushsmileyrelaxed relaxedsmirk
    heart_eyeskissing_heartkissing_closed_eyesflushedrelievedsatisfiedgrin
    winkstuck_out_tongue_winking_eyestuck_out_tongue_closed_eyesgrinningkissingstuck_out_tonguesleeping
    worriedfrowninganguishedopen_mouthgrimacingconfusedhushed
    expressionlessunamusedsweat_smilesweatdisappointed_relievedwearypassive
    disappointedconfoundedfearfulcold_sweatperseverecrysob
    joyastonishedscreamtired_faceangryragetriumph
    sleepyyummasksunglassesdizzy_faceimpsmiling_imp
    neutral_faceno_mouthinnocent
5+two=
Comments (7)
  1. Guest Sergey
    #1 Guest Sergey Guests 11 March 2019 18:17
    7
    Damn, what a lot of fuss! It is much easier and faster to weld a chisel to the shank of an old hammer drill. And in this way you can make a whole set of different chisels for different tasks.
  2. Mikhail Kudashov-Kostenko
    #2 Mikhail Kudashov-Kostenko Guests 11 March 2019 19:06
    12
    Isn’t it easier to weld the shank from a hammer drill to the chisel blade?
  3. Sector
    #3 Sector Guests 12 March 2019 15:39
    1
    What vibration level will this instrument have? It seems to me that this instrument will be difficult to hold in your hands; you shouldn’t even think about doing any serious work with it.
  4. Alexander
    #4 Alexander Guests 12 March 2019 17:03
    0
    Cool, well done author, I was lazy and bought a chisel for a three-mode hammer drill, it also works.
  5. Alexey Zhukov
    #5 Alexey Zhukov Guests March 14, 2019 08:04
    1
    Maybe it’s easier to buy a renovator?
  6. Guest Alex
    #6 Guest Alex Guests March 17, 2019 00:30
    1
    Electric chisel from Sturm...
  7. Aleksandr Vladimirovich
    #7 Aleksandr Vladimirovich Guests July 7, 2019 09:17
    1
    And ultimately, having developed persistent symptoms of Pankerson’s disease with a persistent and clearly pronounced tremor of the hands, we take aim and after the third dozen times, having successfully caught a drill lying motionless on a motionless workbench, we throw it away with all our might and don’t look where it’s flying, then joyfully Step by step, with twitching hands and the whole body, we go to the doctor to be treated for a dozen of the same sums of money that were greedy to buy a professional instrument.

Connector bracelet | Do it yourself

We sew an educational textile rug for girls | Do it yourself

How to install a heated floor with your own hands quickly

Valentine's card with delicious content | Do it yourself

«Do it yourself - with your own hands» - a site of interesting homemade products made from scrap materials and items at home. Step-by-step master classes with photos and descriptions, technologies, life hacks - everything a real master or just a craftsman needs for needlework. Crafts of any complexity, a large selection of directions and ideas for creativity.

We recommend reading

Washing machine error codes