Without practical skills, the plant will simply constantly get sick and lose its foxes. After all, caring for bonsai, in the homeland of these plants, in Southeast Asia, is a whole teaching, and even a way of life. I’ve already seen this with friends – it seems like they did everything right. They maintained the required temperature, trimmed it, fed it with special fertilizers for this species, and even bought a small steam humidifier especially for it, but the tree was constantly sick, bald and stunted. Of course, there was no talk of any flowering.I think that, unfortunately, these beautiful plants are simply physically unable to fully grow and please the eye in our northern latitudes, where I live. Therefore, I decided not to throw away a lot of money, but to try to make something similar, only inanimate. Artificial. Which is not so demanding and capricious. After watching several short videos about these trees on the Internet and studying them visually, I got down to business.
Will need
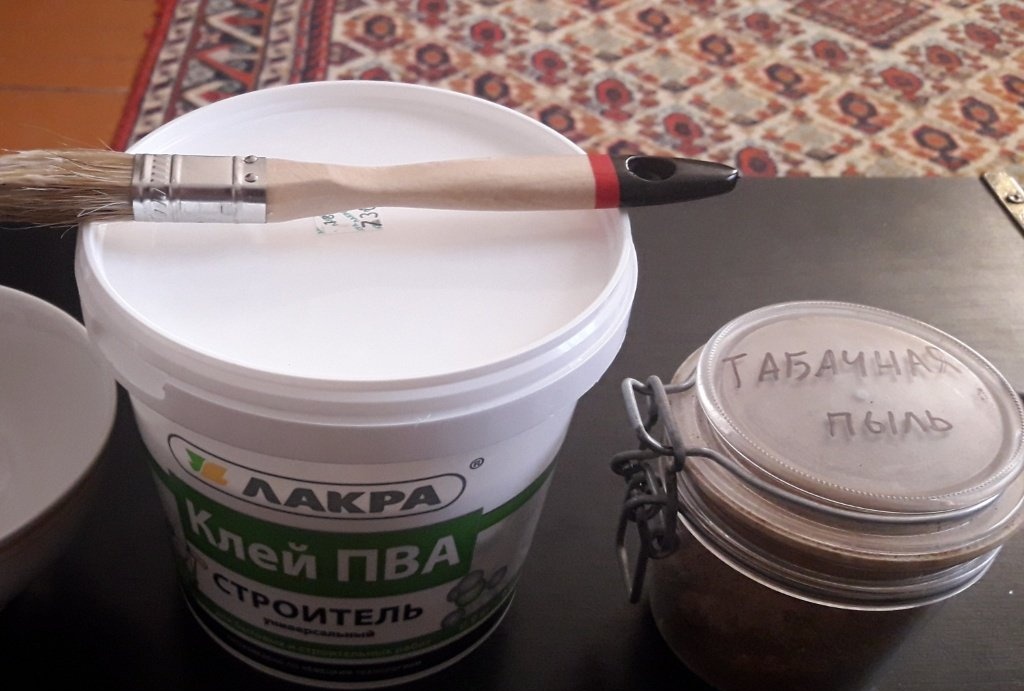
- Wire (1mm thick and 2 meters long).
- PVA glue.
- Tobacco dust.
- Foam sponge.
- Watercolors or gouache.
- A vessel with low sides.
- Sand or earth.
- Universal glue (you can use “Moment”).
Required tool:
- Pliers (2 pieces).
- Wire cutters or scissors (for cutting wire).
- Third hand from the soldering kit.
- Glue brush.
Making a bonsai tree
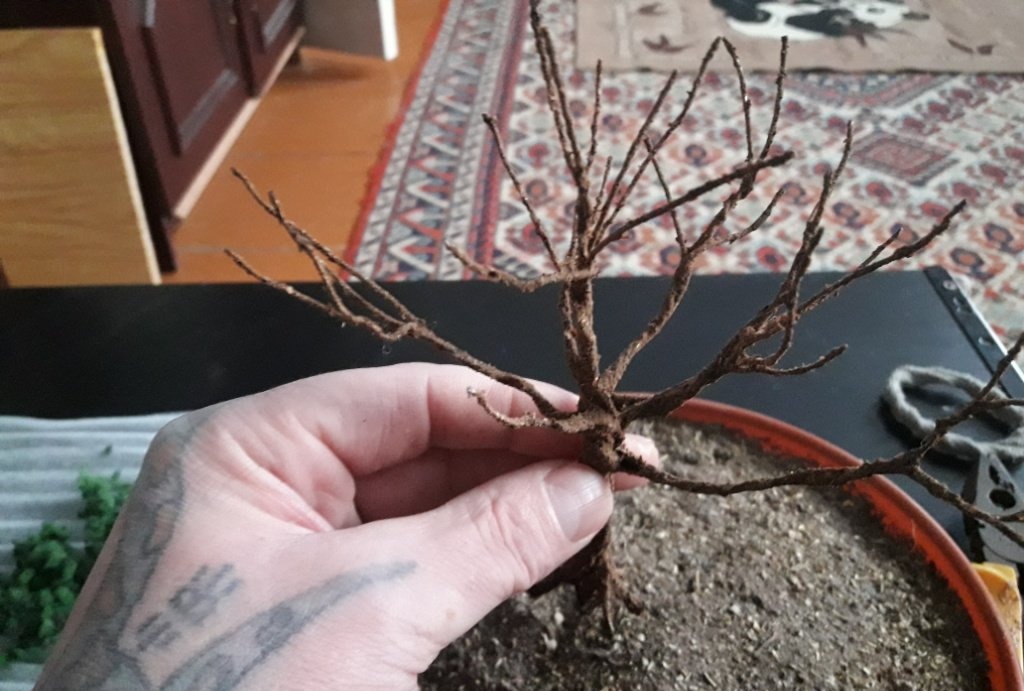
First, let's prepare the wire.
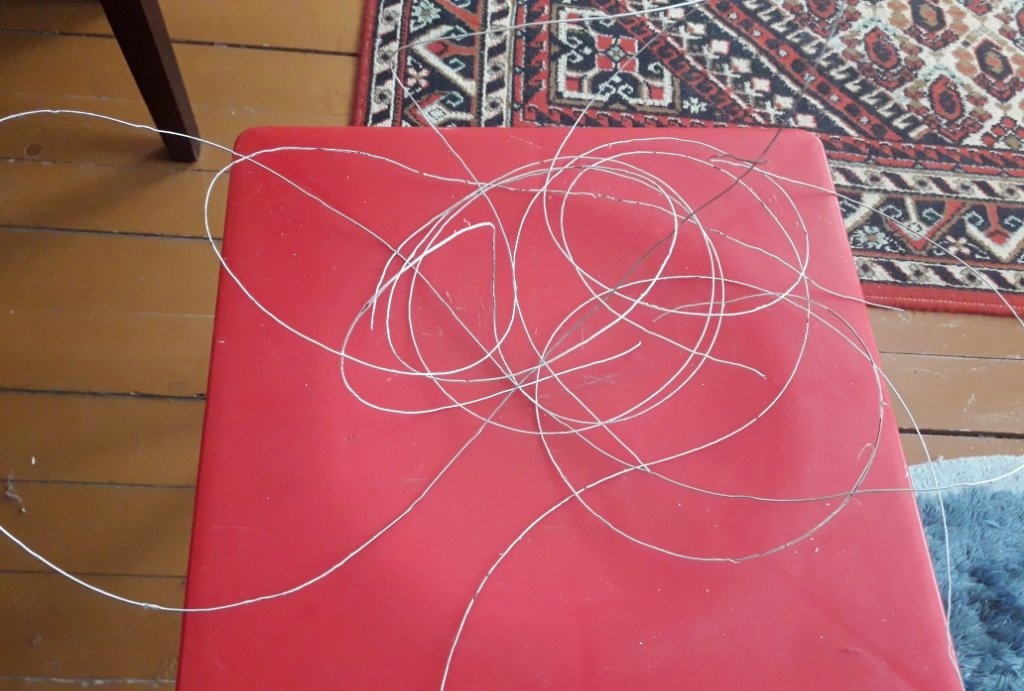
It is better, if possible, to straighten it to make it easier to fold in the future. And we will fold it based on the desired growth of the tree. For example, I chose 15 cm. We measure 15 cm from the beginning of the wire and bend it 180 degrees. We continue to bend this way until the wire runs out. It will turn out like this:
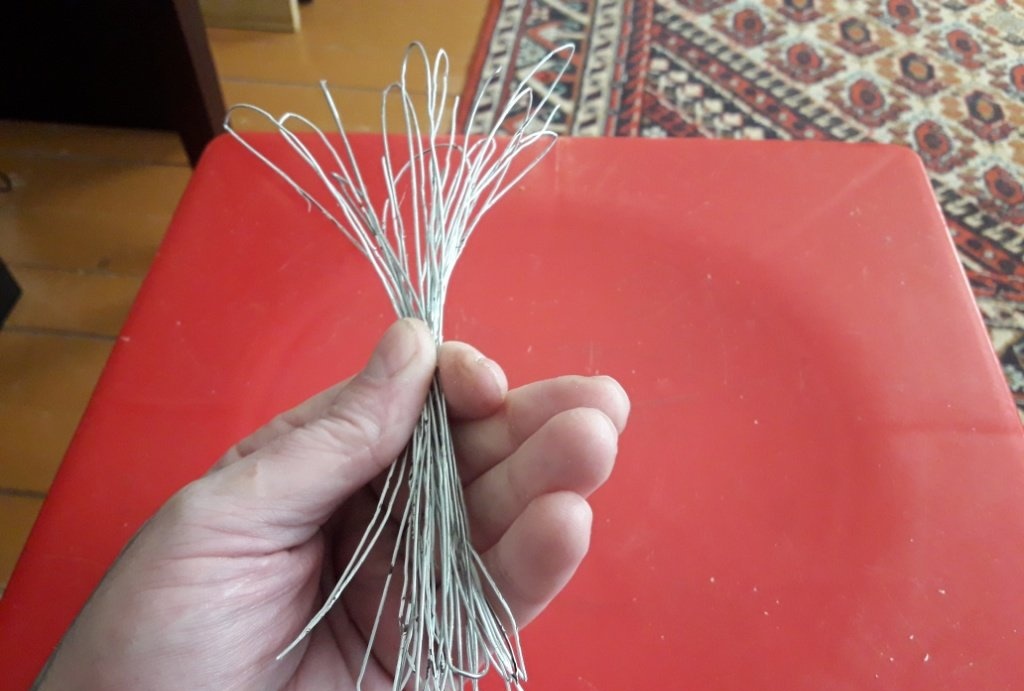
Now we clamp one end of the skein with pliers, and with the second pliers we take the other end of the skein, and twist the skein into a bundle.
Not too tight. So that you can branch two or three cores into separate branches. First, we branch the thickest branches to the middle - three or four wire strands each.

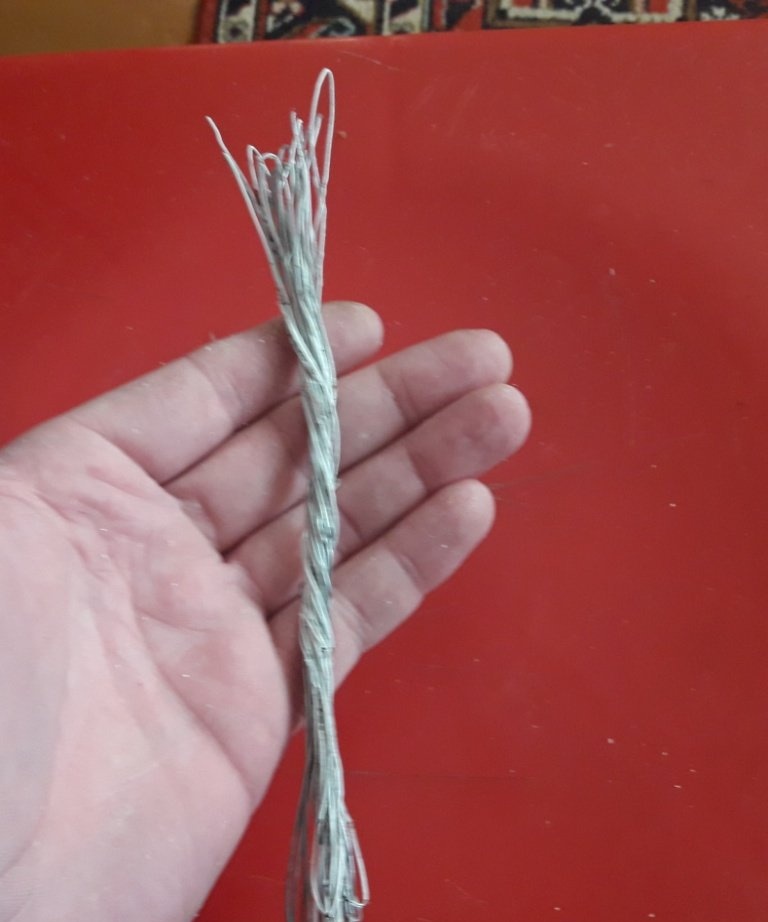
We twist them so that they do not fall apart.
We bite off the curved ends from their tops, and divide the resulting branches into several more separate branches along the entire length.
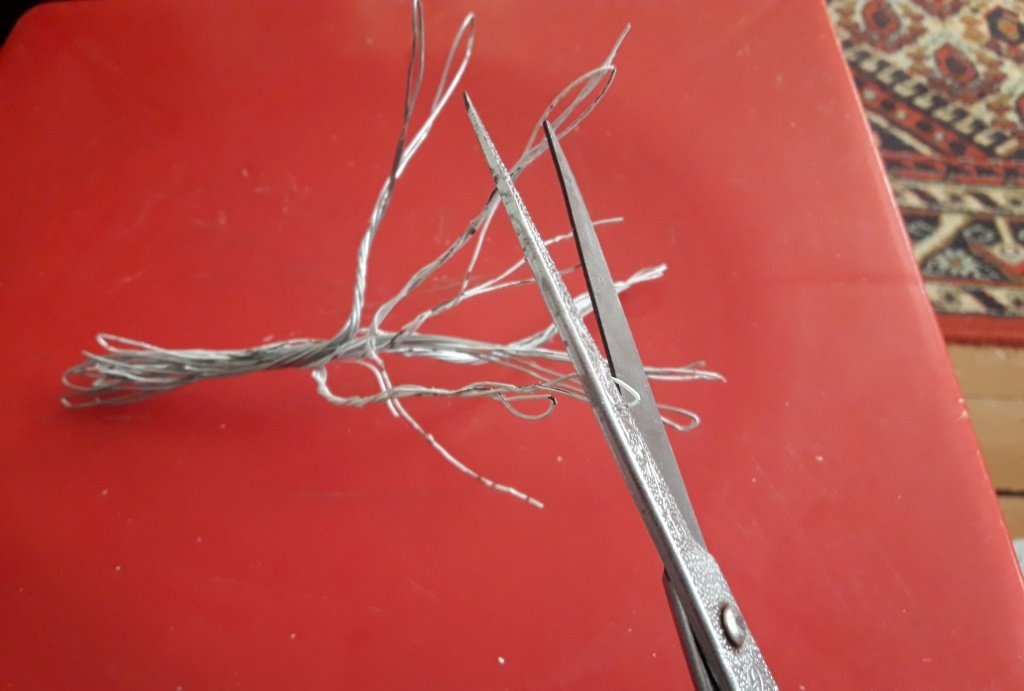
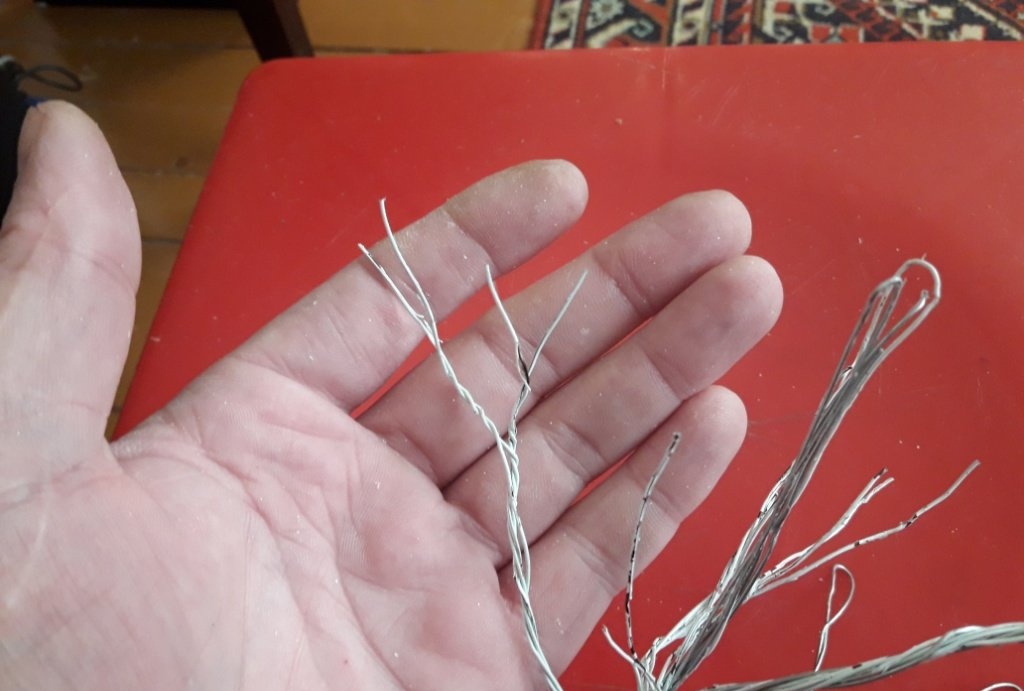
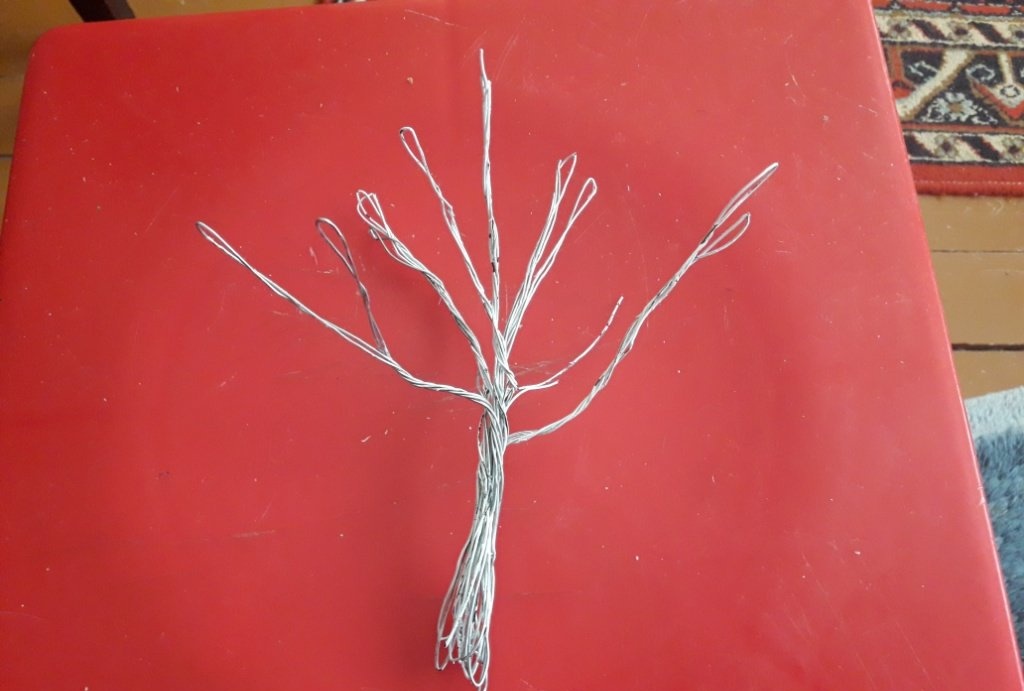
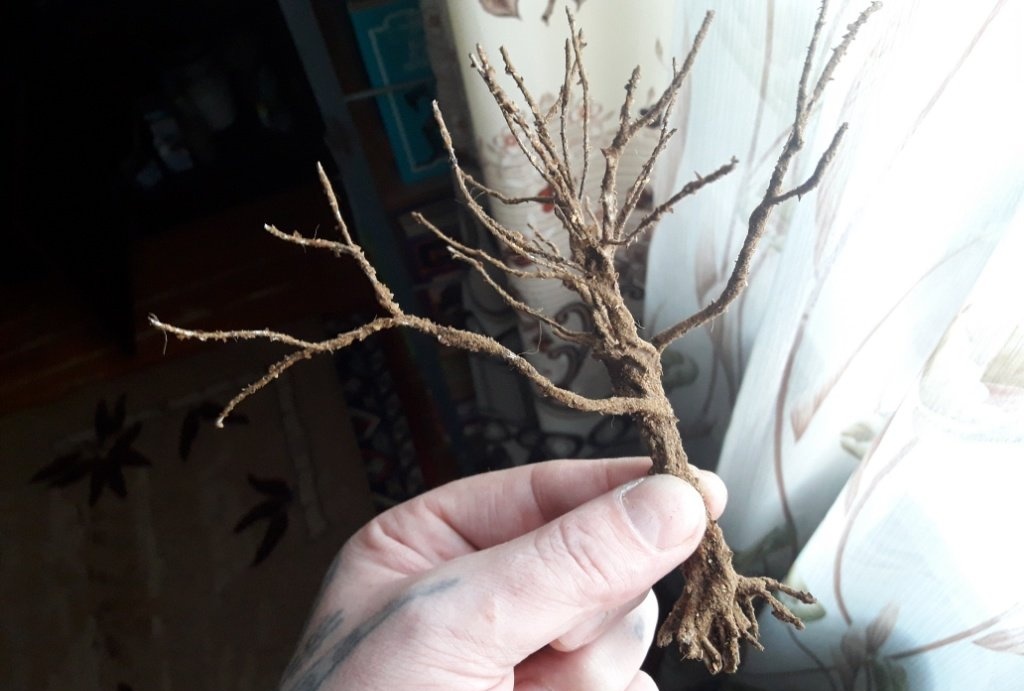
In general, we improvise and give this bundle of wire any shape of wood we like.You can shape it into a slender pine tree or a spreading maple tree.
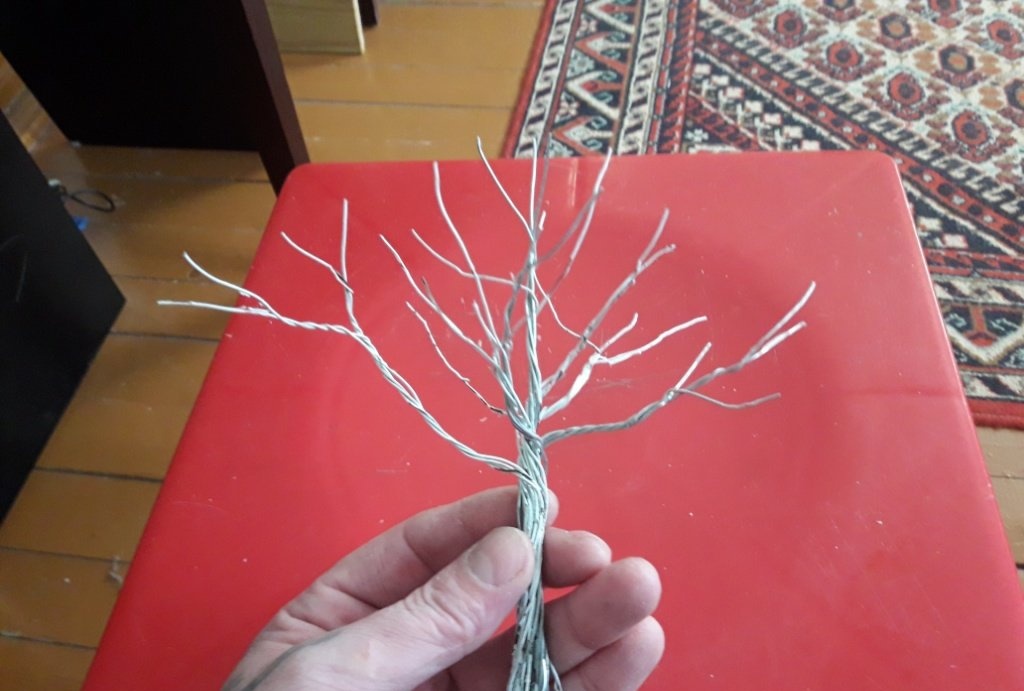
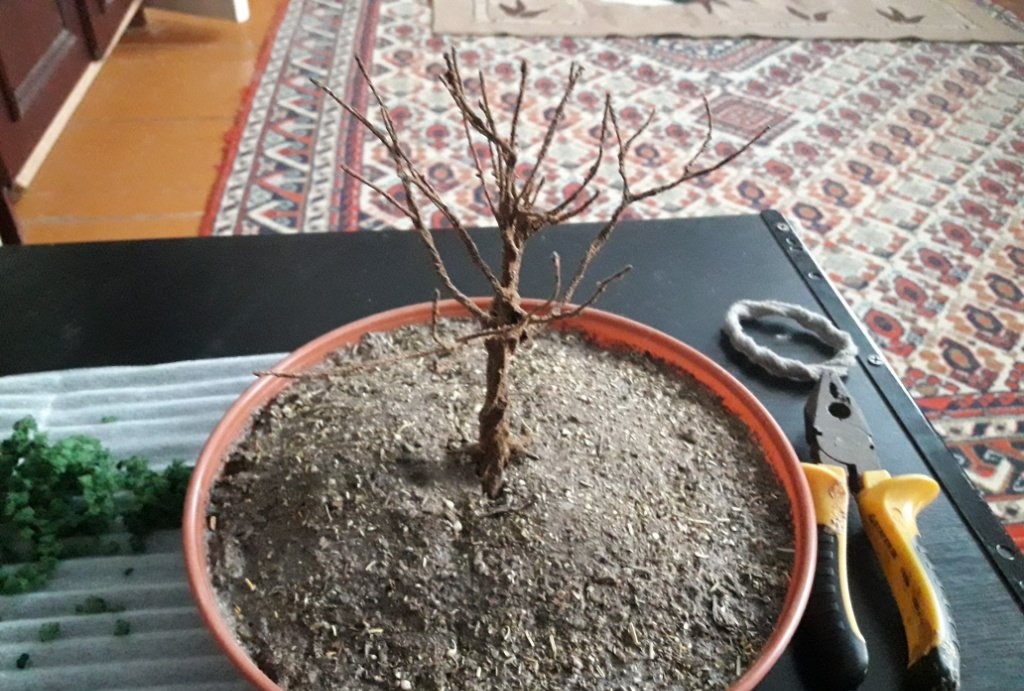
We're done with the branches, now let's move on to the roots. There, in principle, everything is exactly the same, only we make the branches much shorter. It should look something like this:
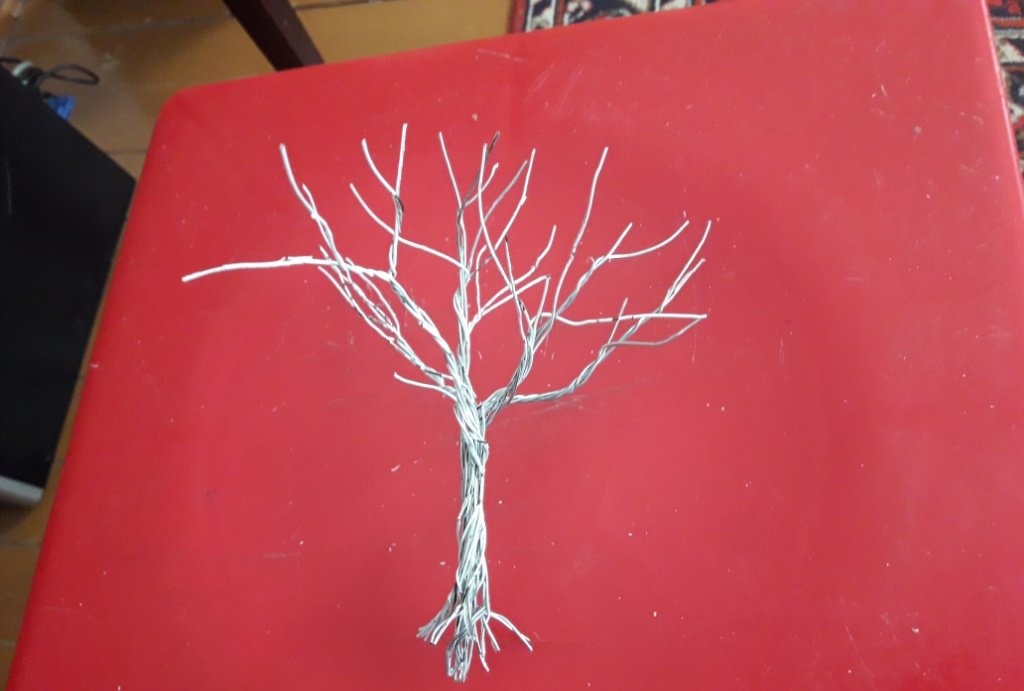
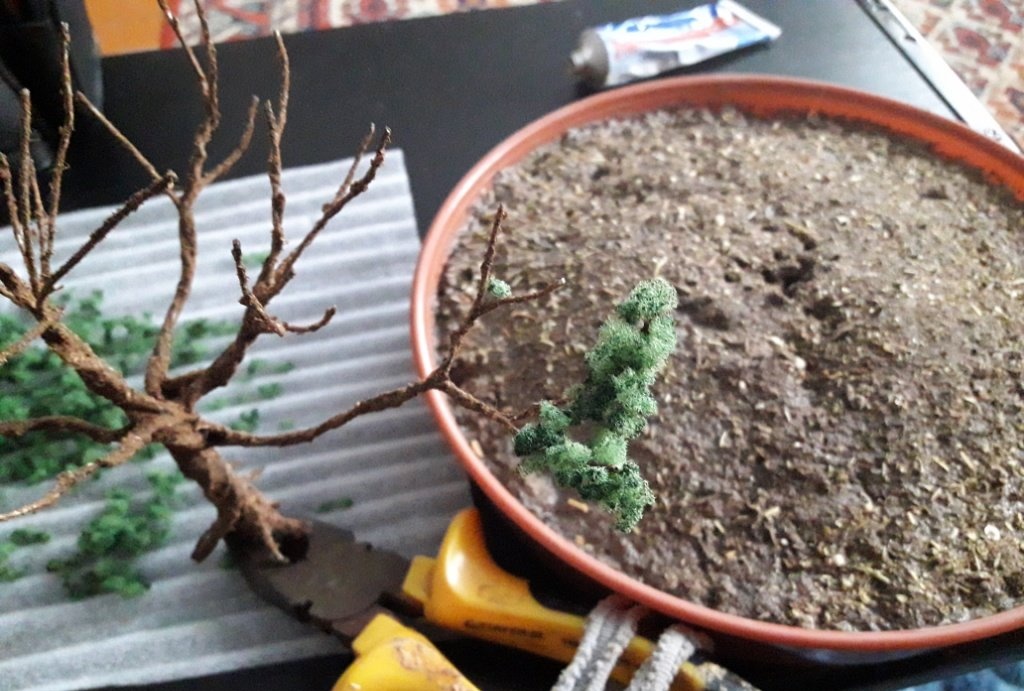
We have received the “skeleton” of the tree, now we need to cover it with “bark” and “leaves”. To imitate the bark, I used tobacco dust, which I had left over from the summer, after fighting garden aphids. It is also sold at any hardware store. You will also need PVA glue.
Apply glue with a brush to the entire surface of the future tree, and immediately sprinkle it with tobacco dust.
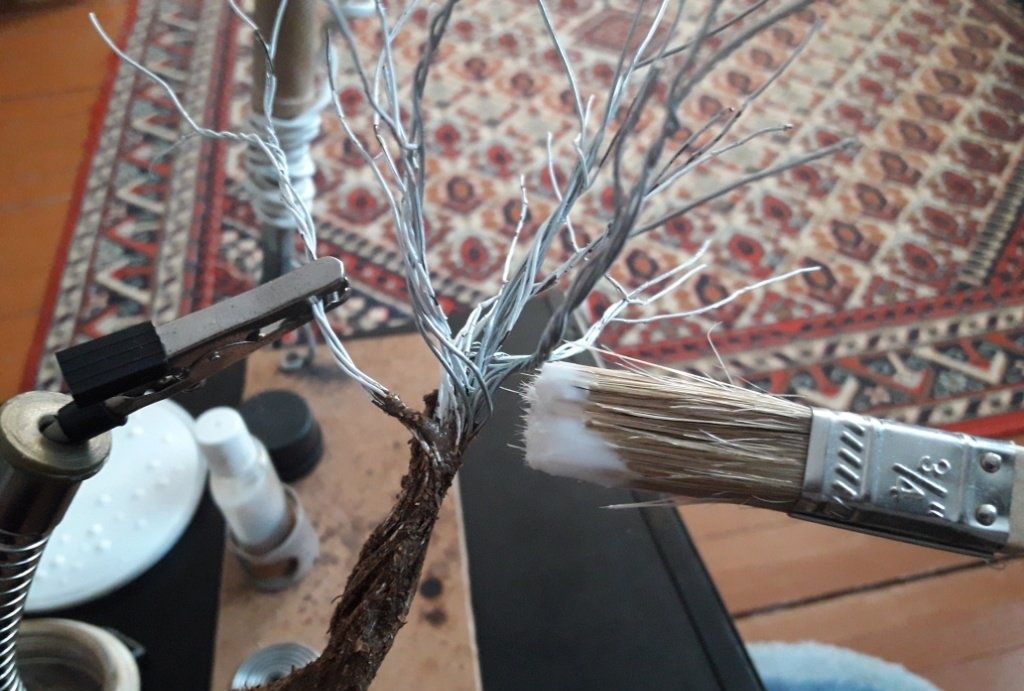
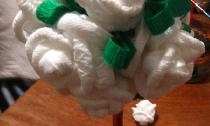
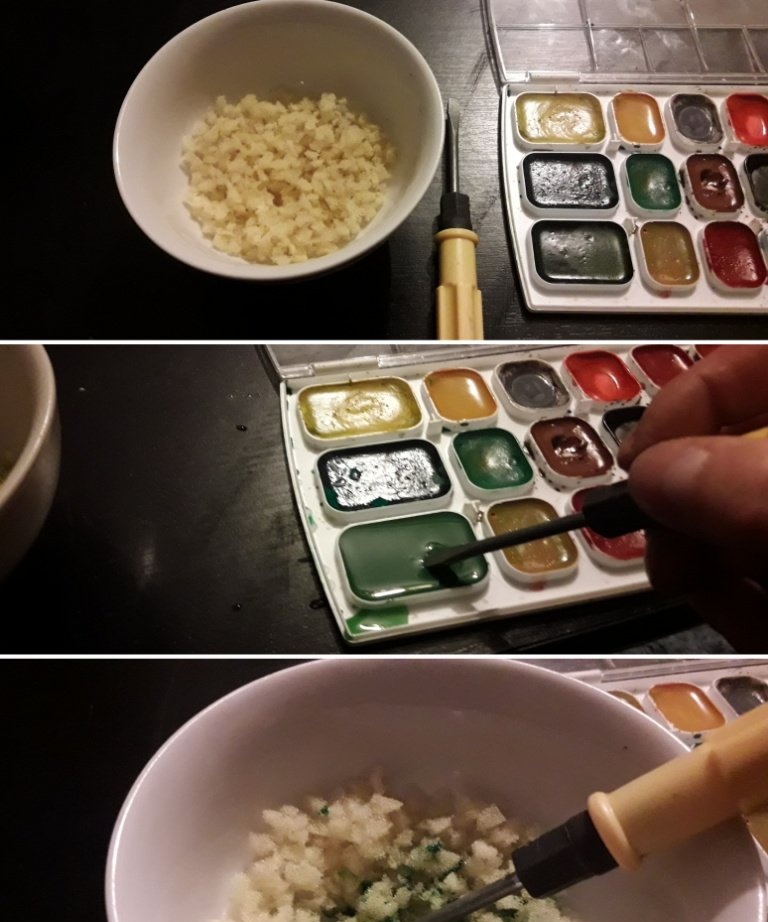
Once, of course, is not enough. After the glue dries (20-30 minutes), repeat the procedure 3-4 times. Until all visible wire on the entire surface of the trunk and branches is hidden under the bark. We put it closer to the heating radiator (where it’s warmer), and leave it to dry until the next morning. In the meantime, while the tree is drying, you can work on the foliage. To do this, you need to finely (as finely as possible!) tear the foam sponge.

Do not cut with scissors, but rather tear into small pieces so that the shape of the pieces is involuntary and varied. The more magnificent you want the tree crown, the more sponges you need to pick. Pour the torn pieces into a bowl or small bowl, dilute a thick green concentrate (about a tablespoon) from watercolors or gouache, pour it into a bowl with a torn sponge and mix thoroughly with a stick, spoon, or hands.
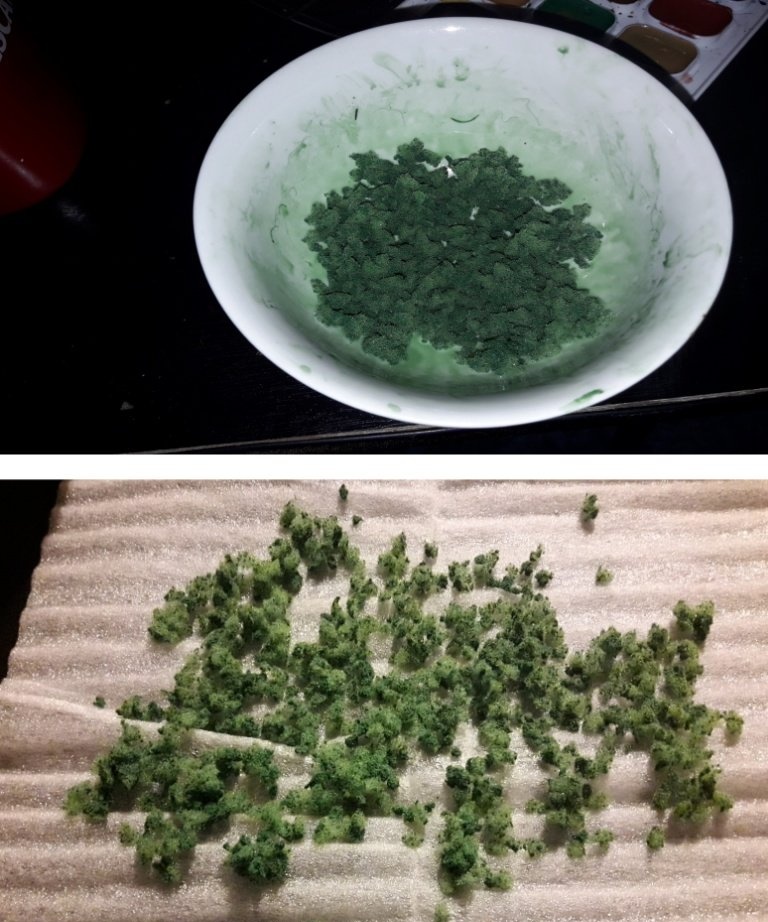
When the sponge is evenly colored, pour it onto some clean surface and also leave it to dry until the morning.
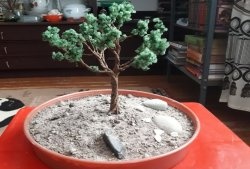
Now it’s the turn of the dishes in which the tree will “grow”. It is advisable if it is a round or oval container with low sides. We pour soil into it, moisten it, and form a bulge in the middle, like a hill.
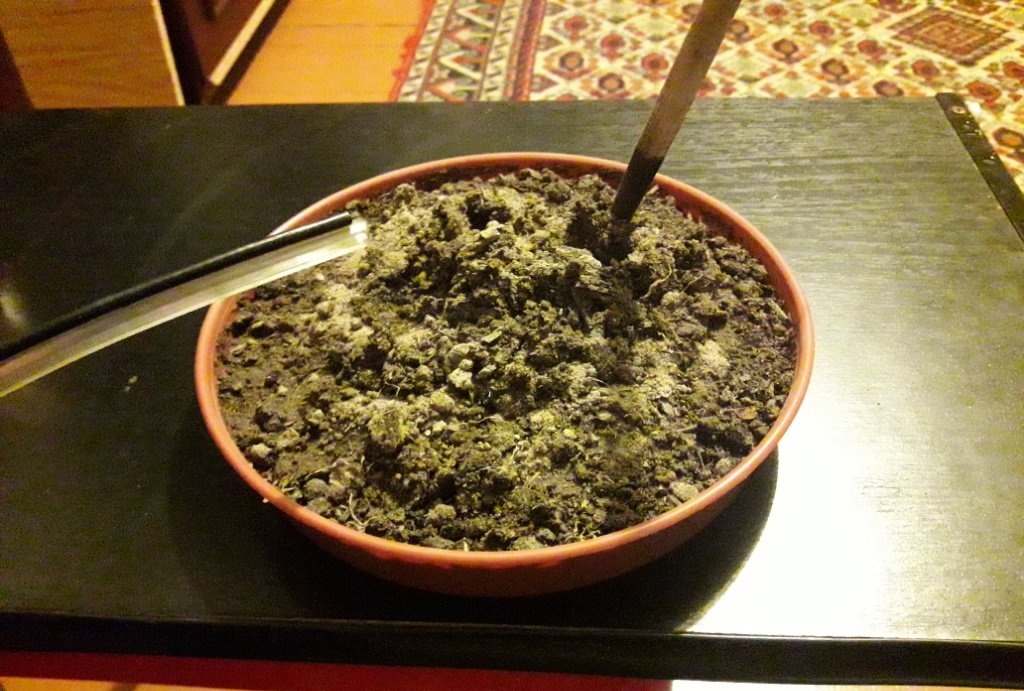
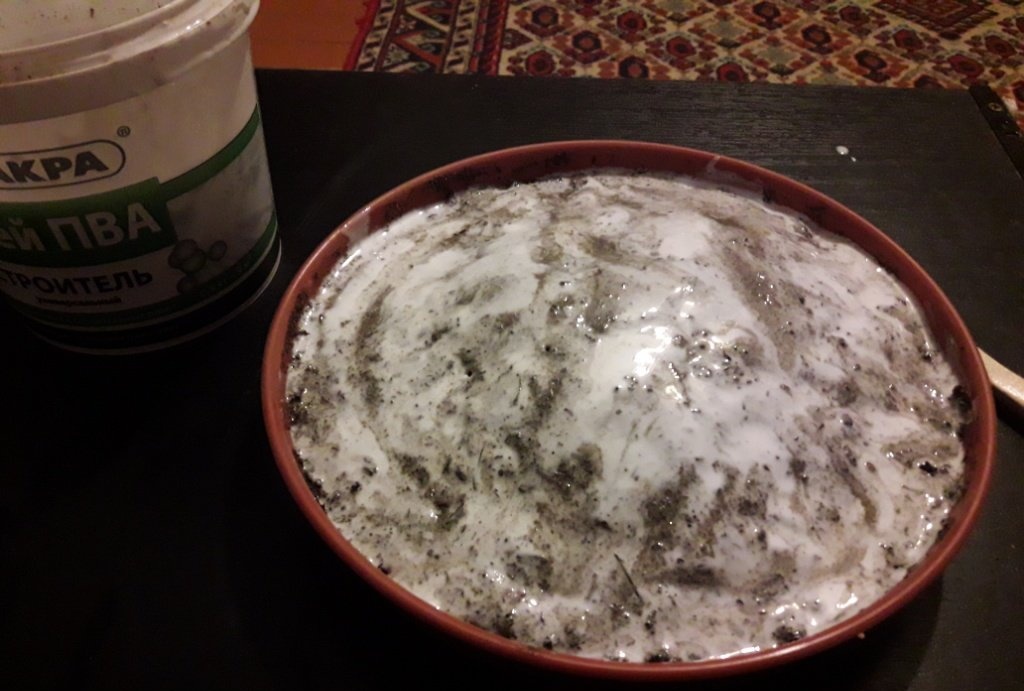
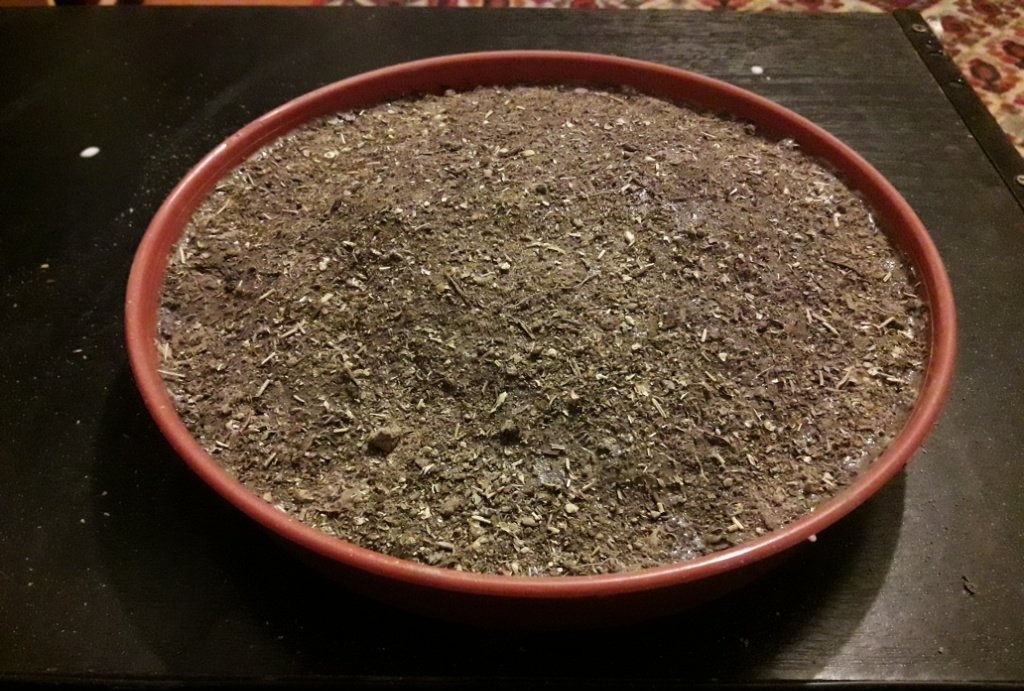
Pour 3-4 tbsp over the whole thing.spoons of PVA glue and spread it all over the ground so that in the future the mound does not settle and lose its shape. Sprinkle dry sand on top (you can mix it with crushed dry leaves), and also put it in a warm place until the morning.
In the morning we check the tree to make sure there are no bare wires left on it.
If everything is fine, we try it on the finished container with soil and mark with protruding roots the place where it will be in the future.
Then everything is simple - coat the tops of the branches (1.5-2 cm) with universal glue, and cover the glue-covered areas with colored crumbs of a torn sponge.
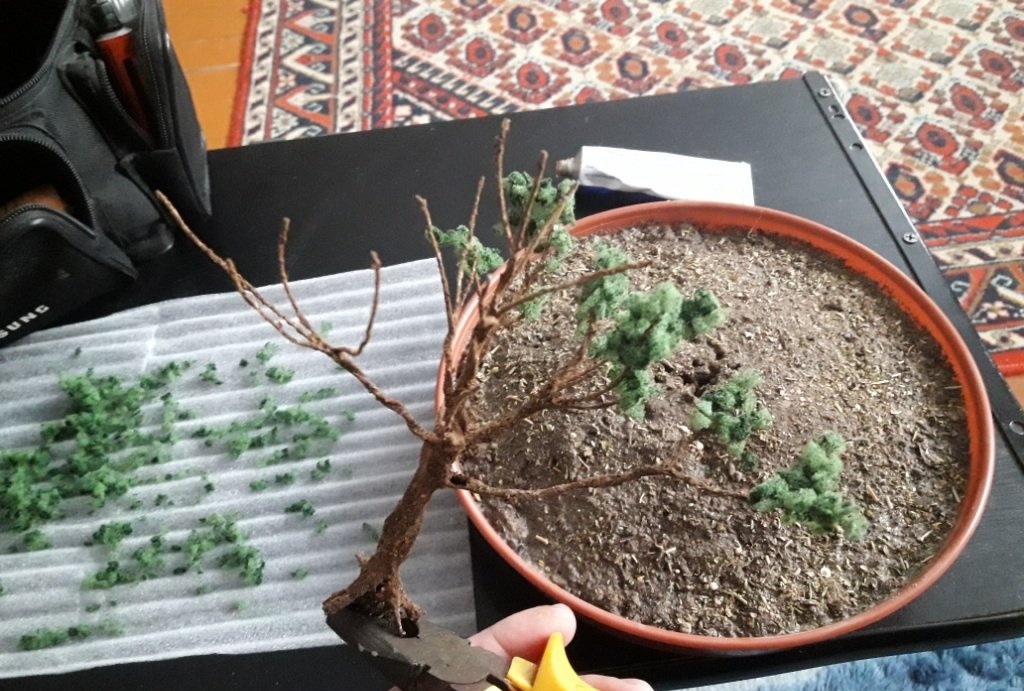

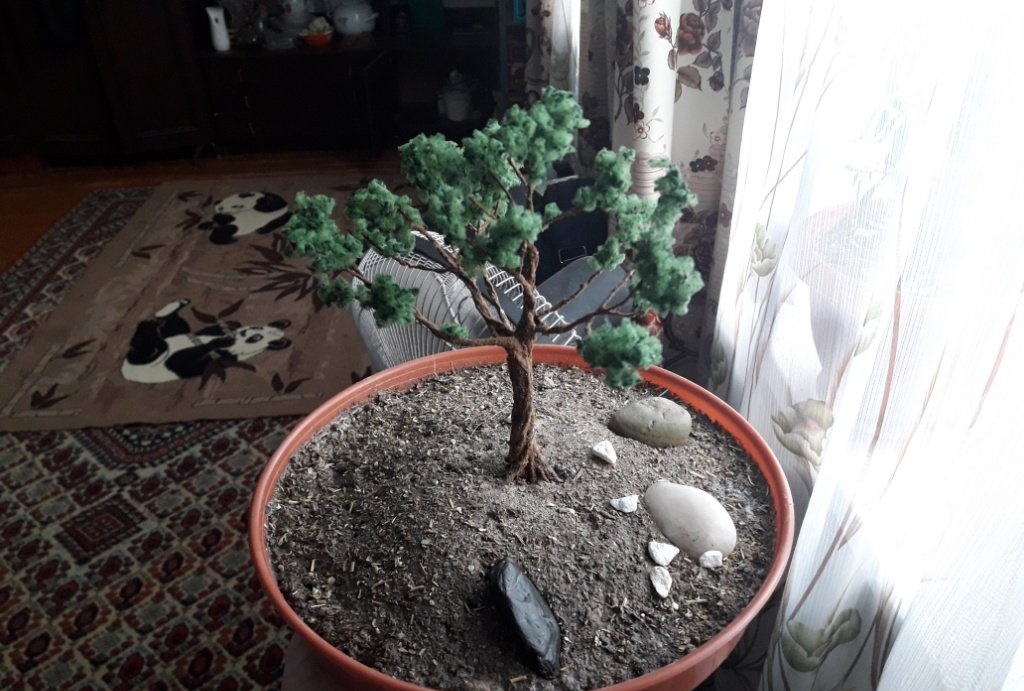
We wait 10-15 minutes for the glue to set and place the tree in the marked place. That's probably all. In a couple of days, the ground coated with glue will turn into a crust and tightly grab the roots of the tree. You can, if you wish, place a few stones under (or near) the tree.
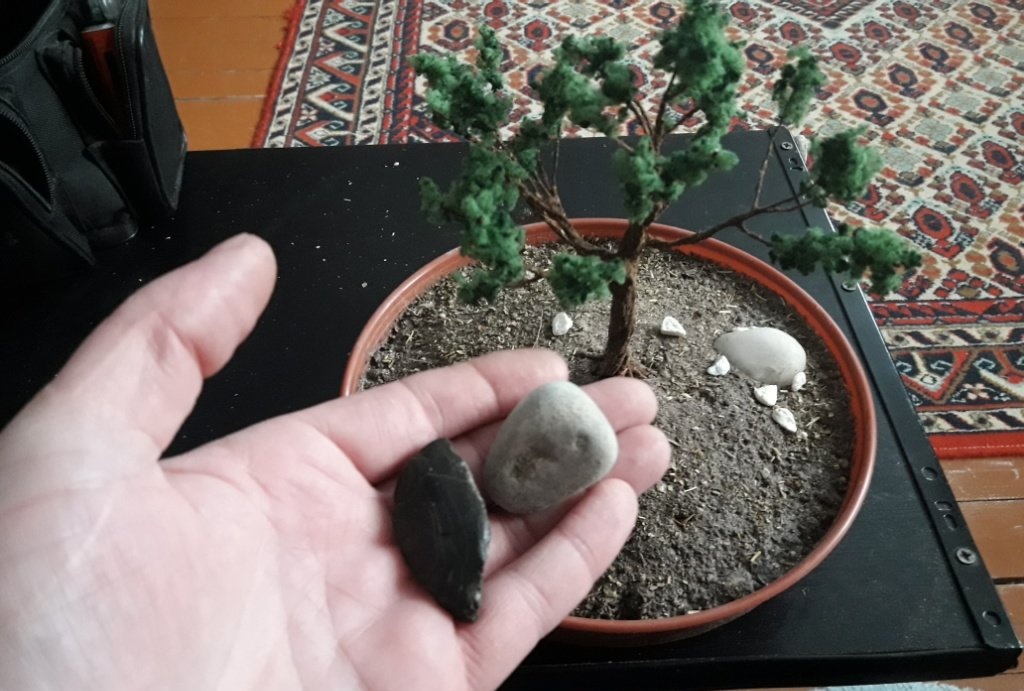
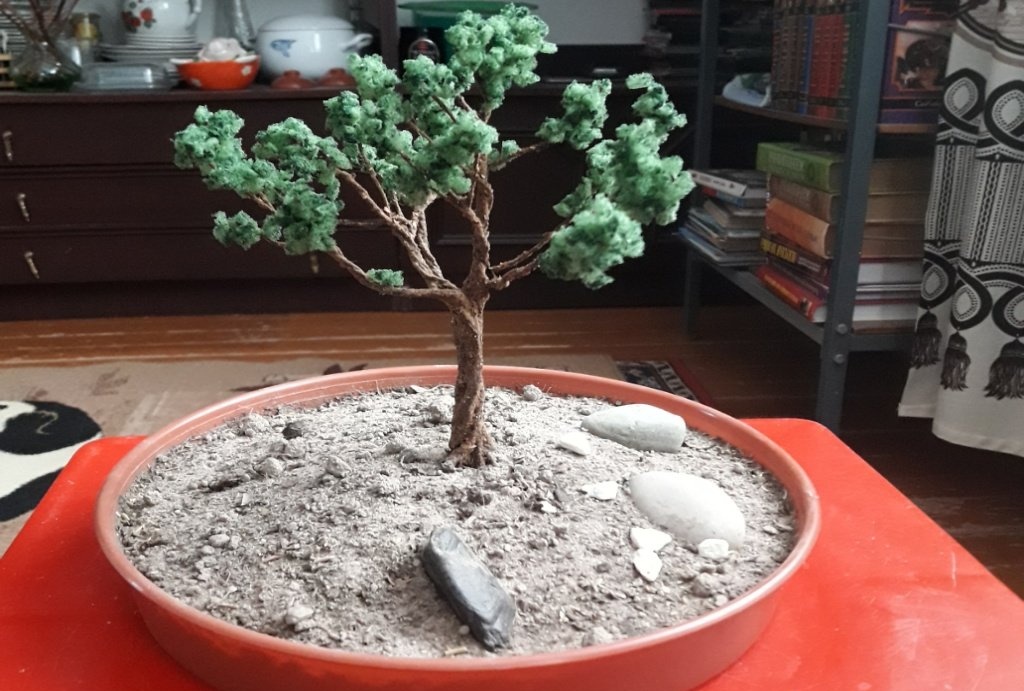
In my opinion, the work done is worth the effort and time spent - from the outside the tree looks very alive and natural. It can only be distinguished from the real thing upon closer inspection. In general, my daughter got what she wanted, and I avoided wasteful expenses and hassle with caring for a capricious living tree.
Watch the video