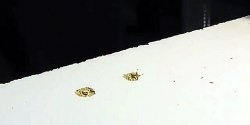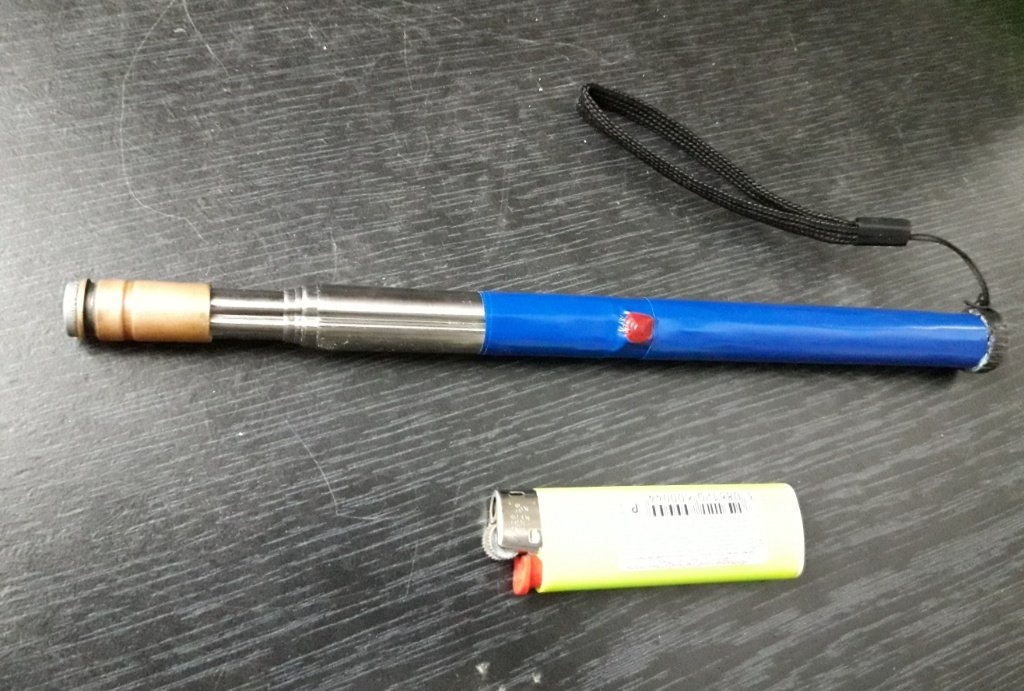
This is the last stage of moral irritation... especially if no one is around to retrieve the fallen item. You have to get down, pick it up, and climb back. And also, if you are standing, say, with your knee resting on the back of the sofa, and a screw or screwdriver falls behind the sofa! In general, when doing small repairs alone, it is better to prepare for it properly so that it goes through with the least amount of trouble and irritation.A telescopic probe-gripper for fallen metal (not large) objects will be of great help in this matter. Such a thing can be ordered in an online store, where I actually got the idea... However, I have never seen this probe on sale or in stores, therefore, I suggest assembling it yourself, with your own hands. The most interesting thing about this business is that almost any junk can be used for assembly! The only irreplaceable and integral part of the design is the telescopic tube. Ideally, it would be a telescopic one from a broken selfie stick. But you can also take a whisker from an old indoor antenna; it is thin, long and light, and extends more than a meter. You can, of course, simply attach a magnet to a piece of wire, and thereby make your work easier, but I suggest approaching the assembly more thoroughly, and making the thing not just for once, but for permanent storage and use at the right time, so that it is always at hand . With backlight and comfortable handle.
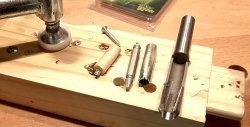
Will need
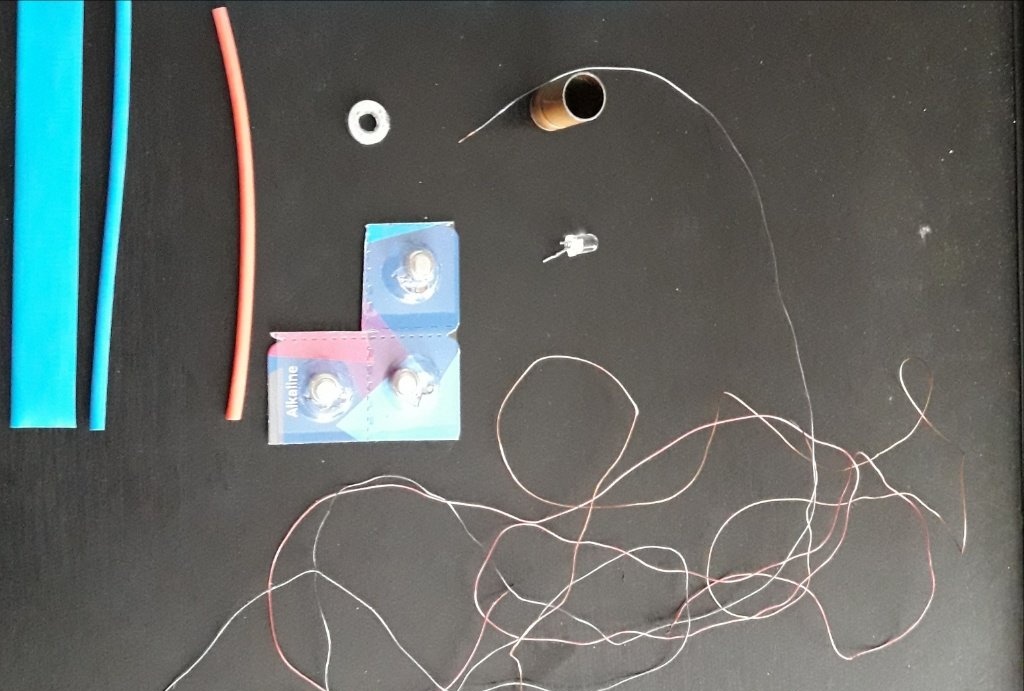
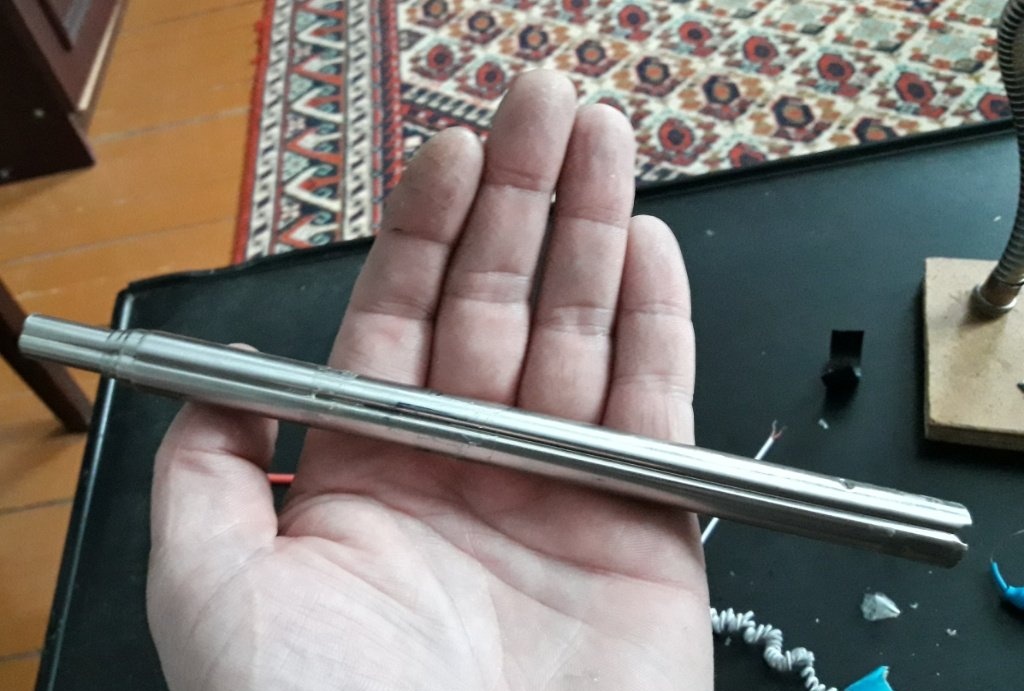
- A telescopic tube from a non-working or unnecessary selfie stick (or a similar telescopic tube).
- Thin two-core cable (preferably from the same broken selfie stick).
- Thin wires (red and blue).
- A neodymium magnet in the form of a washer with a hole with an outer diameter of approximately 10 millimeters.
- Light-emitting diode at 3 volts.
- Tube in the outer diameter of the magnet, 3-4 cm long
- Closing button.
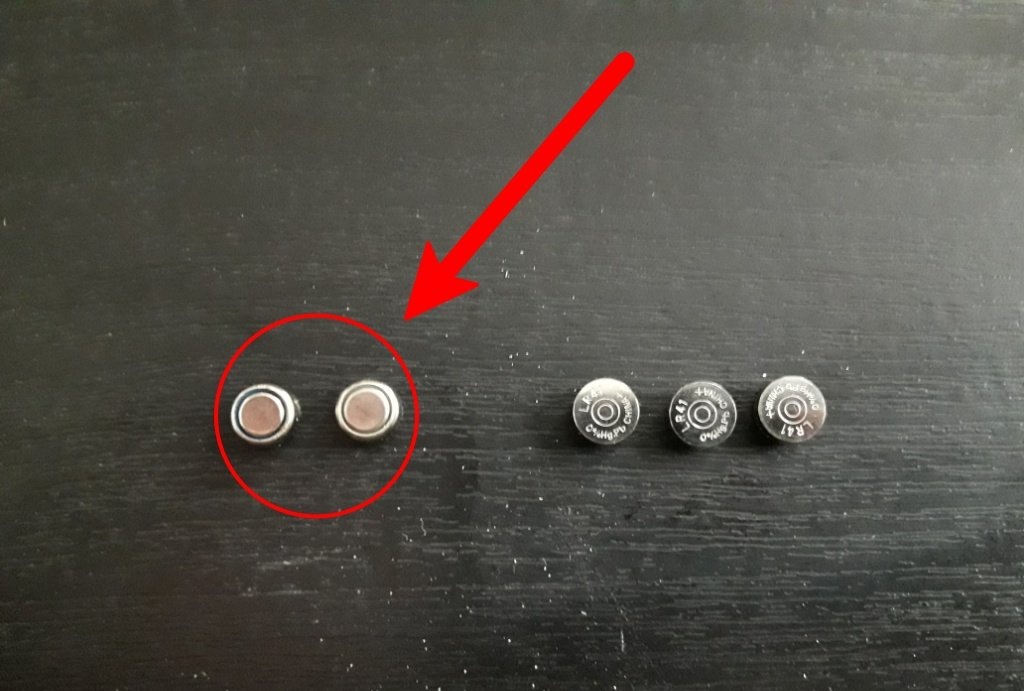
- Three new AG13 batteries (aka watch battery, aka “button cell”).
- Two old and completely discharged AG13 batteries.
Tools and consumables:
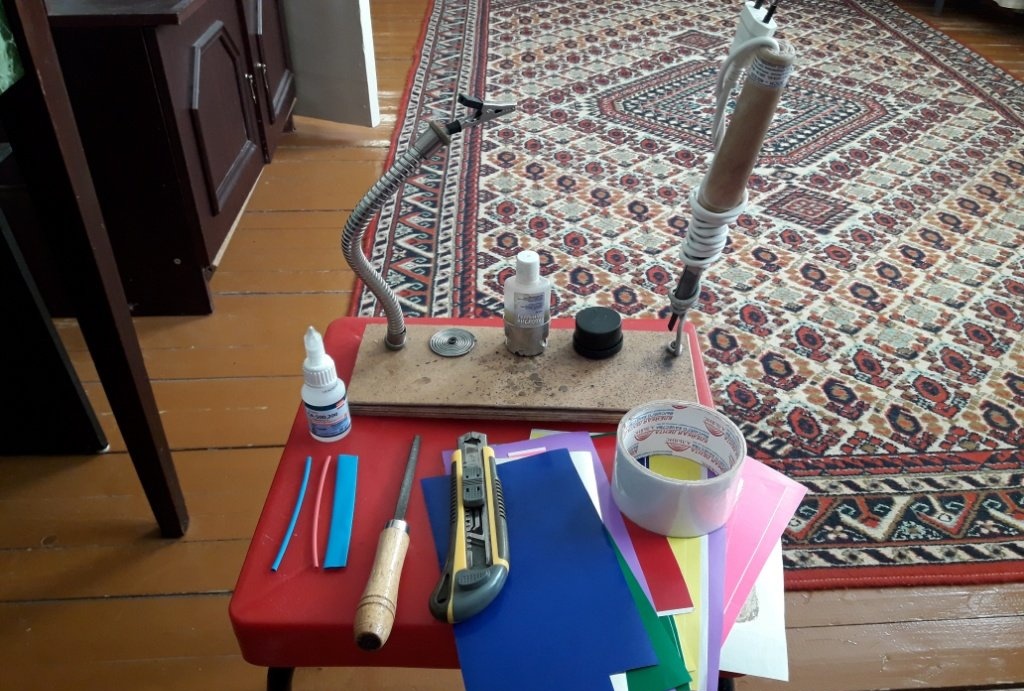
- Soldering iron, flux and tin.
- Secondary glue.
- File or needle file.
- Heat shrink tubes.
- Scissors.
- Stationery knife.
- Scotch.
- Colored self-adhesive film.
Making a telescopic probe
Since we already have a ready-made housing (telescopic tube), let’s start with the battery for the future product.
The AG13 cells themselves have very vague voltage data. Although the voltage on the package is indicated at 1.5 volts, measurements of different, new batteries of this type always show different results. Unfortunately, I myself was not able to carry out these measurements, but after visiting several forums on the Internet on this topic, I became convinced that the voltage of batteries of this type varies from 1 to 1.5 volts. That’s why, it turns out, they are mounted in threes into key fobs that have a 3-volt Light-emitting diode, not two. In addition to three new batteries, I picked out two more old, completely dead and dead batteries from the old key fob; they will serve as contacts for new ones.
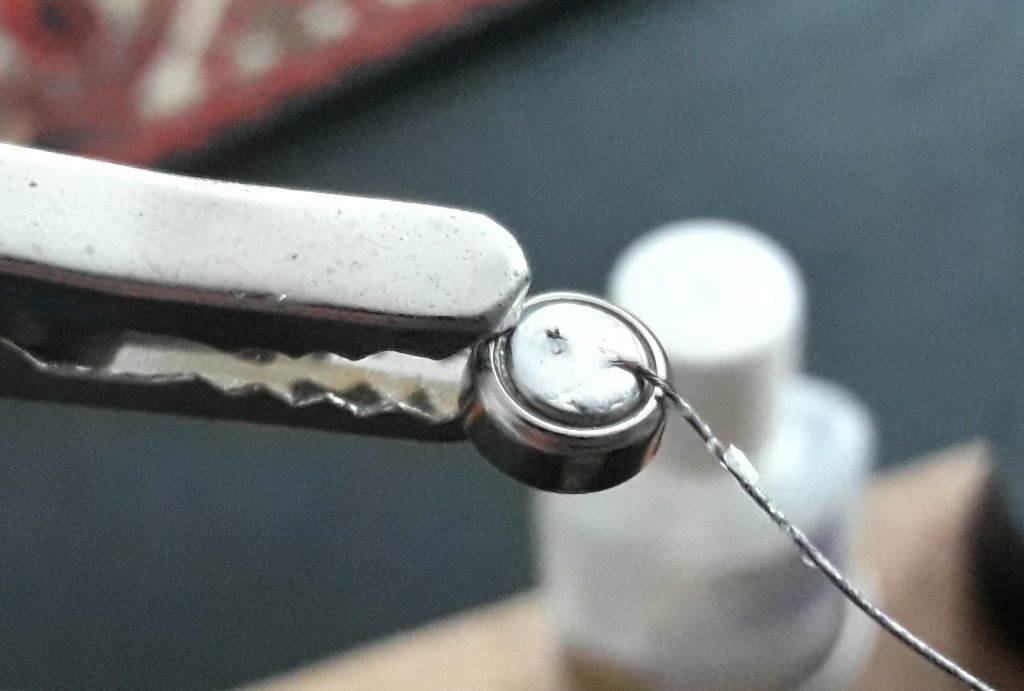
In a good way, of course, I should have cut the contacts out of metal, but I decided to save time... in the end, nothing bad will happen (and did not happen!) when working with dead batteries. So, first we solder the contacts. To one of the old batteries, to the positive contact, we solder the red wire, to the second battery, to the negative contact, we solder the blue wire.
Next, we take a piece of tape and place new batteries on its sticky side, on the edge, in series (plus to minus), close to each other so that they touch. Along the edges of these batteries, also sequentially, we apply dead batteries with soldered wires. Now carefully wrap all the connected batteries in tape. We cut off (or melt with a lighter) the edges of the roll with batteries.
We place this block inside a heat-shrinkable tube of suitable diameter and shrink the tube by heating it with a lighter.Learn how to use this disposable battery for LED:
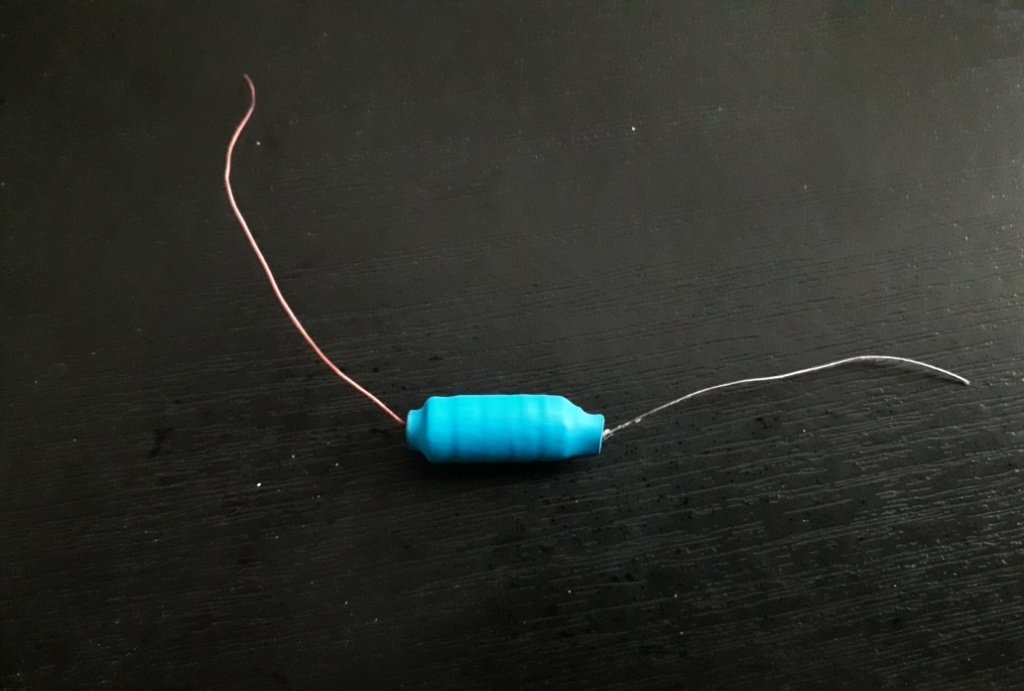
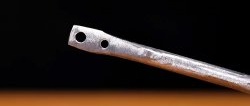
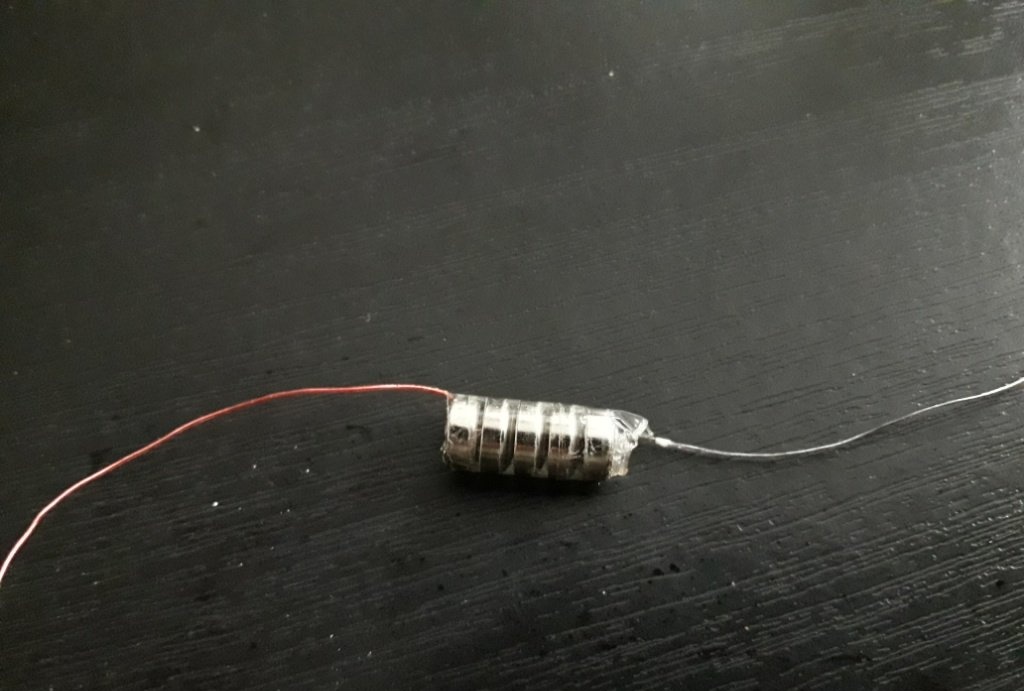
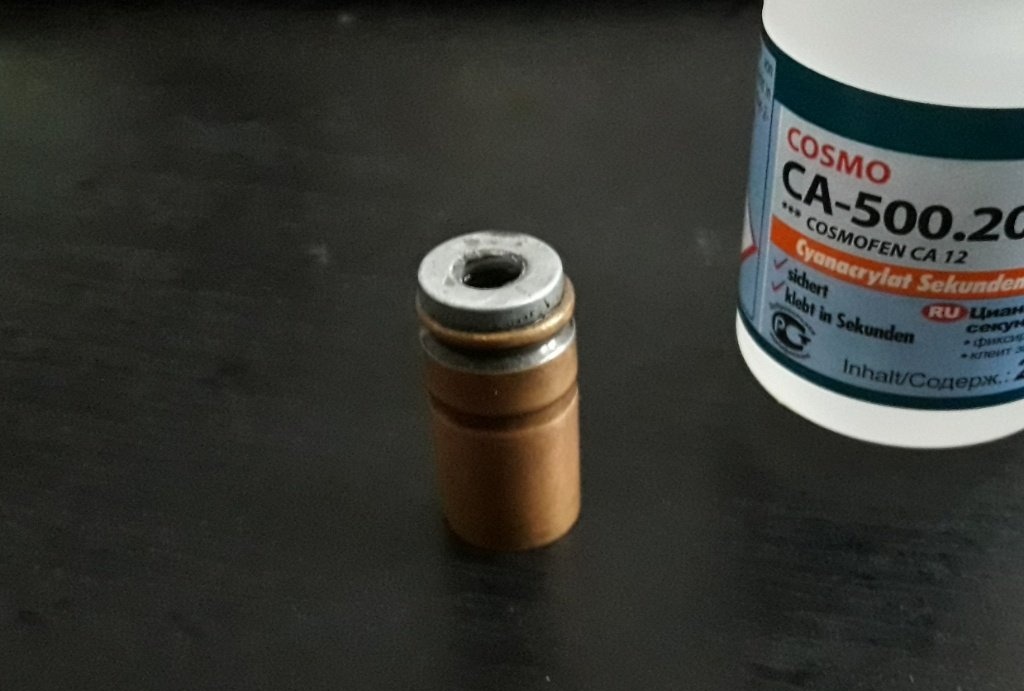
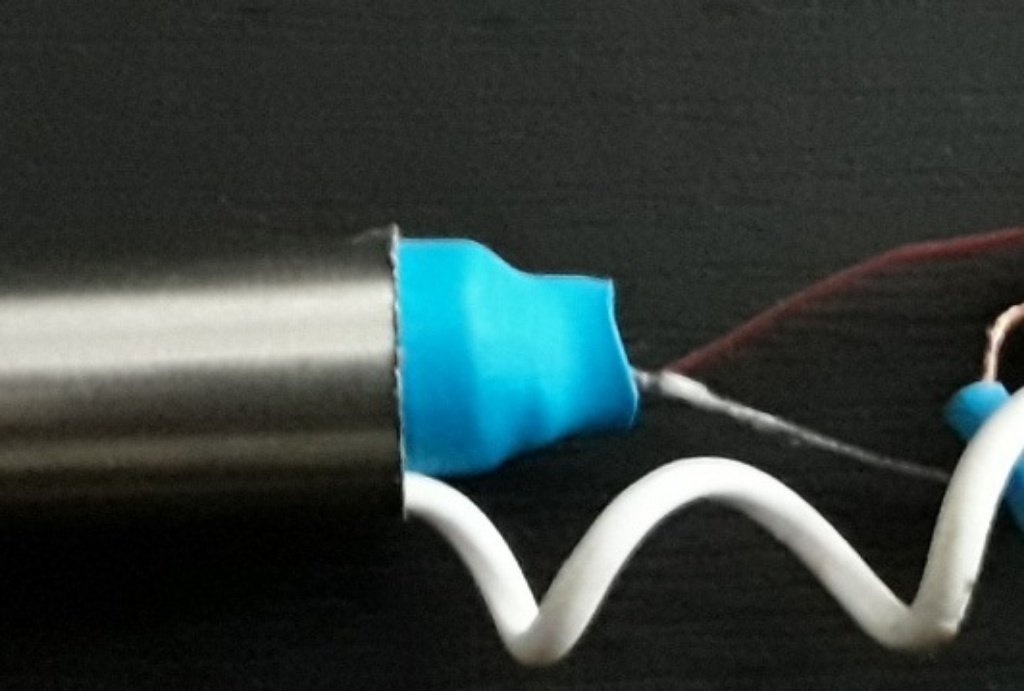
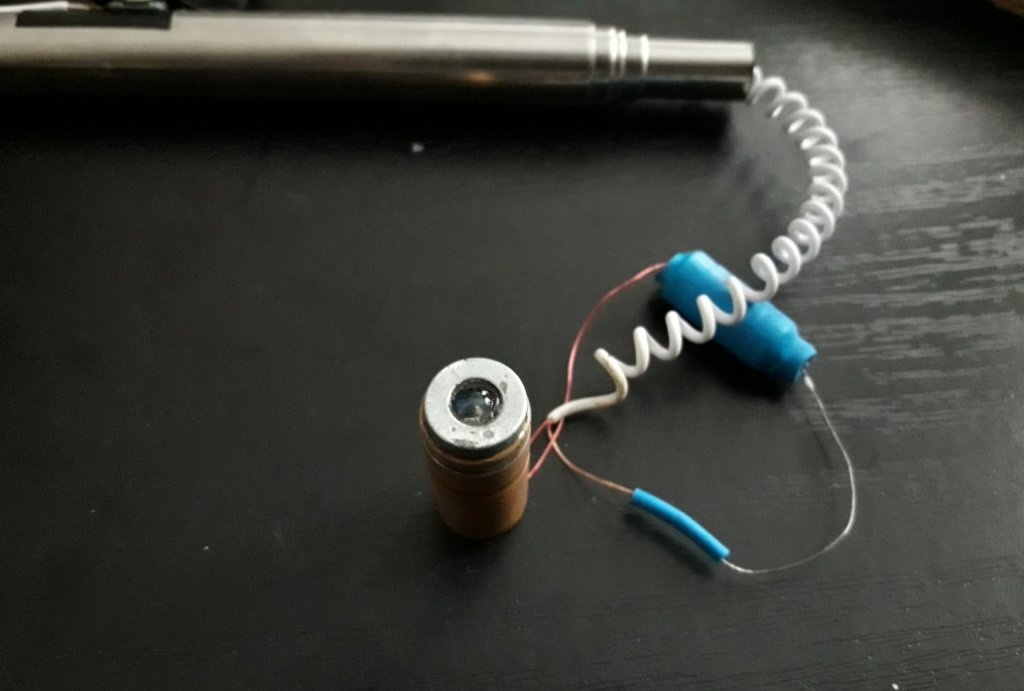
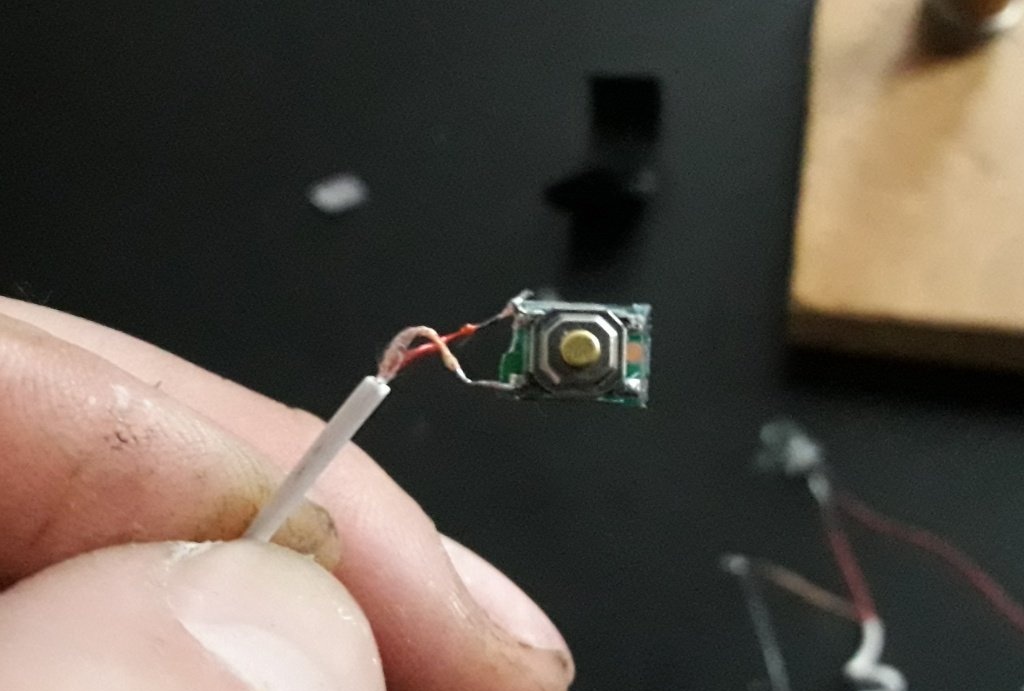
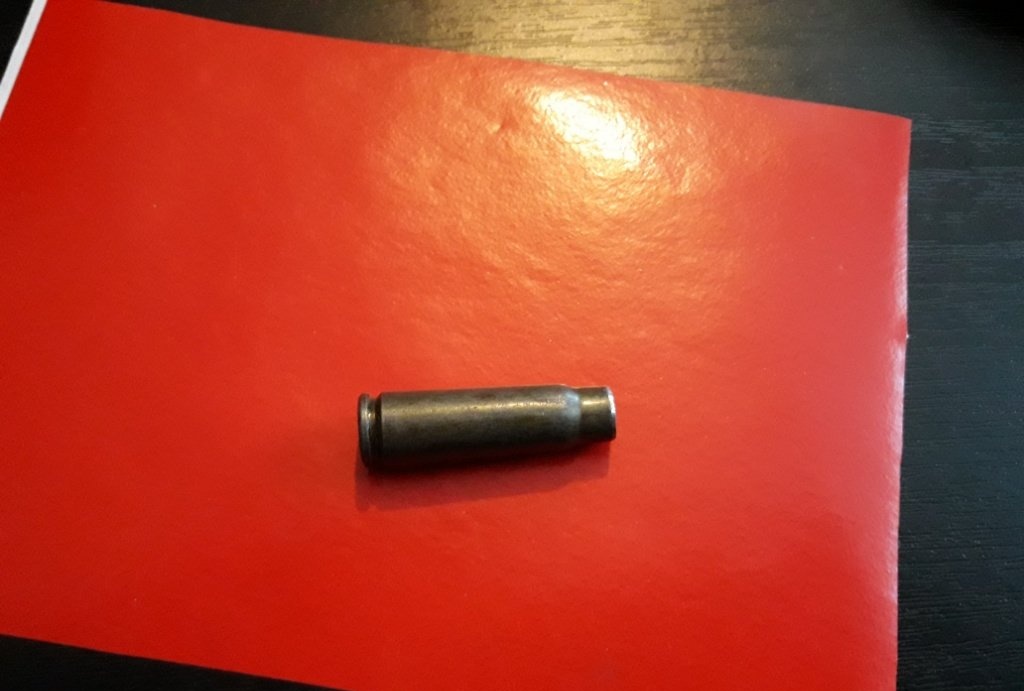
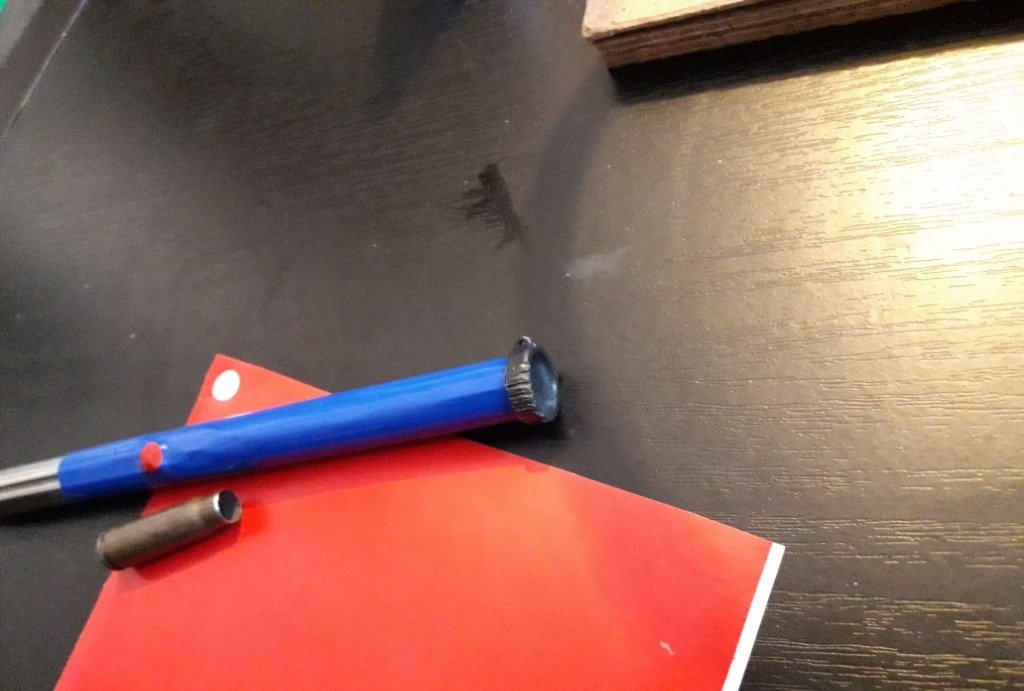
I think there is no need to describe how long button batteries can last, especially considering the intensity of use of this product. So you don’t have to think about replacing the battery for now. Well, when the time comes, assembling the same battery is a matter of ten minutes! Now we will make the working head of the probe itself, which will highlight and also collect fallen objects from the floor. You will need a tube, three or four centimeters long, and with a diameter about the diameter of a neodymium magnet. I adapted a spent cartridge case for this purpose; its drilled capsule fits perfectly to the diameter LED, and to the diameter of the magnet hole. So, glue the magnet to the tube (or sleeve) using second glue. We glue it, not solder it, otherwise the magnet will lose its properties when heated.
Next, take a long two-core cable and solder one of its wires to the antenna LED, the second wire to one of the battery contacts. We solder the second contact of the battery to the free antennae of the LED.
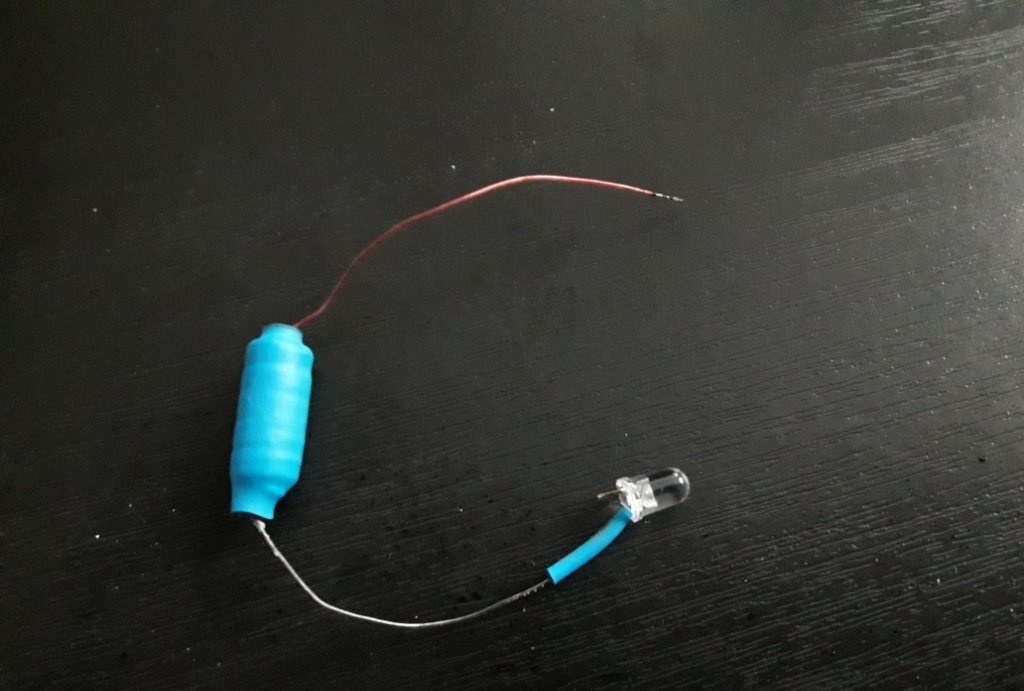

Just before soldering, find out where the plus and minus are located on the LED and do not forget to put thin thermal tubes on the wires. Now we thread the free end of the cable into the telescope, from top to bottom, and carefully, so as not to break the thin wires, we then push the battery into the upper end of the telescope.
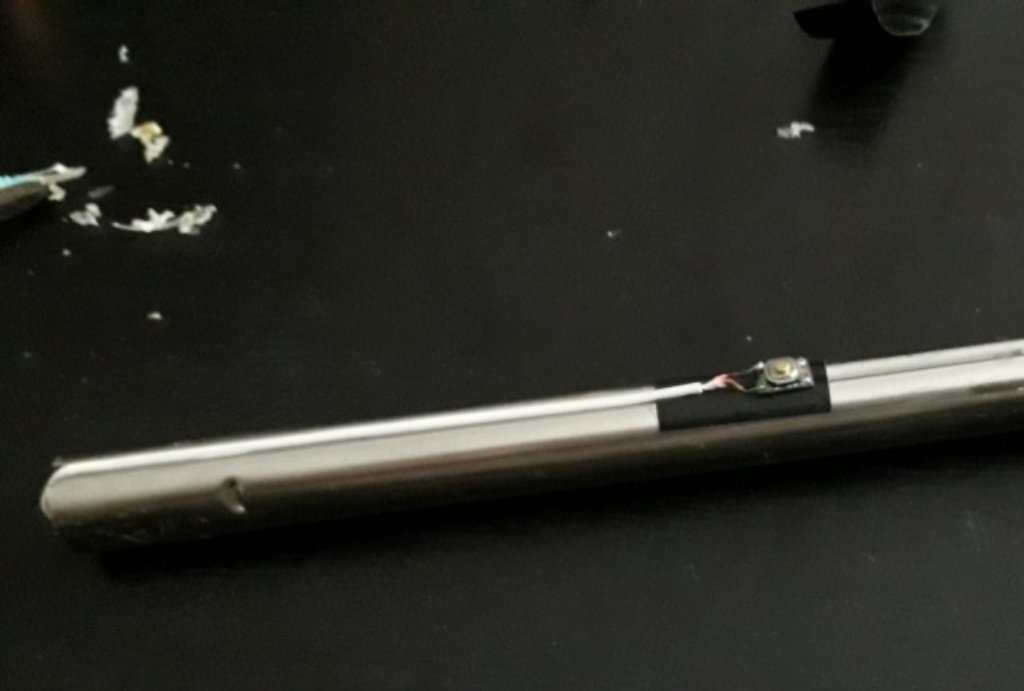
If the battery dangles freely there, increase its diameter using electrical tape. We push the LED into the tube (sleeve) until its top appears from the magnet hole.
We drop a drop of second glue onto the LED to secure it in the magnet (by the way, if you want the light from the LED to be diffused and not hit at one point, due to the drop-shaped shape of the LED, use a file to file the tip of the LED sticking out from the center of the magnet). We place the tube (sleeve), with a magnet and LED glued to it, onto the tip of the telescopic tube with the battery inside.
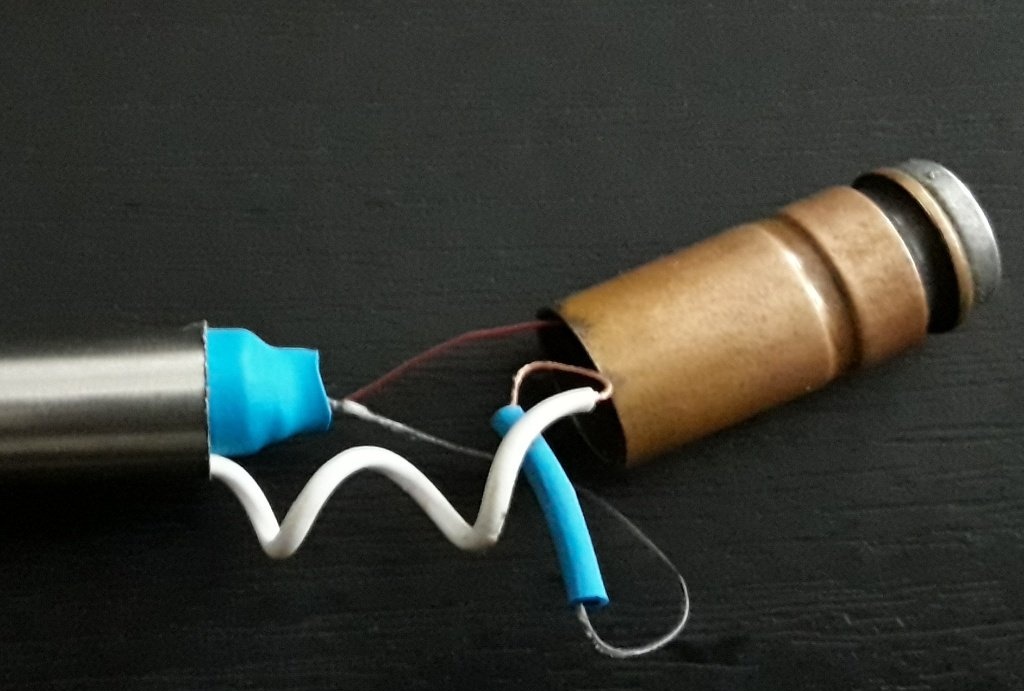
If the caliber of the sleeve turns out to be larger than the tip of the tube, again, increase the required diameter using electrical tape. We drop a second of glue onto the joint between the sleeve and the electrical tape - the head will hold on more tightly, but removing it in case of replacing the battery will not be difficult, since the glue will not come into contact with the tube-body itself.
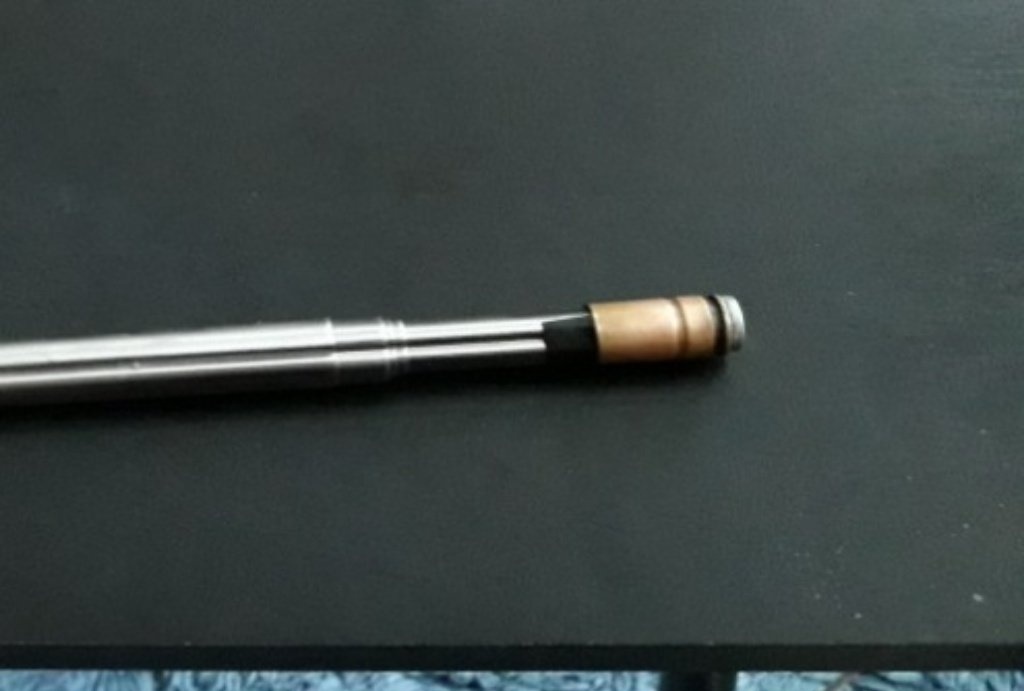
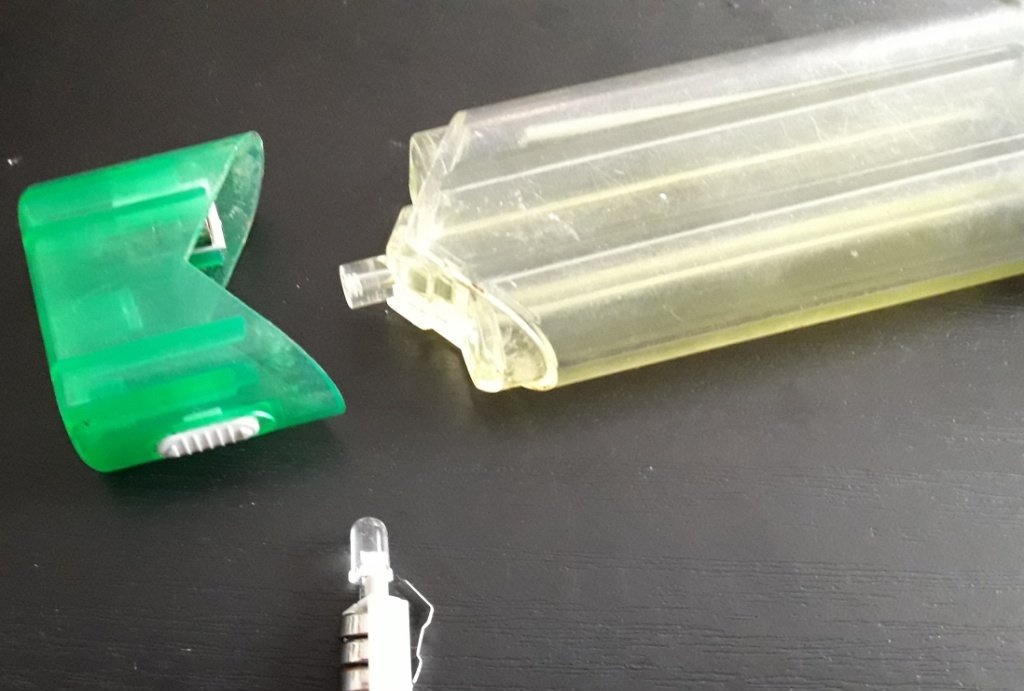
When the glue dries, you can cut off the protruding edges of the electrical tape with a utility knife. Next we will deal with the contactor. At first I thought about leaving the lock button that was originally on the handset, which served as the camera release on the phone. But this button had a small circuit board - if it was present, the LED at the end of the tube glowed constantly, even without pressing the button, although not as brightly as when pressed. I had to remove the button from the body, break off this scarf, and solder the cable wires to the contactor contacts directly.
Now we take the cable with the button out of the lower end of the telescope to the required length, and glue the cable with the button in its original place.
The bulk of the work has been done. Now all that remains is to cover with adhesive film the part of the tube with the button, the place with which the palm will contact.
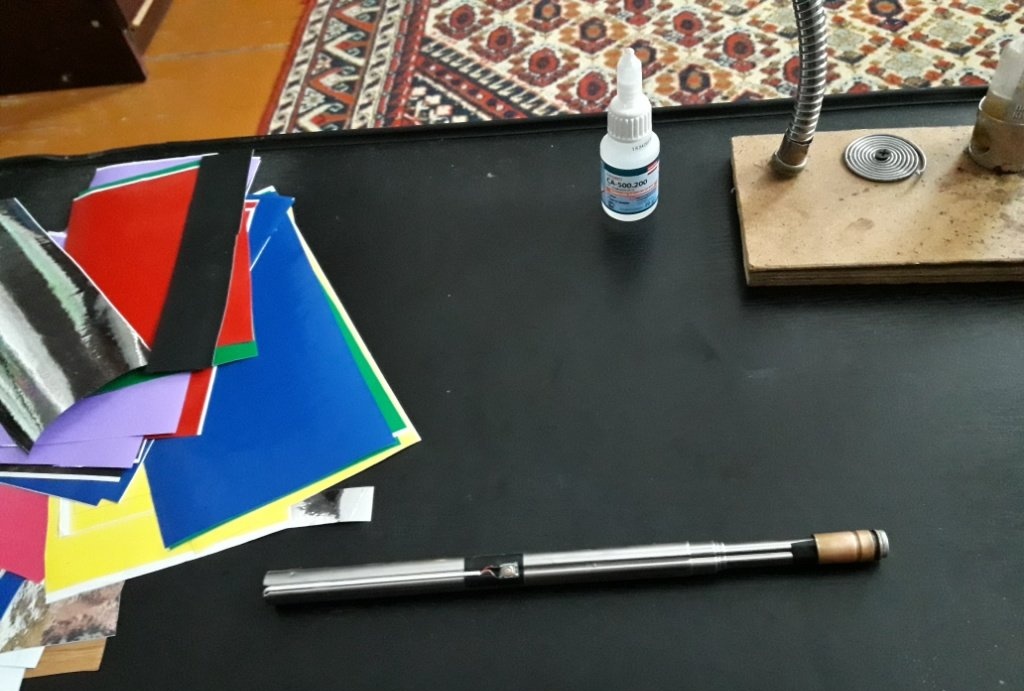
When placing the film on the button, you do not need to press it hard so that in the future the button does not turn on spontaneously, and the waves and unevenness of the film remaining along the edges can be easily shrinked by heating the lighter. Like a heat tube.Well, using a tube with sharpened edges, cut out a red circle that will indicate a button on the handle, and glue it to the appropriate place.

That's all. You can try it. Finally, place the cap with a loop on the end of the handle, which previously covered the end of the selfie stick.
In the future, when working, you can put this loop on your wrist so as not to drop this probe from your tired hands and not get off the stool.