Do it yourself
Life hacks, master classes, useful tips, recipes.
home » Useful and interesting » Lifehacks and useful tips » How to remove a broken bolt or stud from a deep hole
How to Remove a Broken Bolt or Stud from a Deep Hole

When a bolt or stud breaks off and remains deep in the hole, the situation seems hopeless. This happens if:
  • apply excessive force to the key;
  • the hardware turned out to be defective (for example, the presence of an internal microcrack);
  • the tightening was greater than the permissible value;
  • During operation, souring (oxidation) of the threaded connection occurred.

The situation is further aggravated by the fact that the part can be large and expensive (in our case, an aluminum alloy oil pan), and the unit where the piece of hardware is stuck is critical and there is nothing to replace it with.
This matter becomes more complicated if the broken bolt or stud remains in the hole of a part made of aluminum or magnesium alloy, which is much softer than steel hardware. Therefore, the fragment should be removed very carefully and carefully so as not to damage the threads in the hole of the part.

Preliminary actions


In order to increase the likelihood of successfully removing broken hardware from threaded holes, the following operations will not be superfluous:
  • tap the fragment using a special spring-loaded center punch or a regular one, lightly hitting it several times with a hammer. This will loosen the fit of the broken hardware;
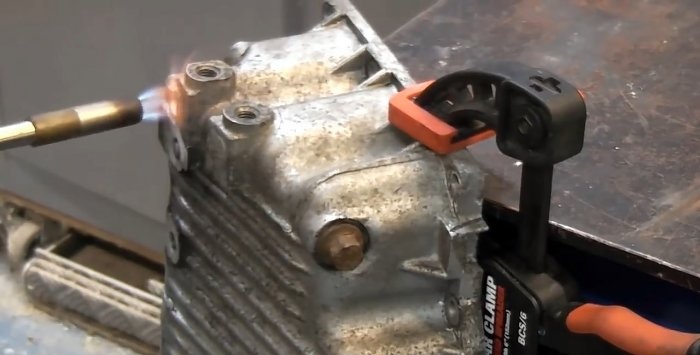
    How to Remove a Broken Bolt or Stud from a Deep Hole

  • heat the part in the area of ​​the hole with the fragment using a gas burner to partially relieve internal stresses, but do not overdo it so as not to melt the aluminum;
    How to Remove a Broken Bolt or Stud from a Deep Hole

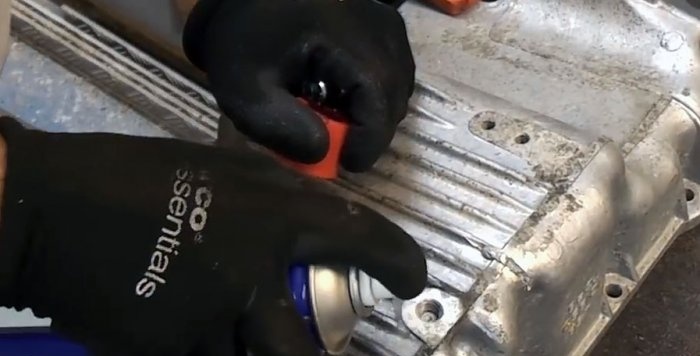
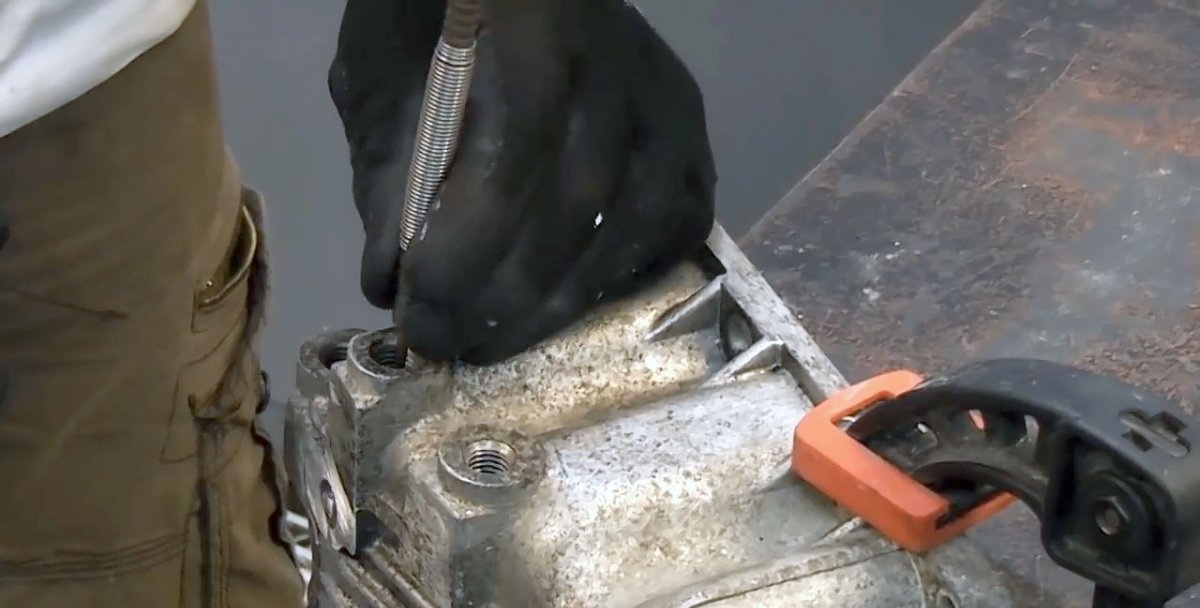
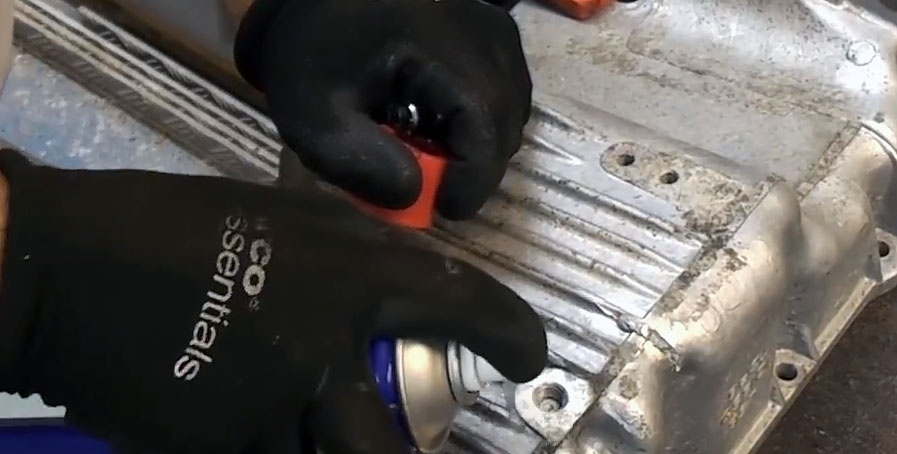
  • inject or pour a little penetrating lubricant such as W-40 into the hole, including to dissolve contaminants and remove rust.
    How to Remove a Broken Bolt or Stud from a Deep Hole


Such measures taken together will significantly facilitate the procedure for removing the remains of a bolt or stud from a hole.

The process of removing the fragment


How to Remove a Broken Bolt or Stud from a Deep Hole

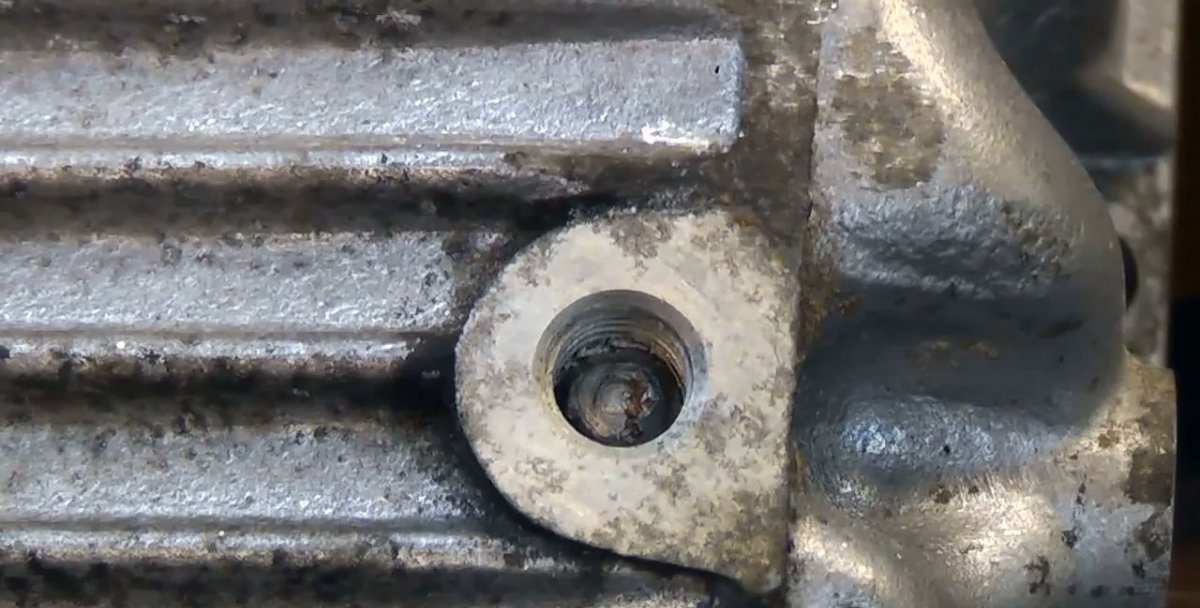
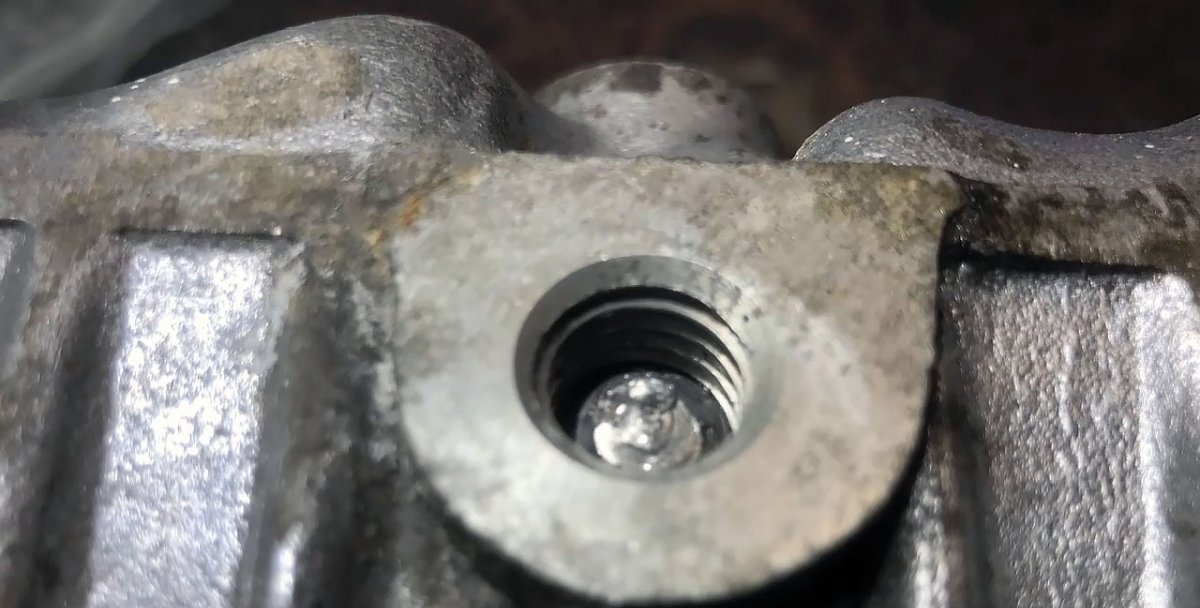
The greatest difficulty is in extracting a piece of hardware with a non-flat fracture surface. When attempting to drill, the drill bit may slip and damage the threads in the hole.
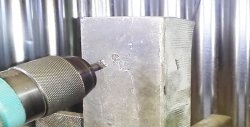
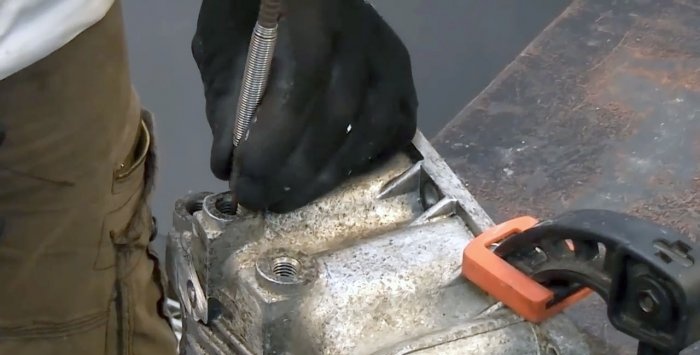
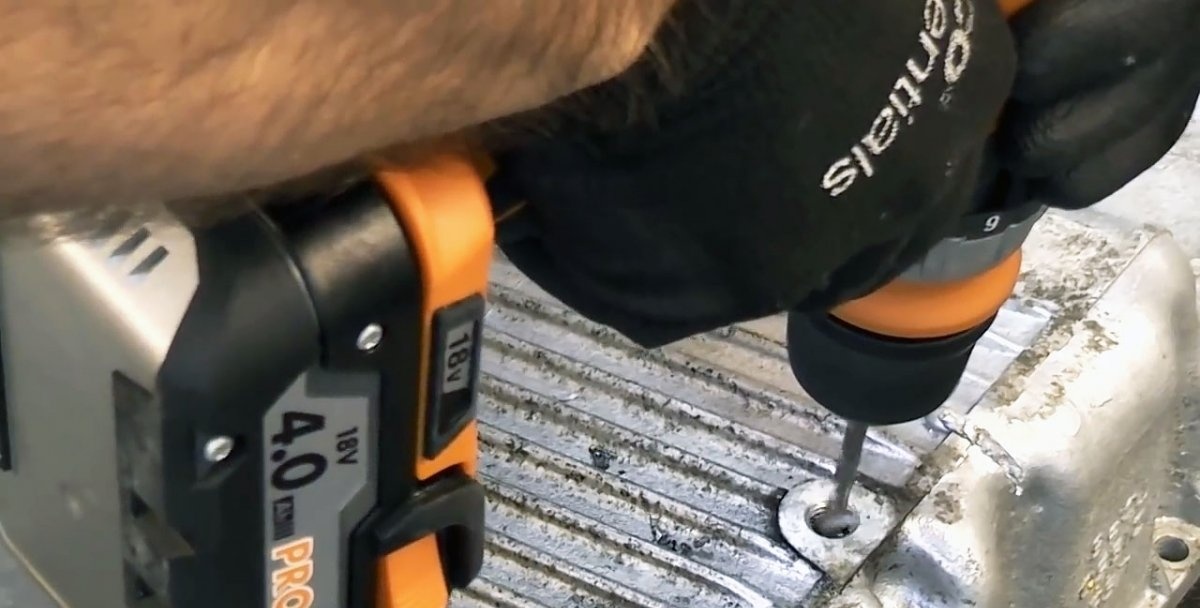
To remove such a fragment, we inject a penetrating lubricating liquid into the hole and select a guide bushing suitable for the thread.
How to Remove a Broken Bolt or Stud from a Deep Hole

How to Remove a Broken Bolt or Stud from a Deep Hole

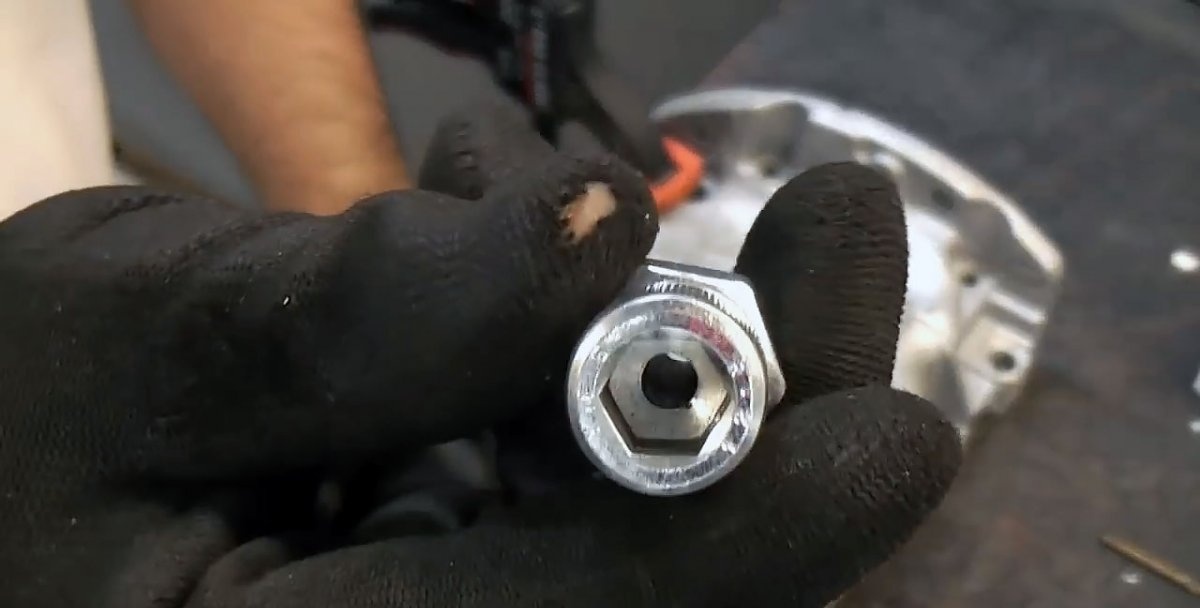
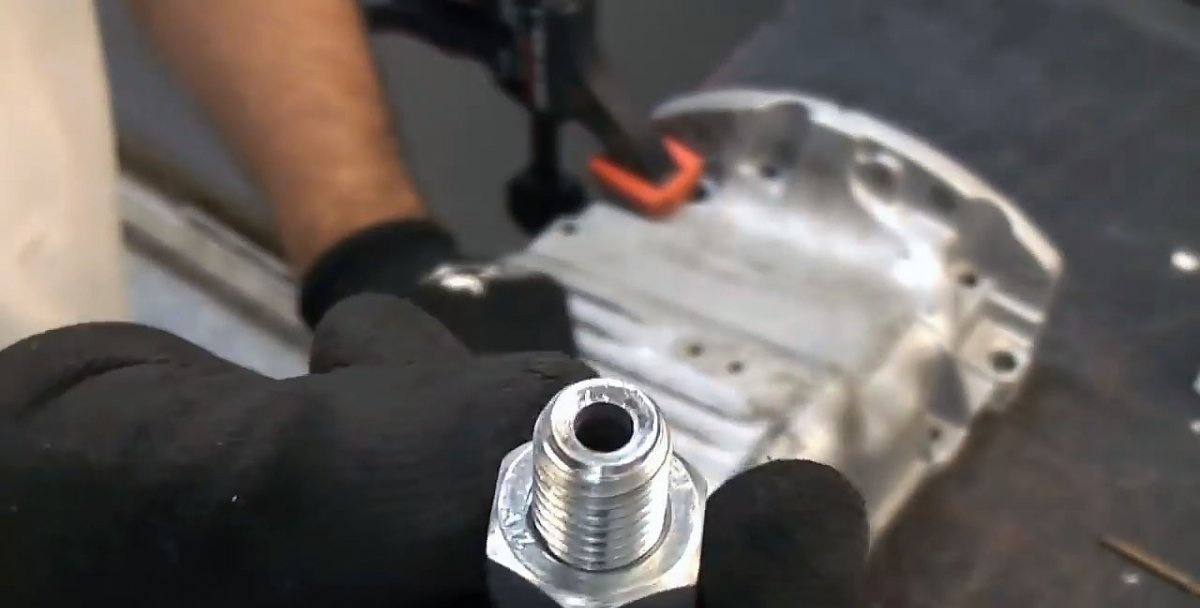
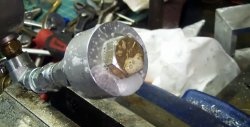
We screw it into the hole until it stops against the bolt or stud and tighten it with a locknut. Using a drill and a solid drill with grease at the end, we drill a small recess in the fragment for the extractor.
How to Remove a Broken Bolt or Stud from a Deep Hole

How to Remove a Broken Bolt or Stud from a Deep Hole

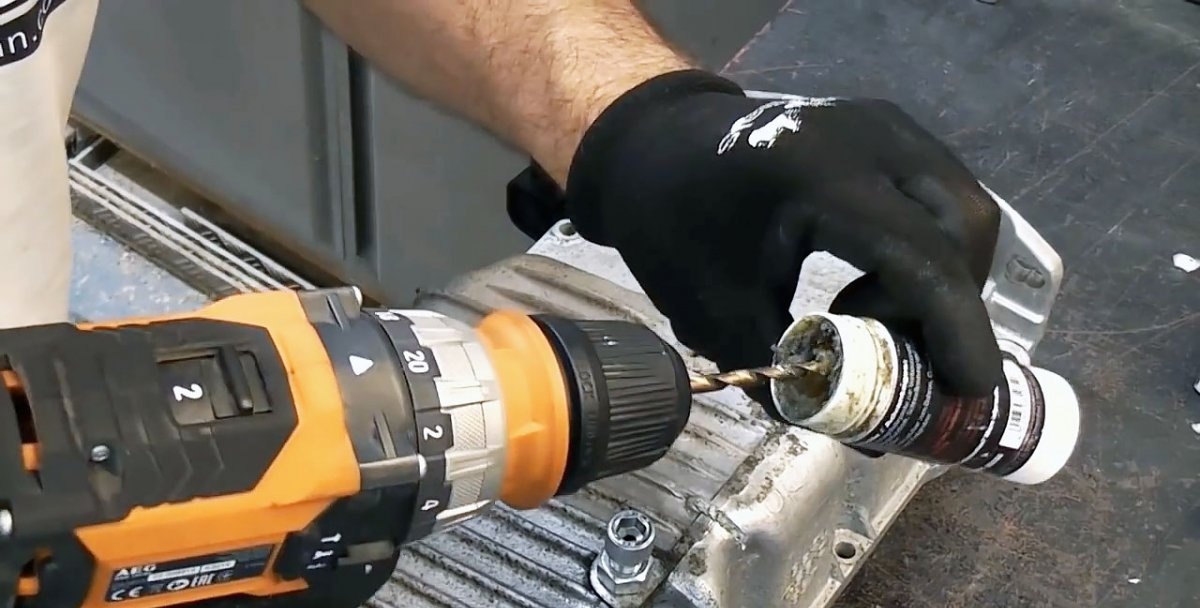
Having unscrewed the jig, we make sure that the drilling is exactly in the center and its depth is sufficient.
How to Remove a Broken Bolt or Stud from a Deep Hole

If this is not the case, you can continue drilling without fear of damaging the threads in the hole, since we already have a guide recess. Drilling should not be through, so as not to damage the aluminum part.
How to Remove a Broken Bolt or Stud from a Deep Hole

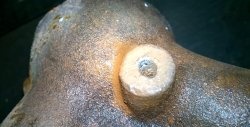
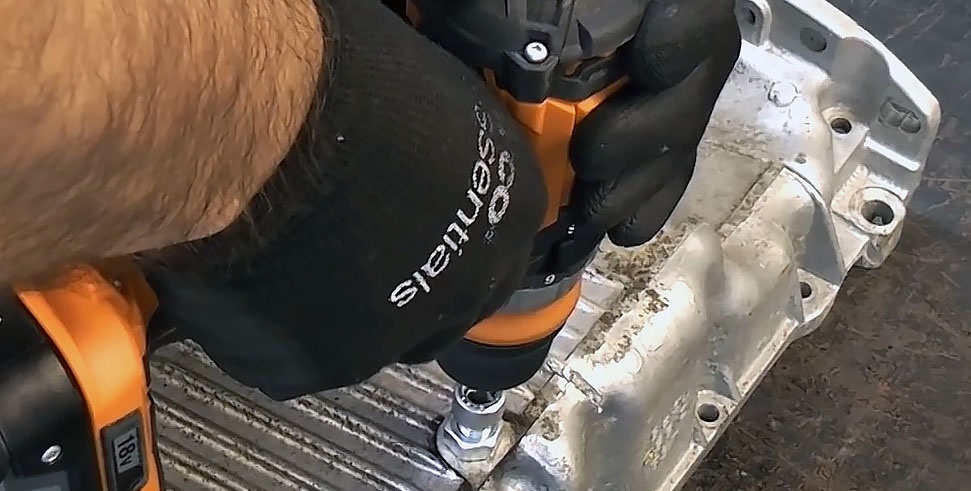
Next, take a screw extractor of suitable diameter and drive it into the hole.
How to Remove a Broken Bolt or Stud from a Deep Hole

How to Remove a Broken Bolt or Stud from a Deep Hole

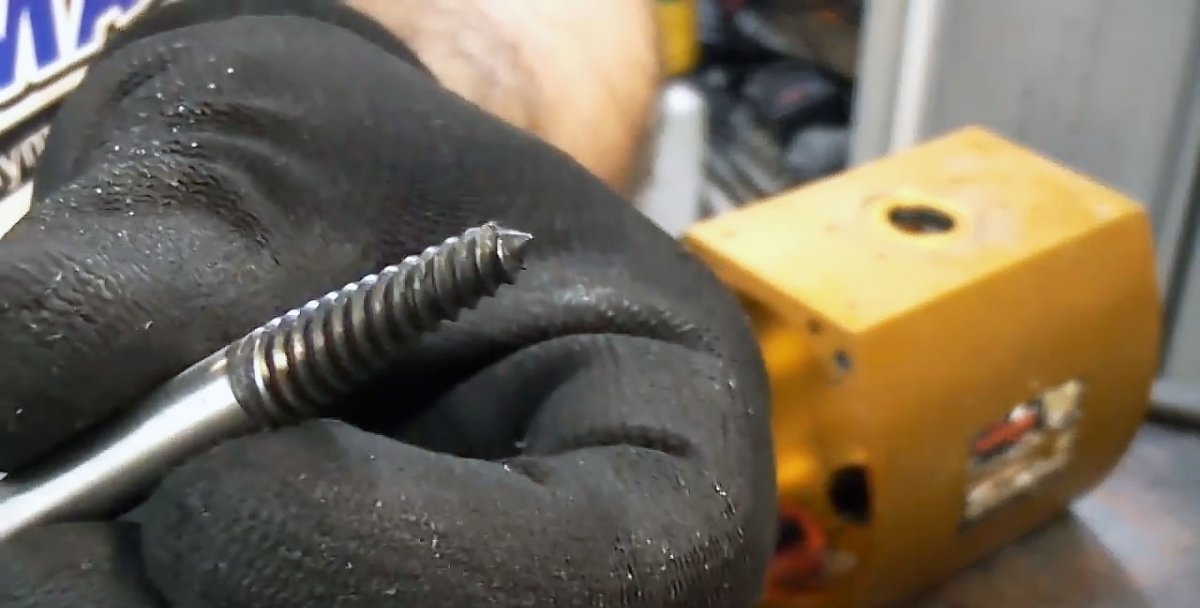
Then, holding the tool with your finger, carefully turn it out, making sure that the extractor sits tightly in the fragment.
How to Remove a Broken Bolt or Stud from a Deep Hole

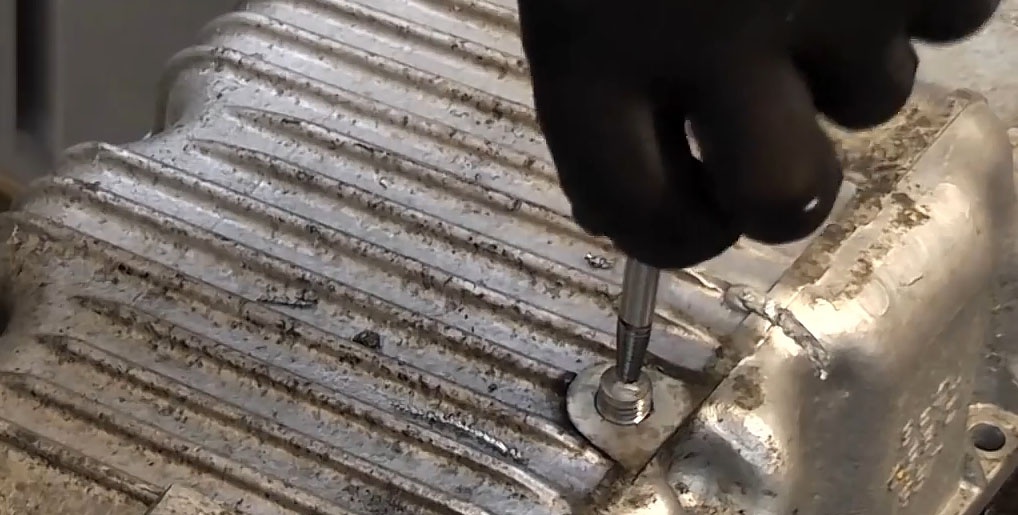
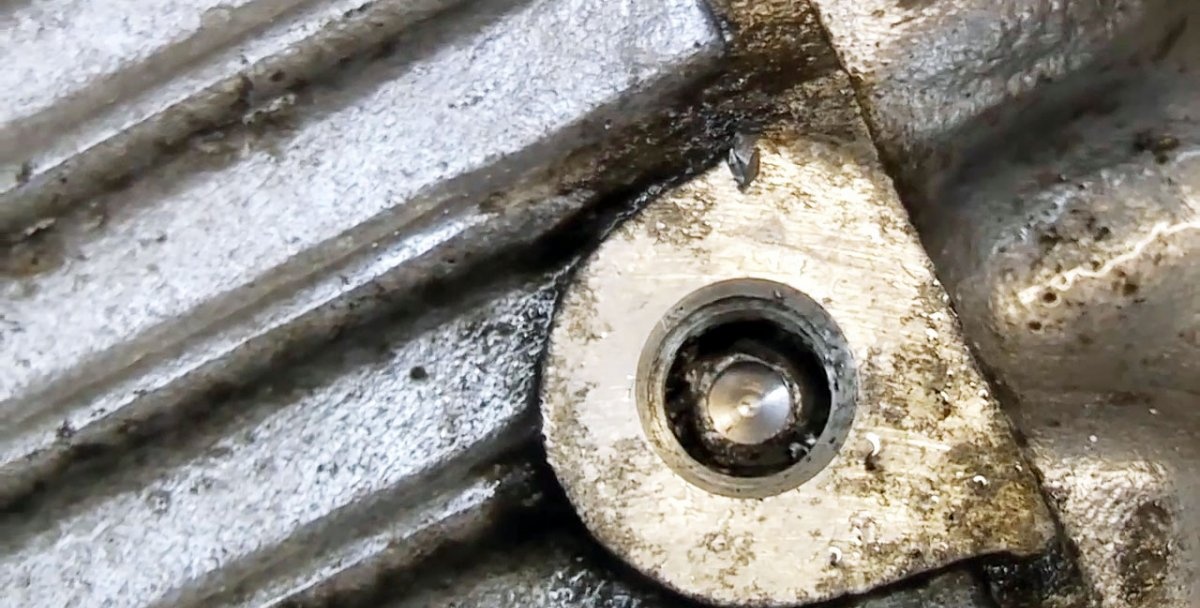
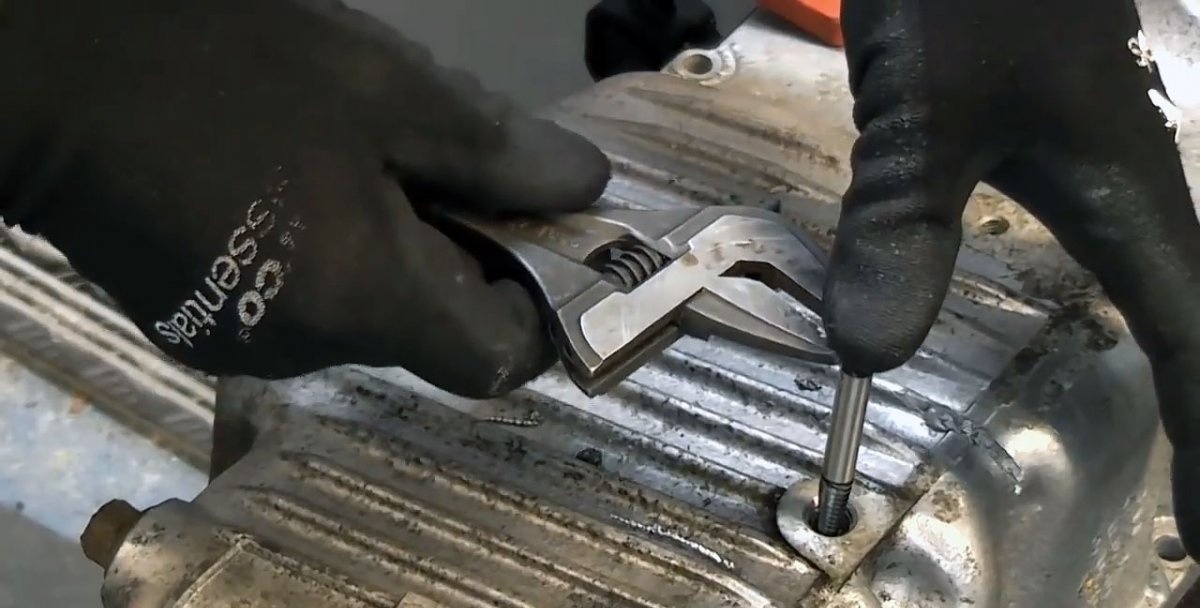
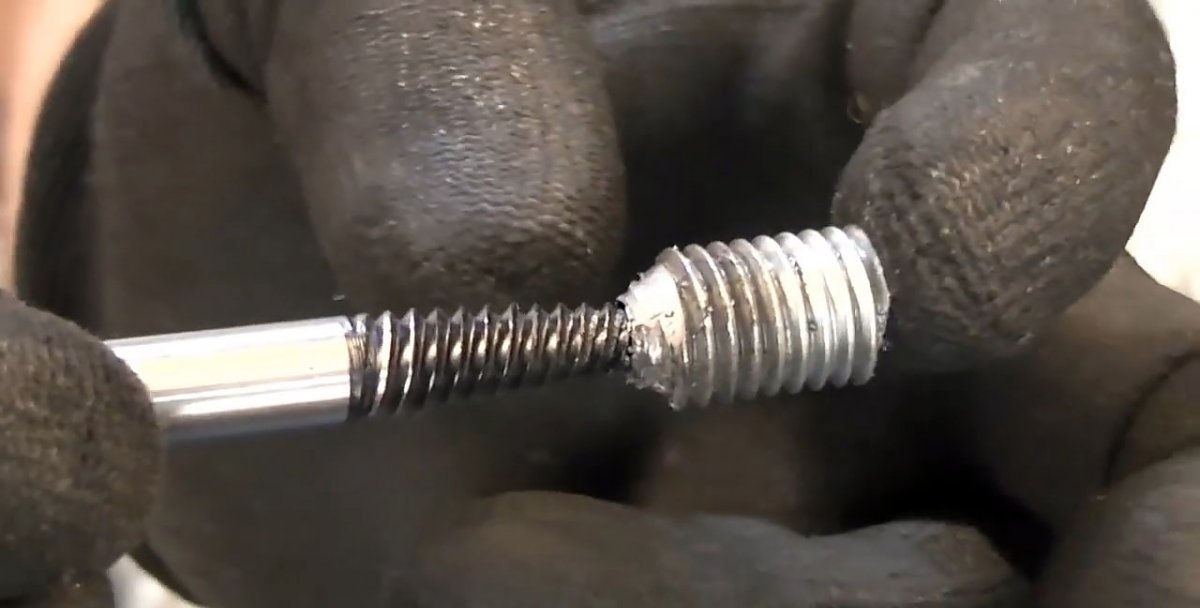
We screw the bolt into the hole and make sure that the thread is intact.You can coat the threads with copper grease or something similar to prevent the bolt or stud from becoming jammed in the threads of the hole the next time.
How to Remove a Broken Bolt or Stud from a Deep Hole

Tips and notes


Since the work of removing broken bolts and studs involves drilling, heating, the use of impact tools and corrosive liquids, it is necessary to use personal protective equipment: long sleeves, gloves, goggles, possibly even a respirator.
If you don’t have a left-hand rotation drill, then nothing bad will happen. You can use a standard right-hand rotation drill, but supplement it with an extractor, which can also be left-handed or right-handed.

Watch the video


come back
Comment
  • bowtiesmilelaughingblushsmileyrelaxed relaxedsmirk
    heart_eyeskissing_heartkissing_closed_eyesflushedrelievedsatisfiedgrin
    winkstuck_out_tongue_winking_eyestuck_out_tongue_closed_eyesgrinningkissingstuck_out_tonguesleeping
    worriedfrowninganguishedopen_mouthgrimacingconfusedhushed
    expressionlessunamusedsweat_smilesweatdisappointed_relievedwearypassive
    disappointedconfoundedfearfulcold_sweatperseverecrysob
    joyastonishedscreamtired_faceangryragetriumph
    sleepyyummasksunglassesdizzy_faceimpsmiling_imp
    neutral_faceno_mouthinnocent
4 minus one =
Comments (37)
  1. Igor
    #1 Igor Guests November 19, 2018 00:06
    37
    The extractor is very fragile and if it breaks (which is what mostly happens), then nothing can help except burning it out. Therefore, only drill completely and constantly try to pick up the drill in reverse rotation. The best way is with left-hand drills - both drill and hook.
  2. Guest Alexey
    #2 Guest Alexey Guests November 19, 2018 01:35
    25
    And now we are writing about removing a broken extractor (supposedly Made in Germany) along with a broken bolt from a cast iron body (you can’t play with the difference in temperature coefficient of expansion, as with aluminum).
  3. Boris
    #3 Boris Guests November 19, 2018 09:34
    21
    You, my friend, have never done this! This is how amateurs work.
  4. Slavkin
    #4 Slavkin Guests November 19, 2018 10:11
    4
    The extractor is drilled with a feather drill or any other diamond-coated drill.
  5. Sergius
    #5 Sergius Guests November 19, 2018 12:21
    13
    It’s immediately obvious that he’s a special breeder!
    1. Guest Vladimir
      #6 Guest Vladimir Guests November 30, 2018 09:30
      6
      And even at the very tip.
  6. Arthur
    #7 Arthur Guests 19 November 2018 16:23
    3
    Also, this probably depends on the relationship of the “hole” to the “chisel”, perhaps this is not a fundamental option!? . 2018
  7. Guest Mikhail
    #8 Guest Mikhail Guests 19 November 2018 18:03
    21
    We select a drill according to the diameter of the hexagon. After drilling, hammer the hexagon into the crease with a hammer. Unscrew it. That’s it.
  8. Guest Victor
    #9 Guest Victor Guests 19 November 2018 19:37
    11
    I inserted a steel tube inside the thread (so as not to damage the walls), took a weld at high current and melted an electrode into this tube to burn through it, then abruptly turned it off and waited for it to cool down, the electrode was bent and twisted into swing and happiness was only on the third try. good luck guys!
    1. Guest Alexander
      #10 Guest Alexander Guests 20 November 2018 19:11
      8
      The option does not “roll” - a piece of the stud may remain forever, the part will be “screwed up”. It will blow through the “fool” once or twice, and then the thread of the piece will tightly grab onto the thread of the “useful body”. The correct option, as already indicated, is work with centering, using a left-handed drill. Tested many times, there were no misfires.
  9. Guest Alexander
    #11 Guest Alexander Guests 19 November 2018 20:46
    15
    Well, if you start drilling, then take drills with the left direction; when drilling, the drill will constantly create force on the slug bolt and the part will begin to unscrew. I've been doing this for over 20 years.
  10. Unshaven
    #12 Unshaven Guests 19 November 2018 22:28
    28
    Here the guys write correctly, a little tighter creases and good luck with your extractor.
    I would drill out slowly increasing the diameter of the drill. Then break the remains and pick them out of the internal thread

How to cook “Lazy” pilaf in a baking bag

How to move a large cabinet and its contents alone

Do it yourself - crafts and master classes | Page 300

Fan made from disposable forks | Do it yourself

«Do it yourself - with your own hands» - a site of interesting homemade products made from scrap materials and items at home. Step-by-step master classes with photos and descriptions, technologies, life hacks - everything a real master or just a craftsman needs for needlework. Crafts of any complexity, a large selection of directions and ideas for creativity.

We recommend reading

Washing machine error codes