When working with wood, due to inexperience or lack of suitable tools, sometimes unforeseen situations arise from which you somehow need to get out.
If the self-tapping screw turns
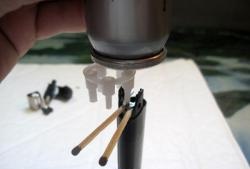
1. The screw that you are going to screw into a previously prepared hole turns out to be smaller in diameter and does not stay in the place intended for it. The situation is unpleasant, especially if you don’t have a larger diameter screw at hand.
Since the screw remains the same, you need to narrow the hole, for example, using a simple match. We insert it into the recess until it stops, and begin to screw in the screw. When it “seizes,” you can break off the protruding part of the match and tighten the screw all the way using a suitable screwdriver.
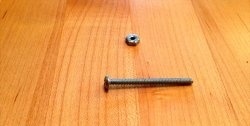
If the key is slightly larger than the bolt
2. How to unscrew a bolt from wood if only the head sticks out and the wrench is one or two sizes too large? A coin of suitable denomination, that is, thickness, can help out. We insert it into the gap between the jaw jaw and the edge of the bolt. Now you can unscrew the bolt, maintaining the coin in the desired position.You don’t need to apply any special effort, because the bolt is held in wood much weaker than in metal.
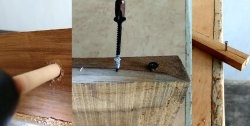
Marking from a flat line
3. A marking line on the surface of a wooden board or beam, parallel to the base, is drawn using a special carpentry tool - a surface planer. If there is no such device, then it can be replaced with a small wooden block with at least one smooth surface, into which a screw with a head, preferably with sharp edges, is screwed approximately in the center.
Having established the required size from the screw head to the surface of the block, screwing the bolt in or out using a metal ruler, press the block tightly to the base and draw a line that the screw head extrudes on the workpiece. To be safe, we draw the line in one direction or the other.
Take care of your fingers
4. In order not to injure your fingers when driving nails into a wooden board with a hammer head that has jumped off the nail head, the nail must be held with an ordinary wooden clothespin.
Everything turns out perfectly: the nail remains vertical to the surface being hammered, and the fingers are at a safe distance from the danger zone.
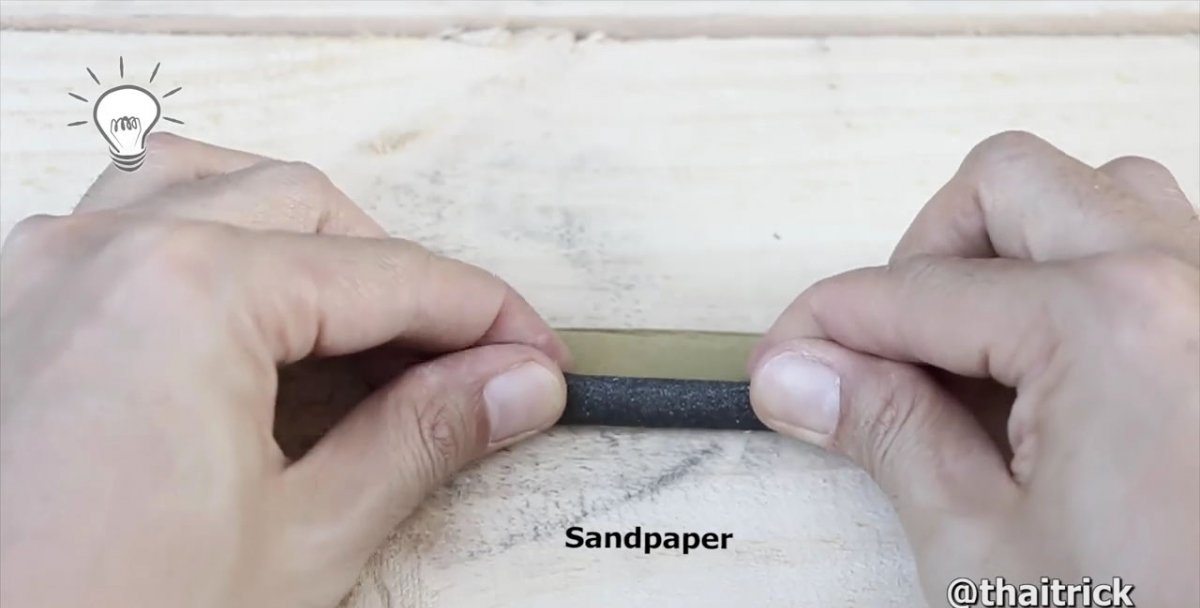
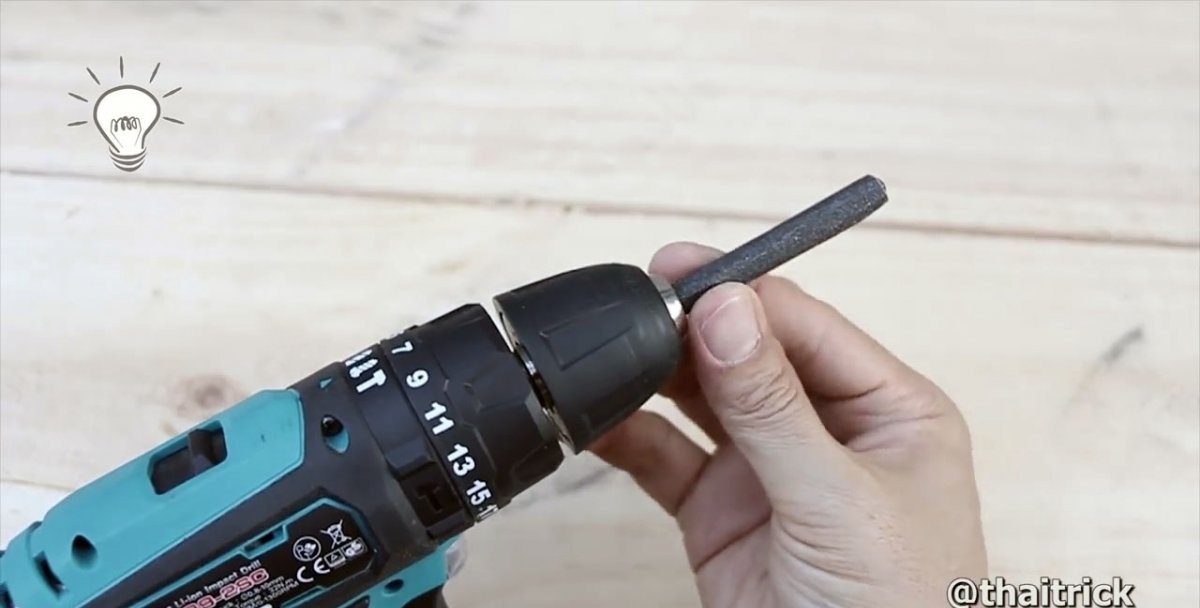
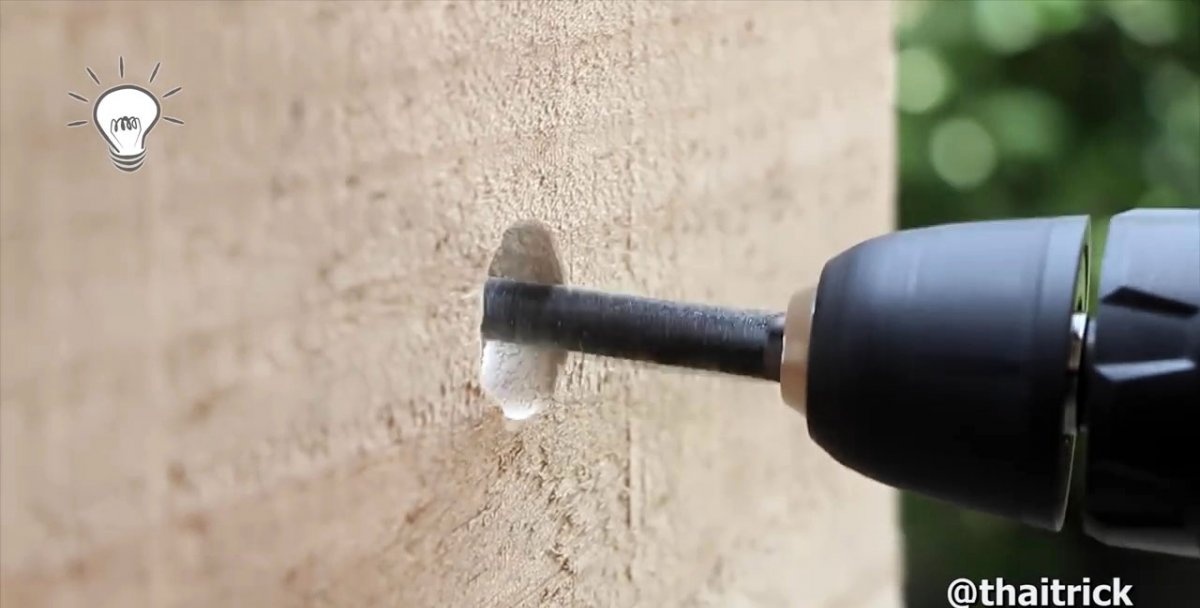
Grinding the inner surface of the hole
5. An attempt to process a small through hole in wood using a piece of sandpaper does not give the necessary results, and it is not entirely convenient to work with.
Try rolling the sandpaper into a tight tube with a diameter smaller than the transverse size of the hole. Insert and clamp this improvised tool into the chuck of the electric drill, turn it on and calmly and comfortably process the inner surface of the hole. You will quickly achieve the desired result.
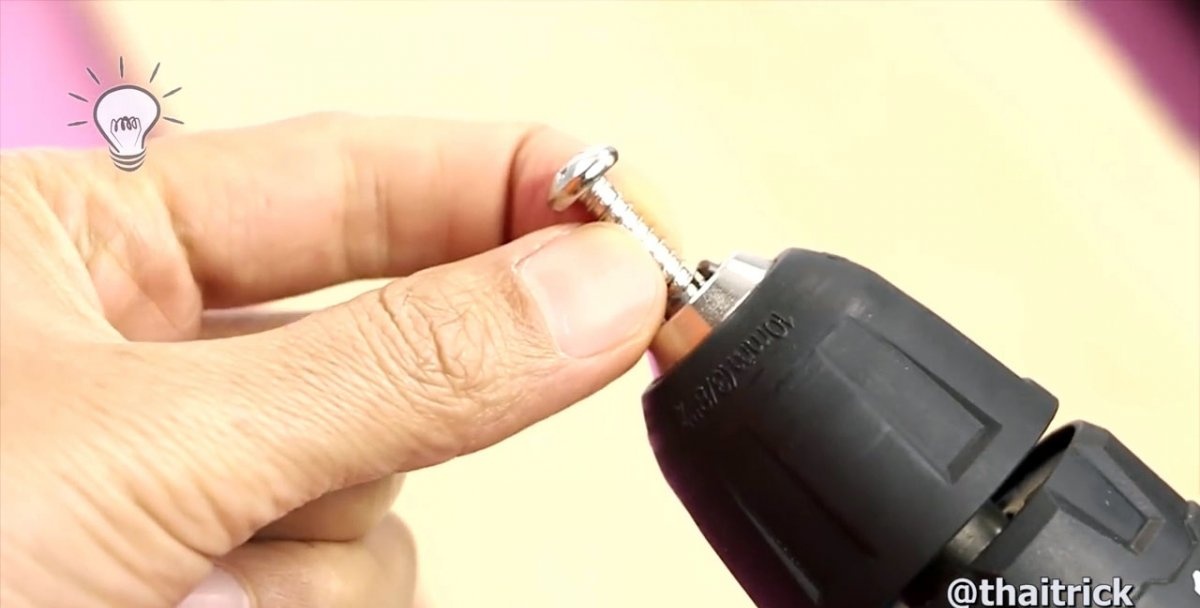
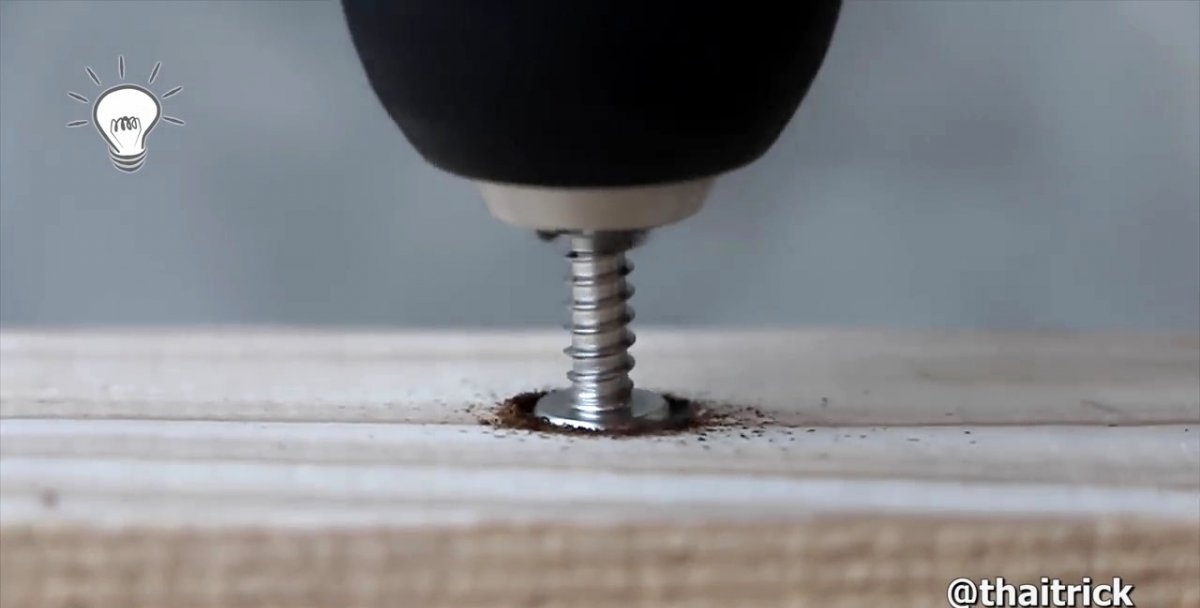
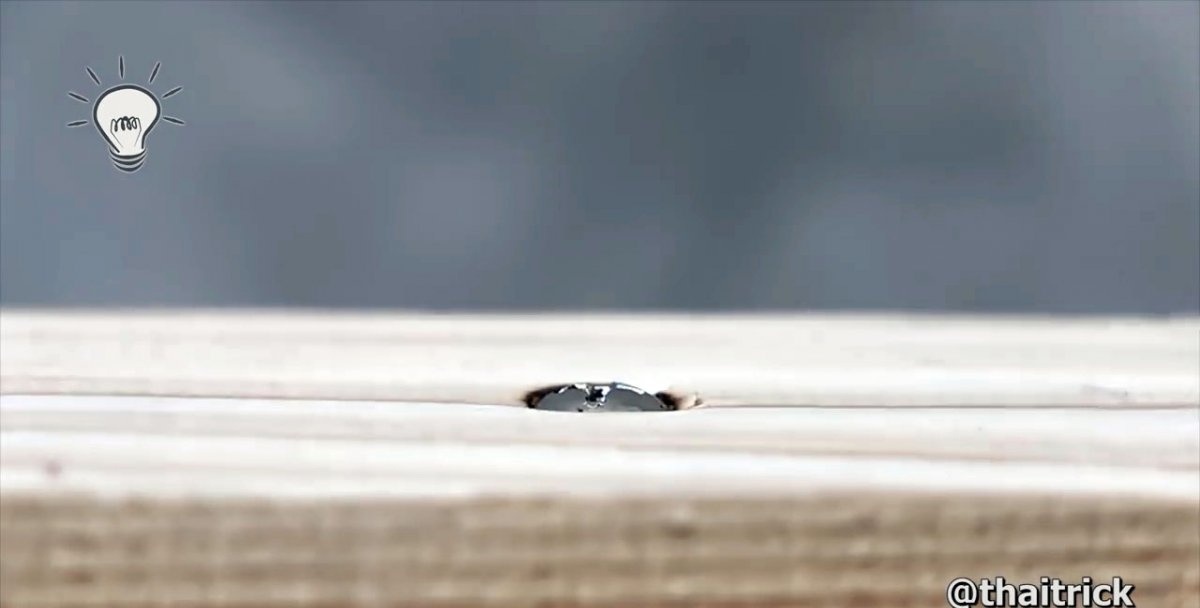
Self-tapping screw head - flush
6.If you need to screw a screw with a convex spherical head into wood flush with the surface of a board or beam, you can use the same hardware. To do this, it must be inserted into the cartridge with the sharp side and tightened.
We turn on the drill and use the head of the screw, like a reamer, to make a spherical depression in the wood that exactly matches its shape. Then we take the same screw and use a screwdriver to screw it in the center of the recess. The flush mount is perfect.
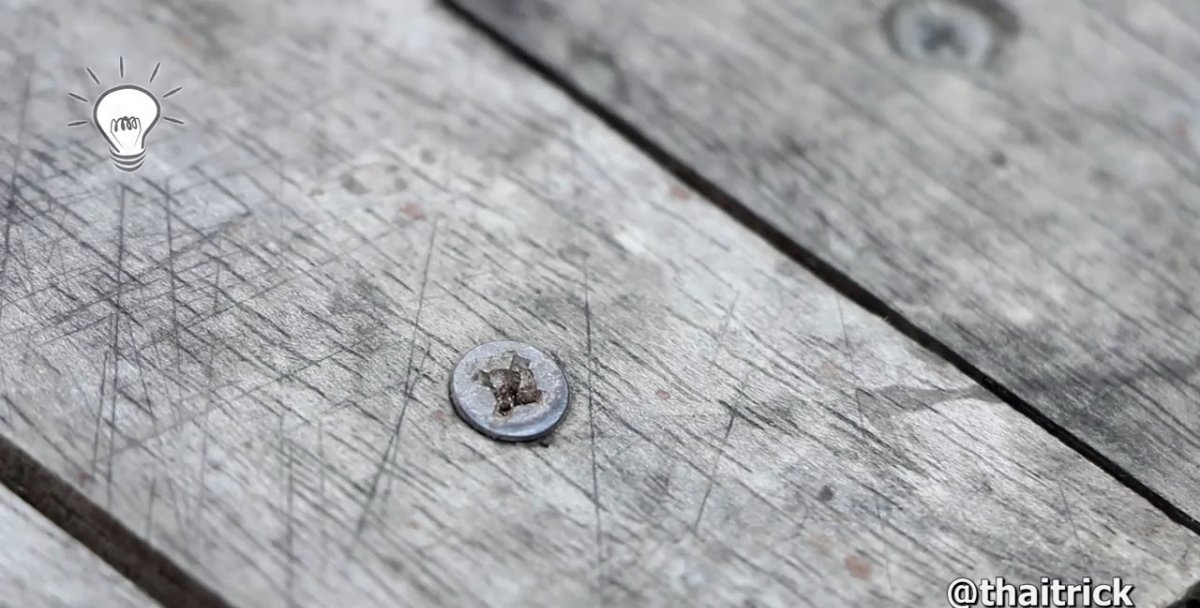
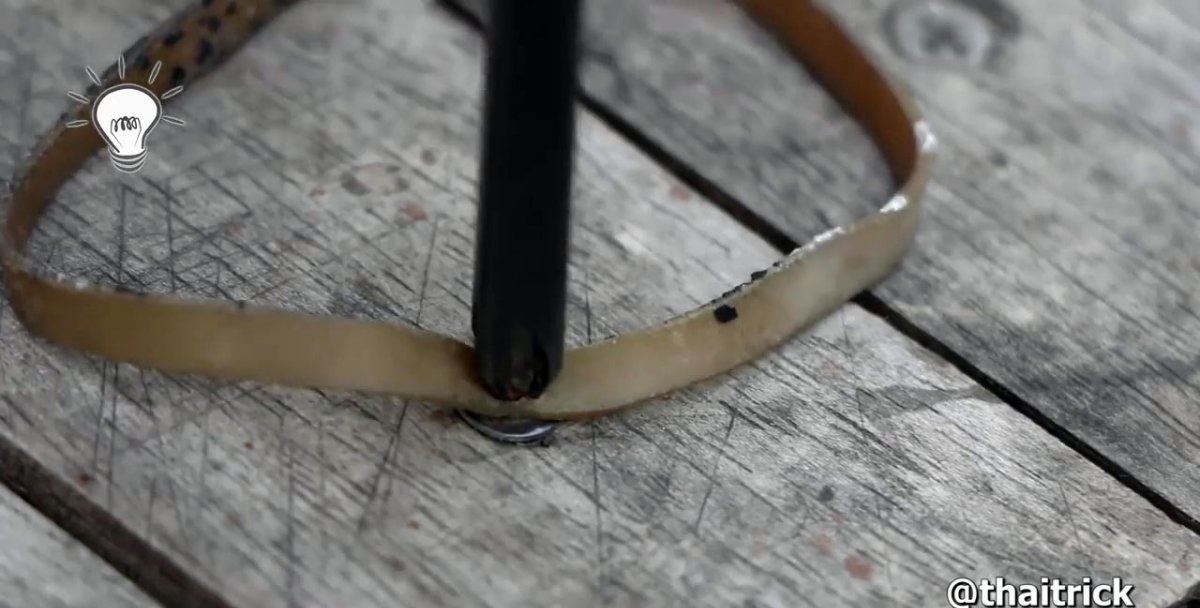
If the self-tapping screw has torn edges
7. Sometimes the screwdriver bit does not catch on the knocked-down recesses in the screw head. It becomes problematic to unscrew such hardware. In this case, you can use a piece of leather strap or leatherette.
We apply the material to the damaged screw head and use a bat to press it firmly against the recesses, while simultaneously rotating the screwdriver counterclockwise. Thanks to the increased friction forces, the screw can be unscrewed without difficulty.
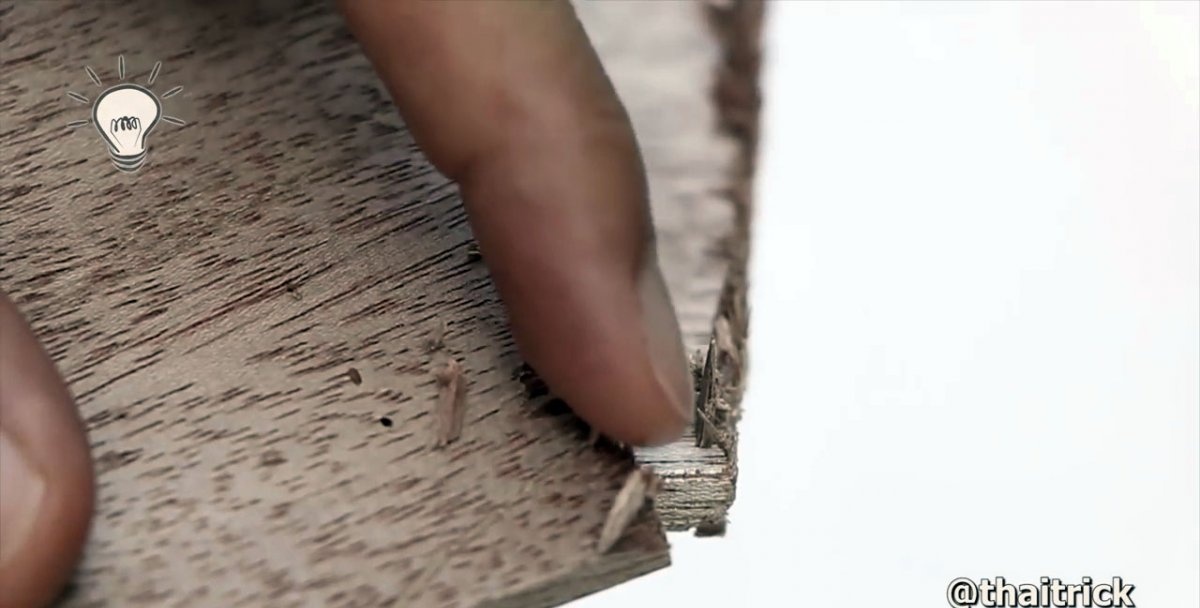
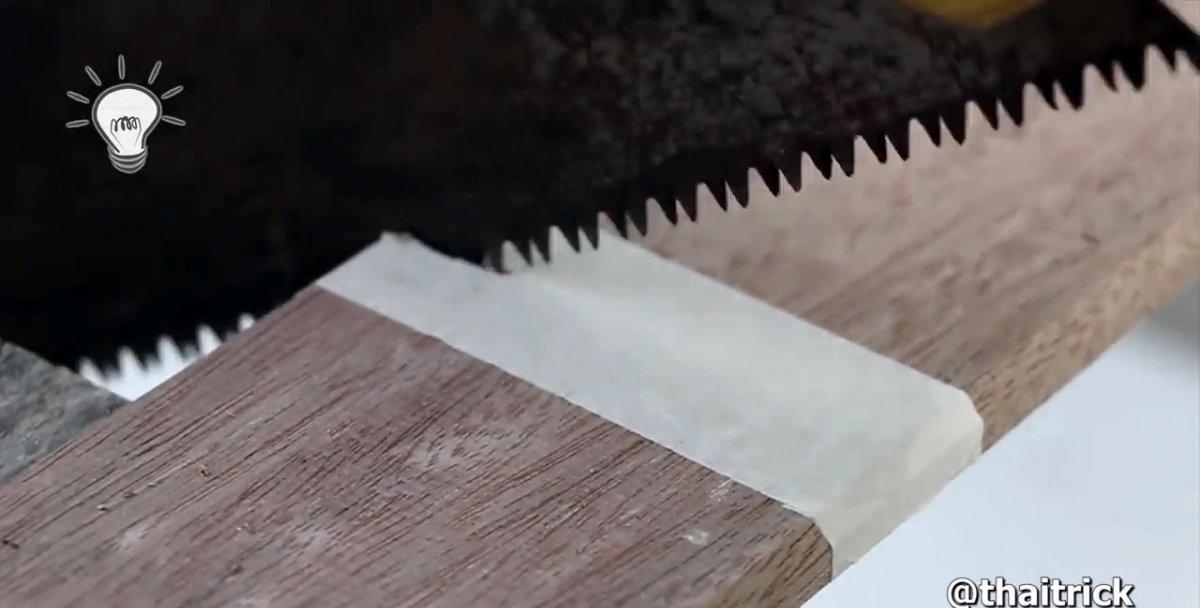
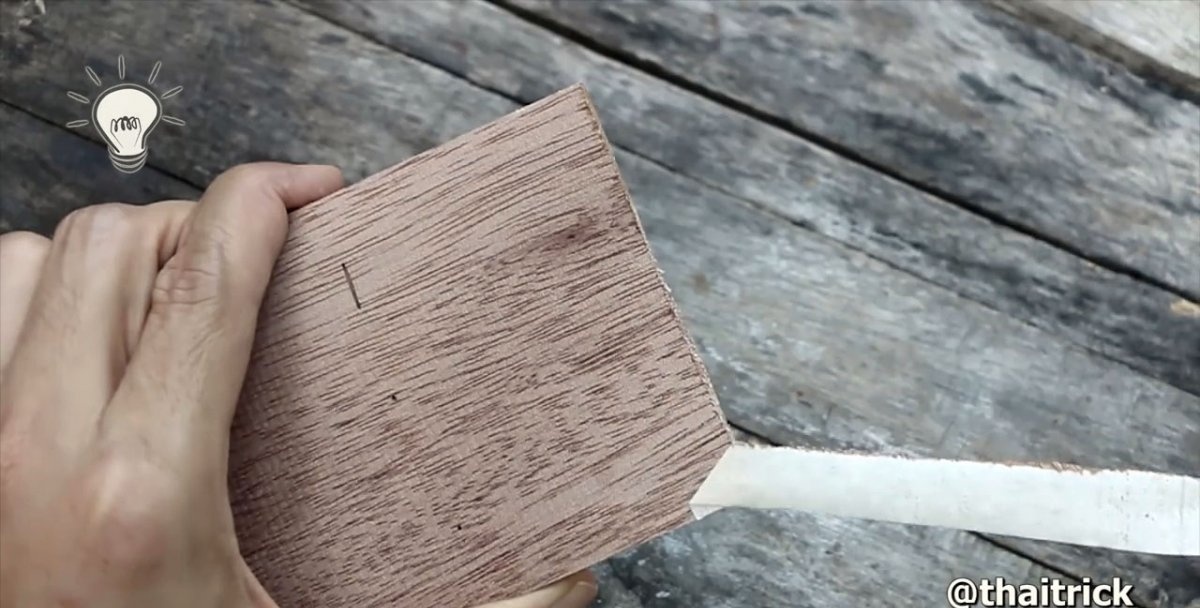
How to saw leaving a smooth edge
8. Cross-cutting a wooden board or beam using a hand saw rarely comes out neat. The cut area becomes rough, and sharp burrs and chips form on the edges.
To avoid these shortcomings, we stick carpentry tape to the cut site along the entire perimeter of the workpiece. Sawing is done using tape. Having completed the process, we remove the strips of tape and make sure that the edges in this case turned out to be of much better quality: there are no burrs or chips. The tape prevented their formation, strengthening the surface of the board and preventing their appearance during cutting.