Do it yourself
Life hacks, master classes, useful tips, recipes.
home » Different » Crafts » Metal crafts » Device for sharpening drills
Drill sharpening device

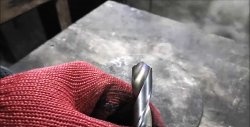
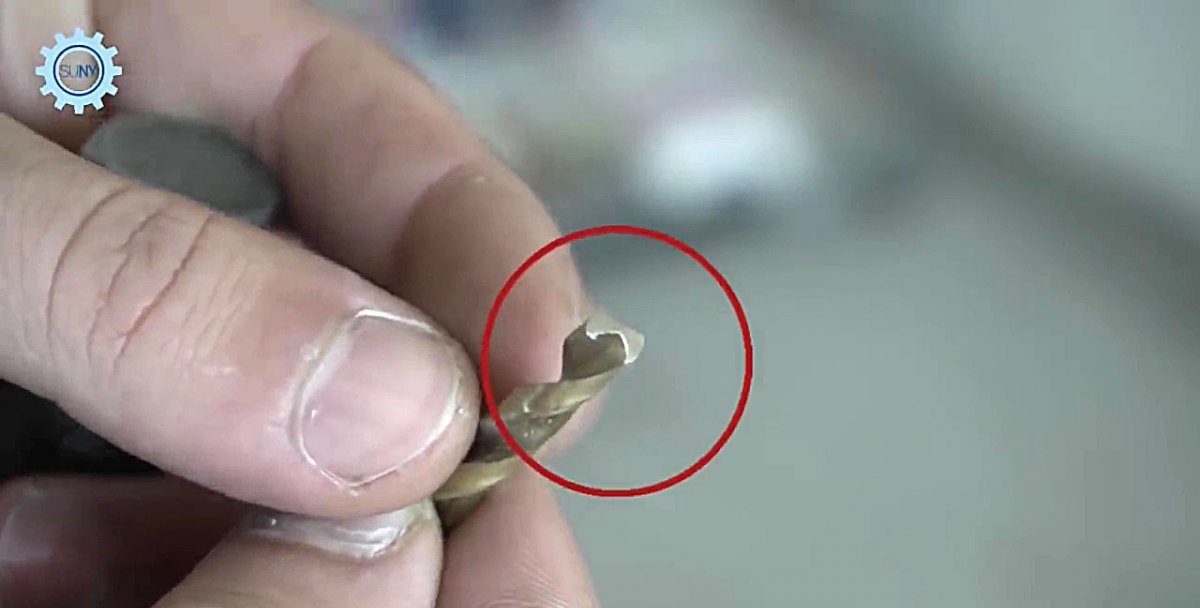
One of the main parameters of a twist drill is the tip angle, which for durable metals (steel, cast iron, hard bronze, titanium, etc.) is approximately 120 degrees.
Deviation of this angle more or less from the nominal value makes it difficult for the drill to operate effectively. In the first case, productivity drops and the tool overheats; in the second, the drill may simply break, unable to withstand the excessive load.
In order to comply with the sharpening parameters without special devices, you must have high qualifications and experience as a tool sharpener. Well, it will be almost impossible for a non-specialist, especially in domestic conditions, to do this.
But, having some tools and simple materials, you can make a not very complicated, but reliable device for sharpening the corner at the tip of a twist drill for hard metal.

What you might need to work on the device


To do this you will need the following tools:
  • calipers;
  • marker;
  • metal vice;
  • Bulgarian;
  • pliers;
  • welding machine;
  • sharpening machine with an emery wheel.

Materials you need to have on hand for work:
  • regular hex nut;
  • castle nut;
  • bolt of the same size and thread as the nuts;
  • twist drill that requires sharpening.

Drill sharpening device

Manufacturing process


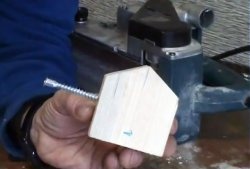
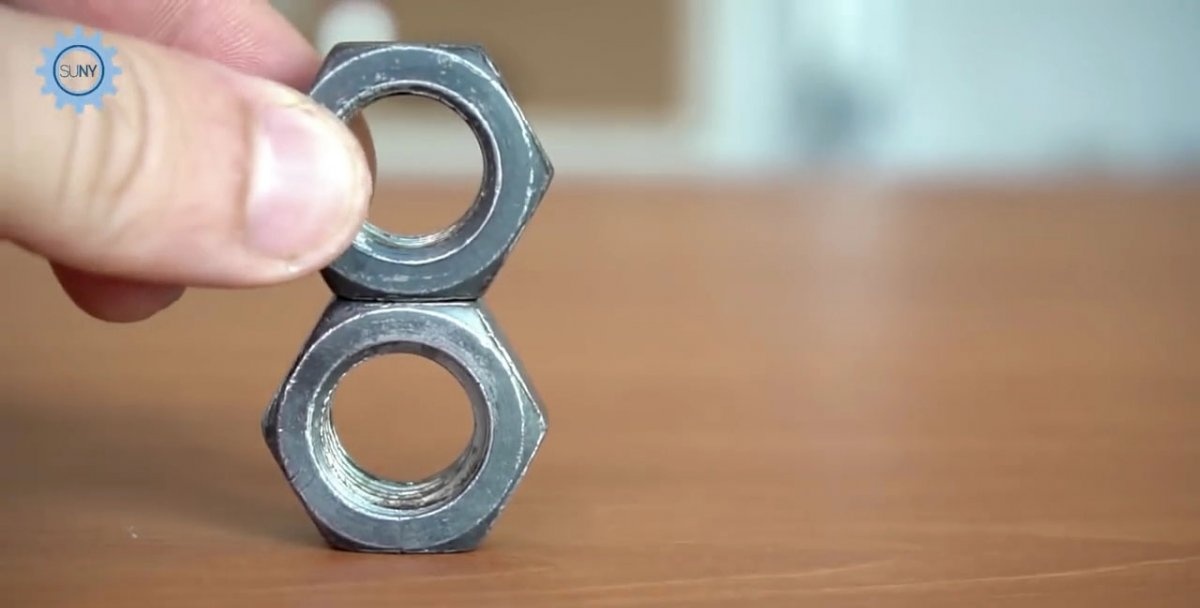
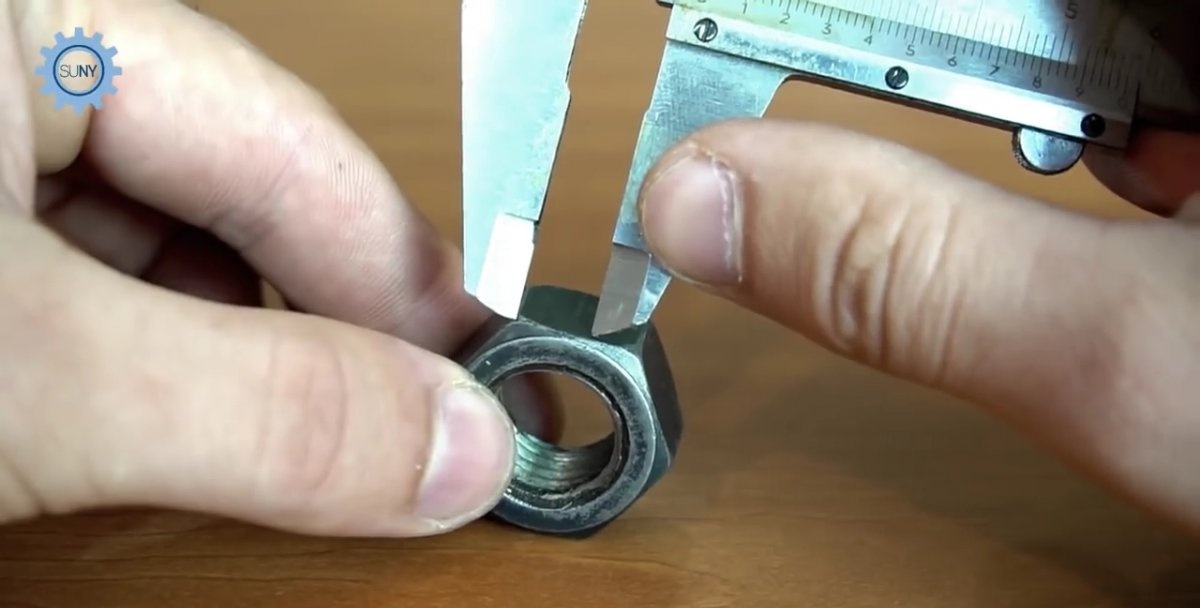
The peculiarity of a hex nut is that any two adjacent faces meet at an angle of 120 degrees. The apex angle of a twist drill for working on hard metals is approximately the same size. This random coincidence can be used to make a tool for sharpening a twist drill.
Drill sharpening device

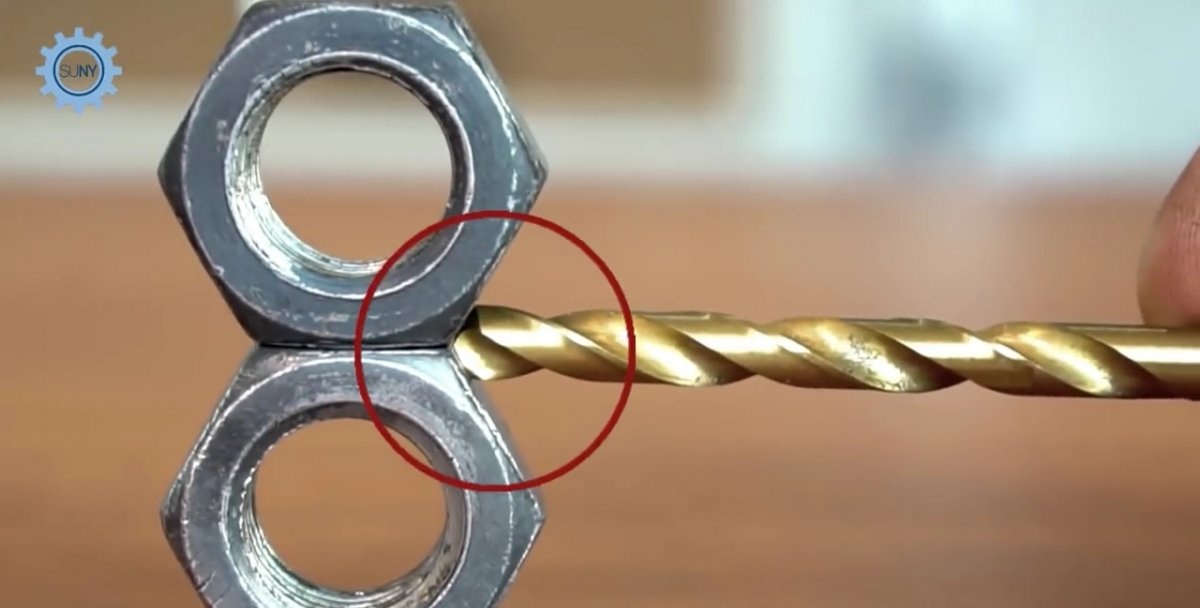
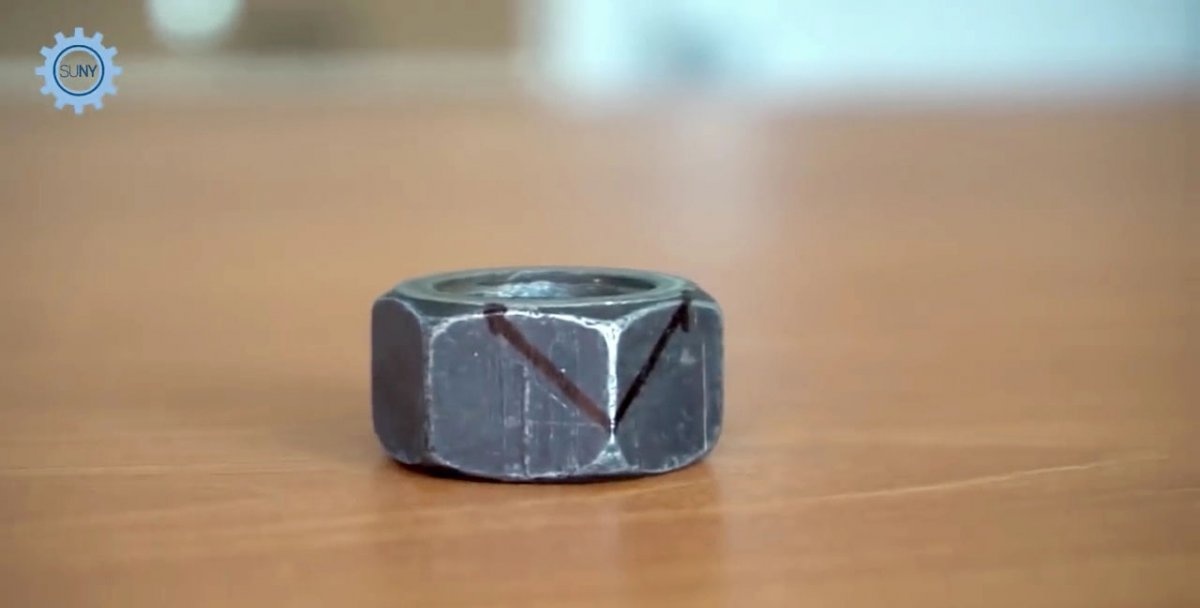
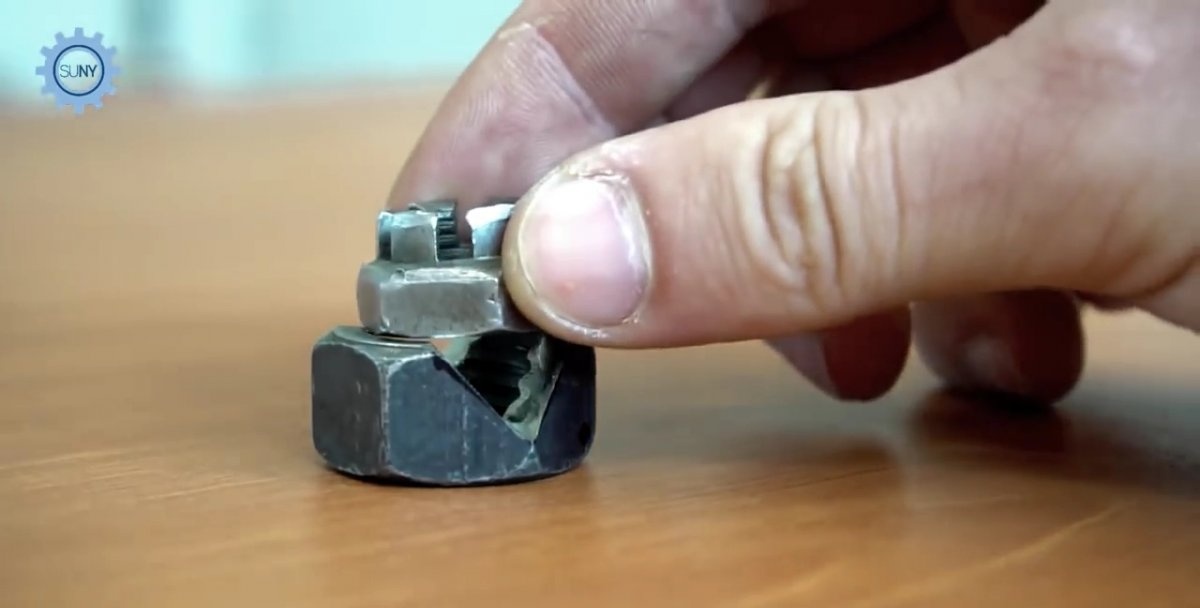
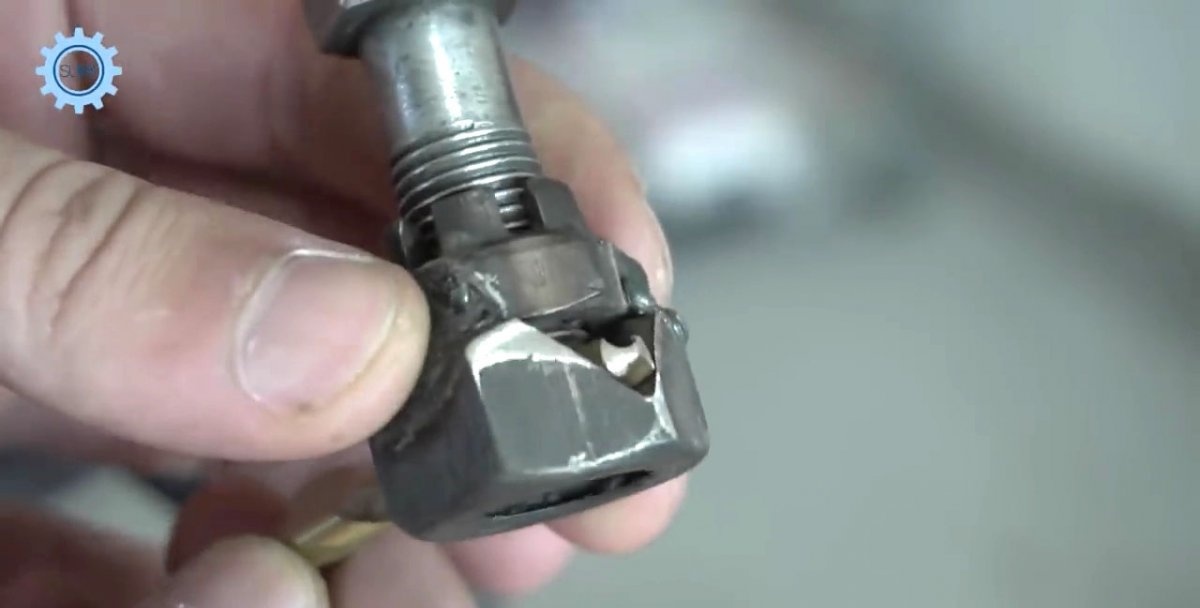
To do this, using a caliper and a marker on the nut, mark the cutting lines to create a triangular slot, symmetrical with respect to the diagonal connecting two opposite corners of the nut. The drill will be placed longitudinally into it before the sharpening process.
Drill sharpening device

Drill sharpening device

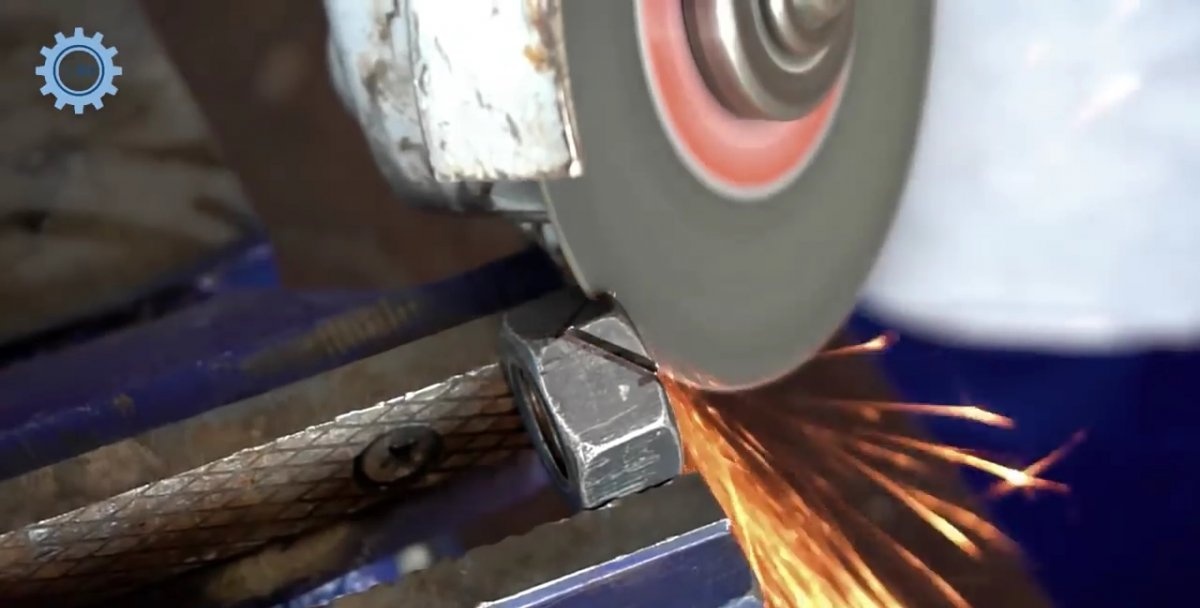
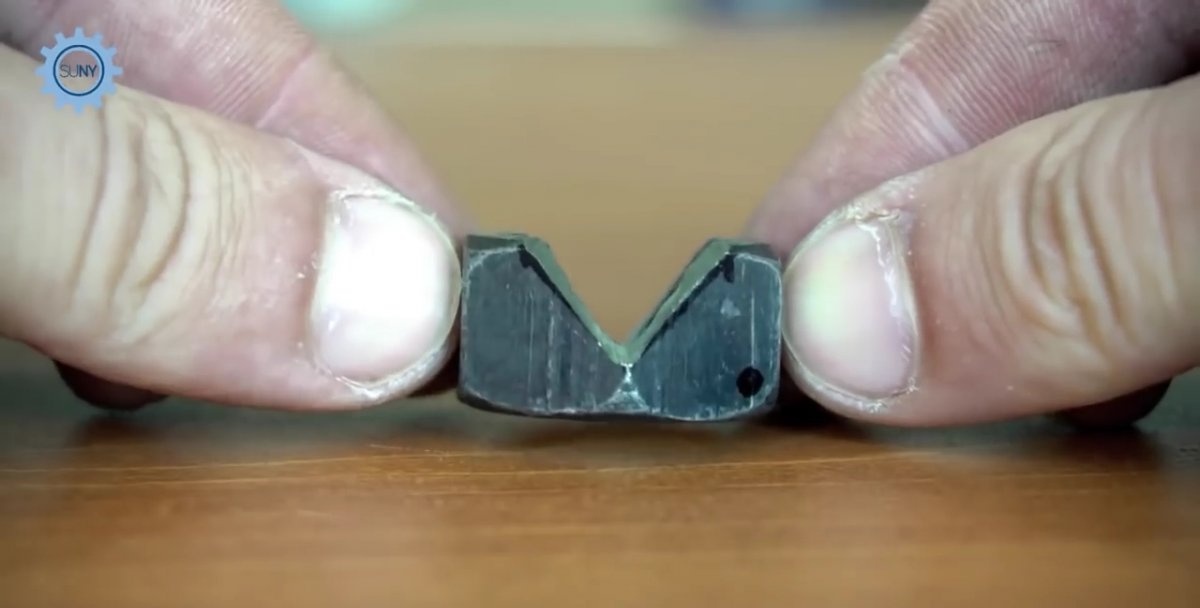
To cut out the intended triangular groove in the nut, it is clamped in a vice and, using a grinder, cuts are made along pre-drawn lines. You can use pliers to remove sawed off pieces of the nut.
Drill sharpening device

Drill sharpening device

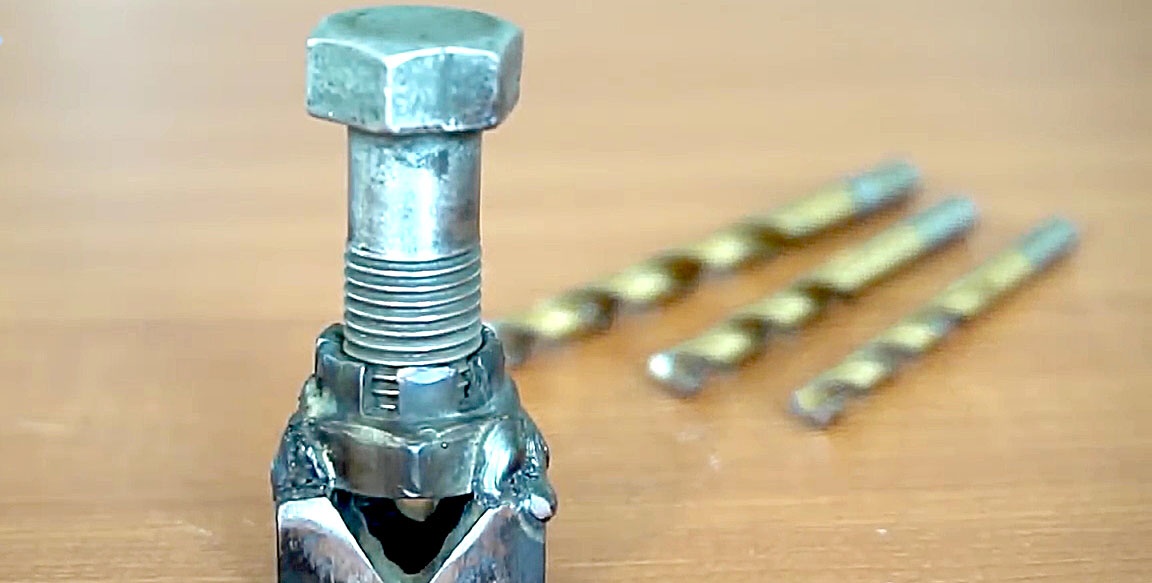
Next, take a castle nut and weld it with its base to the first nut on the side of the cut groove. Moreover, it is necessary to maintain their absolute alignment, because when small-diameter drills are sharpened, the bolt, having passed through the castle nut, will begin to screw into the lower nut in order to firmly clamp the drill in its groove.
Drill sharpening device

Drill sharpening device

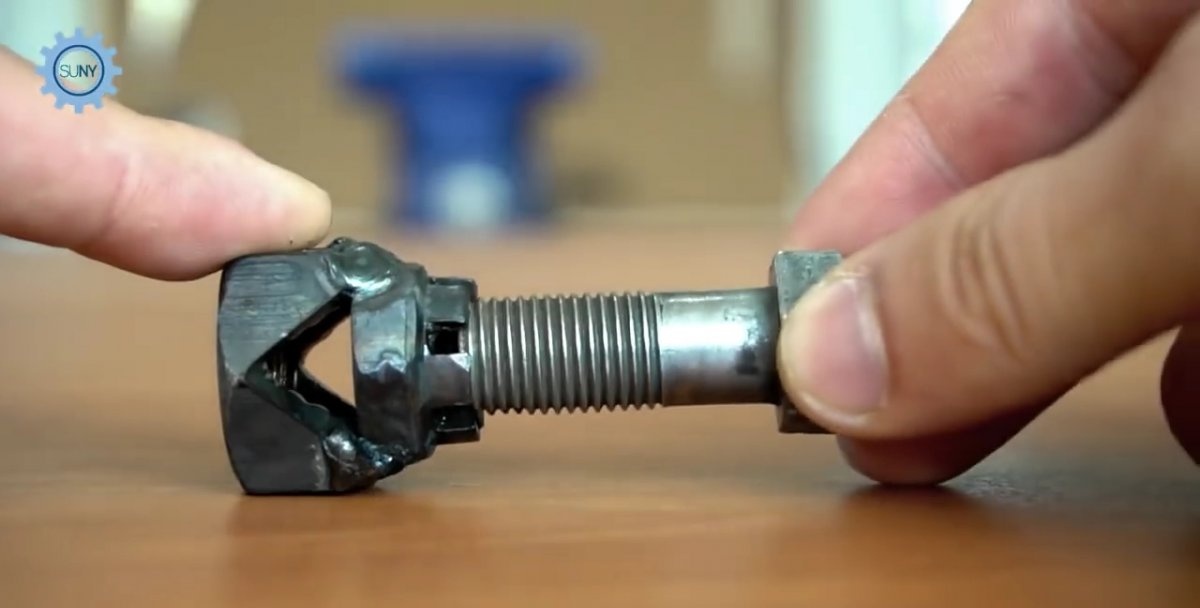
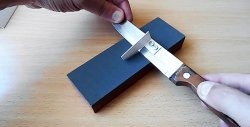
Now we screw the corresponding bolt into the castle nut, which will securely press the drill placed in the sharpening groove on the sandpaper of the sharpening machine.
Drill sharpening device

Drill sharpening device

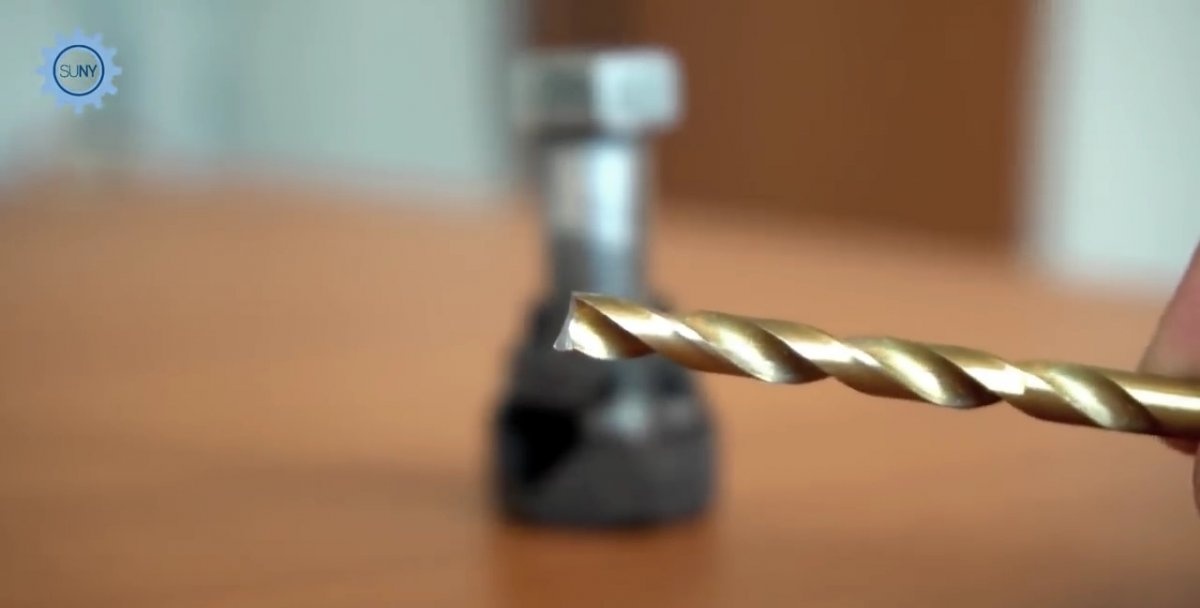
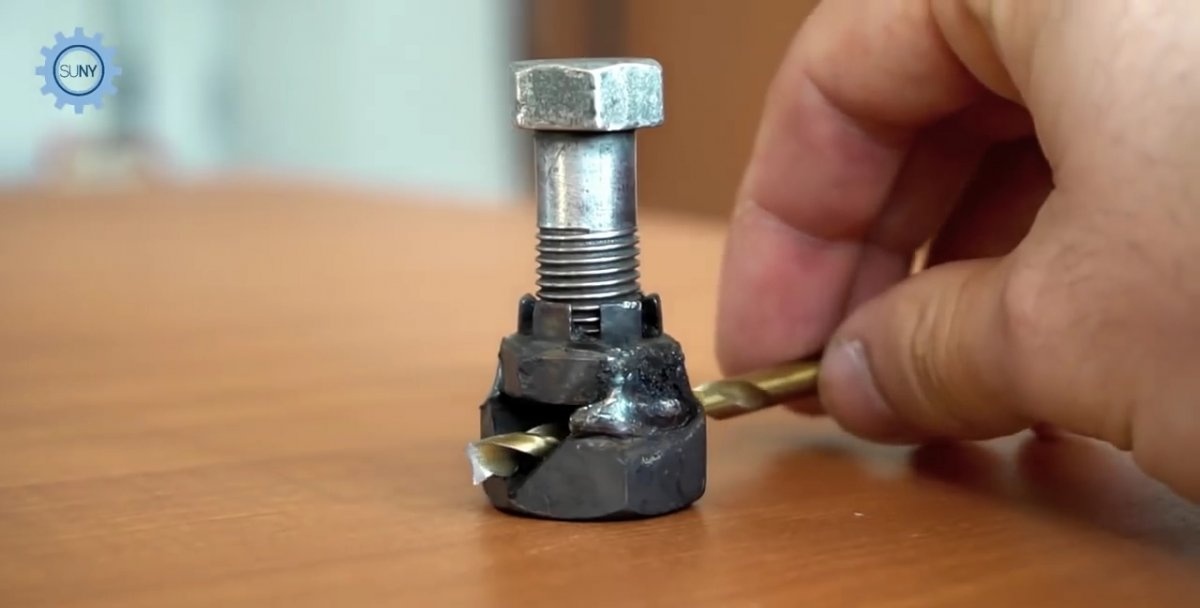
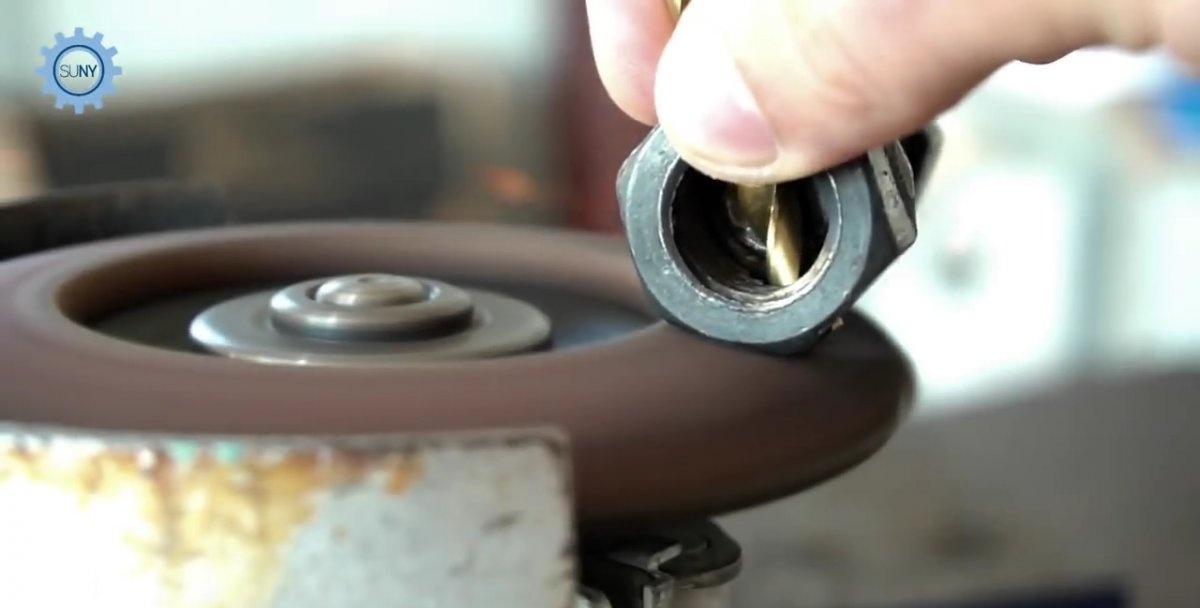
All that remains is to sharpen the drill on an emery wheel, using the edges of the bottom nut as a template.
Drill sharpening device

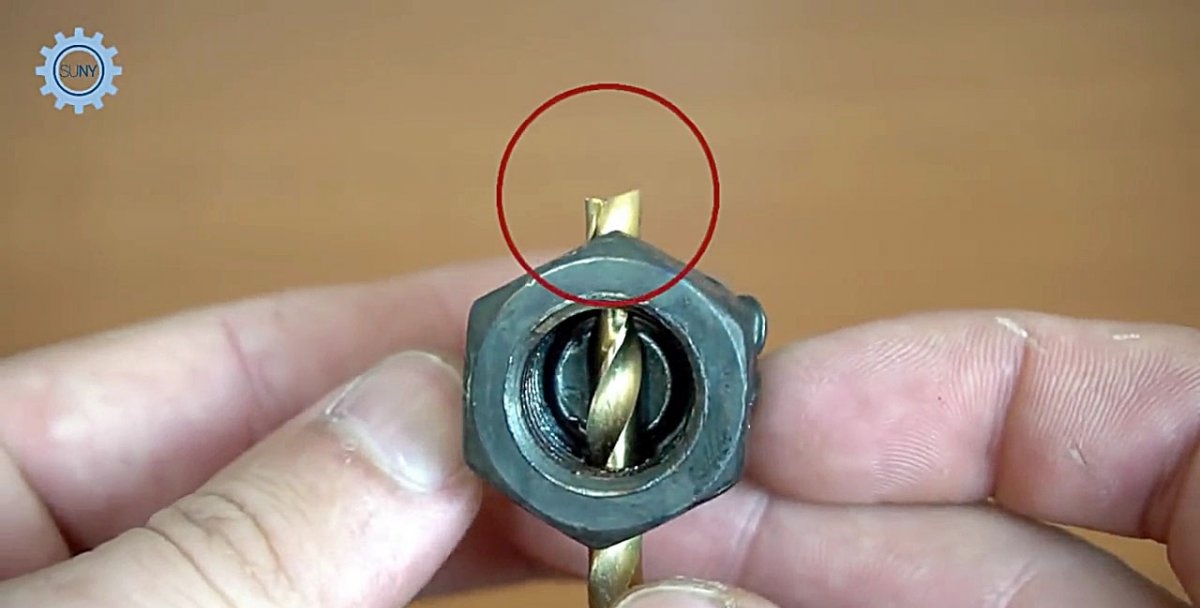
To do this, we simply grind the protruding part of the drill flush with the edges of the nut, which even a first-year vocational school student can easily cope with.
Drill sharpening device

Drill sharpening device

After sharpening is completed, the bolt is loosened, the drill is removed from the homemade device and can be used for its intended purpose.
Drill sharpening device

Additions and improvements


During the welding process of nuts, liquid metal may splash onto the threads of castle and regular nuts. To eliminate this nuisance, it is necessary to screw a bolt into them and thereby protect the thread.
Since it will not be possible to cover all the diameters of drills with one device, at least two template clamps will be required: one for small drills, the other for large products. Accordingly, in the first case the nuts will be small in size, and in the second - large.

Watch the video


come back
Comment
  • bowtiesmilelaughingblushsmileyrelaxed relaxedsmirk
    heart_eyeskissing_heartkissing_closed_eyesflushedrelievedsatisfiedgrin
    winkstuck_out_tongue_winking_eyestuck_out_tongue_closed_eyesgrinningkissingstuck_out_tonguesleeping
    worriedfrowninganguishedopen_mouthgrimacingconfusedhushed
    expressionlessunamusedsweat_smilesweatdisappointed_relievedwearypassive
    disappointedconfoundedfearfulcold_sweatperseverecrysob
    joyastonishedscreamtired_faceangryragetriumph
    sleepyyummasksunglassesdizzy_faceimpsmiling_imp
    neutral_faceno_mouthinnocent
5+two=
Comments (53)
  1. Class
    #1 Class Guests 30 October 2018 19:18
    6
    Very interesting very
  2. Guest Anatoly
    #2 Guest Anatoly Guests 30 October 2018 20:30
    17
    On YouTube, a well-known DIYer demonstrated a similar device. However, it has a difference. The slot on the nut on one side is several mm deeper than on the other.This is so that the rear edge of the drill part is lower than the front (cutting) edge. And why weld a castle nut and not a simple one? There’s nothing to pin!
  3. SANYA VASIN
    #3 SANYA VASIN Guests 30 October 2018 20:47
    6
    and what will you fuel with??
  4. Alexander Nikolaevich
    #4 Alexander Nikolaevich Guests 30 October 2018 21:11
    10
    ...a professional sharpens a drill without tools (he himself worked on automatic lathes)
  5. Cyrus
    #5 Cyrus Guests 30 October 2018 21:26
    17
    I made such a device, it doesn’t sharpen anything
    1. do it again it will be fine
      #6 do it again it will be fine Guests 19 July 2020 19:54
      2
      do it again it will be fine
  6. Cyrus
    #7 Cyrus Guests 30 October 2018 21:31
    15
    It’s better to watch Viktor Leontyev on YouTube. he shows how to properly sharpen drills on a sharpener. and with this device you need to know how to initially position the drill so that it sharpens
    1. Volka
      #8 Volka Guests 31 October 2018 19:00
      11
      Right! But I'm afraid not everyone will understand what I'm talking about. Here, for them: - imagine what happens if you turn the drill a quarter turn and sharpen it. Hence the question for the authors of the device, or those who successfully use it - how to properly install the drill before sharpening?
    2. Alexander Valerievich Tkachev
      #9 Alexander Valerievich Tkachev Guests 21 April 2020 22:56
      2
      Leontiev is more of a theorist, he would have long ago shown how to sharpen drills not on a sharpener, but on a device, and then strike the sharpener twice and rant about the sharpening angles for 20 minutes; this is not for everyone, but not acceptable for practitioners.
  7. Guest Alexander
    #10 Guest Alexander Guests 30 October 2018 23:54
    7
    I didn't understand. Why a castle nut? When can I use exactly the same one?
    1. Sector
      #11 Sector Guests 29 January 2019 20:03
      2
      For fun or to look smart, like they know there are castle nuts.
  8. Guest Victor
    #12 Guest Victor Guests October 31, 2018 05:41
    3
    1. And what (I don’t understand) is the second nut for? crowned?
    2. The bolt from the top nut to the bottom will not be screwed. Unless there's a big coincidence...
  9. Guest Andrey
    #13 Guest Andrey Guests October 31, 2018 08:13
    11
    It definitely won't work. The trailing edge will roll the metal, making the drill difficult to drill, the workpiece will heat up and the size of the hole will begin to increase.
  10. kumeyko63
    #14 kumeyko63 Guests October 31, 2018 09:20
    43
    Do not publish unverified advice! About sharpening a drill, complete nonsense from an ignorant person! The sharpening angle of the drill is different for different metals! The main thing is that the cutting edge is 0.2-0.4 mm higher than the back edge! This is the only way the drill will drill properly!
    1. Well
      #15 Well Guests October 31, 2018 09:58
      1
      Do not publish unverified comments from armchair analysts. I've been using this for 5 years - everything is ok!
      1. Sector
        #16 Sector Guests 29 January 2019 20:05
        3
        What are you drilling? Paper?

Cereal bag with transparent window | Do it yourself

Microwave cake in 5 minutes

How to reduce energy costs when heating your home with electricity

We clean the perch quickly, easily and without scattering scales

«Do it yourself - with your own hands» - a site of interesting homemade products made from scrap materials and items at home. Step-by-step master classes with photos and descriptions, technologies, life hacks - everything a real master or just a craftsman needs for needlework. Crafts of any complexity, a large selection of directions and ideas for creativity.

We recommend reading

Washing machine error codes