Making a classic sled yourself according to all the canons will be quite difficult and will take a lot of time. And in terms of costs, it can cost a pretty penny.
Another thing is a non-standard product, which in terms of reliability, capabilities and safety is not inferior to a factory device. After all, when making a sled with your own hands, you can find an original design, creatively approach the creation of each element and operation, and come up with some options. As a result, you can get a real masterpiece, which will not take much time, labor and money.
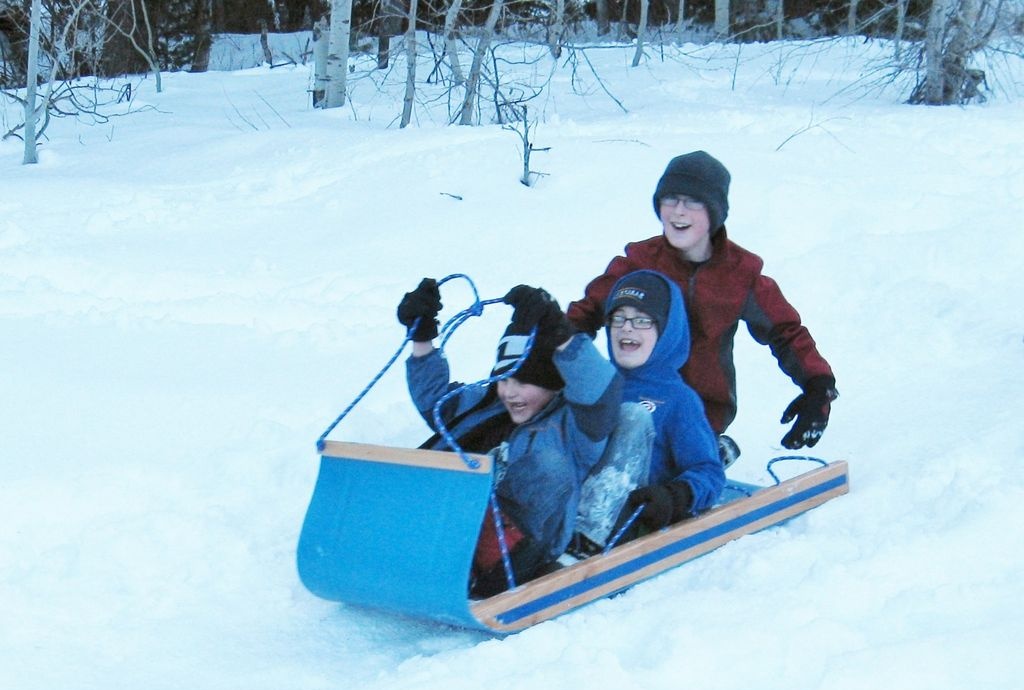
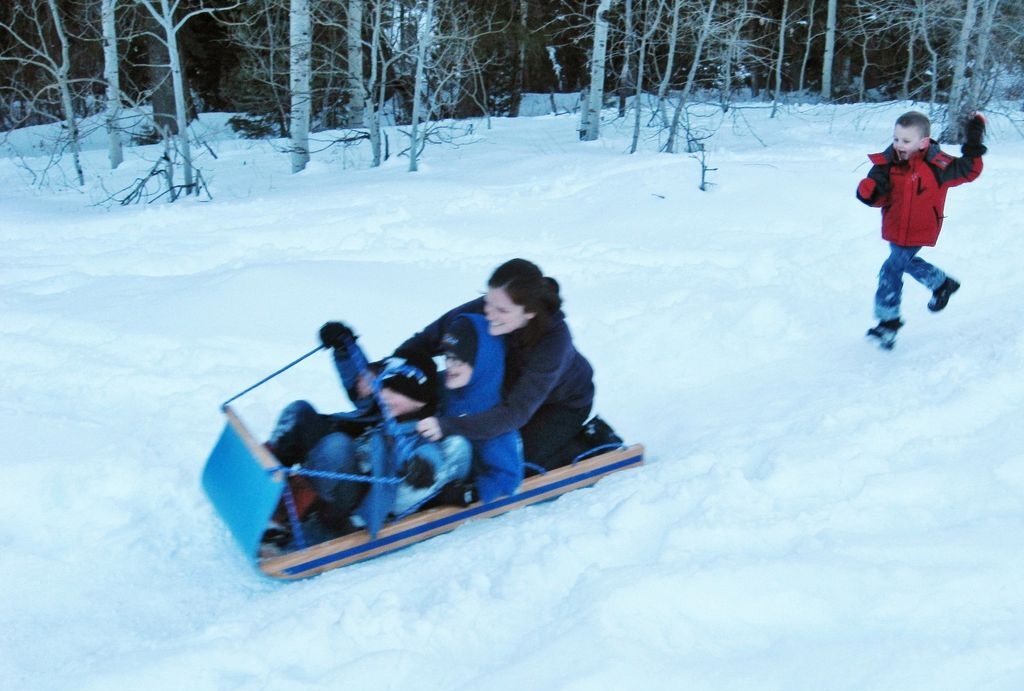
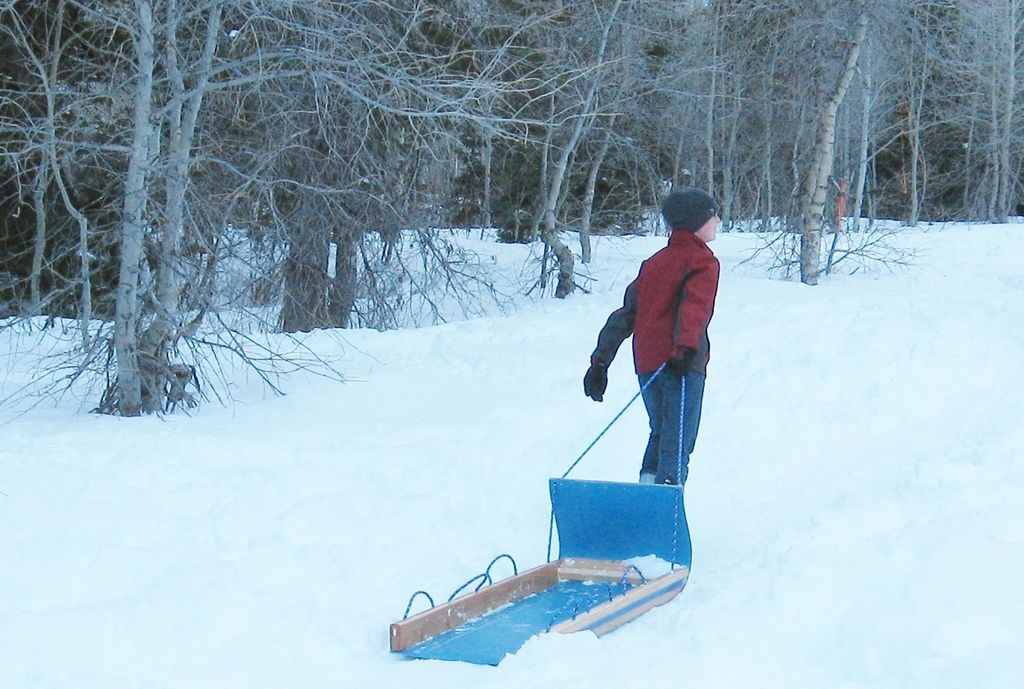
Of course, children will be especially delighted with the homemade product. What a joy it is to have a whole group racing down a hill on such a sled - an indescribable, breathtaking descent that will remain in the memory for a long time! So, what do you need for this?
Required materials and tools
Inexpensive materials and a tool that is not too difficult to use are suitable for our idea:
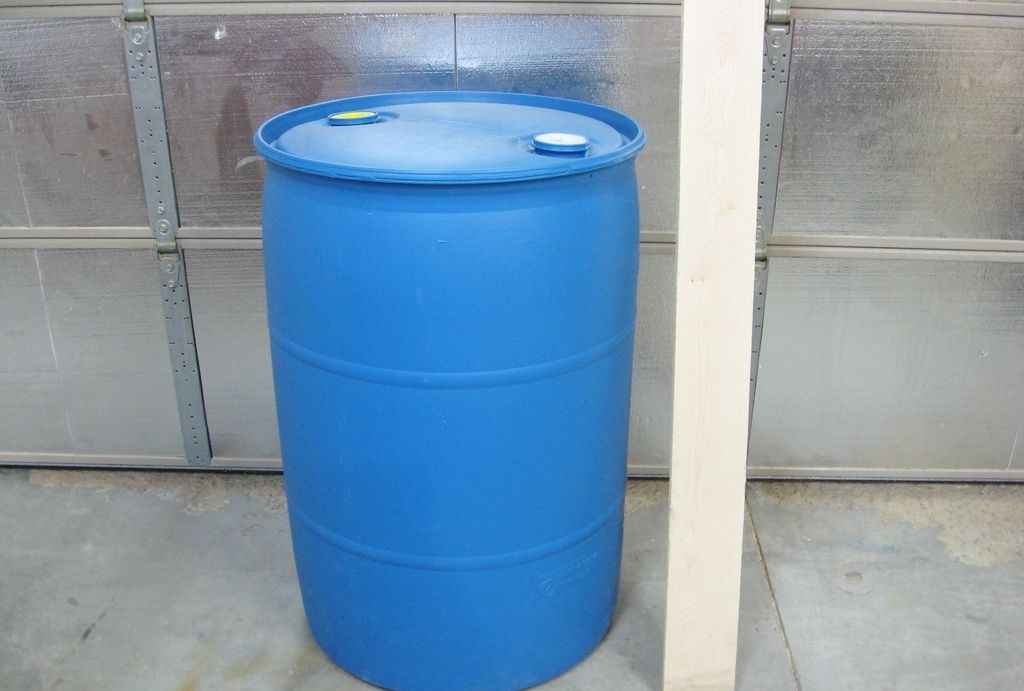
- one 200-liter plastic barrel;
- wooden beams with a section of 38×89 mm and 30×70 mm;
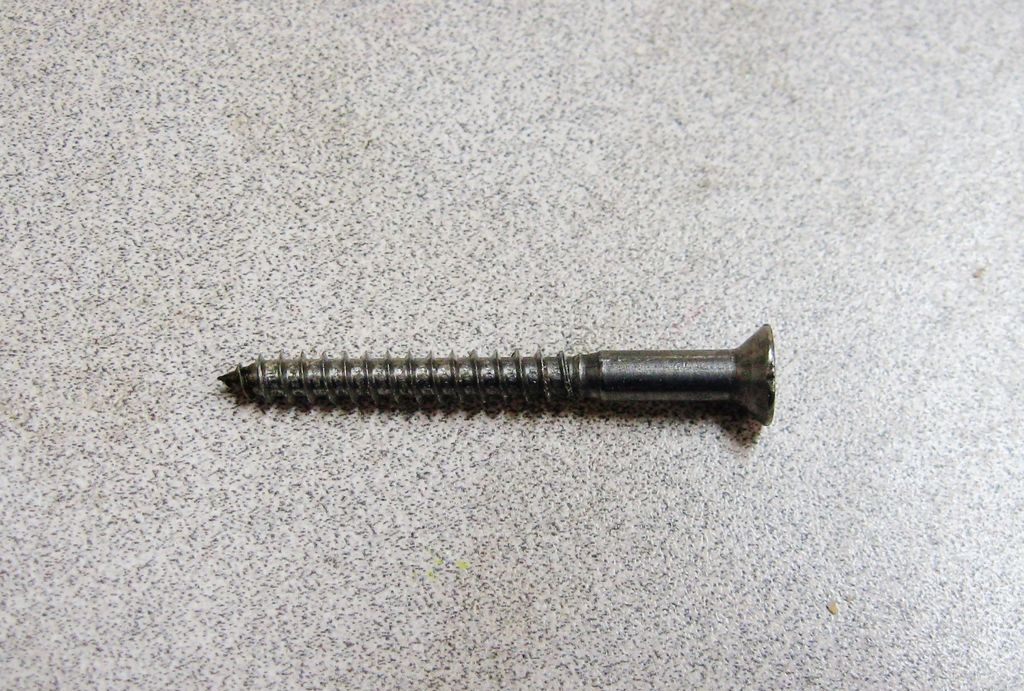
- screws or wood screws with a wide head;
- synthetic cord or thin rope;
- varnish and paint brush;
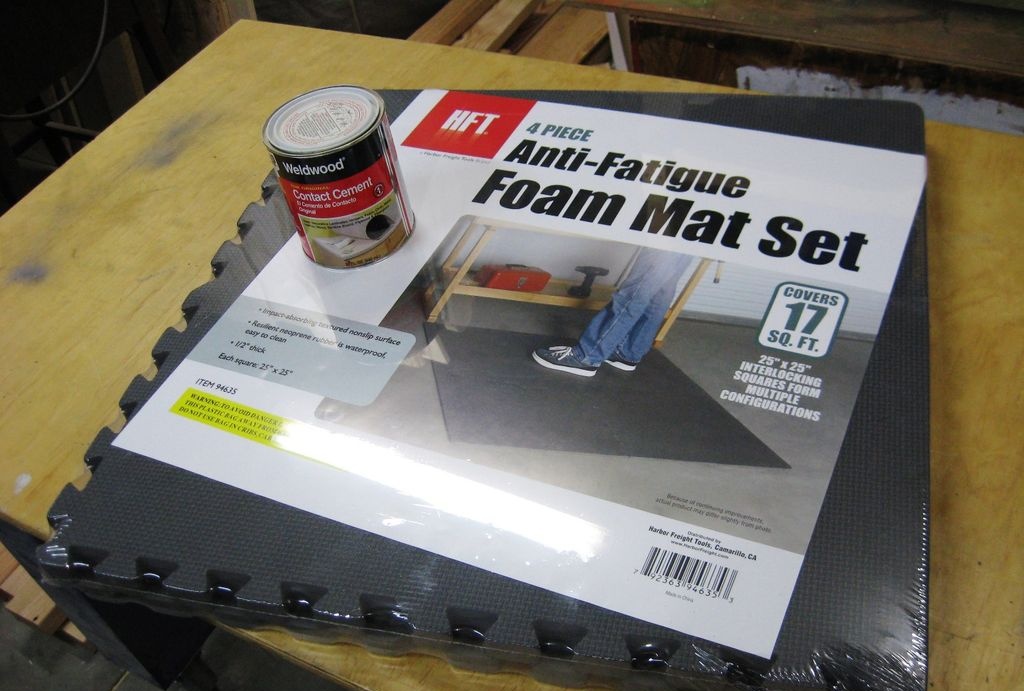
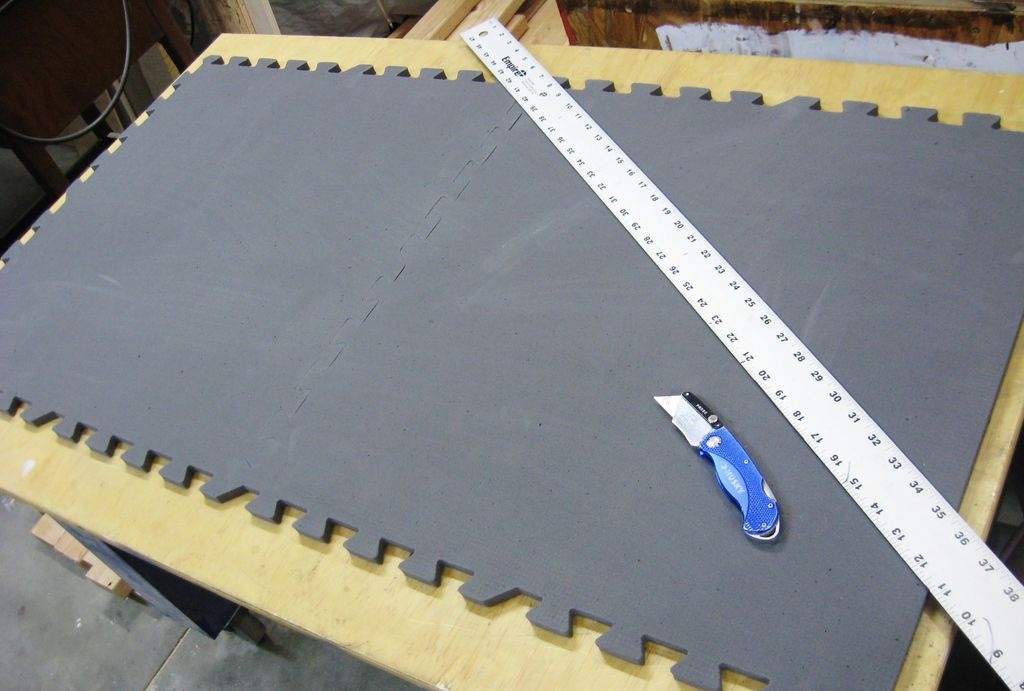
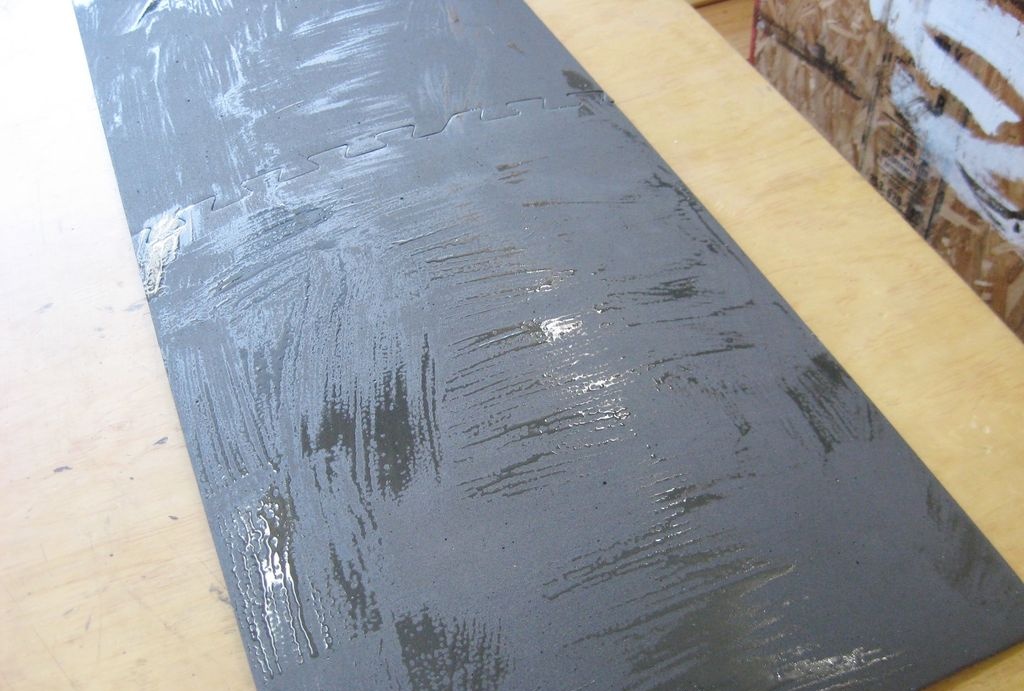
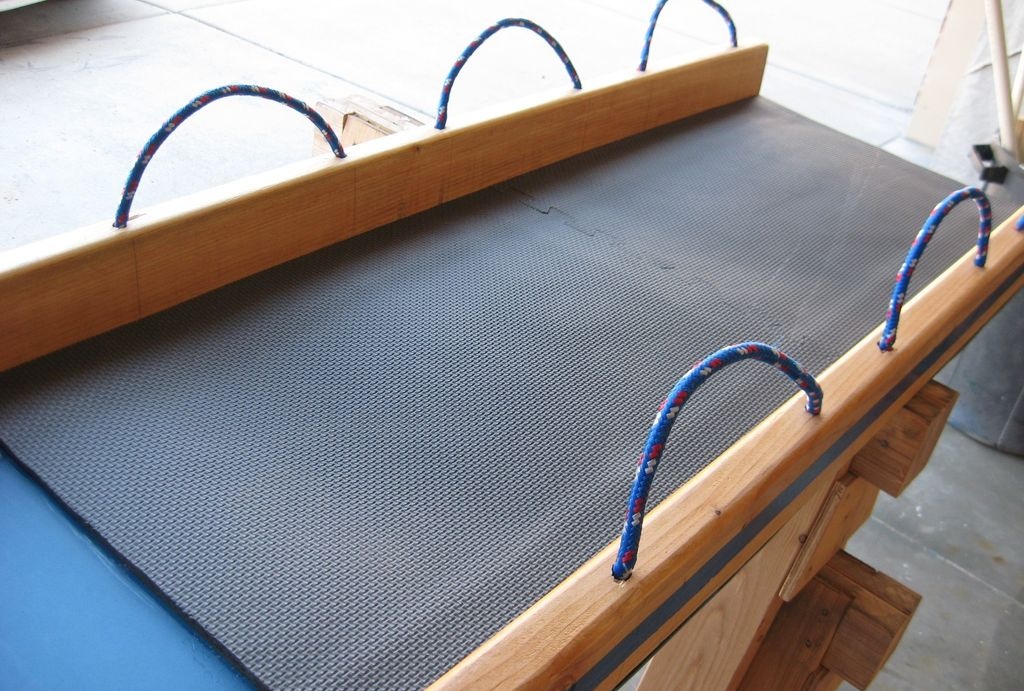
- anti-slip material (for example, a rubberized floor mat);
- paraffin wax;
- gas-burner;
- metal square;
- drill with 2 drills with a diameter of 7/8 and 1/2 inches;
- band-saw;
- hand screwdriver or screwdriver.
Manufacturing
Let's start by looking at the elements that determine the design, in particular the dimensions of the mountain sled.
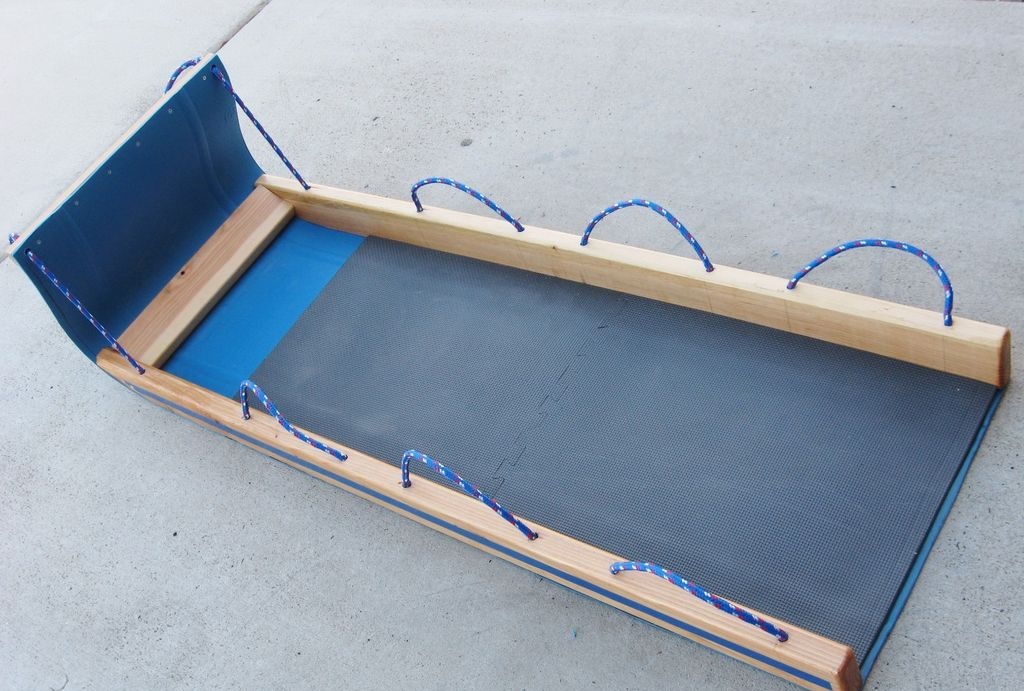
Basic elements of a sled
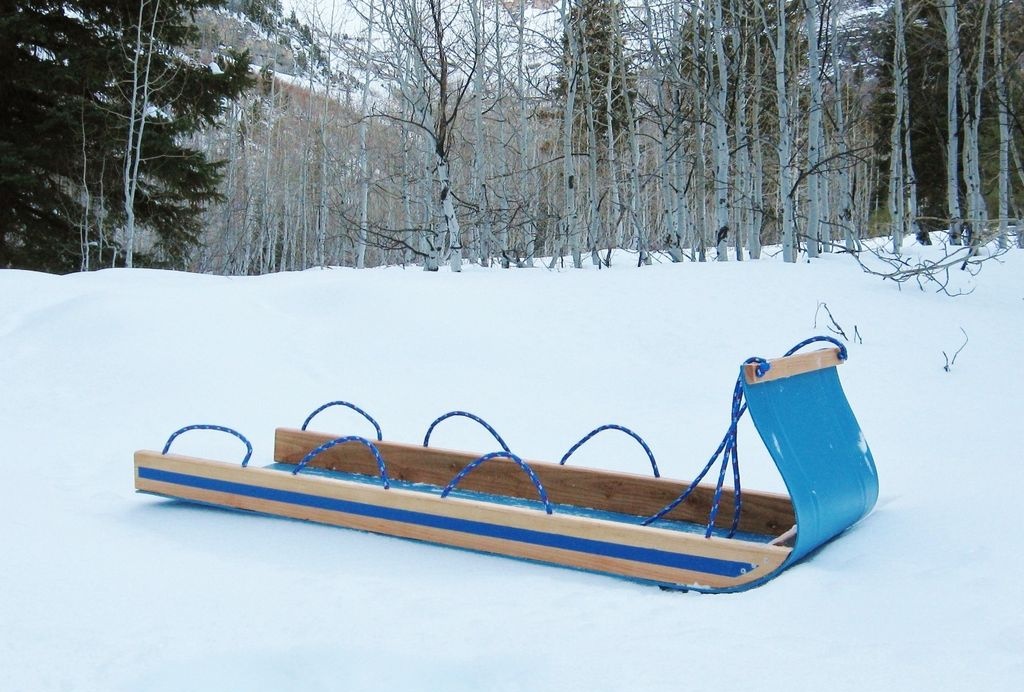
A sliding surface approximately 560 mm wide can be cut from a standard plastic barrel with an outer diameter of 580 mm. Reversing such a circle will give the length:
C = πD = 3.14×580 = 1820 mm.
If the front bend takes about 300 mm, then the horizontal part will be about 1520 mm, which is enough to accommodate 3-4 children. The indicated dimensions will be updated as work on the sled progresses.
The price of a new 200-liter barrel is about 2,100 rubles; a used container can probably be bought for 500 rubles or less. If something oily was stored in it, it can be easily washed with detergents. Sometimes they are stored in such barrels. Then the container will be clean by default.
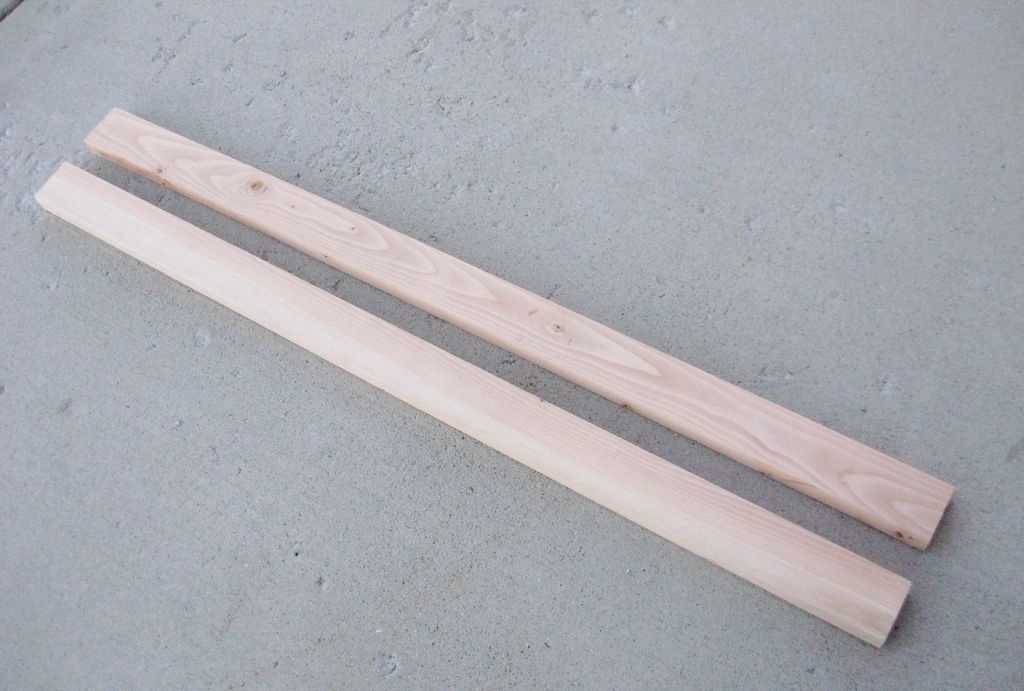
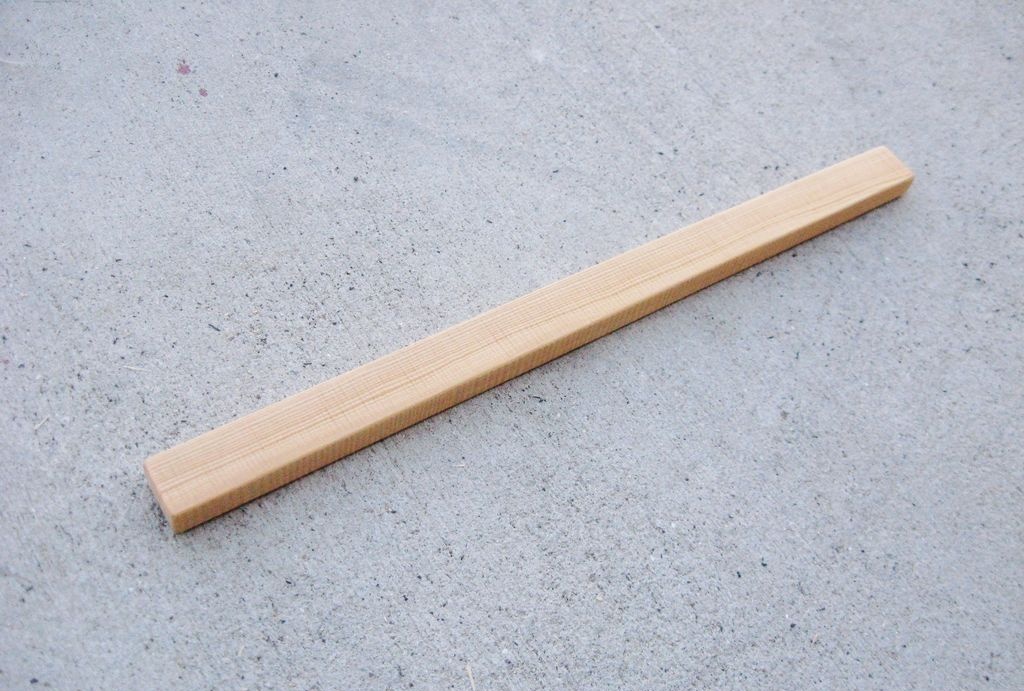
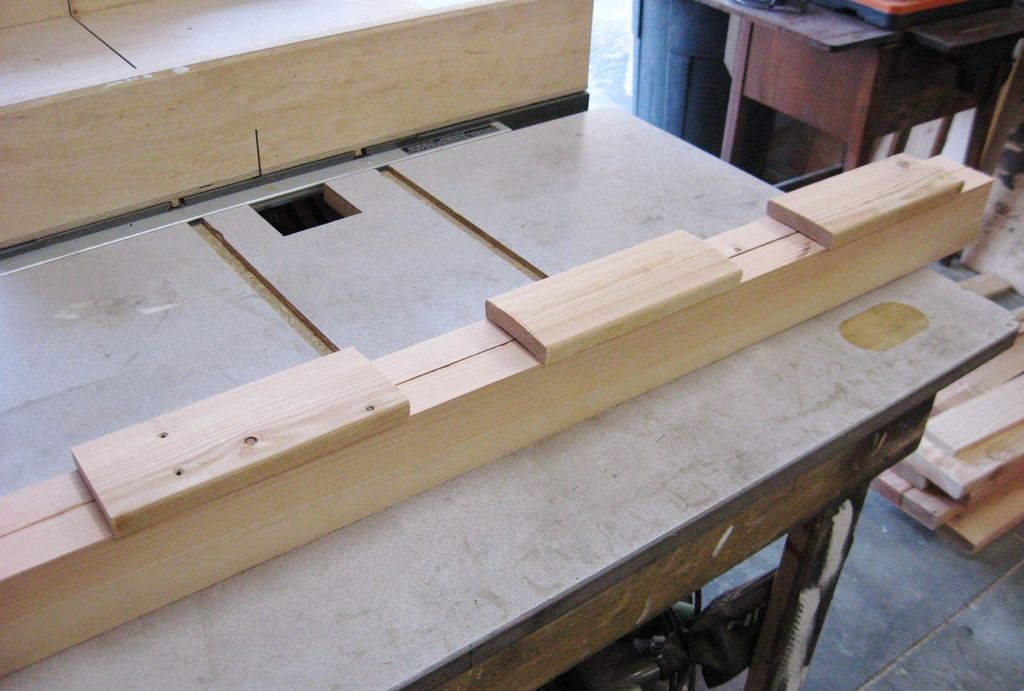
For the side elements of the sled, we will choose 2 dry wooden blanks with a cross-section of 38×89 mm and a length of approximately 1530 mm from oak, birch, maple, etc. The front crossbars can be made from 2 blanks with a cross-section of 30×70 mm and a length of 560 mm.
Barrel marking and tools for this
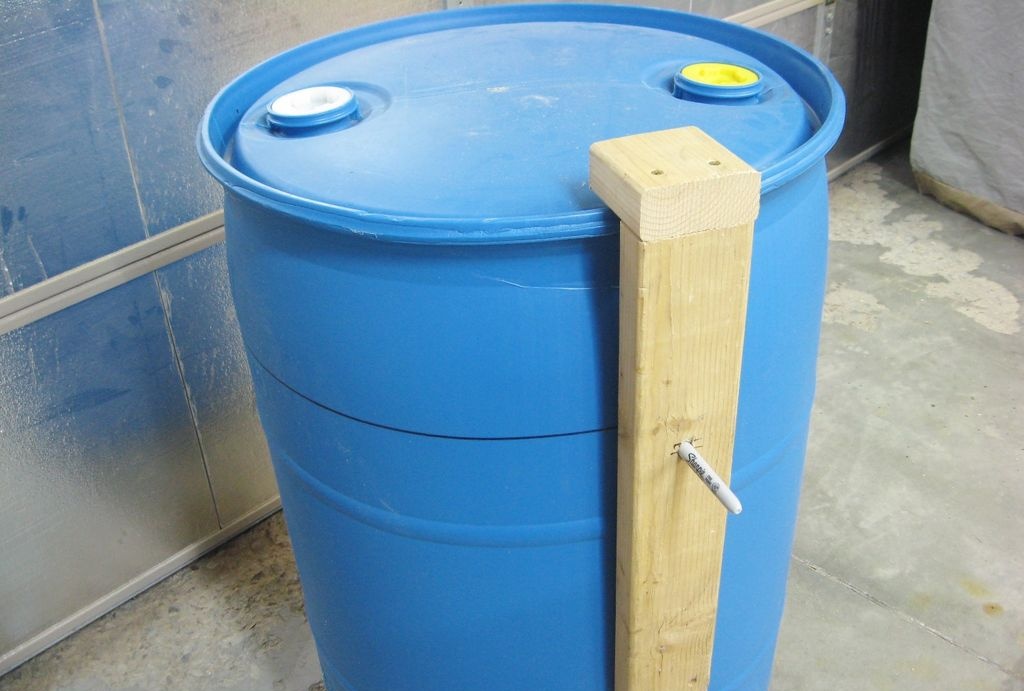
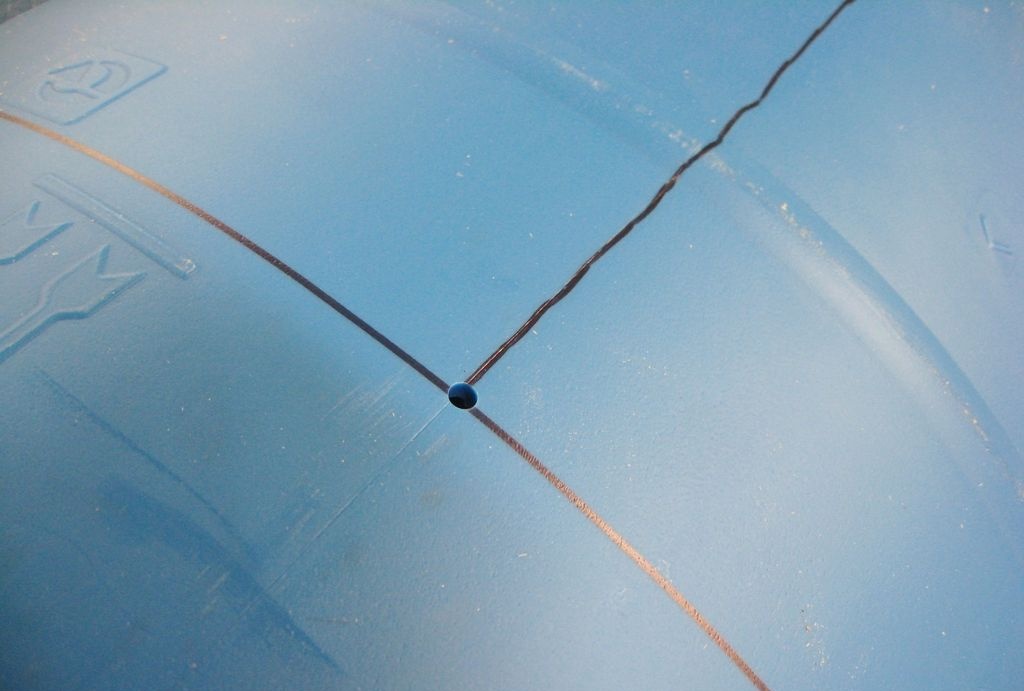
To cut out the sliding base of the sled, you need to mark the side surface of the plastic barrel. For this we need a homemade surface planer. It can be made from a hard wooden block ⅔ the height of the container.
Having measured the height of the barrel and the selected width of the sled (560 mm), we mark a place on the surface planer and drill a hole for the marker.We securely attach a limiter to its upper end, which will slide along the lid and bottom of the barrel, and the marker will draw two circles. All that remains is to draw a vertical line between them.
Cutting a barrel
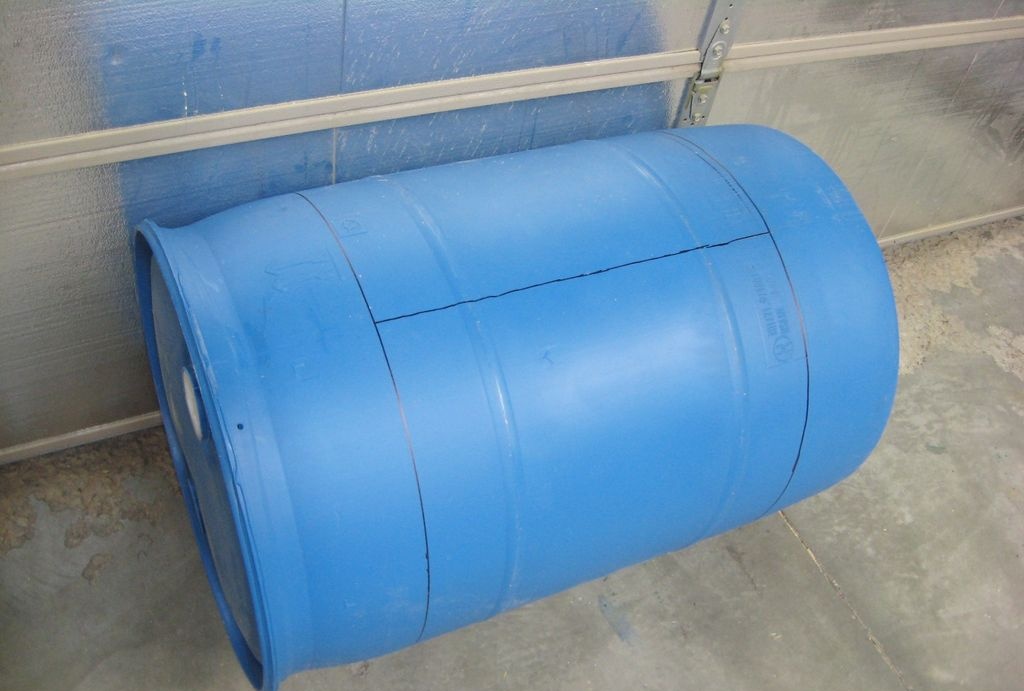
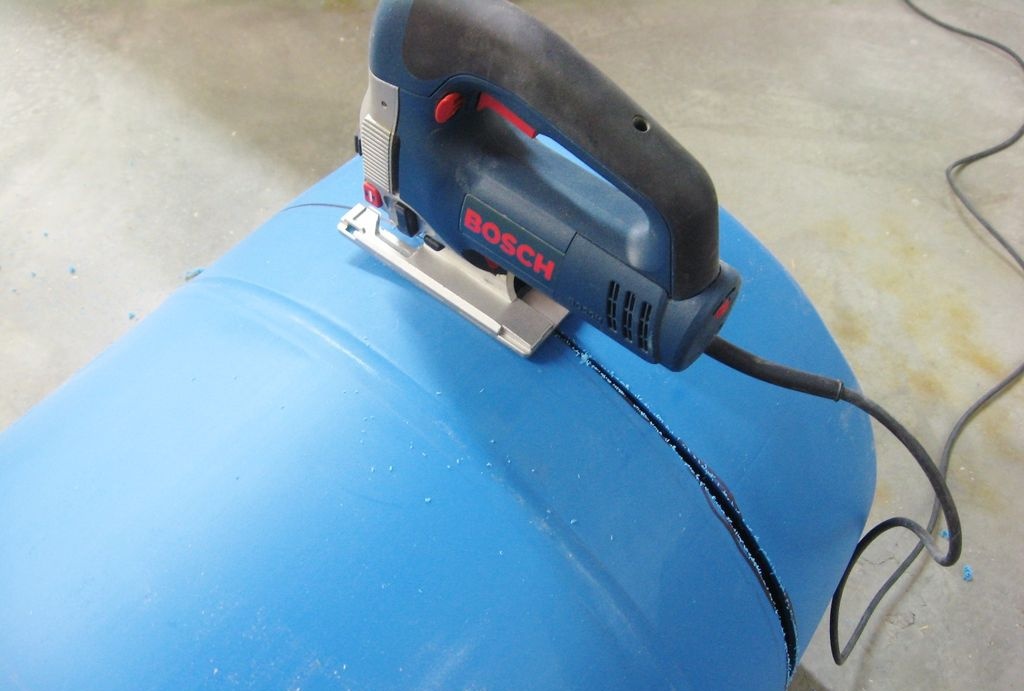
The reference points for cutting will be the holes at the points of convergence of the marking lines, made with a 6 mm drill. The most convenient tool for cutting barrels is a jigsaw, although you can also use a grinder.
In order for the barrel to maintain its rigidity, we first cut it in circles, separating the area of the lid and bottom, and only then the middle part of the workpiece along a vertical line.
The edges can be lightly processed with a wood file or a sharp knife, removing any roughness remaining after cutting.
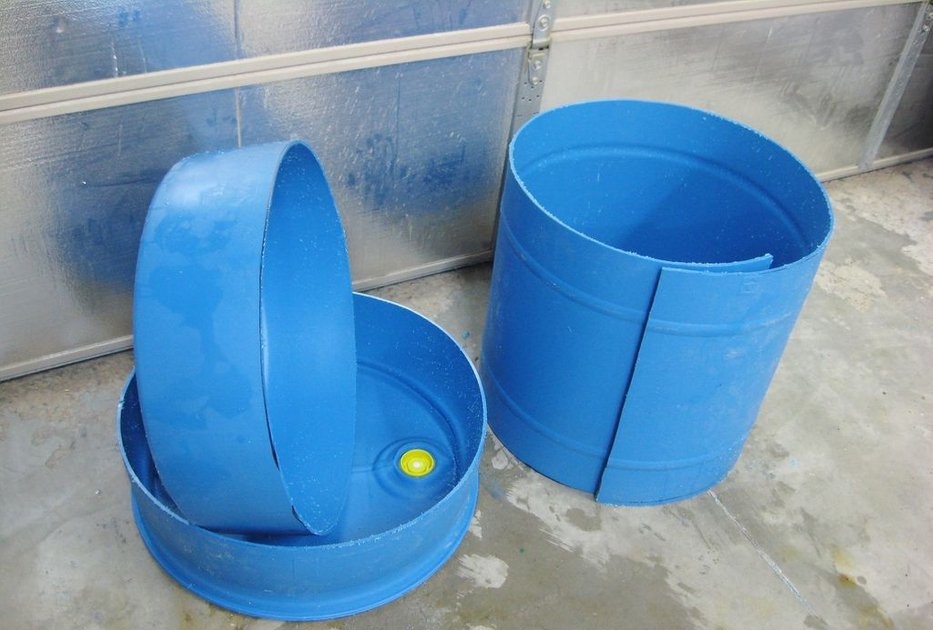
Straightening a plastic blank
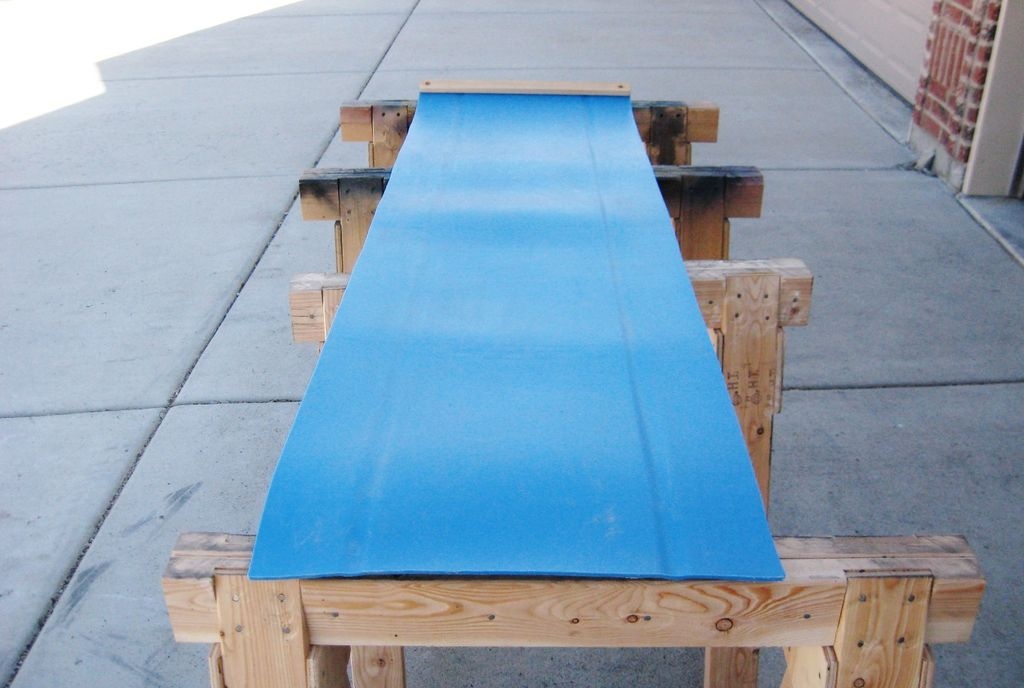
The workpiece, representing the middle part of the barrel, should be straightened, with the inner side facing outward, since it is smoother than the outer one.
Often, plastic barrels have stiffening ribs with a protrusion outward. When arching the inner side towards the snow, these longitudinal grooves play the same role as on the sliding surfaces of skis or snowboards. They will provide directional stability to the sled.
To straighten the workpiece, lay it out on a flat surface and press it in several places with bricks or buckets of water, and leave it for a while. Then the workpiece can be twisted in the opposite direction and also held in this position for some time. As a result of these manipulations, she will straighten out sufficiently. Small irregularities will be removed during subsequent operations.
Elements for sleighs made of wood
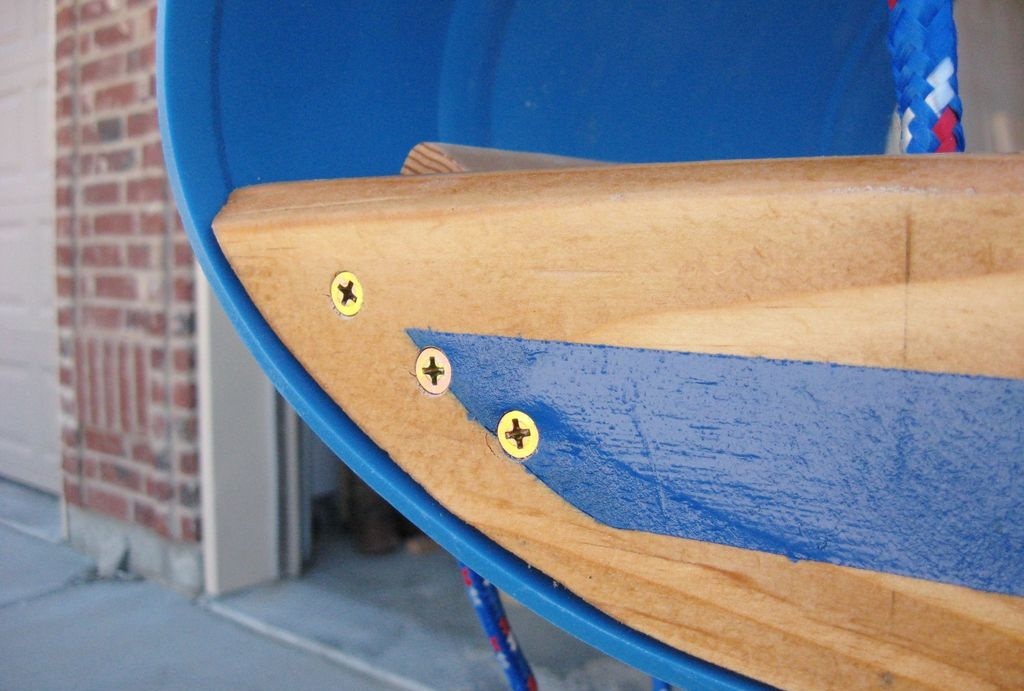
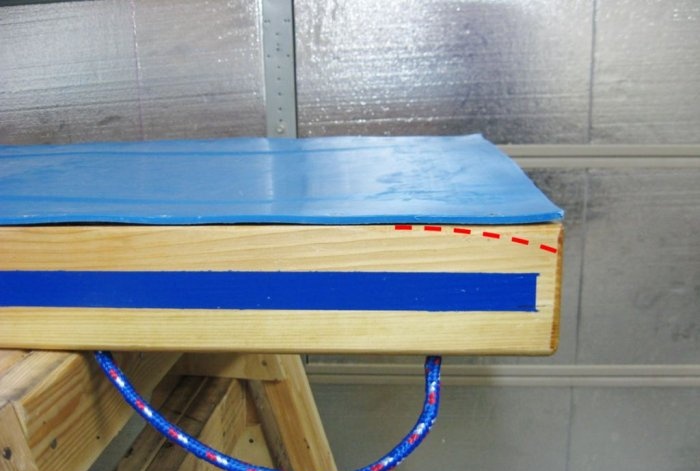
As we already determined in step No. 1, we will need two wooden blocks with a cross-section of 38x89 mm and a length of 1524 mm (final size). The lateral power elements will be made from them, the role of which in the design of the toboggan is no less important than the sliding surface.
We will also need two bars with a cross-section of 30×70 mm and a length of 560 mm. We will install one at the front below between the sidewalls to give strength to the entire structure, and the second at the end of the curved part of the plastic. The ends of the cord for transporting the sled will be passed through it. Moreover, the nodes on the outside of the bar will ensure the constant bending of the front end.
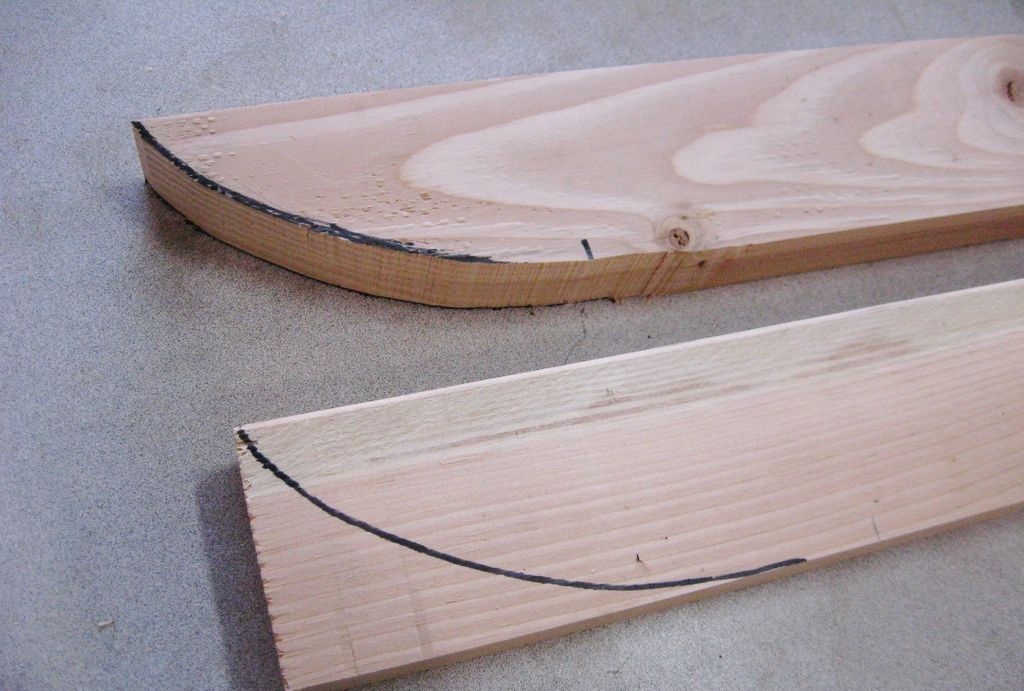
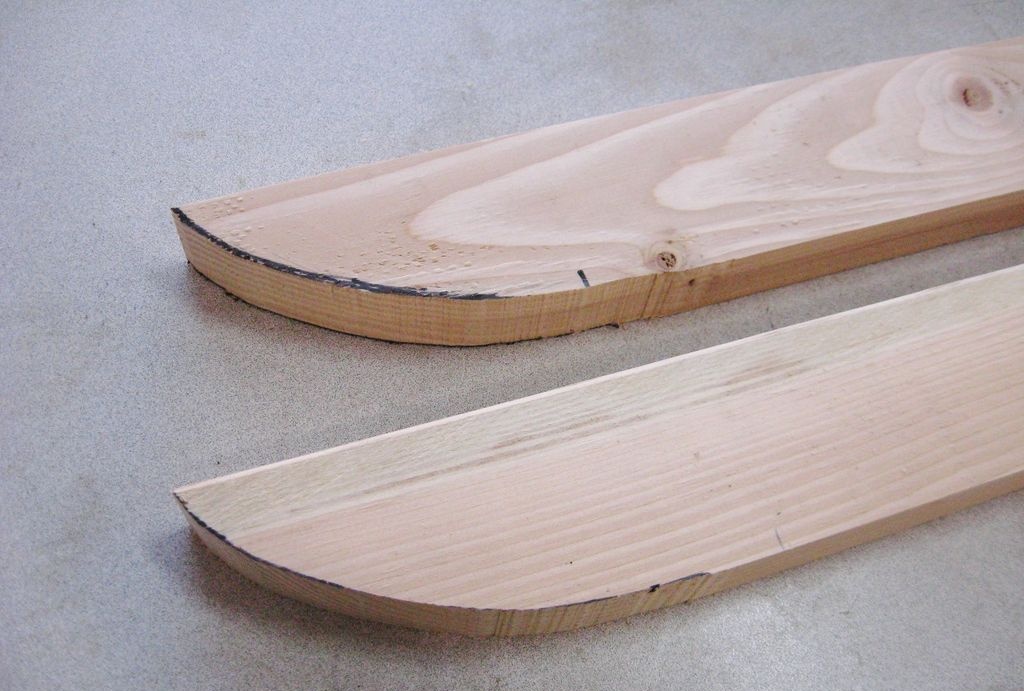
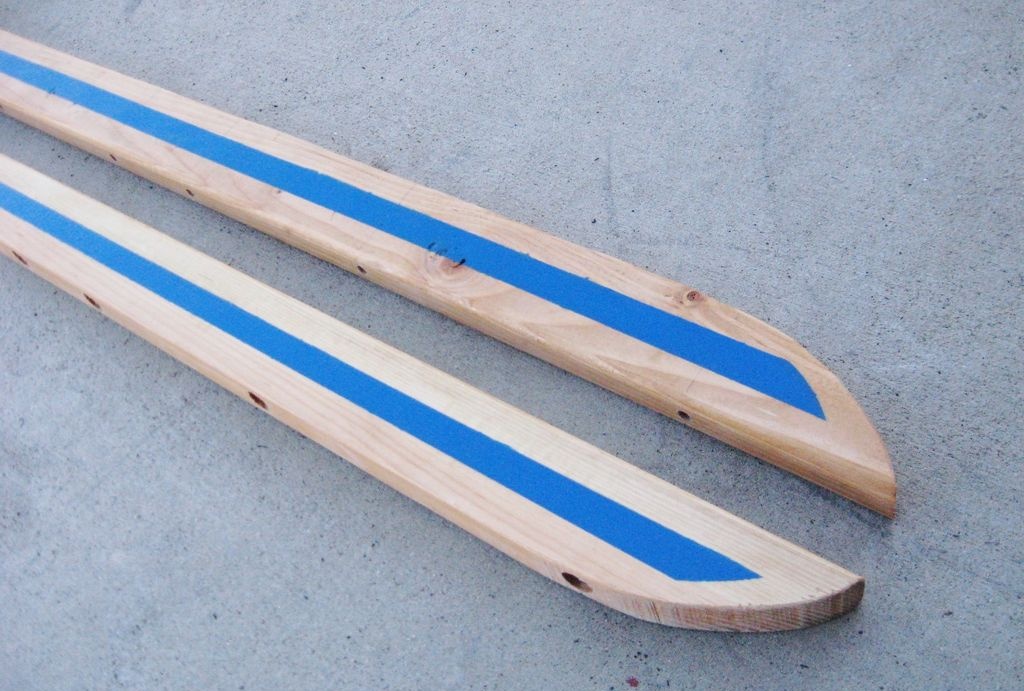
Processing of side elements
For better sliding on snow, these wooden parts at the front need to be given a rounded shape. To do this, you can cut out a template from thick cardboard, attach it to the board and trace it with a marker.
The same needs to be done at the back, but in smaller sizes. This will allow you to pull the canvas towards the bars so that it does not slow down the movement.
We cut along the markings using a band saw or carefully plan it with a sharp carpenter's hatchet and finally finish it with a wood file.
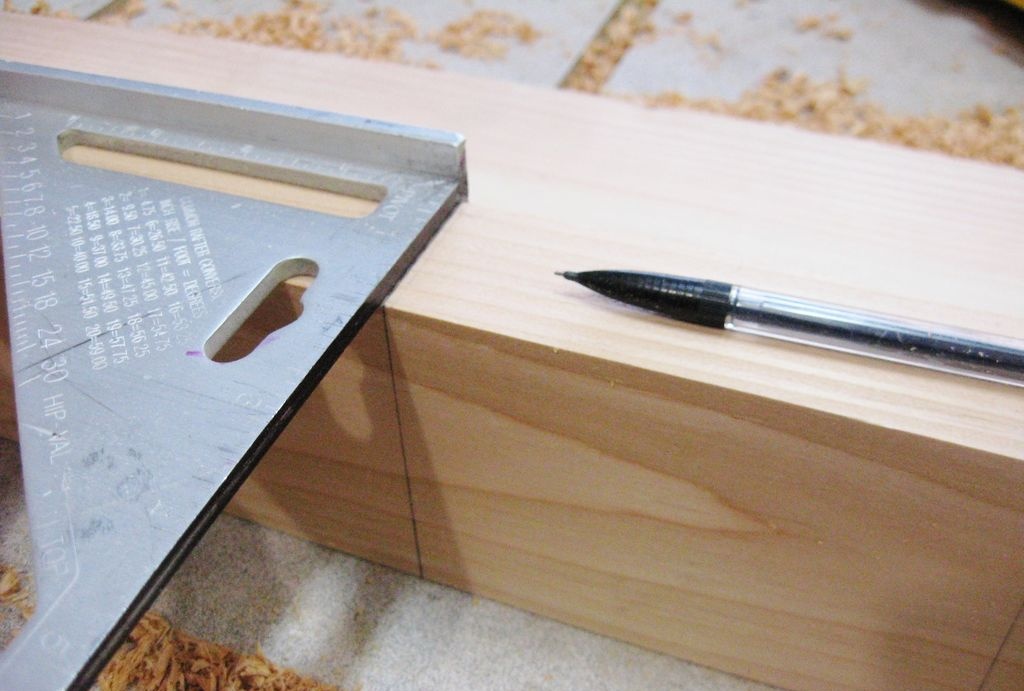
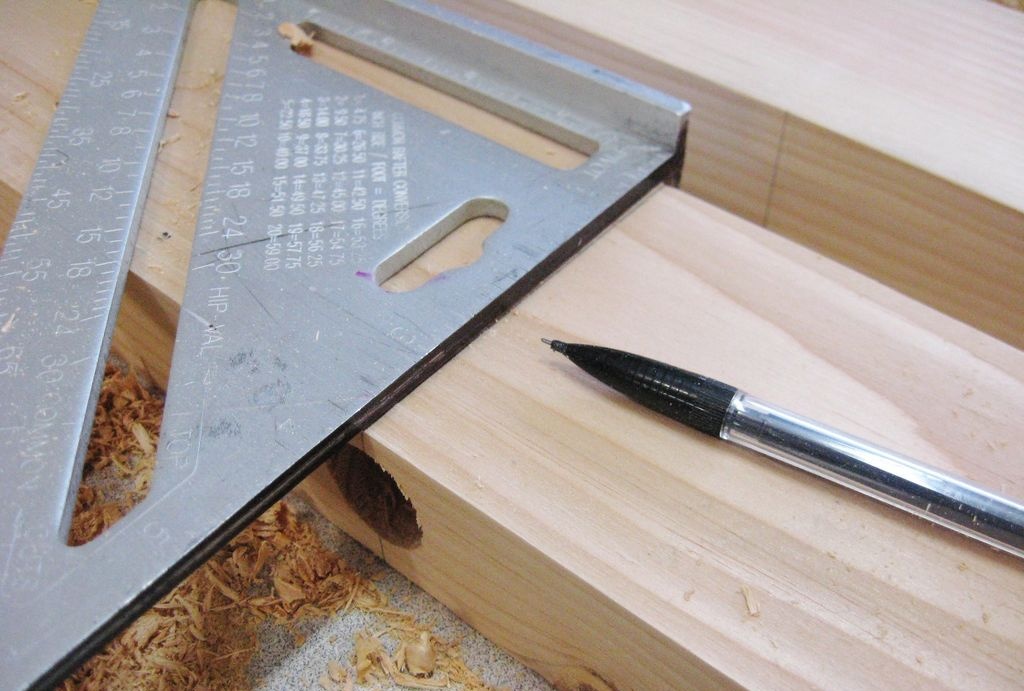
Marking the holes for the handles
The number of handles on each side may vary. We settled on three. Any method is suitable for marking them:
using a template - a wooden block with straight ends, the length of which is commensurate with the distance between the holes for the handles;
using a metal ruler and marker.
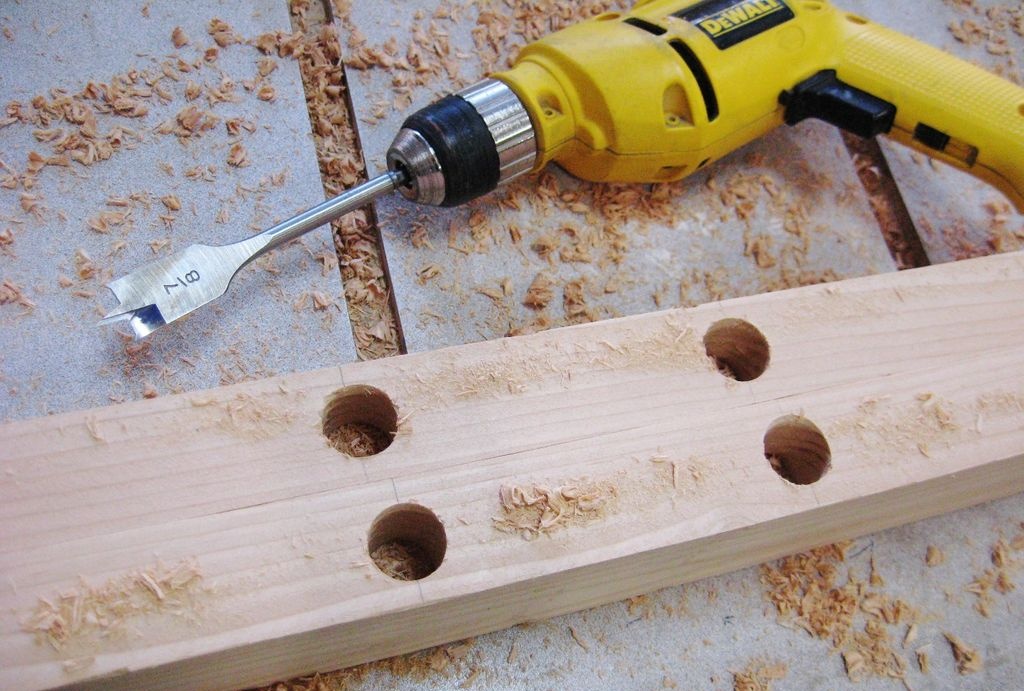
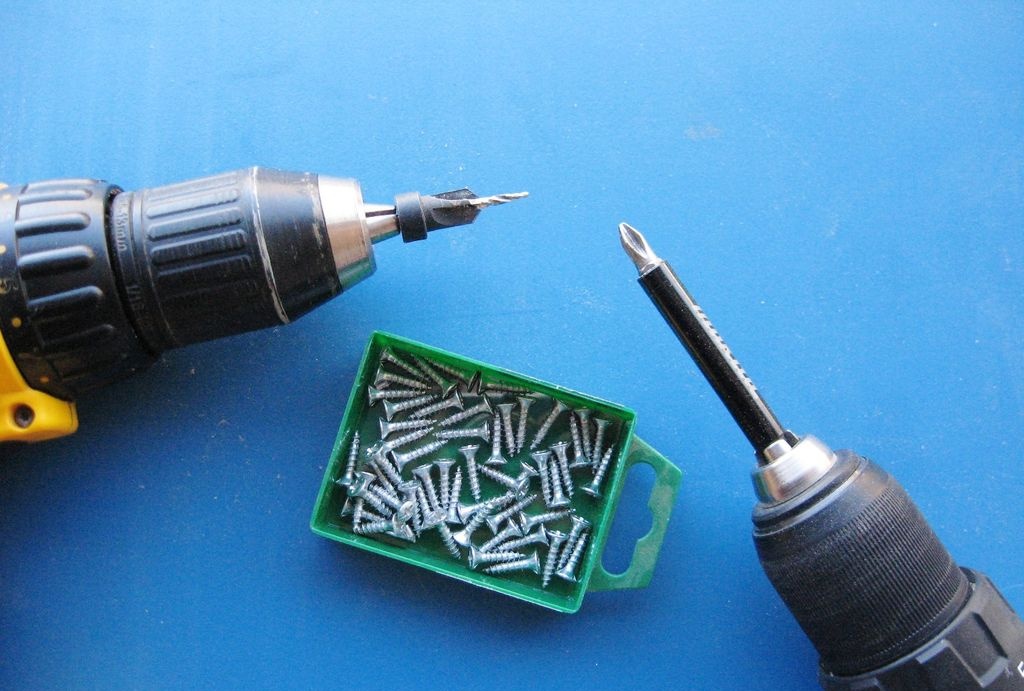
Drilling holes for handles
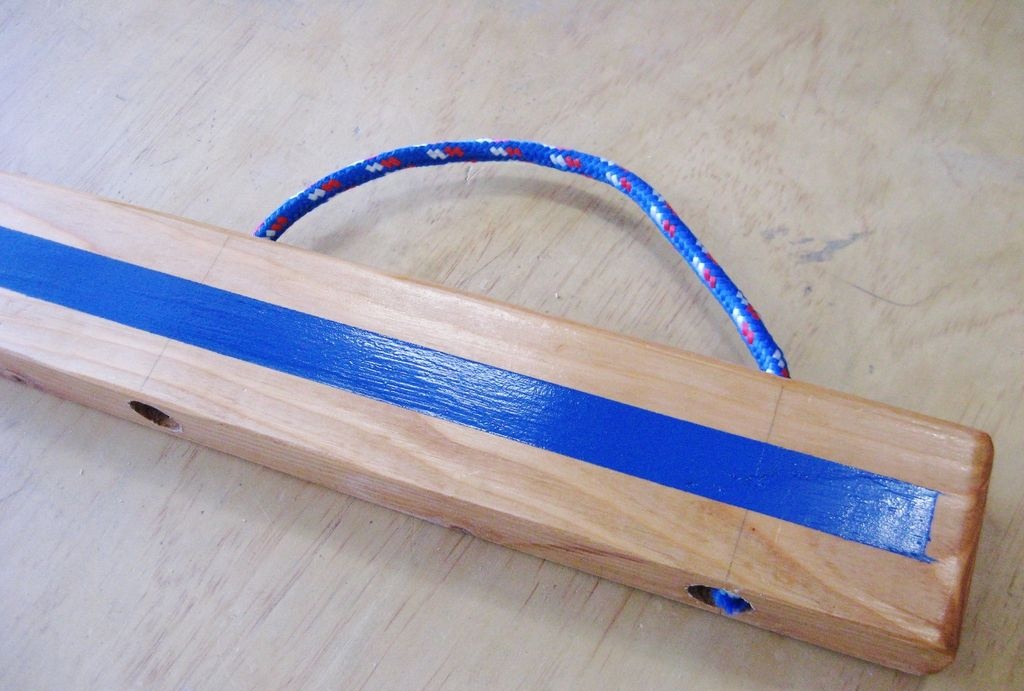
To do this, you will need a drill and two drills: one with a diameter of 22.2 mm, the other with a diameter of 12.7 mm. In this case, we choose the diameter of the synthetic cord or thin rope equal to 9.5 mm.
First, on the face of the workpiece, we drill 2 large holes to a depth of 25.4 mm, one below the other vertically, leaving a jumper between them approximately equal to the diameter of these holes. Then, from the upper end, we drill holes with a smaller drill until the large sockets are connected to each other.
We make exactly the same holes, retreating from the front edge of the boards by 152 mm. They will be needed to pass ropes that will hold the front of the sleigh with their knots and serve as a tow.
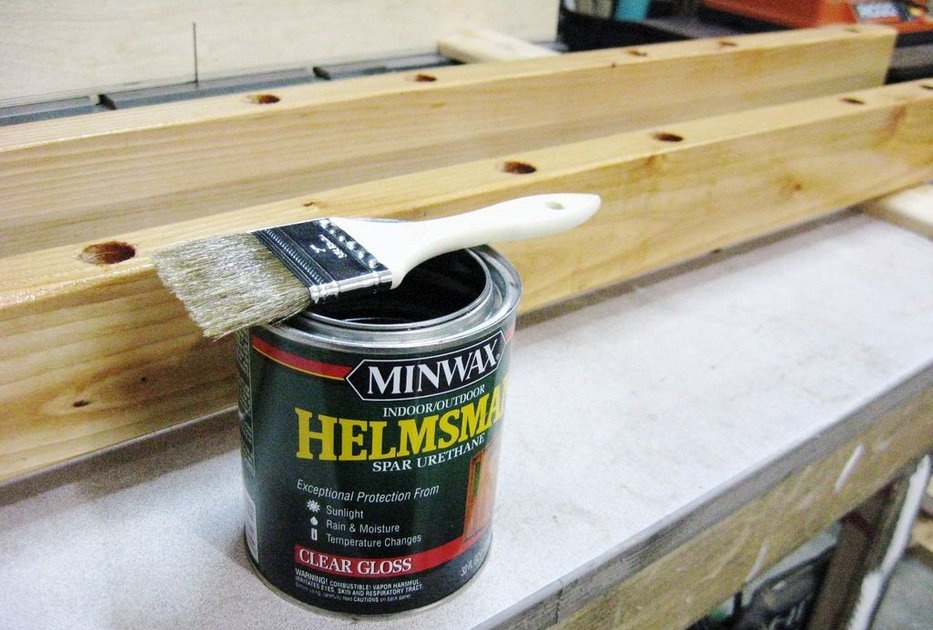
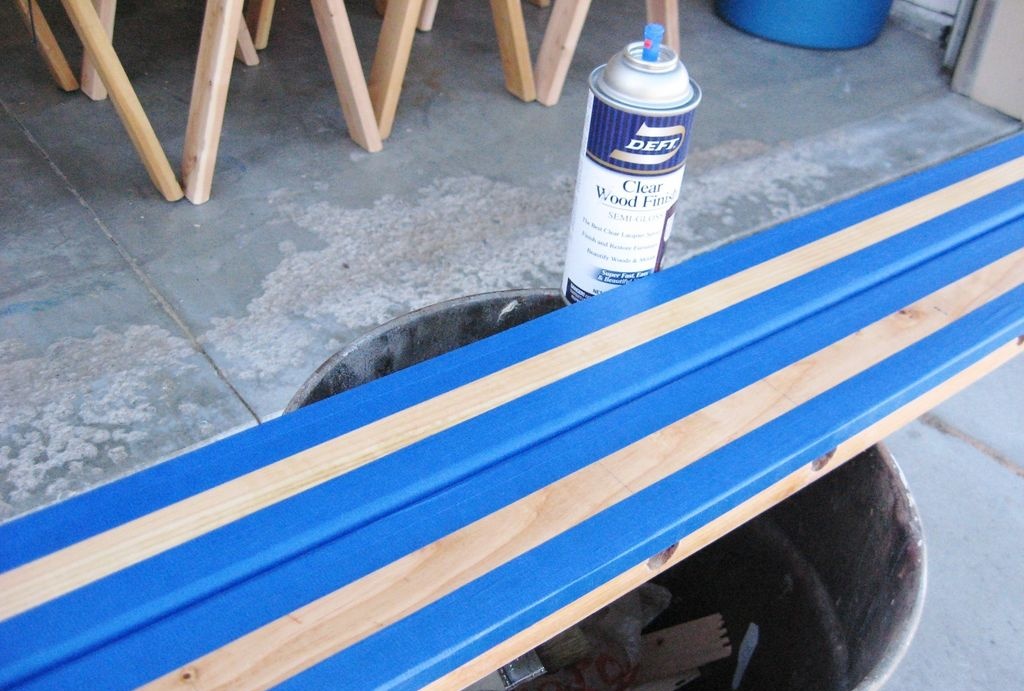
Finishing work on wooden parts
To prevent wooden parts from getting wet when in contact with snow, they should be coated on all sides with several layers of urethane varnish using a small paint brush, following the instructions on the can.
After the next layer of varnish has dried, it can be lightly sanded with sandpaper No. 220 to remove roughness and sagging. The result will be very smooth surfaces.
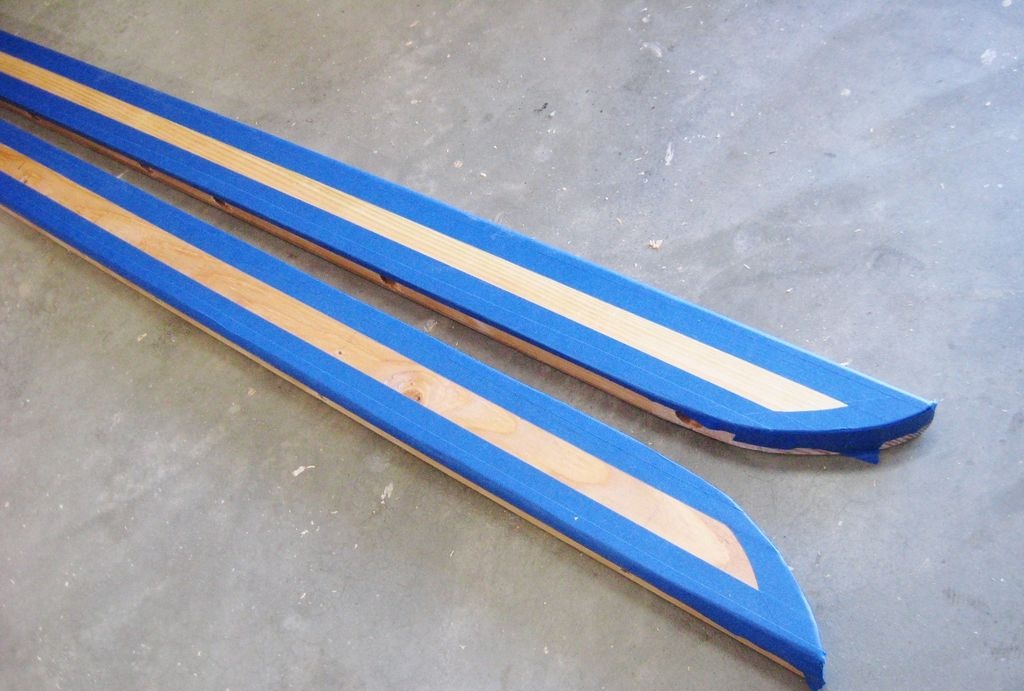
Improving the appearance
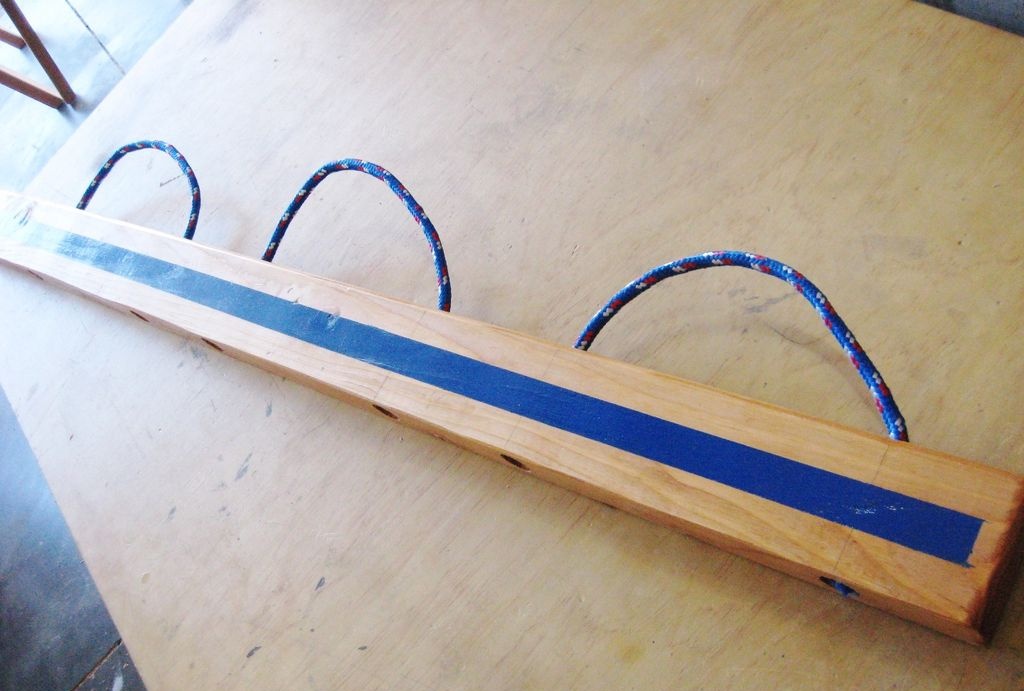
You can make blue stripes along the side elements. To do this, cover the entire surface with adhesive tape, except for the outline of the strip. To prevent paint from leaking under the tape, it can be coated with colorless varnish.
All that remains is to spray blue aerosol paint in several layers and remove the protective film. The clarity of the stripe contour will be impeccable.
Preparing handles and tug
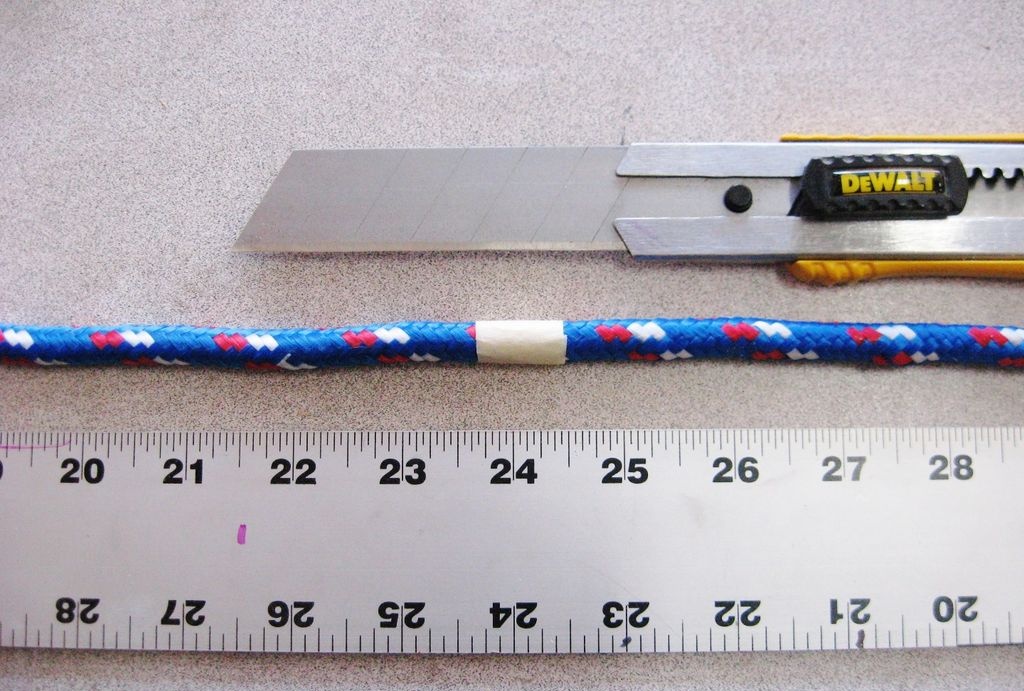
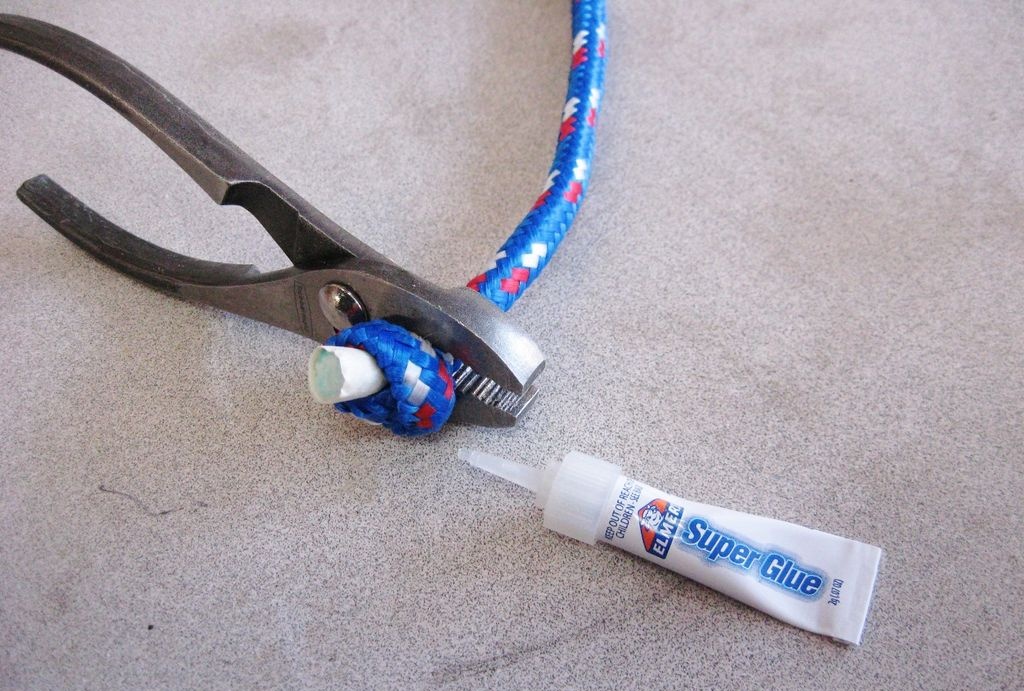
Blanks for handles about 610 mm long are made from braided synthetic cord with a diameter of 9.5 mm. To make it easier to work, we mark the cutting places by winding narrow tape, and cut with a carpenter's knife in the middle of the tape belt.
For the towing rope we use two cords approximately 1520mm long. On all workpieces, we tie a knot on one side using pliers.For reliability, the nodes can be lubricated with super glue before installation in the socket, but this is not necessary.
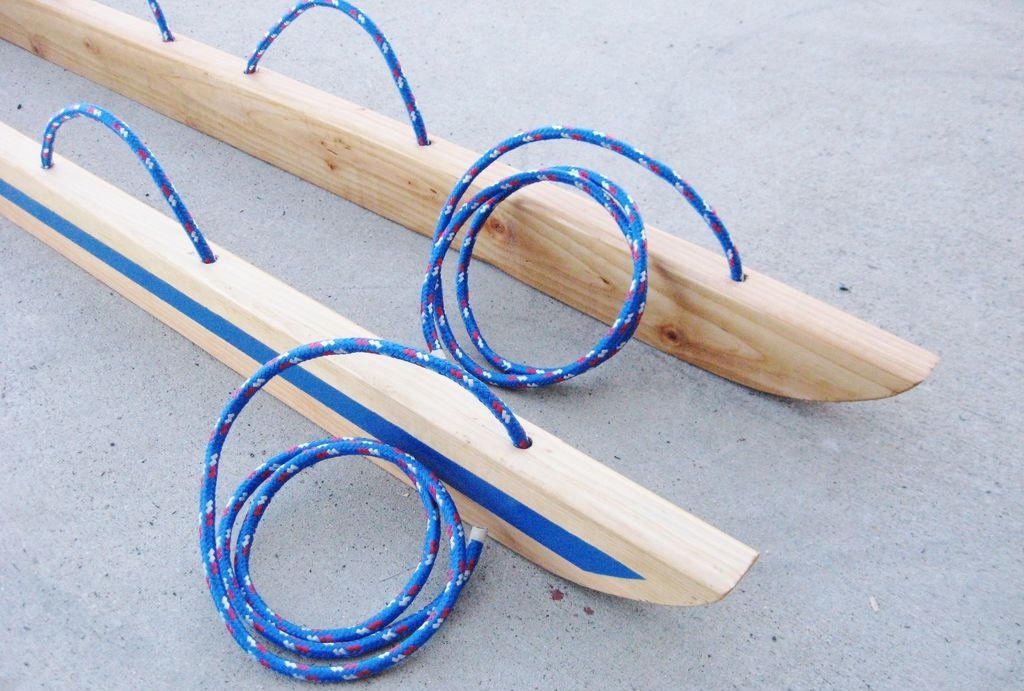
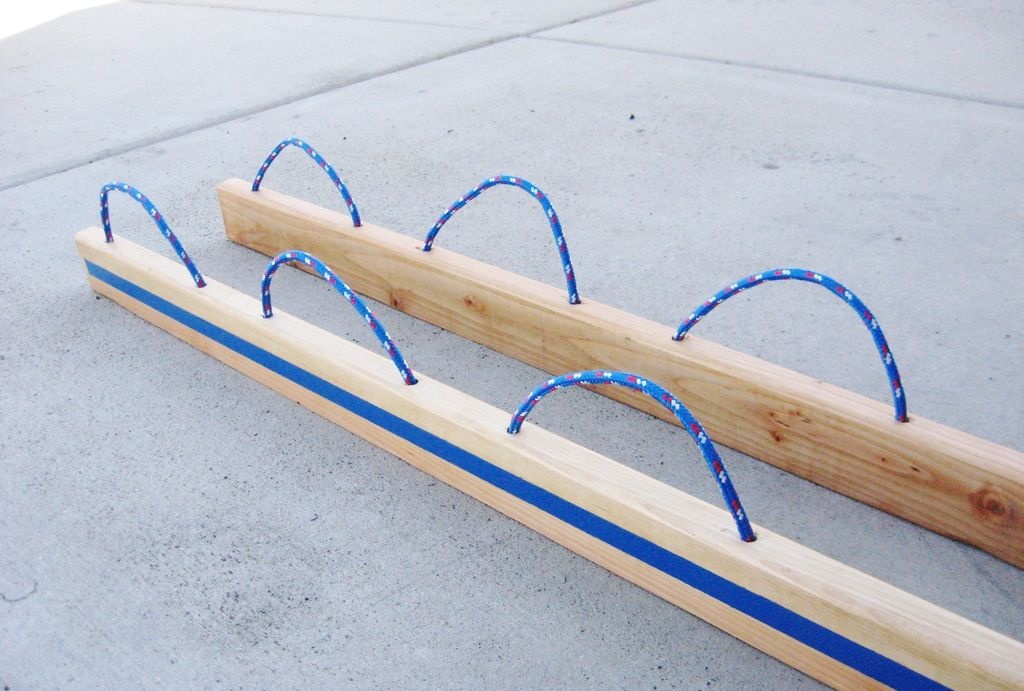
Installation of handles and towing ropes on site
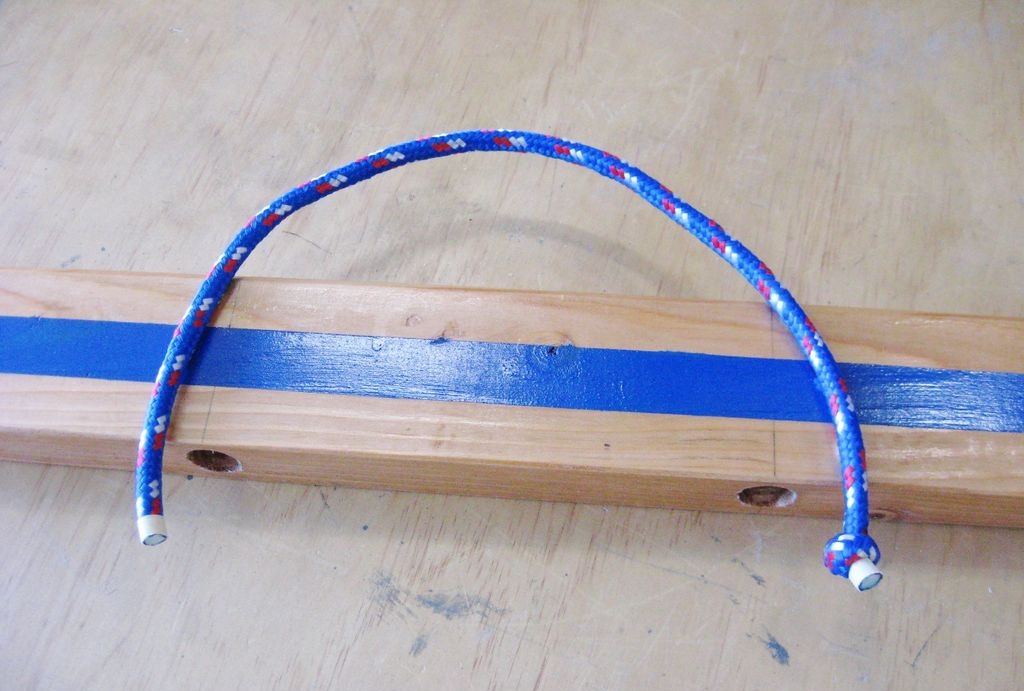
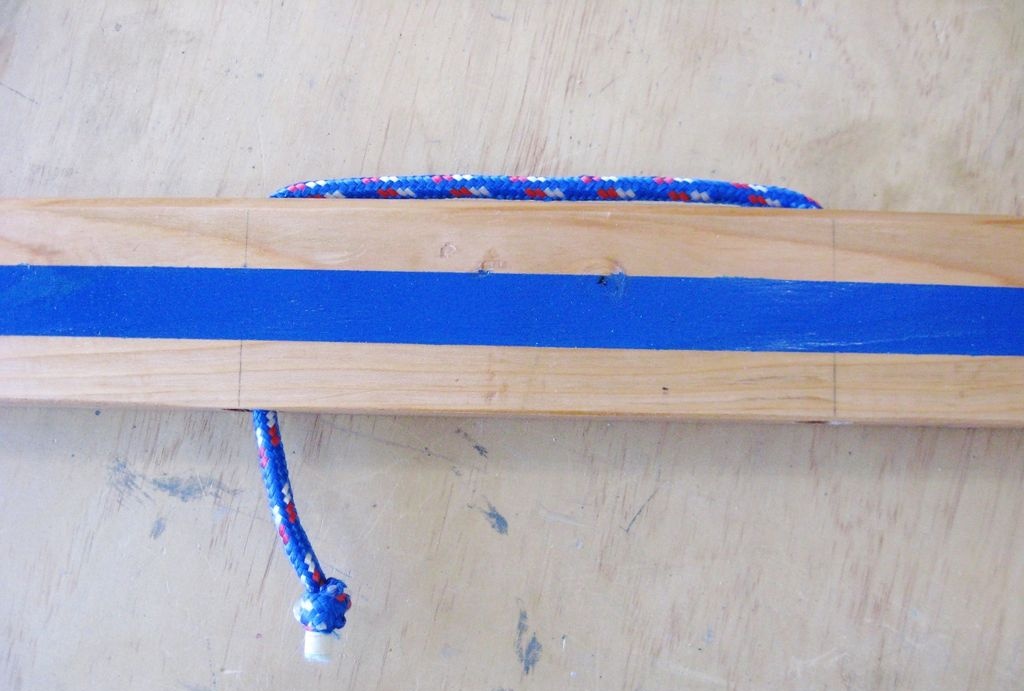
At stage 8 we have already prepared the hole system for the handles and the towing rope. We insert the free end of the cord through the large hole into the small one and pull it up strongly so that the knot is further tightened and sits in place. Then we push the same end from above into the small hole until it appears in the large one. We pull it out and tie a knot. Now pull the handle up forcefully enough so that both nodes are strengthened and take their proper place.
We do the same with two ropes designed to hold the front of the sled and tow it.
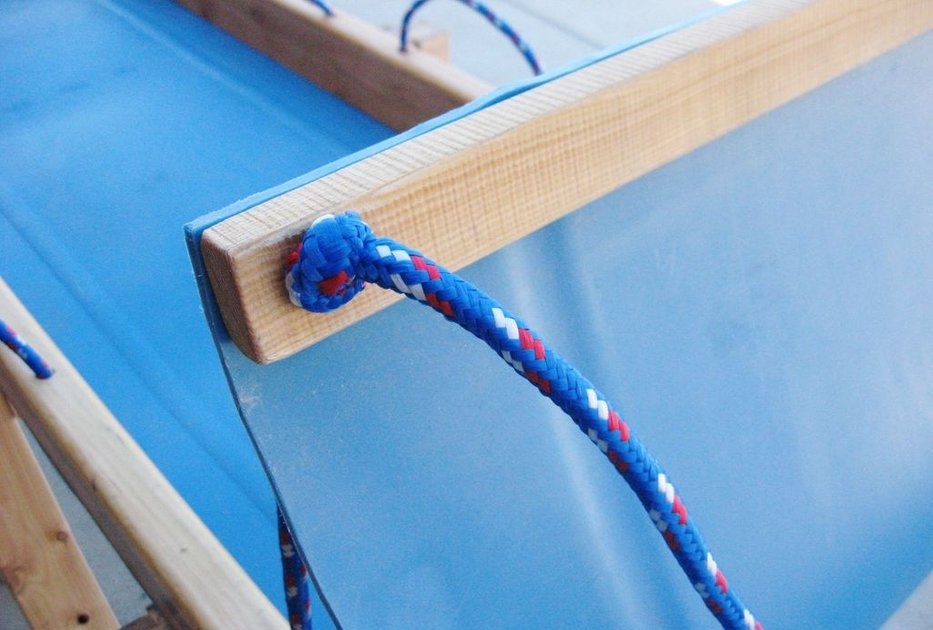
Leading Edge Attachment
This crossbar gives the sled rigidity, helps maintain the flex of the front end, supports the tow ropes, and even serves as a means of steering the sled.
It is placed on the plastic from the outside, having drilled several holes in it in advance, and secured with screws 15 mm long. On the sides of this beam there are already 2 holes with a diameter of 12.7 mm for passing the towing rope.
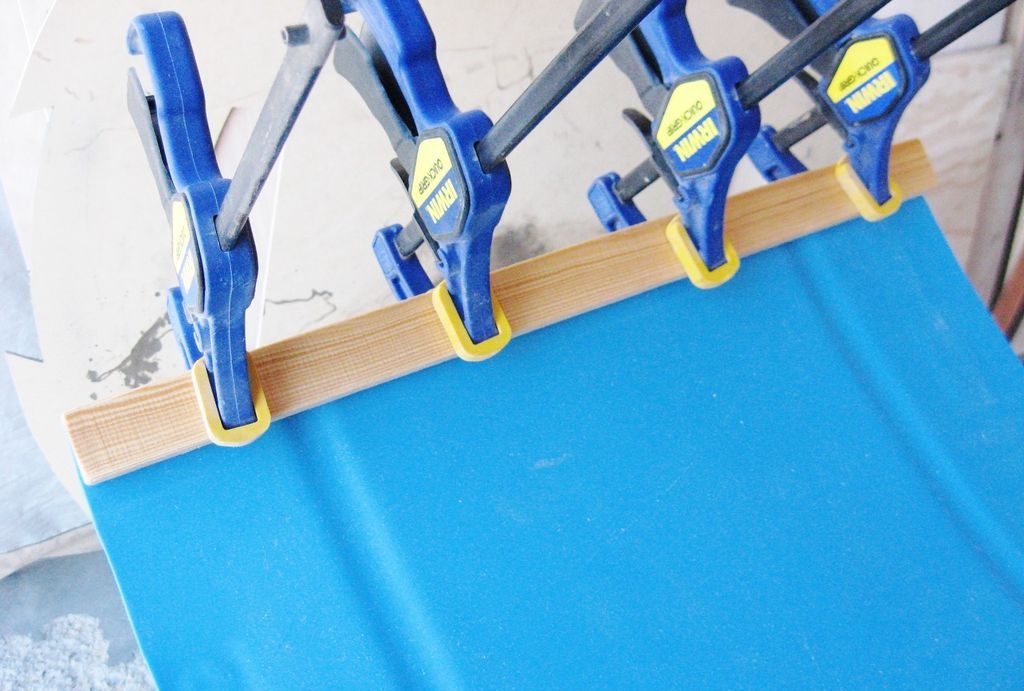
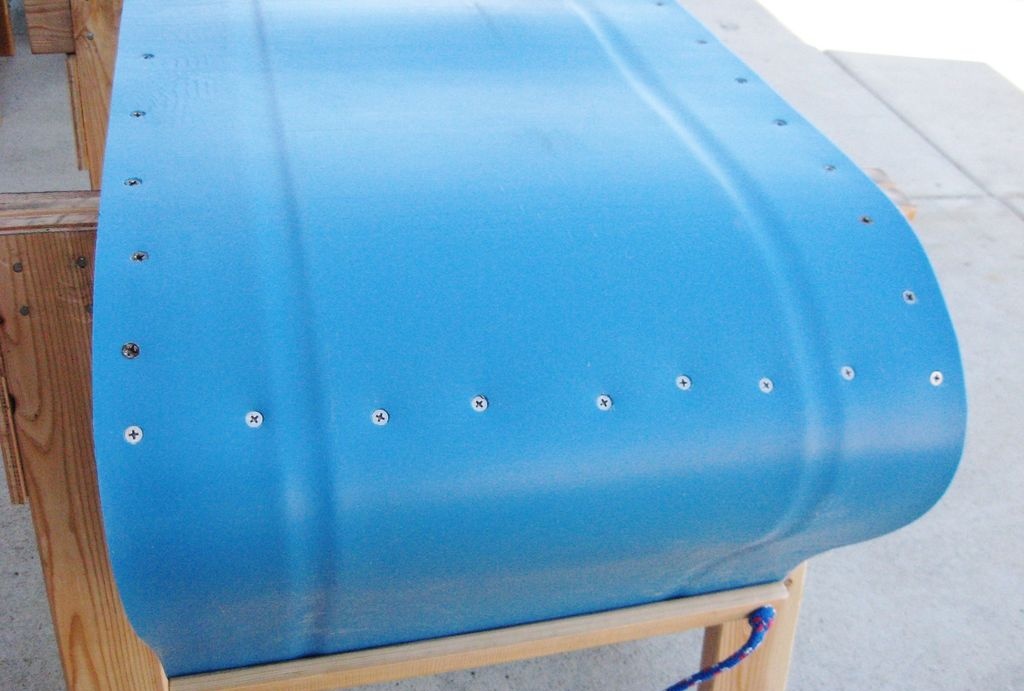
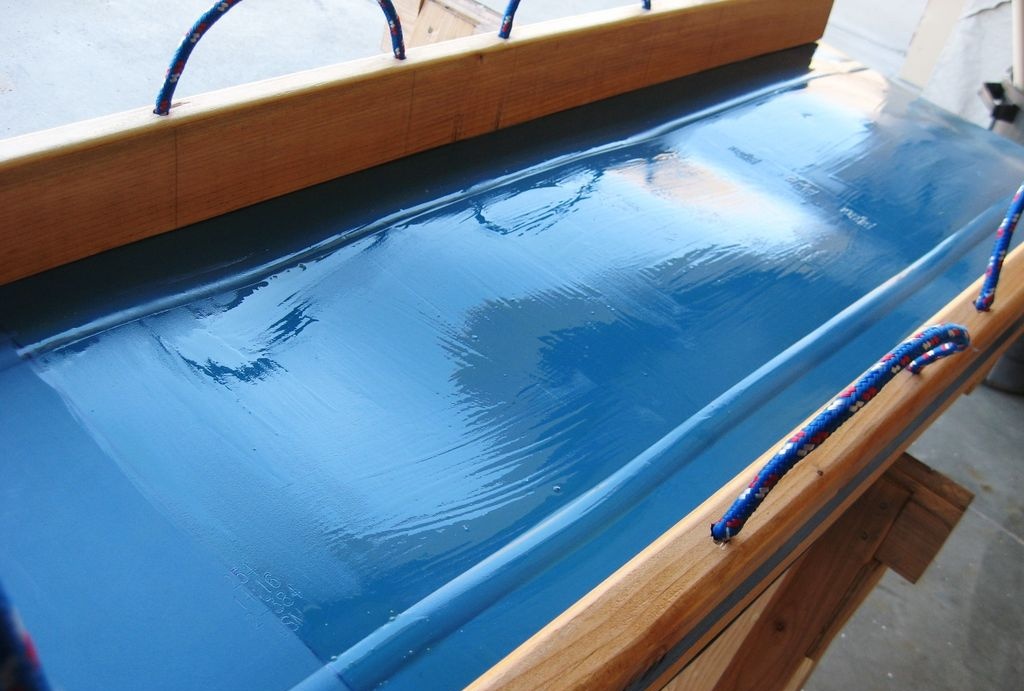
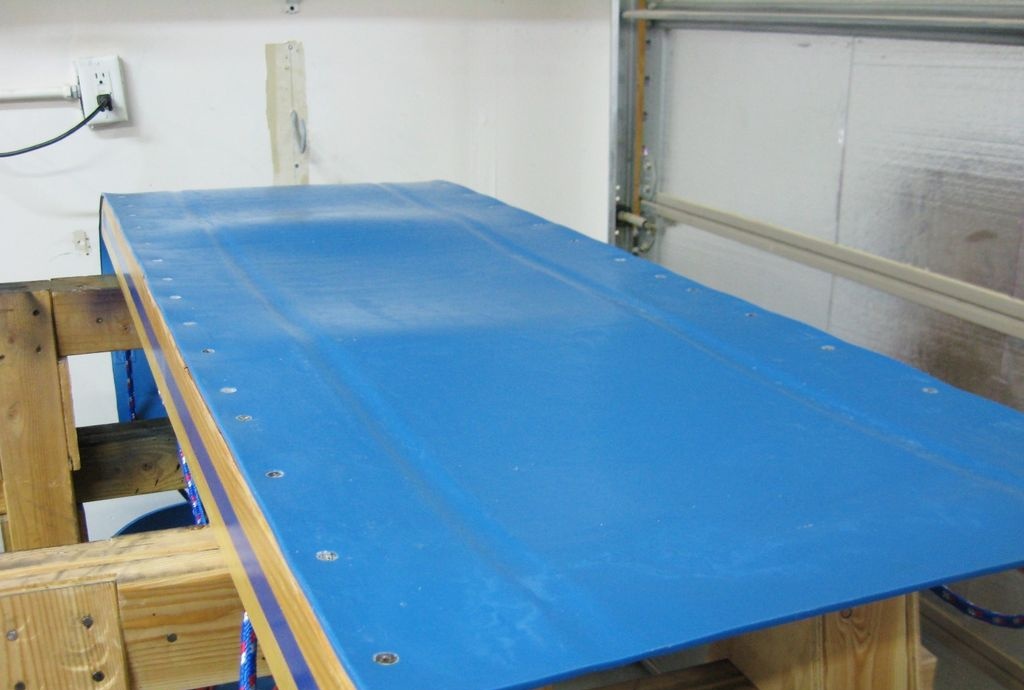
Attaching the side bars to the sliding surface
To firmly connect the main parts of the sled, the side beams are laid on carpenter's sawhorses, a thin anti-slip sheet is placed on them, and everything is covered with sliding plastic.
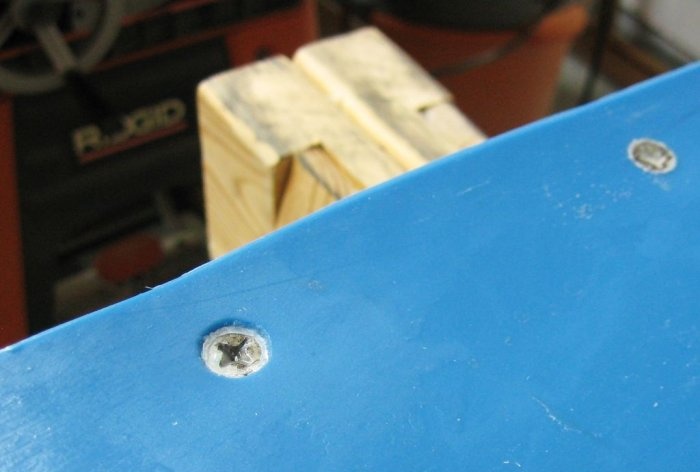
Then you should mark the places for tightening screws 40-50 mm long with a wide head. The installation pitch is 115-120 mm, preventing screws from getting into the holes for handles and tow rope.
We tighten the screws from the center to the edges. This will smooth out the last small transverse unevenness on the plastic base. When screwing in the next screw, you should tighten all the parts nearby with a clamp.
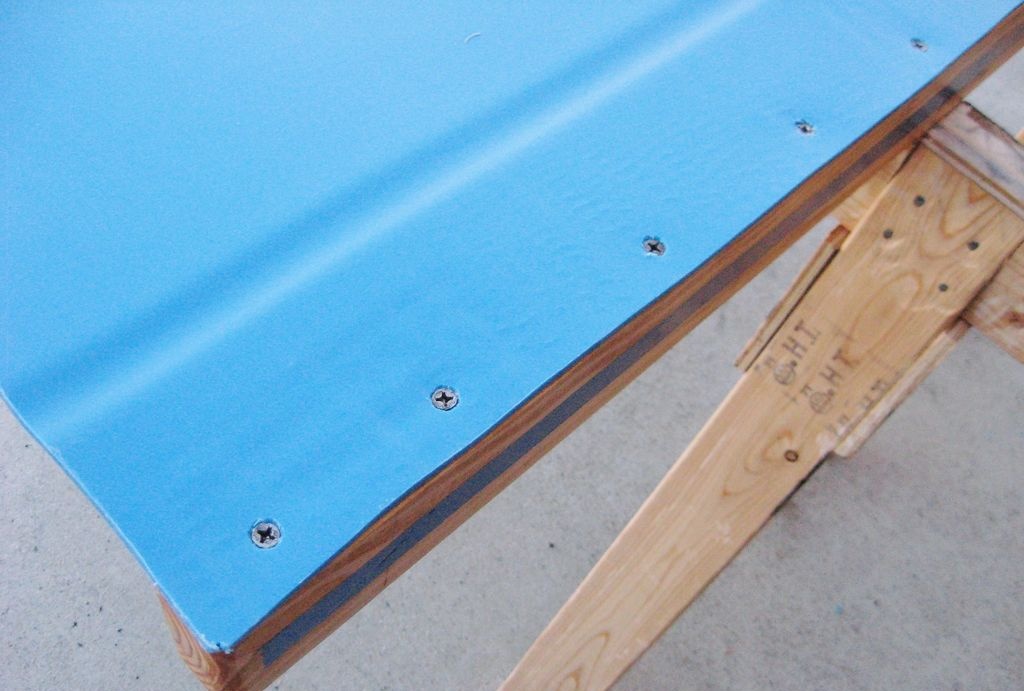
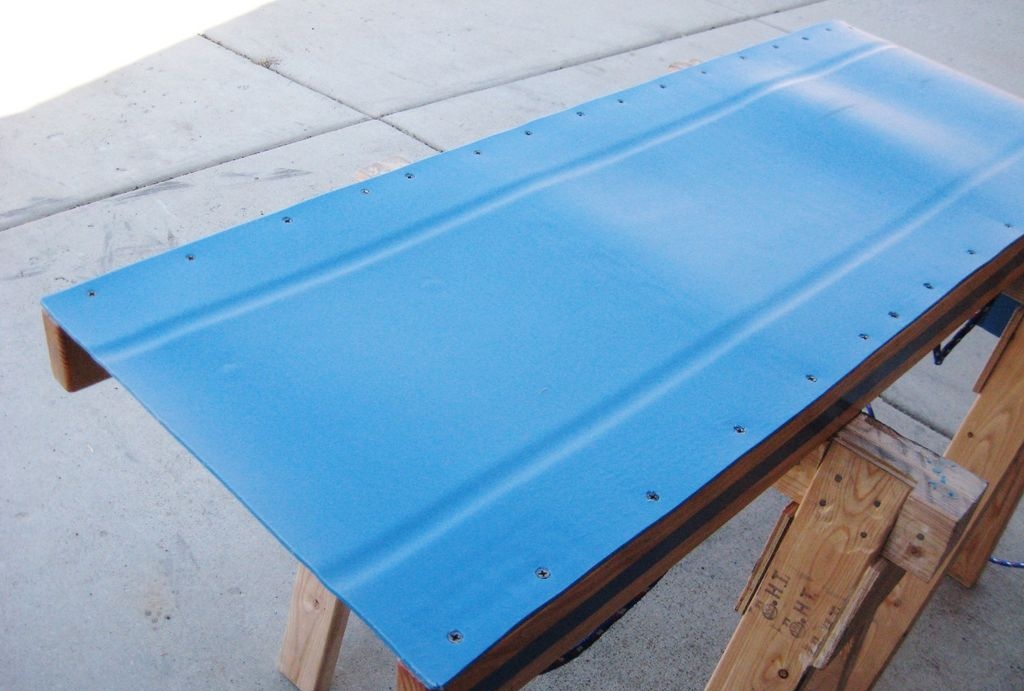
Installation of the front beam
It is fixed at an angle due to the plastic surface beginning to bend at this point. This beam is fastened at the ends with three strong screws 75-80 mm long on both sides. From the front it is secured in 9-10 places with screws 40-50 mm long through a plastic bend.
This beam gives the sled lateral stability, preventing the side elements from moving outward or inward. It also strengthens the curved part of the plastic sheet, which experiences heavy loads.
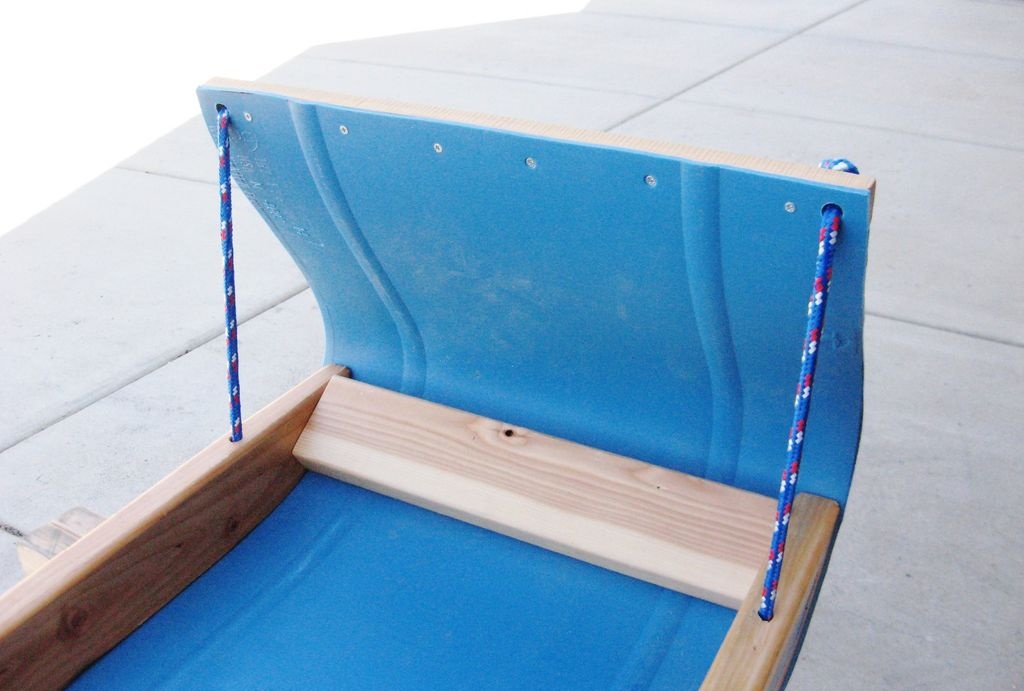
Installing a tow rope
The towbar halves are passed through the side holes in the top bar. Depending on where we tie the knots, the front of the mountain sled will be raised and curved. The ends of the ropes are tied together to form a towing rope.
Another option for installing an anti-slip mat
The first and more successful option for attaching it is described at step 14. If you forgot to install it, then the anti-slip coating can be cut out in place and glued from the inside to the plastic with an adhesive suitable for these materials. Otherwise, there will be quite a lot on the bare plastic after snow gets on it.
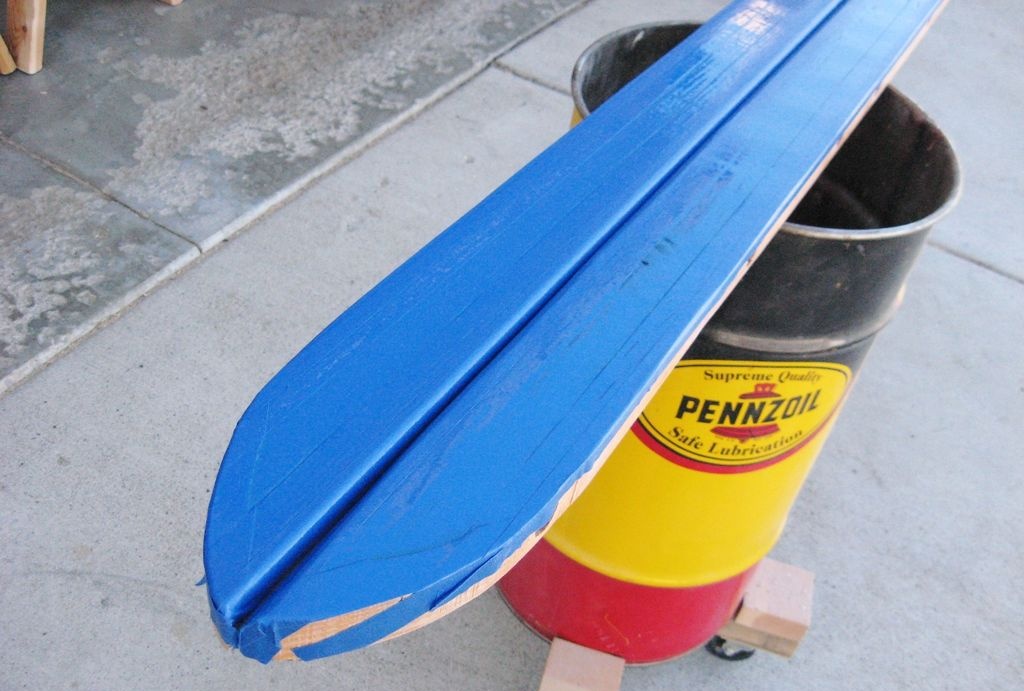
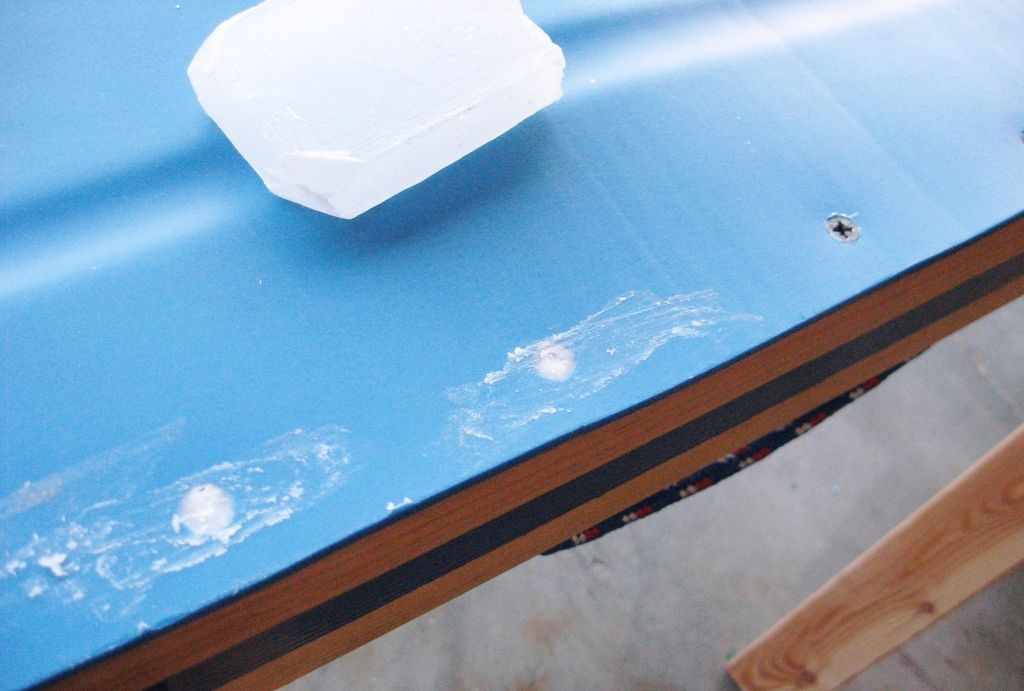
Waxing
Wax improves the sliding of plastic on snow. A piece of this material should be thoroughly rubbed over the entire sliding surface, especially the screw heads. Then heat the waxed plastic with a gas burner so that the wax is more evenly distributed over the surface and gets into the recesses of the screws. It is advisable to do this operation before each day of riding. The result is stunning!

Improvements and advice (instead of a conclusion)
After analyzing the work done, it turned out that the design could be modified and improved. Let us present them in summary order:
- You can make a semicircular shank;
- instead of 28 large blind holes on the sides of the side elements, you can get by with 14 combined ones - wide at the bottom at 1/3 of the height of the beam and narrow at the top;
- It is better to replace ferrous metal screws with galvanized or stainless steel ones;
- some waviness of the sliding surface is not dangerous, because when several people sit in the sleigh, it is smoothed out under their weight;
- You can add more crossbars to increase strength and even seats for comfort, but this will make the product heavier. Let everyone choose what they like.


Original article in English