On the Internet I saw a lot of different technologies and methods for making solar water heaters and decided to share my own experience. I consider this project to be very successful, since literally every centimeter of the surface of the collector is in direct contact with heated water. In addition, using the technology as a basis, you can easily build a collector of the required size.
Project concept
The essence of the solar collector is that cold water from the reservoir flows by gravity into the collector. The heated water rises up through the channels and flows back into the tank. Thus, natural circulation is created in a closed system.
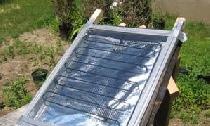
The manifold is made of a sheet of polycarbonate or other plastic with hollow squares inside running lengthwise. To increase the absorption of sunlight and improve the collector's performance (the rate at which the water heats up), the plastic can be painted black. But here it is important to remember that the sheet is made of rather thin polycarbonate, so if it is heated strongly in the absence of circulation, it can soften or deform, which will lead to water leaks.
It is also worth noting that this device is not suitable for installation in residential premises for the purpose of hot water supply. This experimental project is more suitable for equipping a summer shower in a summer cottage.
Tools and materials
Tools you will need:
- Circular and hand saw.
- Electric drill.
- Knife.
- Roulette.
- Screwdriver.
- Silicone glue gun.
- Construction stapler.
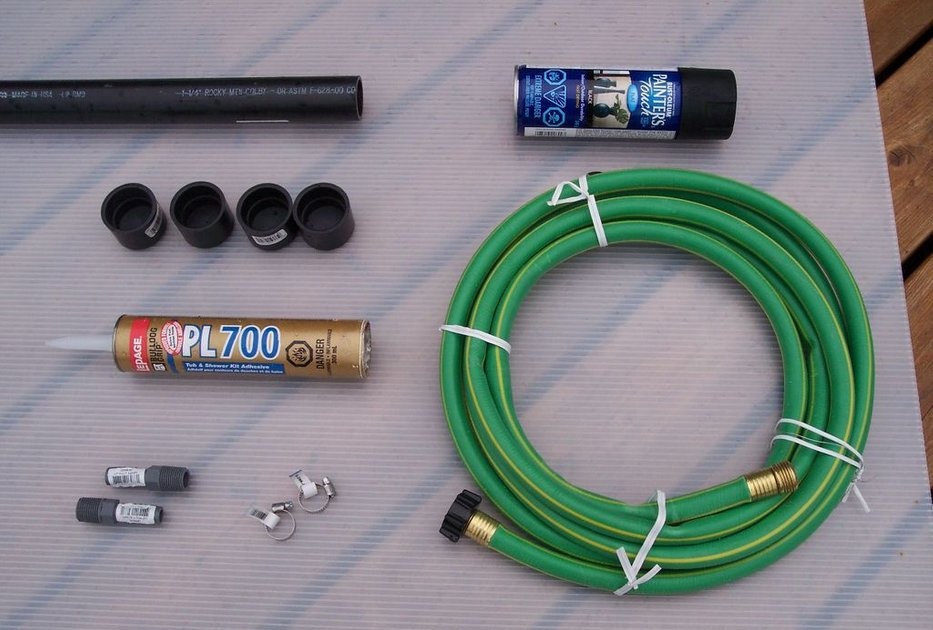
Materials for the collector:
- Polycarbonate sheet with hollow channels.
- ABS plastic tube.
- 4 tube plugs.
- 2 ½ inch plastic threaded nipples with hose fitting.
- Tube of silicone sealant.
- Spray paint if you plan to paint.
Frame materials:
- 1 sheet of plywood.
- Expanded polystyrene sheet. You can also use foam squares.
- Wooden beam with a section of 100×100 mm.
- Polyethylene film, tape.
- Bolts, nuts, washers, brackets for fastening.
Materials for organizing water circulation:
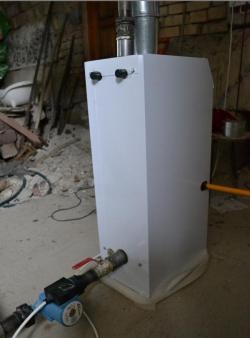
- A suitable reservoir or container for water.
- To connect the tank, you will need a garden hose, the length of which depends on the distance of the water container from the collector itself.
- Several clamps for connecting the hose.
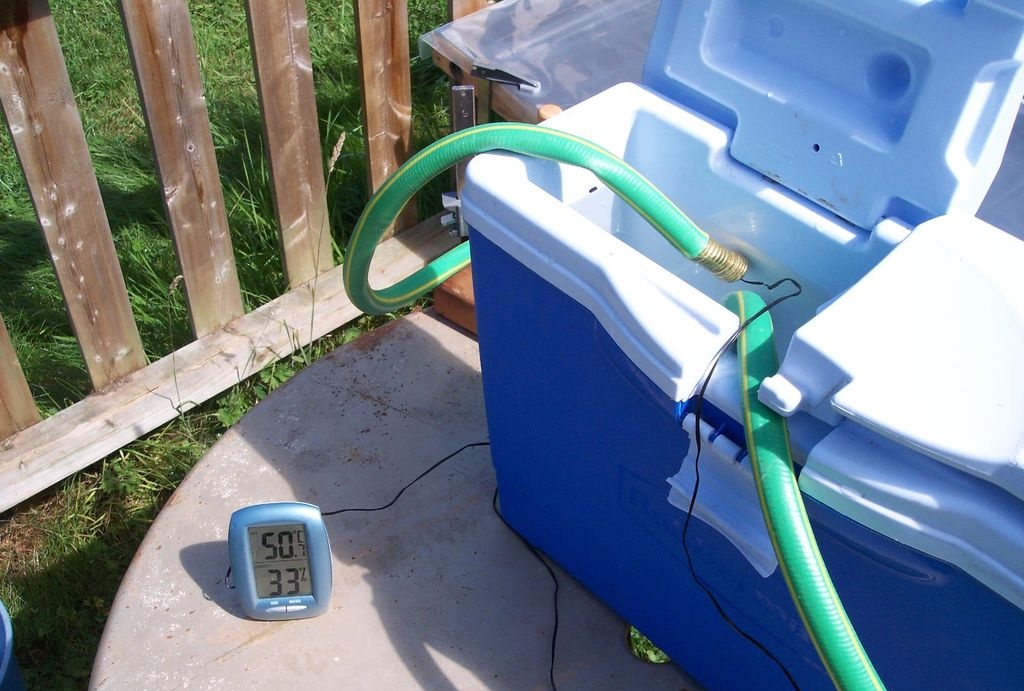
To clearly test the performance of the hot water collector, I used a digital thermometer.
Step-by-step technology for assembling a solar collector
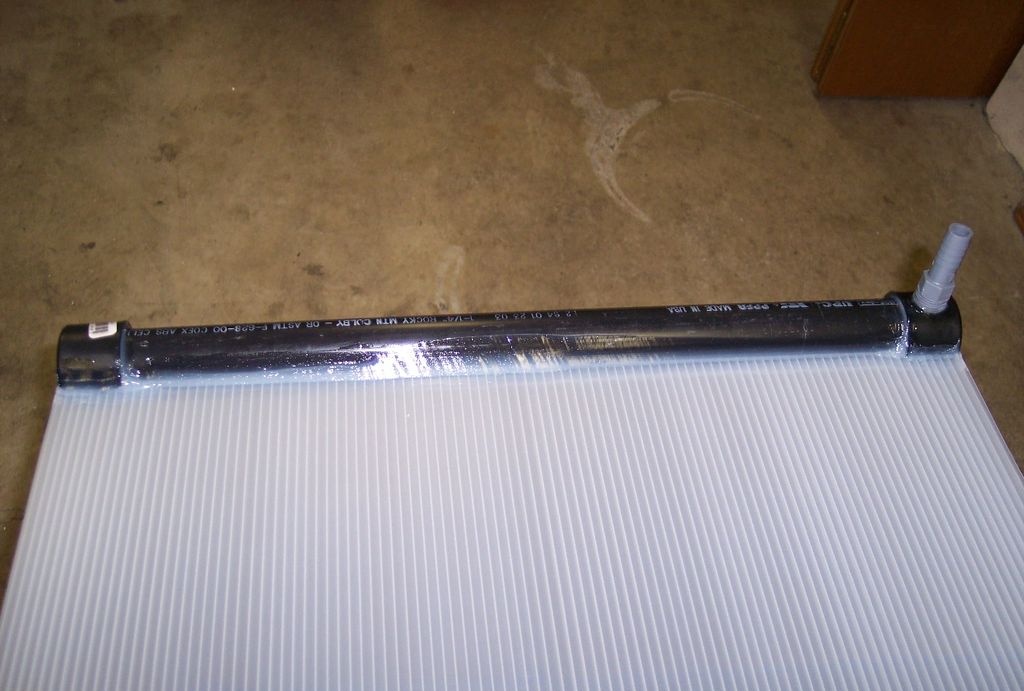
First of all, you need to cut the polycarbonate sheet to the required dimensions. I planned to make a collector measuring 1x2 meters, and proceeded from this fact. The order of work is as follows:
- The ABS plastic pipe is cut into pieces of such length that it corresponds to the width of the sheet. In my case it is 1 meter.
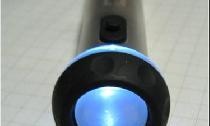
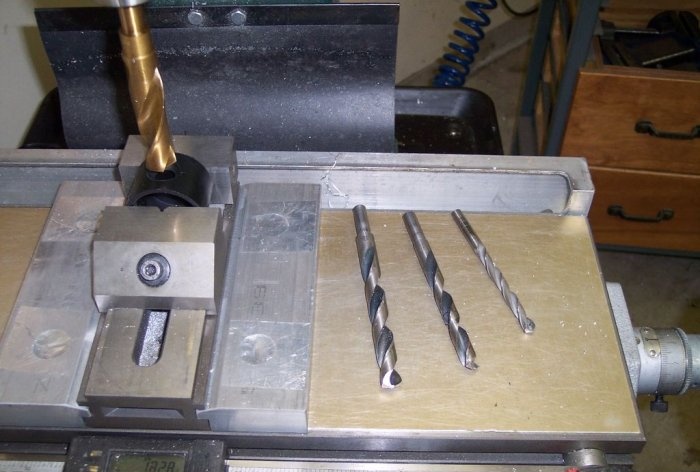
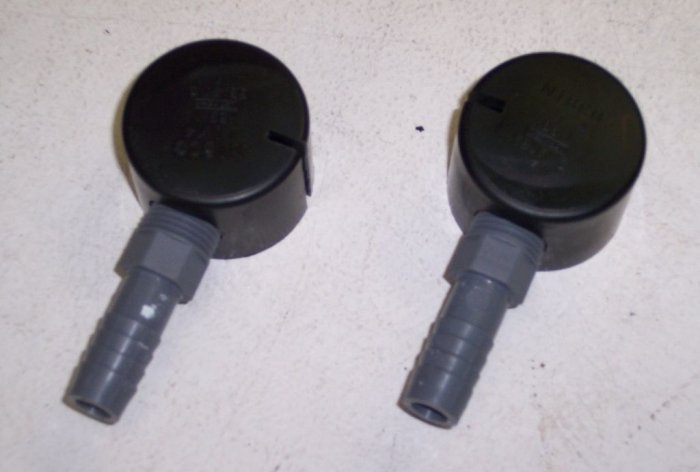
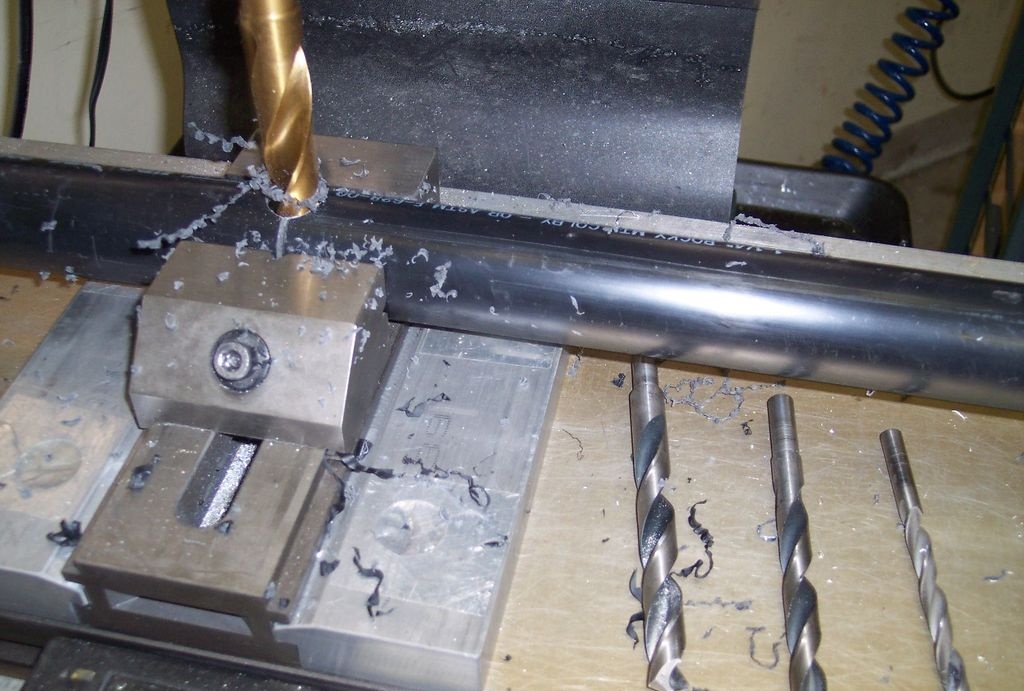
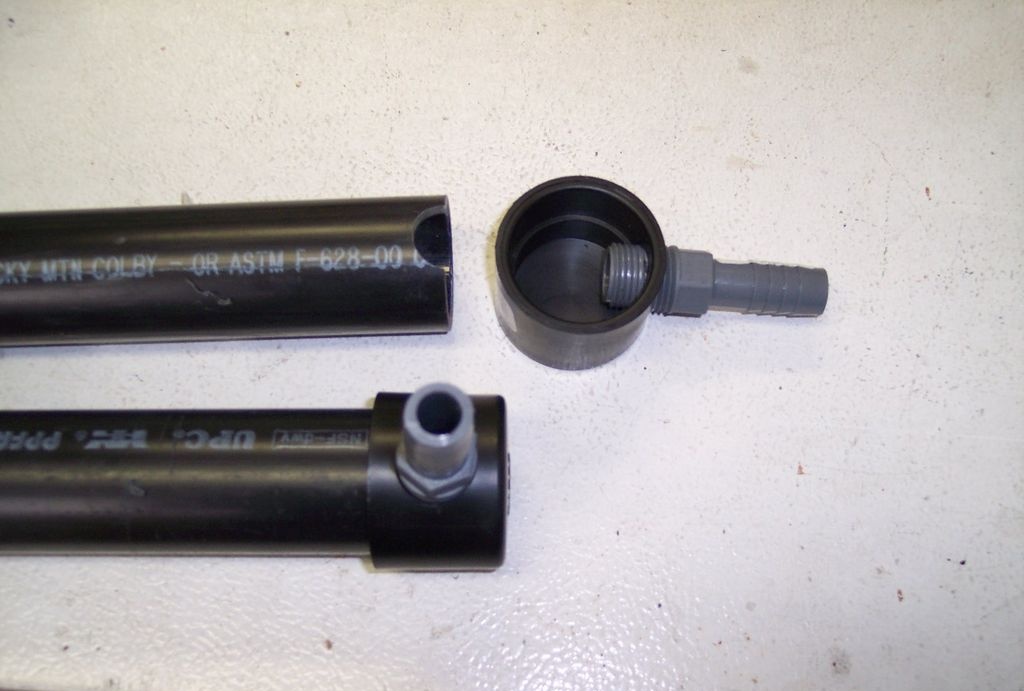
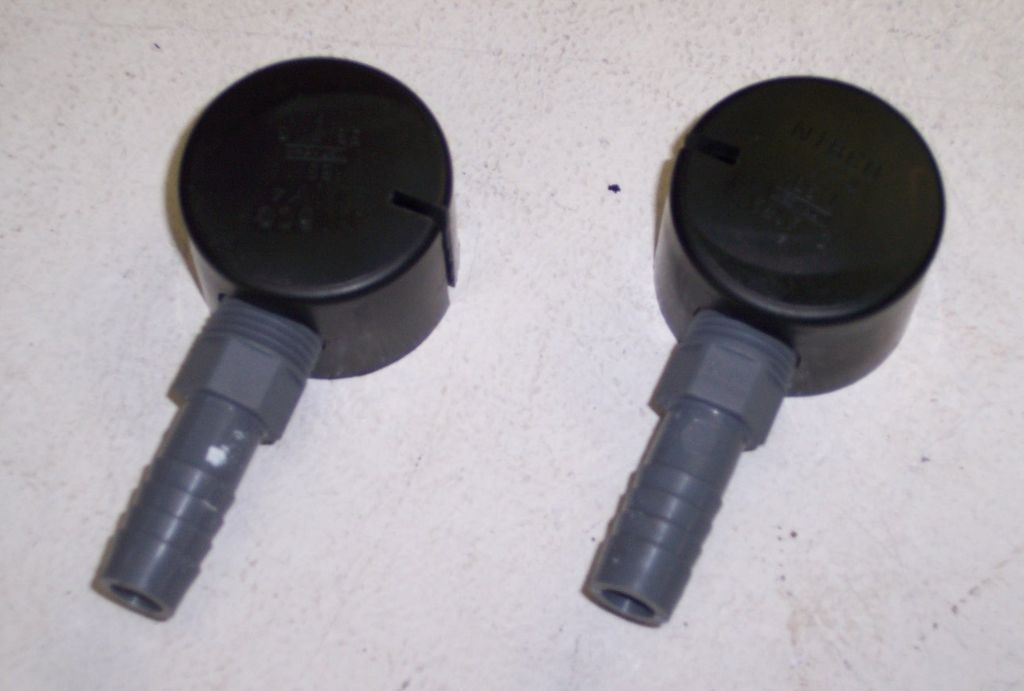
- In the side of the two caps you need to drill holes for the nipples.If you don't have a drill of the appropriate diameter, you can widen the small hole with a round file.
- In order for the plugs with installed adapters to fit onto the pipes, a semicircular hole had to be cut in them, as shown in the photo.


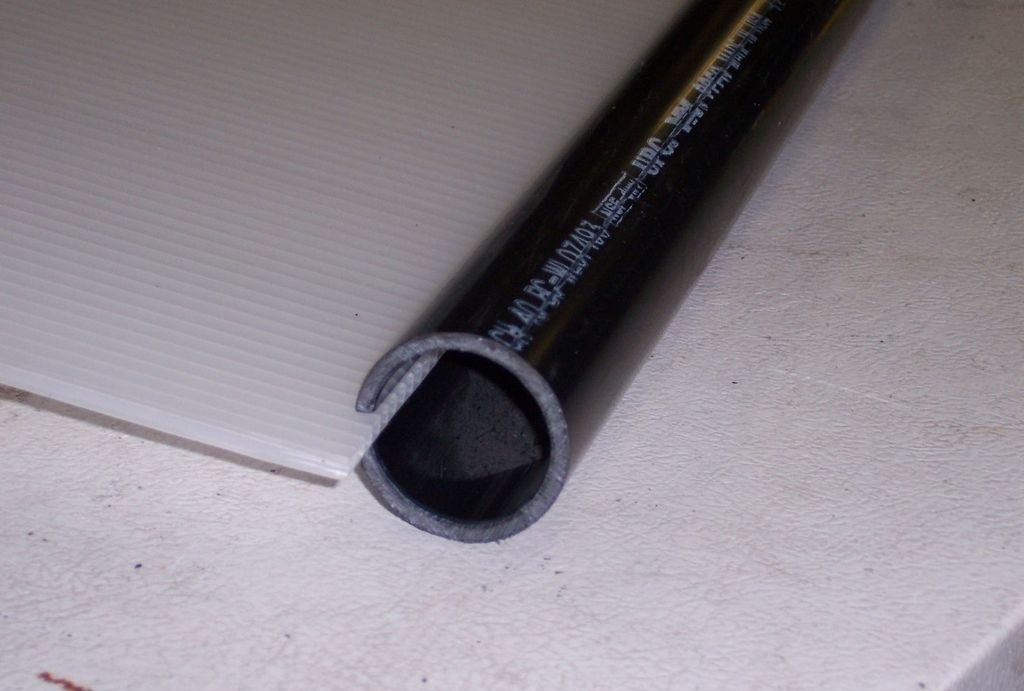
- I then used a table saw to cut both tubes to create a C-section.
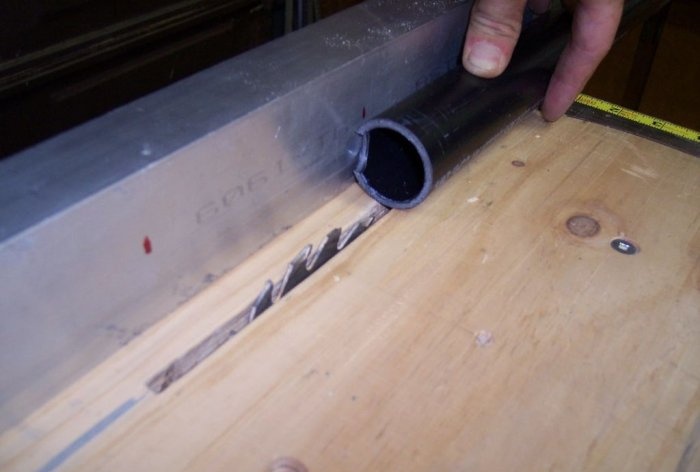
When performing this operation, you need to be careful and take into account the location and required direction of the nipple adapters.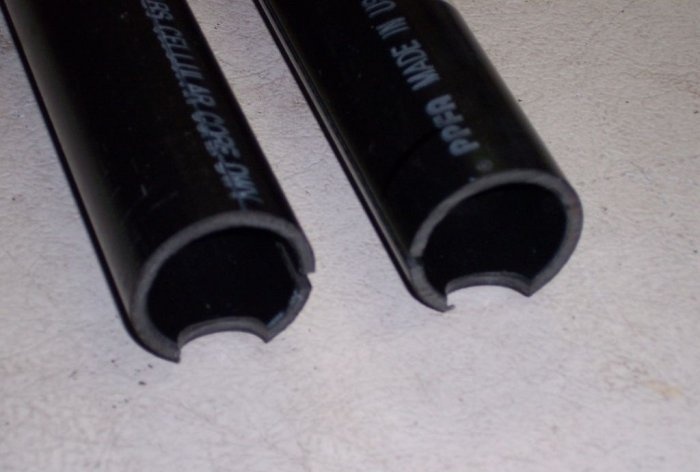
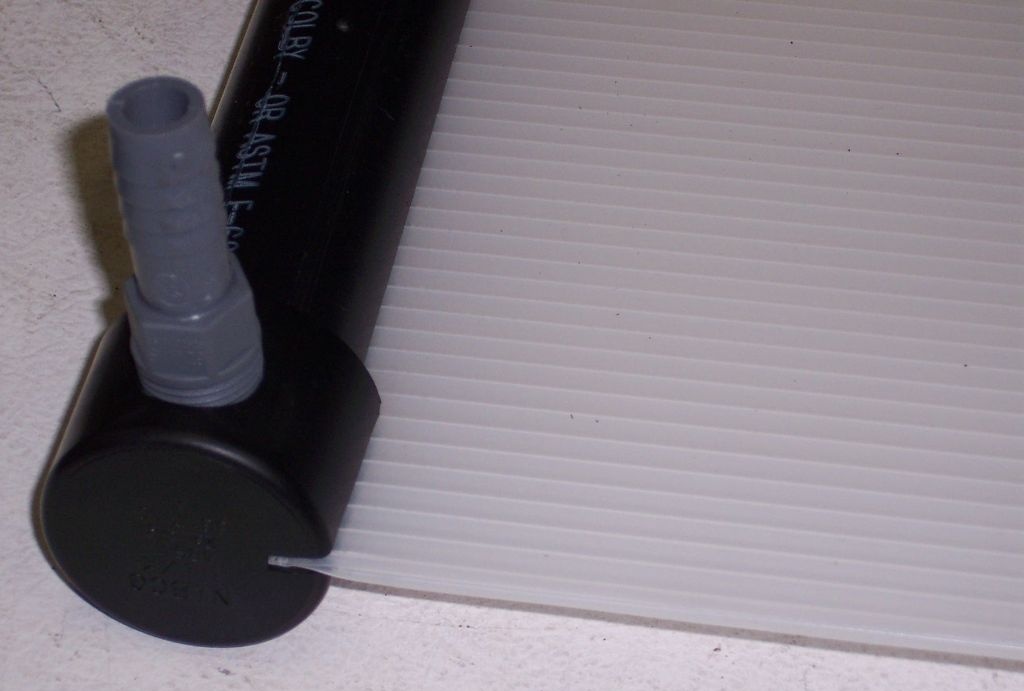
- The same cut must be made in the caps so that the plastic panel can fit into them.

- When all the preparatory operations have been completed, you need to dry assemble all the parts to ensure their compatibility, and, if necessary, make adjustments.
- When all elements are adjusted, the structure is disassembled and reassembled using silicone glue to seal all joints. In addition to coating the joints with sealant, I recommend applying a little silicone on the outside of all seams after assembly.


In order for the sealant to dry well, the assembled structure must be left motionless for about a day, after which you can begin checking the tightness. To do this, hoses are connected to the inlet and outlet adapters, one of which is connected to the water supply. After the collector is completely filled with water, all seams and connections are checked for leaks. If a leak is detected, the water is drained and after drying, the problematic connection is resealed.
To be able to calculate the productivity and efficiency of the collector, you need to know its volume. To do this, the water from the collector must be drained into some container.For example, my panel contains 7.2 liters (including hoses).
Making the frame and assembling the panel
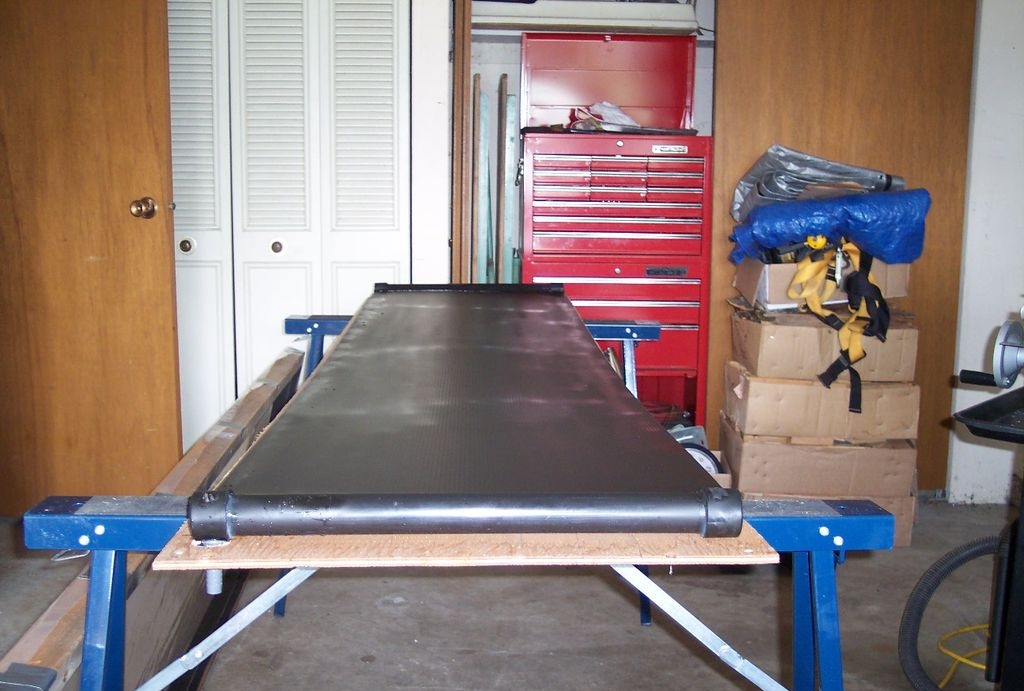
In principle, the collector can already be used by placing it on a roof or other flat, stationary surface. But I decided to make a kind of housing for the plastic panel in order to reduce the likelihood of damage when lifting/lowering from the roof of the barn, in which I decided to install a summer shower, since I’m planning to remove it for the winter.
The step-by-step assembly of the case is described below:
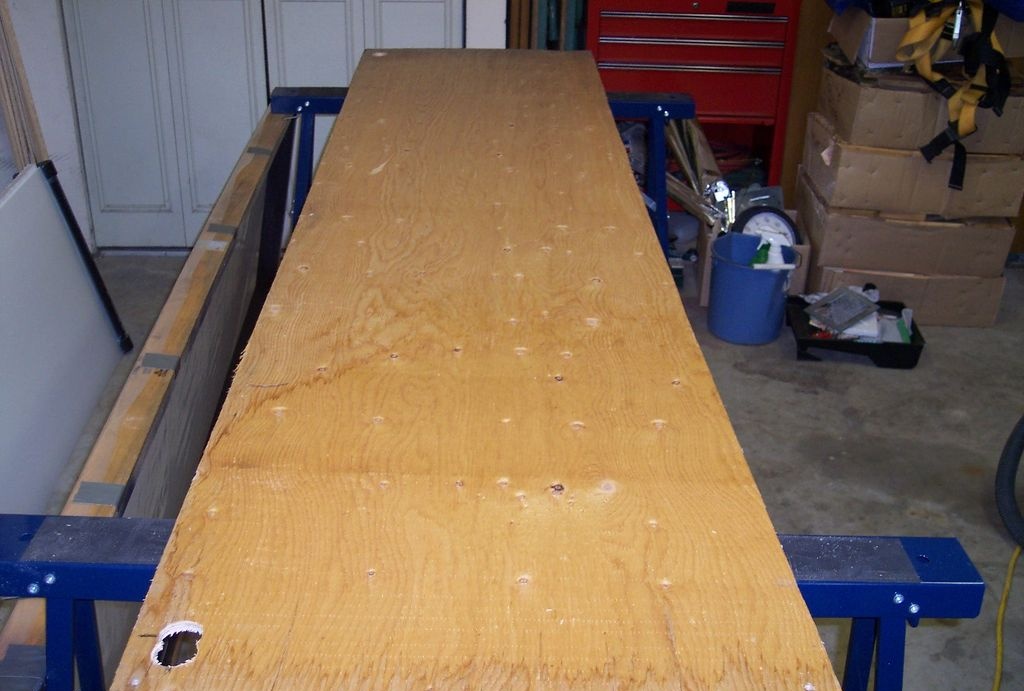
- The plywood sheet is cut to the size of the assembled collector with an overlap of 10 cm on each side (I first painted the plastic sheet black with spray paint).
- To remove the fittings for connecting the hoses, I drilled holes.

- Expanded polystyrene 50 mm thick was laid on the plywood.
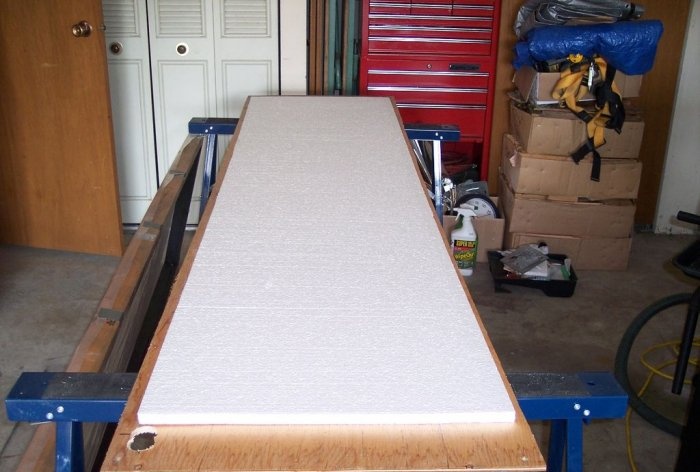
- I laid the plastic manifold on top of the polystyrene foam.

- On all sides of the panel, a wooden block was screwed to the plywood, which serves as a kind of fencing.
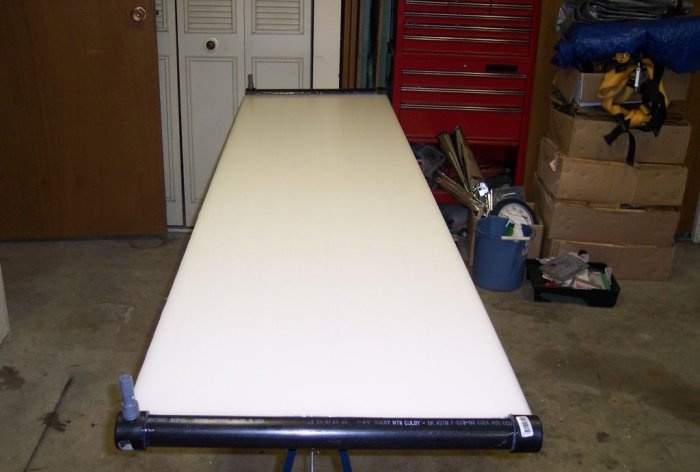
- From above, the entire structure was covered with thick plastic film, which was secured with tape and staples using a construction stapler.


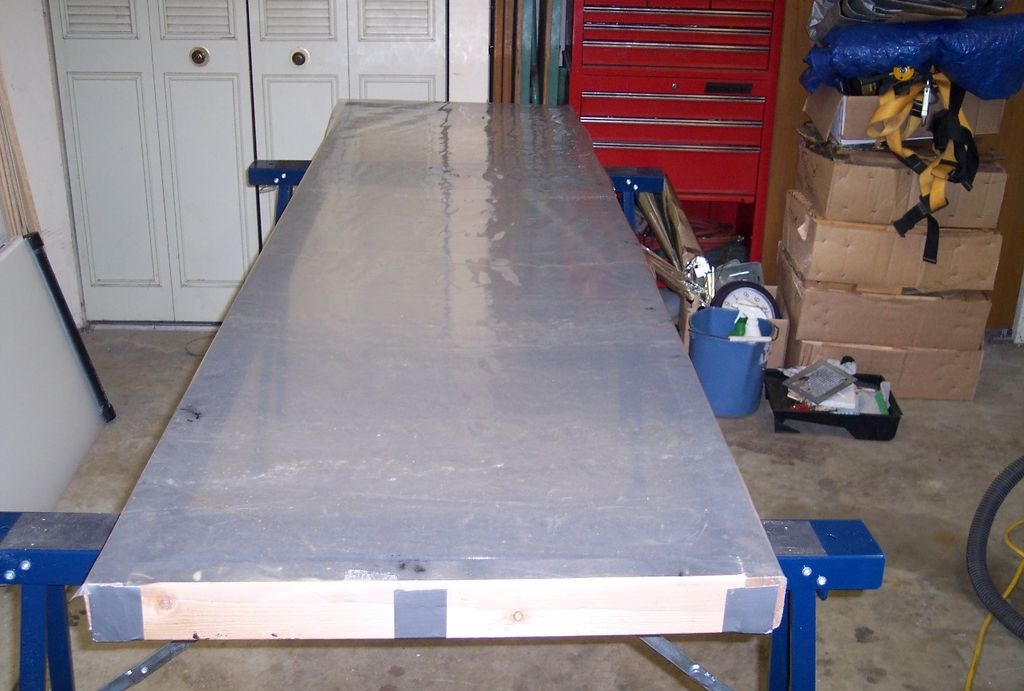
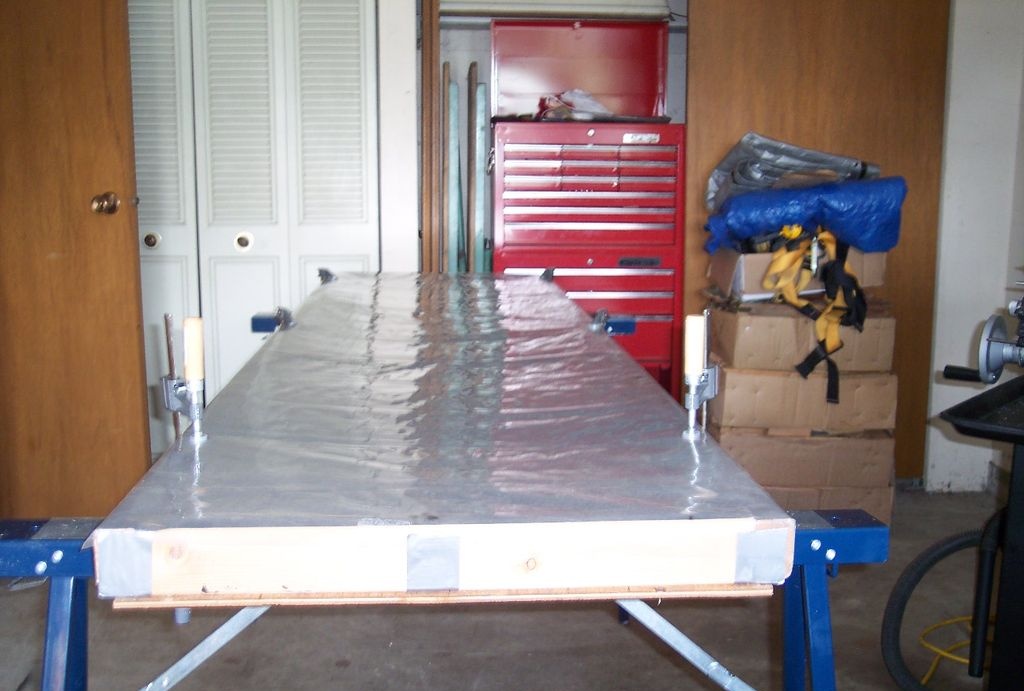
Thus, I received a heat collector in a reliable “case”, thanks to which the plastic panel is protected from mechanical stress.
Note! I used regular transparent polyethylene, but in the photo it looks like it's white - that's glare.
Filling the system
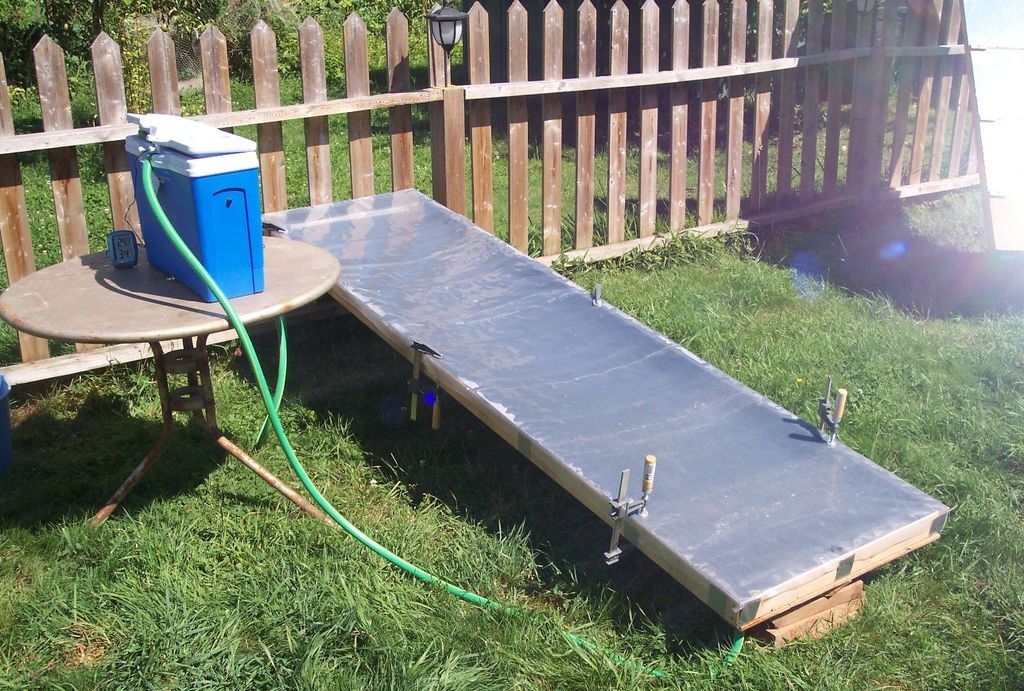
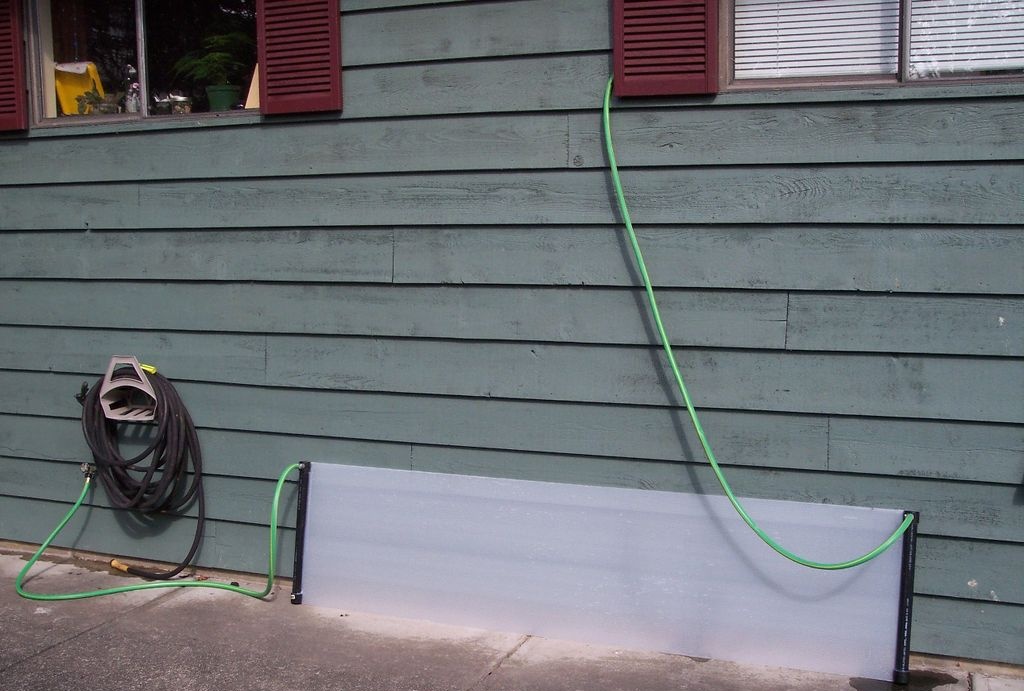
Now you can fill the collector with water and test the performance of the system. I installed it at an angle and the tank (empty) a little higher. One hose is connected to the lower fitting, the second to the upper. To fill the system with water, I connected the lower hose to the water supply and opened the valve slightly so that the system was filled with water gradually.This is necessary so that the water gradually displaces all the air. When water came out from the second hose (the collector was completely filled), I opened the valve all the way so that the remaining air came out under water pressure. I also filled the water container.
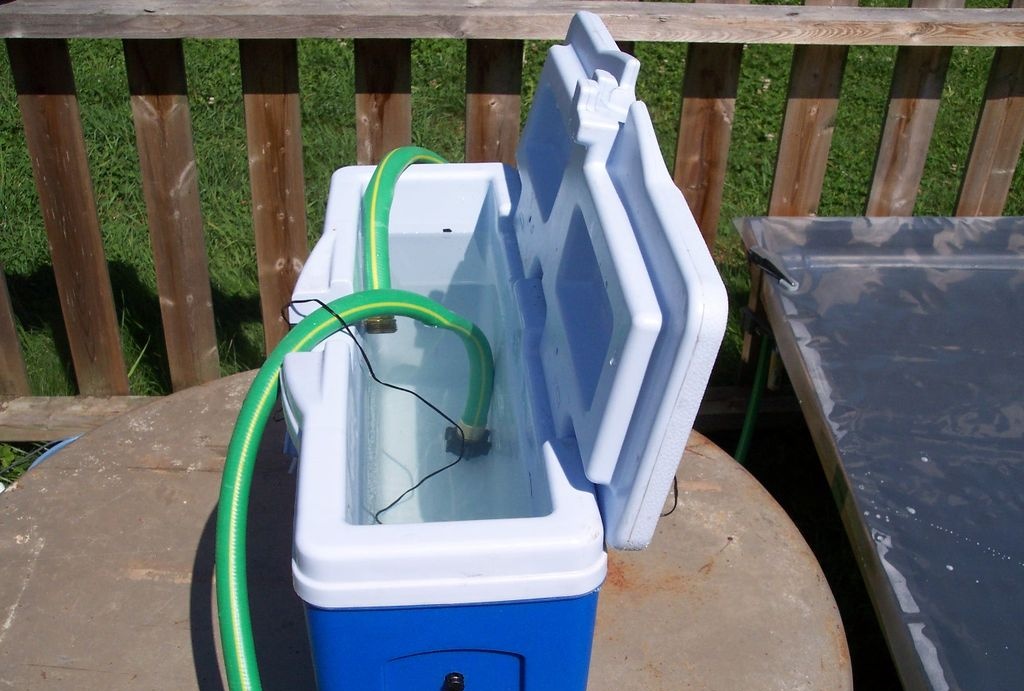
When there were no more air bubbles in the water flow coming out of the outlet hose, I turned off the water and immersed both ends of the hose in water in the reservoir (they should always be under water so that air does not enter the system).
Solar Water Heater Testing and Testing

When the system is filled, under the influence of solar heat, the water located in the thin channels of the plastic panel heats up and gradually moves upward, forming natural circulation. Cold water flows from the tank through the lower hose, and heated water from the collector enters the same tank through the upper hose. Gradually the water in the container heats up.
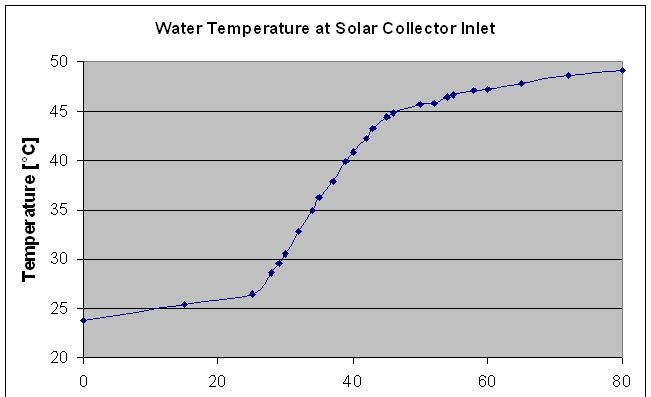
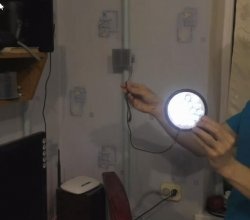
To illustrate the experiment, I used a digital thermometer with an external temperature sensor. First, I measured the temperature of the water in the container - it was 23 °C. Then I inserted the sensor into the outlet hose through which the water heated in the manifold flows into the reservoir. The thermometer showed 50 °C. The solar water heating system is working!
Conclusion
Based on the results of testing the performance of the collector system for 1 hour, I received heating of 20.2 liters of water (7.2 liters in the collector itself and 13 liters I collected in a container for the experiment) from 23 to 37 °C.
Of course, the performance and efficiency of the system depends on solar activity: the brighter the sun shines, the more the water heats up and a larger volume can be heated in less time. But for a summer shower, I think this collector is quite enough.
Original article in English