I don’t argue that you could buy a ready-made ultrasonic humidifier, it would be faster, but I had a problem with spare parts that it came out by itself. In the article I will show how and what I made it from, and at the end, I will tell you how I would make it now, based on the experience of the current run-in.
In March, an ultrasonic atomizer in a plastic case arrived to me, I was specially preparing for the summer, the structure was assembled, but one day, the level sensor built into the ultrasonic head did not work, and as a result of working dry, the sensor body melted and in some places burned out, though , I didn’t notice it right away - it turned out okay.
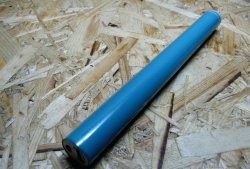
A week ago, an ultrasonic head came to me already in a metal case, which means I had to disassemble the entire structure and reassemble it again.
Will need
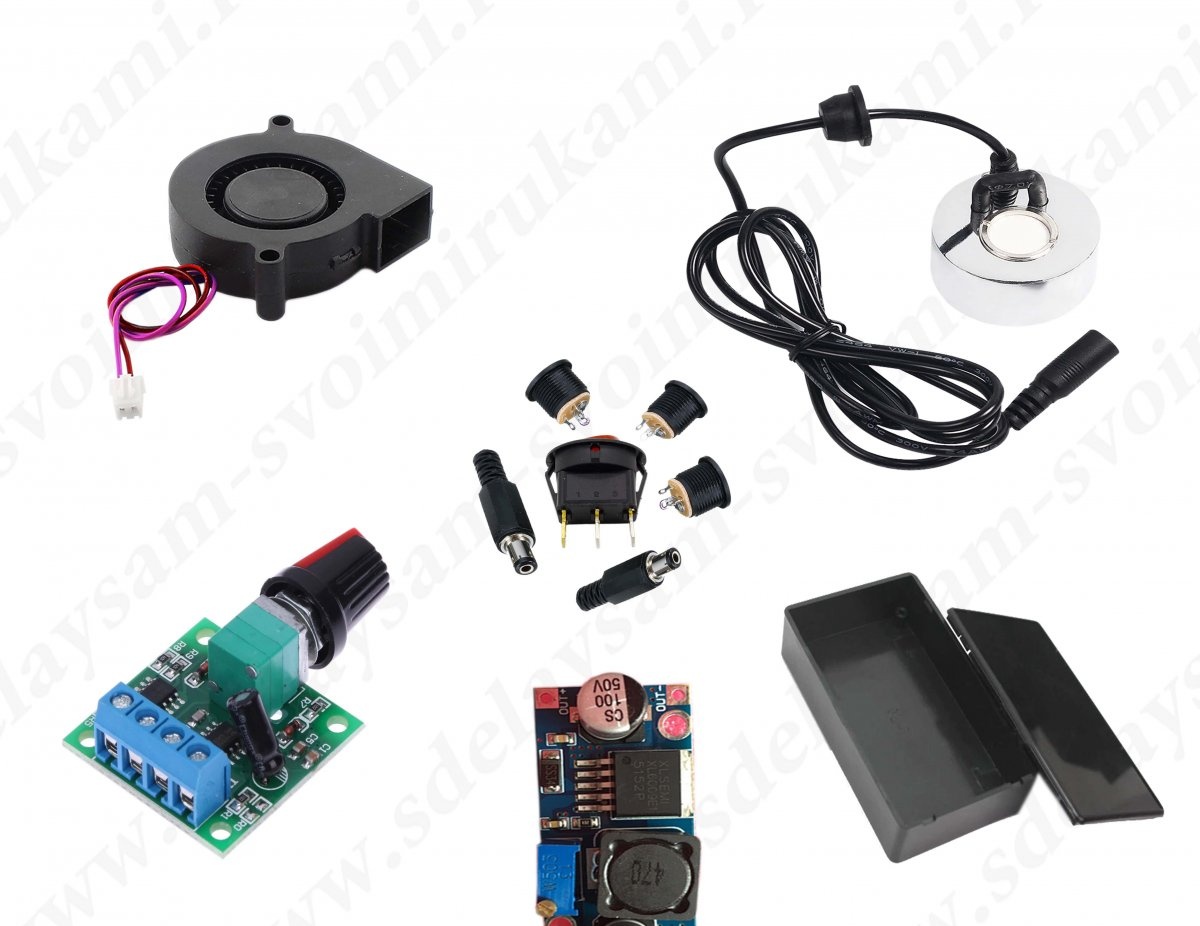
I had in stock:
- - office bucket with a capacity of 10 liters;
- - 12 volt power supply;
- - ultrasonic sprayer in a metal case;
- - black mounting box dimensions 100 x 60 x 25 mm;
- - any boost module, I happened to have the Xl6009 module;
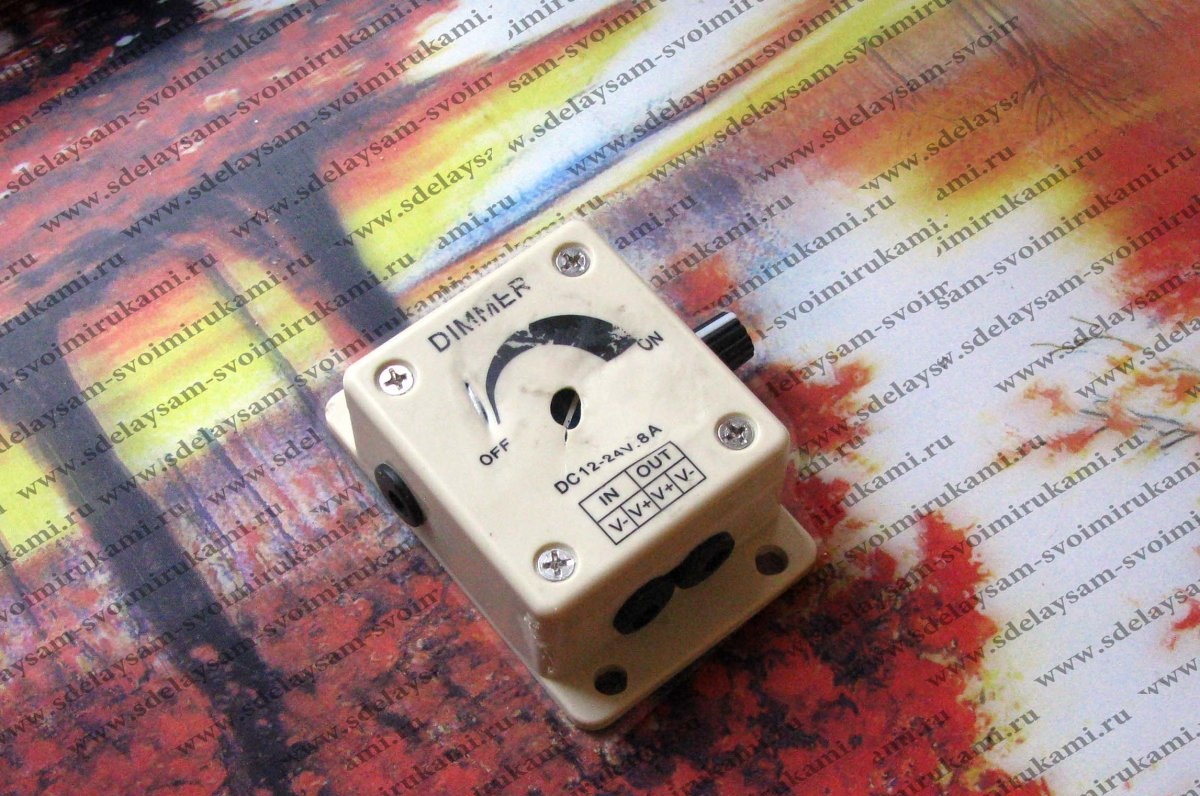
- - speed controller 12 volts;
- - turbine;
- - power switch, several sockets and plugs for them;
- - handy little things appeared during the assembly process;
- - and also - the housing from the faulty speed controller - you will see it later.
Visual connection diagram
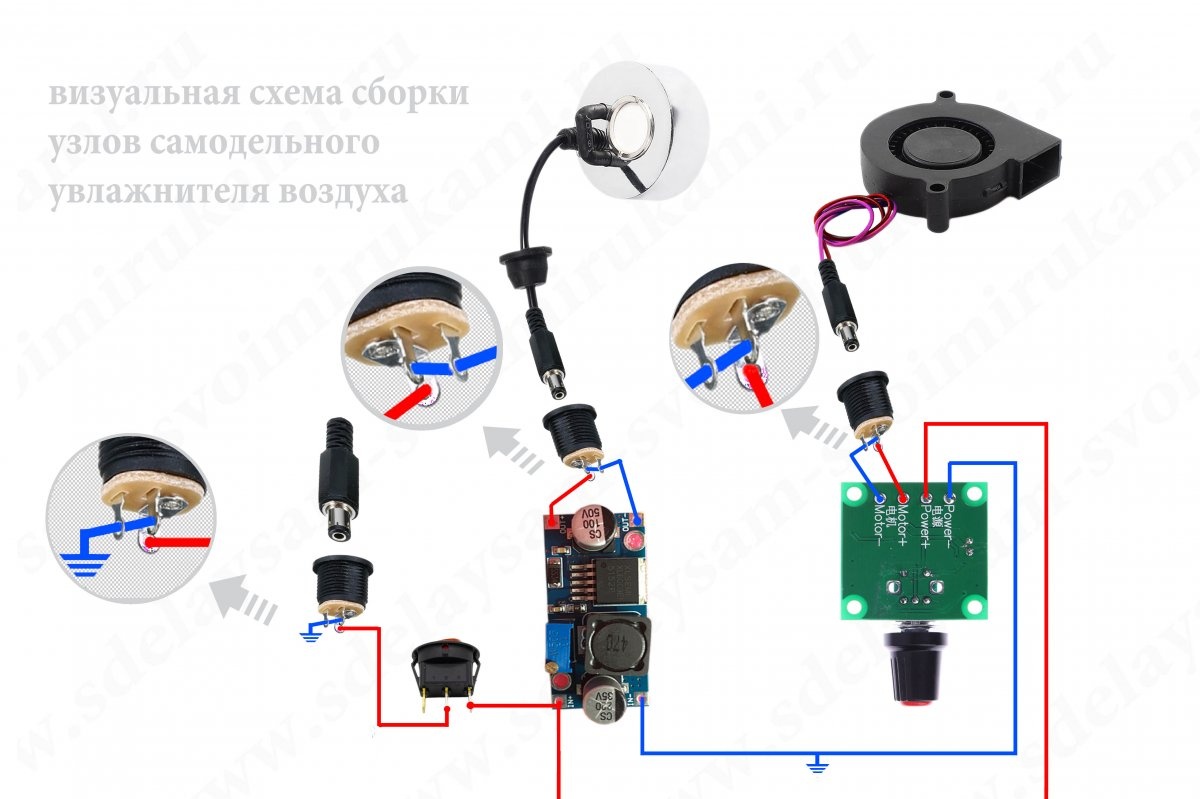
I had to try to make it all not look like a mess and be easy to understand.
- - the input 12 volts is increased by the module to 22 volts and supplied to the ultrasonic atomizer;
- - also, the input 12 volts are supplied to the fan speed control unit;
- - both of them are connected in parallel and connected to the input jack through a common power switch.
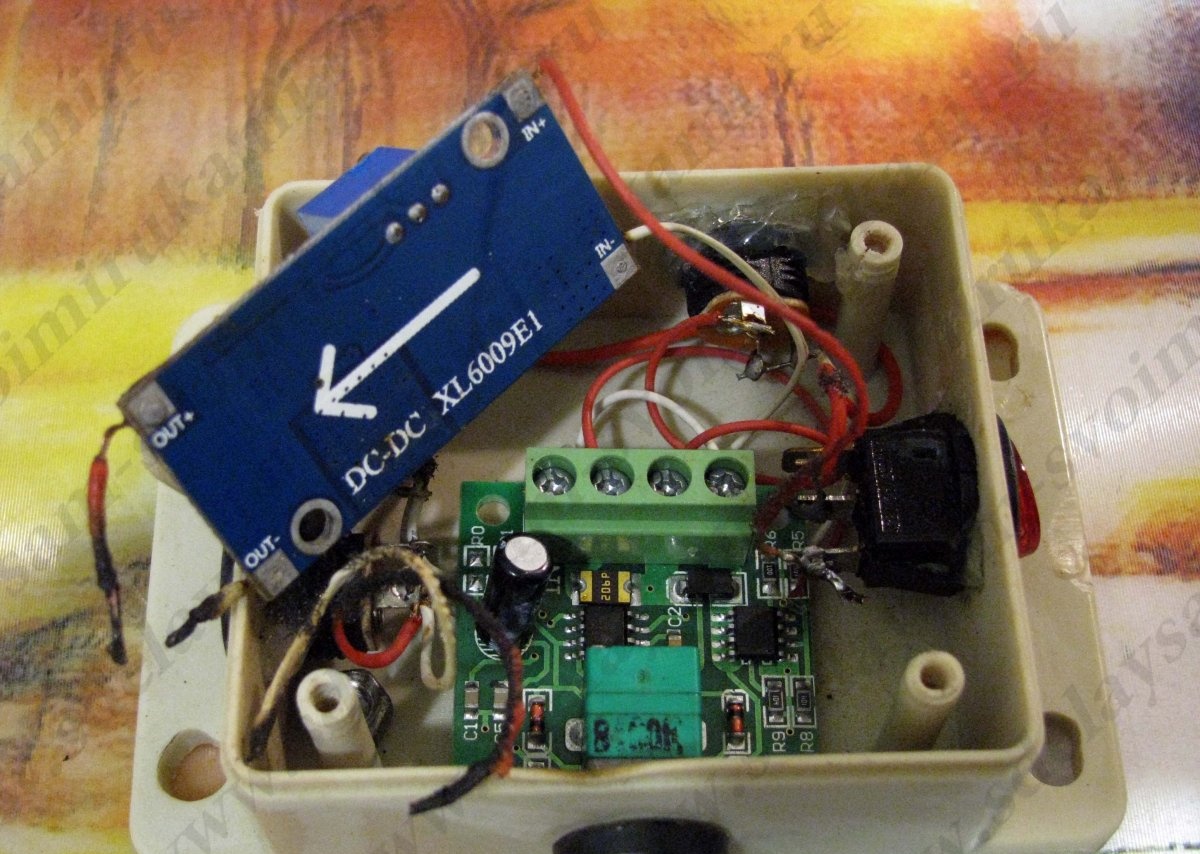
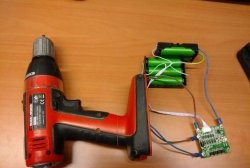
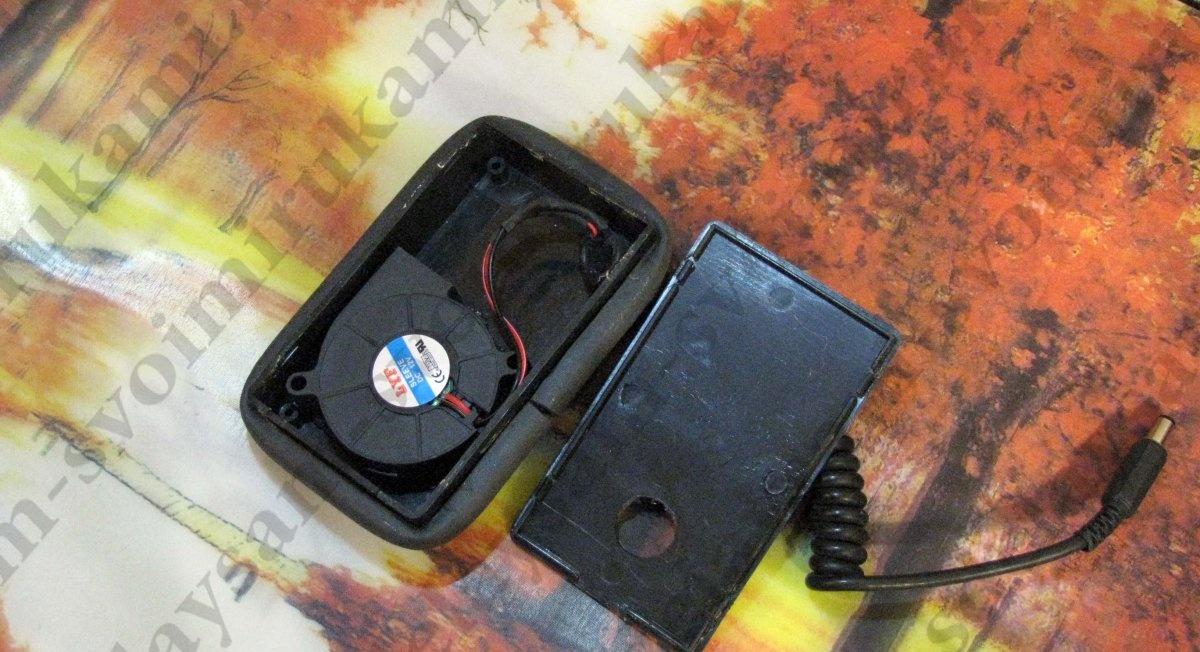
The finished speed controller immediately came to me faulty, and as it happens, it was put aside in a pile “until better times”; its housing with four convenient holes for mounting was used. You can see what happened to the filling. For some time, the current was so high that the wires leading to the socket on the ultrasonic head burned out and melted. However, both modules turned out to be serviceable and it was only necessary to replace the wiring.
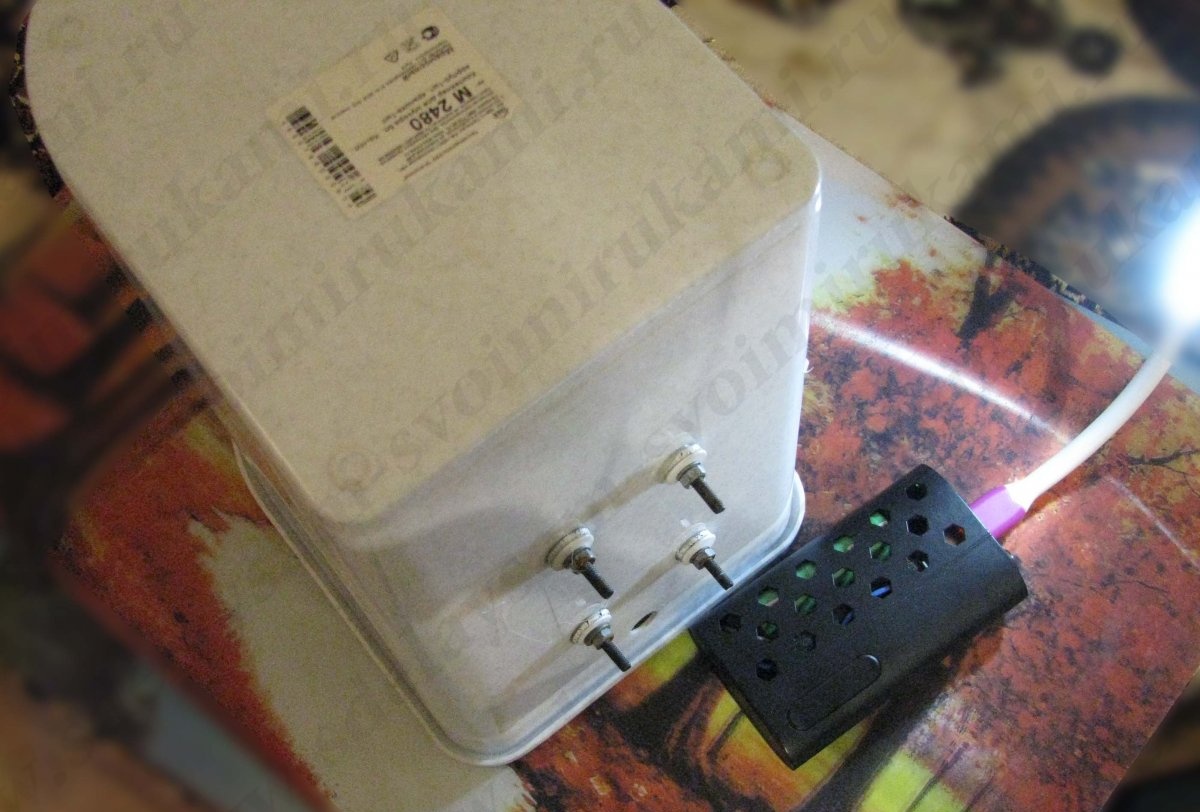
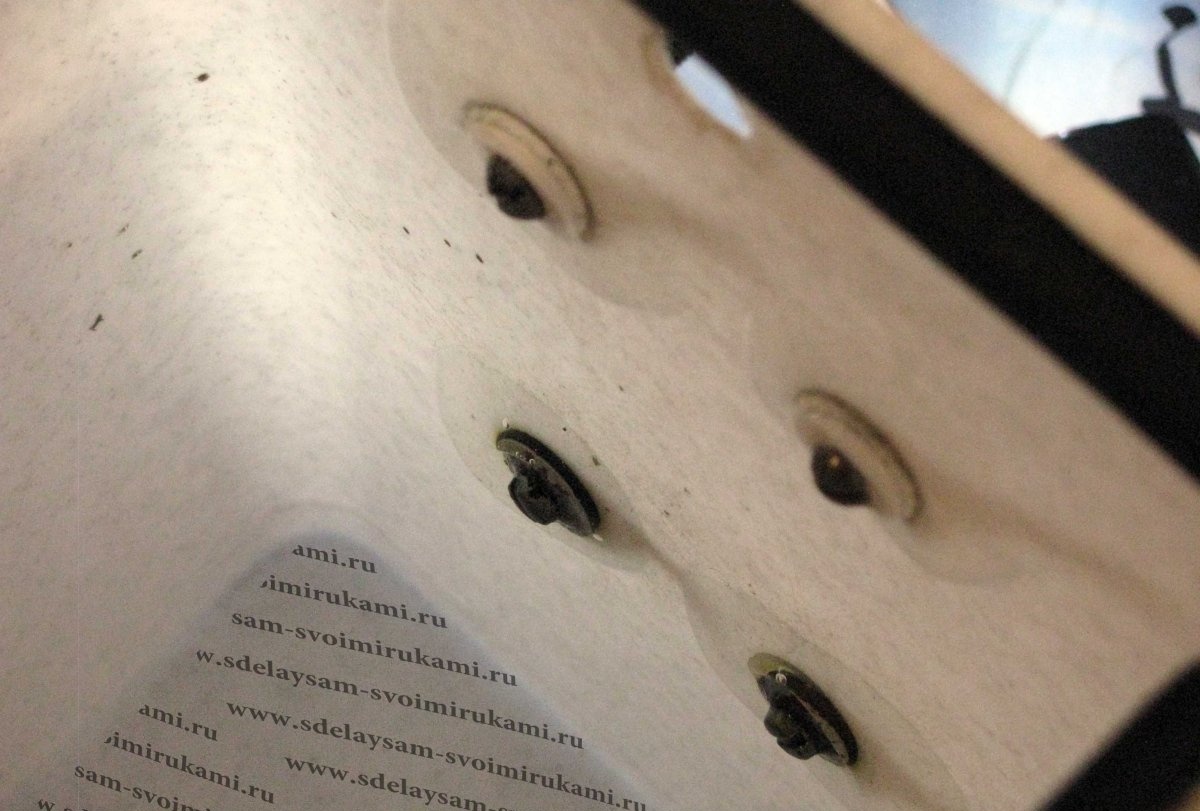
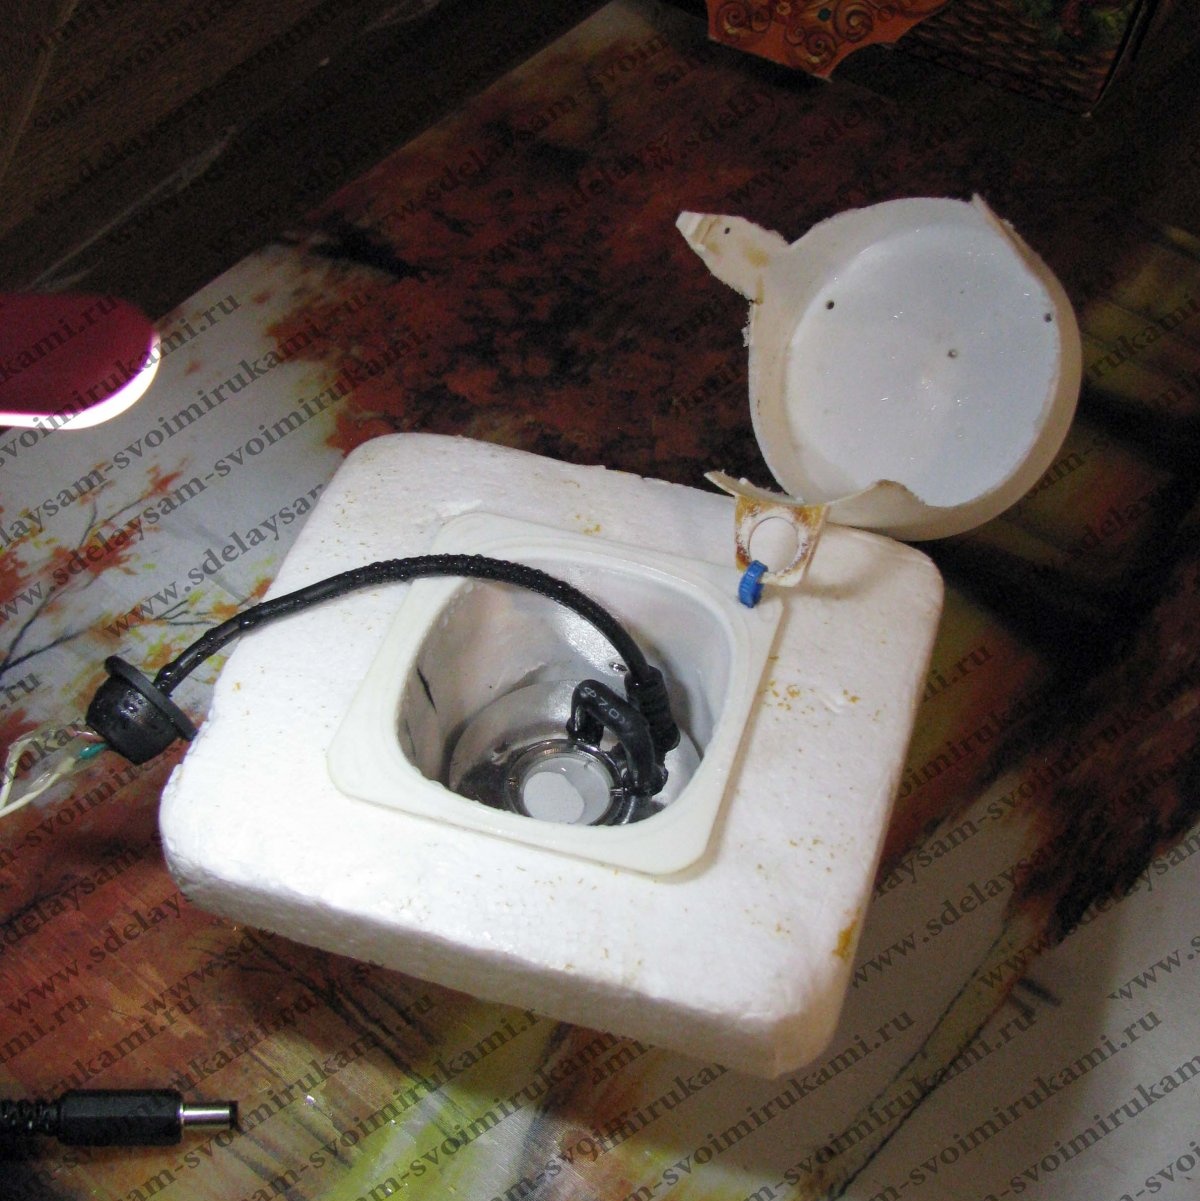
At the end of the office basket, I drilled four holes for installing screws to which the control unit was attached, even lower, you see a hole for passing the wire going to the ultrasonic head.
The first option, I put together in a hurry, and this solution revealed its shortcomings. If you look inside the basket, you can see that the screw heads have been corroded.
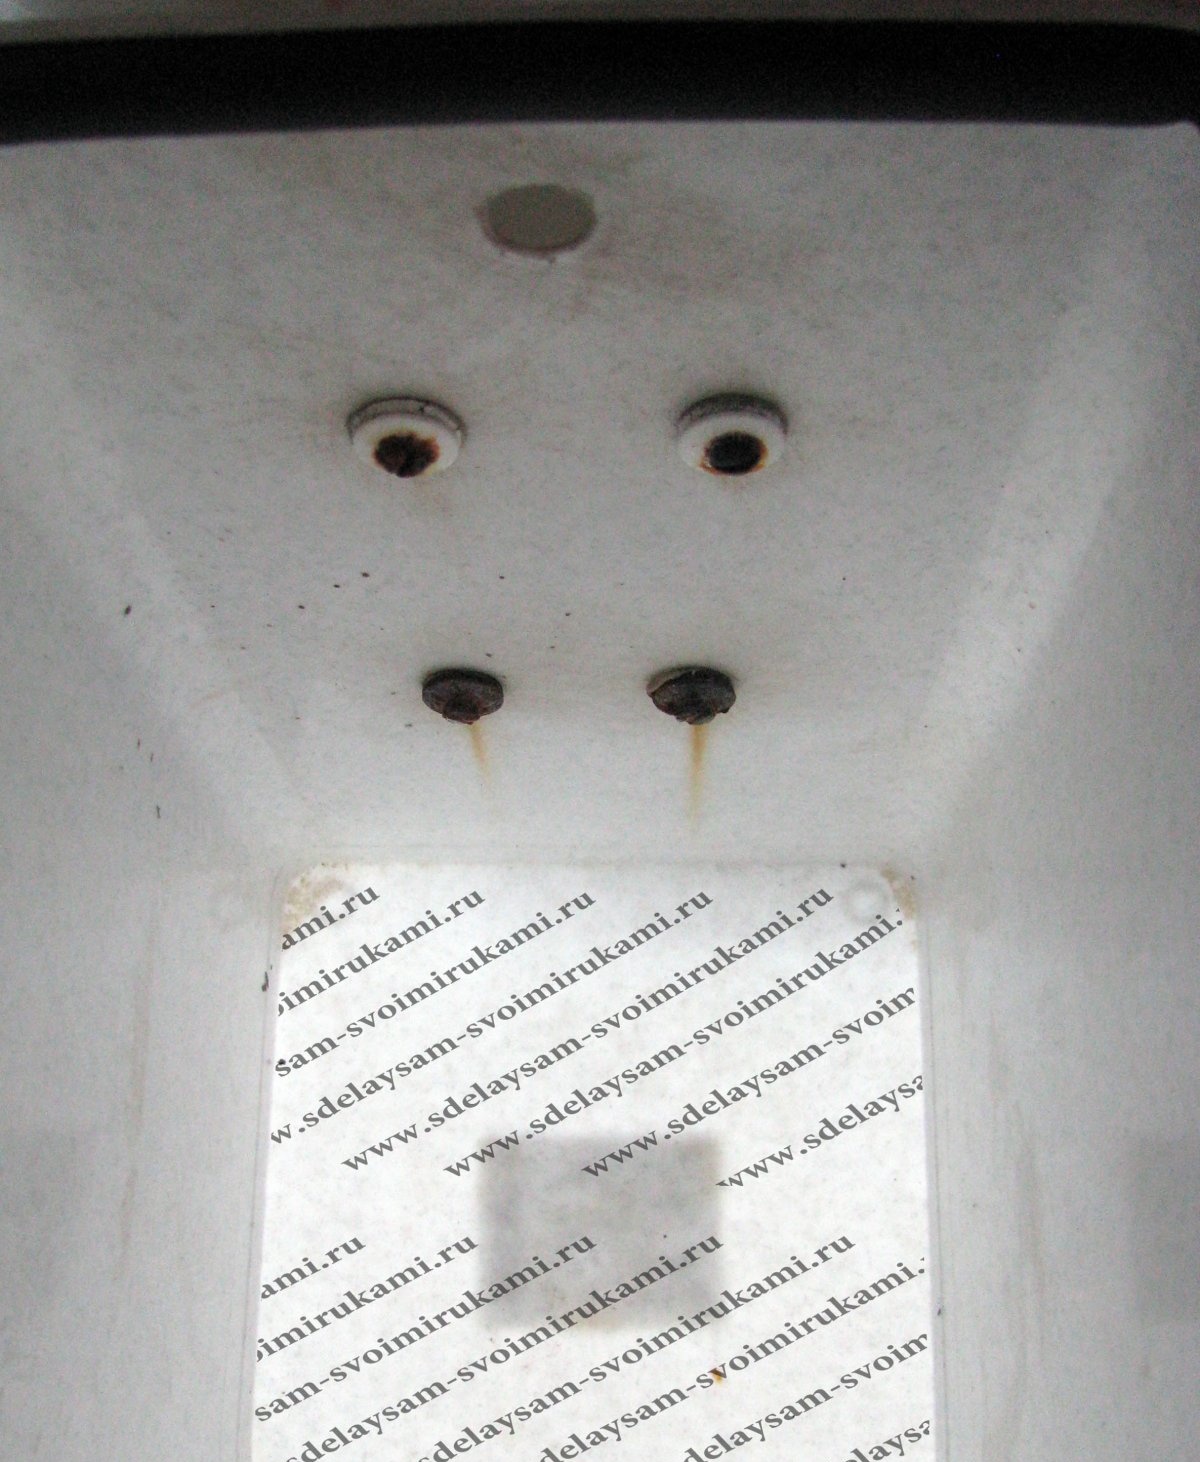
To get rid of rust, it was necessary to transform it with swabs soaked in a strong solution of food grade citric acid
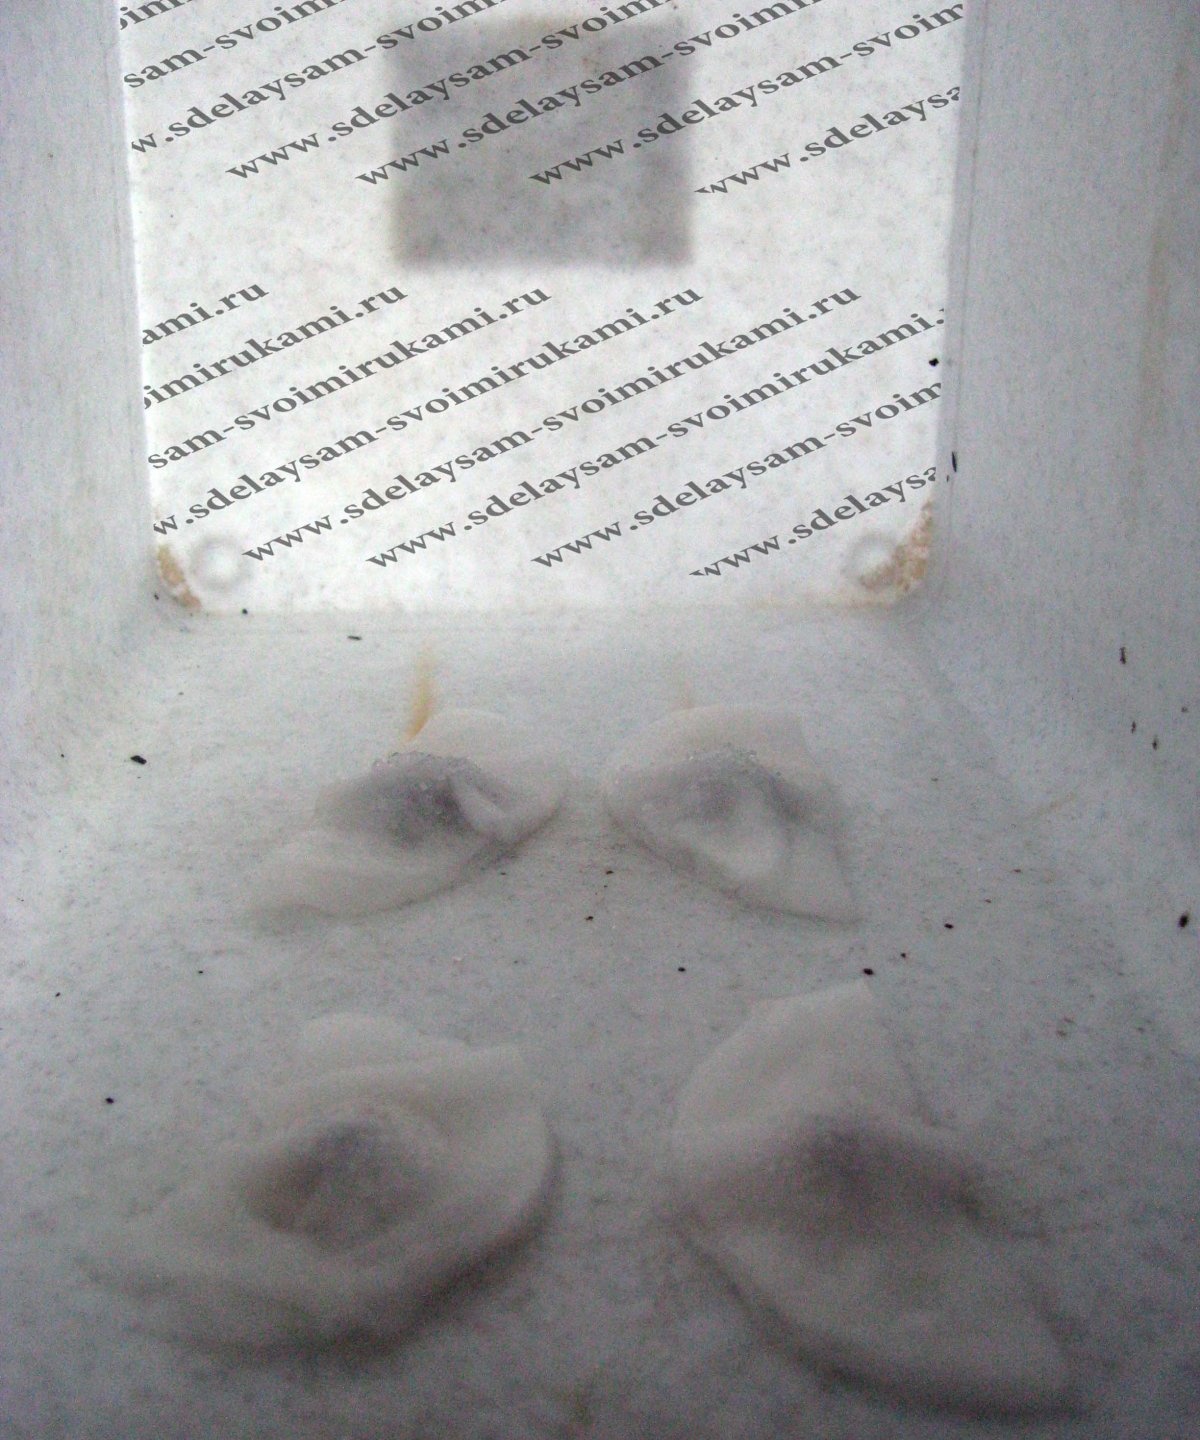
After brushing and drying, the heads were sealed with clear acrylic glue from a hardware store.
Fan Assembly
It should be completely protected from splashes and after a short deliberation, I decided to use a centrifugal turbine, which I glued into a black plastic box on strips of double-sided mounting tape based on 1 mm.
Through a smaller hole on the bottom lid of the box, air is supplied inside the basket. Please note that the intake hole on the top side of the box and the outlet hole on the bottom will be located opposite each other. Thus, no splashes will be able to reach the turbine engine. Along the perimeter of the resulting unit, I pasted a sealing tape used to seal the openings of opening plastic windows, and to the turbine itself, a piece of twisted cord was soldered with plugs at the end. The soldered contacts were sealed with hot glue.
Cover assembly
Back side.
The lid of the office bucket, as you know, is equipped with a rotating valve, and this gave me the most inconvenience.
- - first, I marked and made a hole for the water mist to escape;
- - then, I slumbered and cut out a rectangular window for the fan assembly;
- - to lock the valve, I glued a piece of foam rubber onto the entire inner area of the lid with waterproof glue;
- - the workpiece, in order to prevent it from poisoning steam, had to be well moistened with the same glue in several stages;
- - after drying, on an almost water-repellent foam rubber blank, I glued a blank from linoleum scraps.
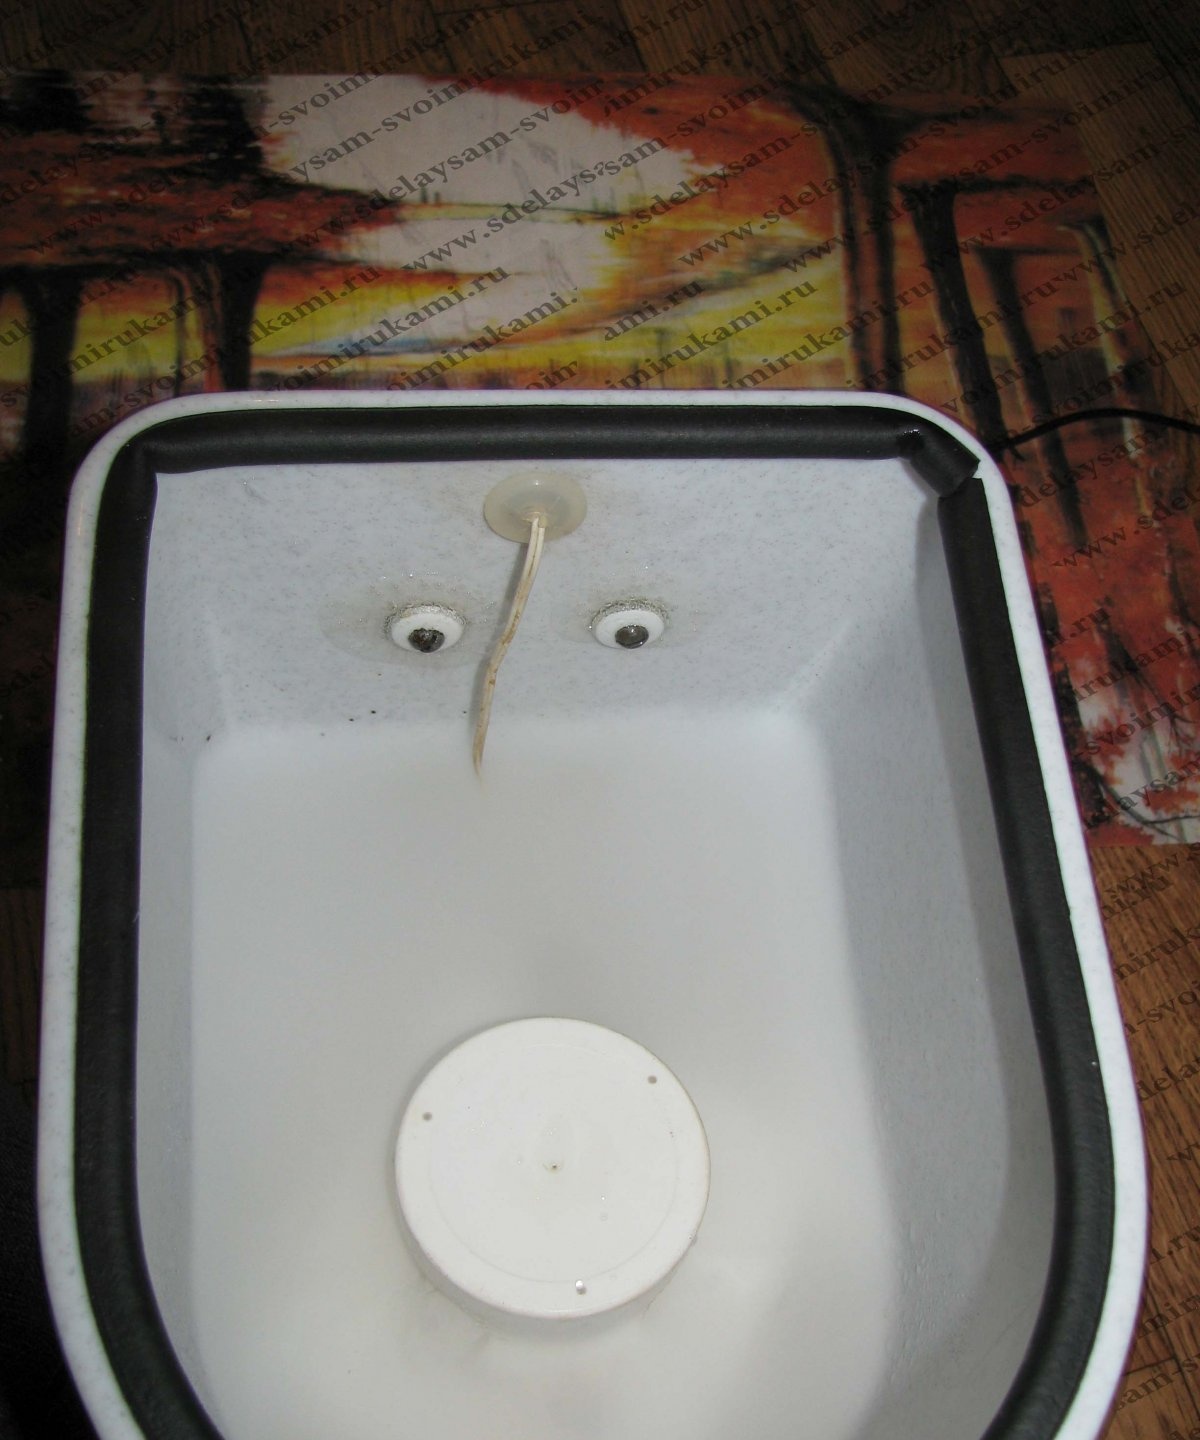
In the slice, you can see which sandwich came out:
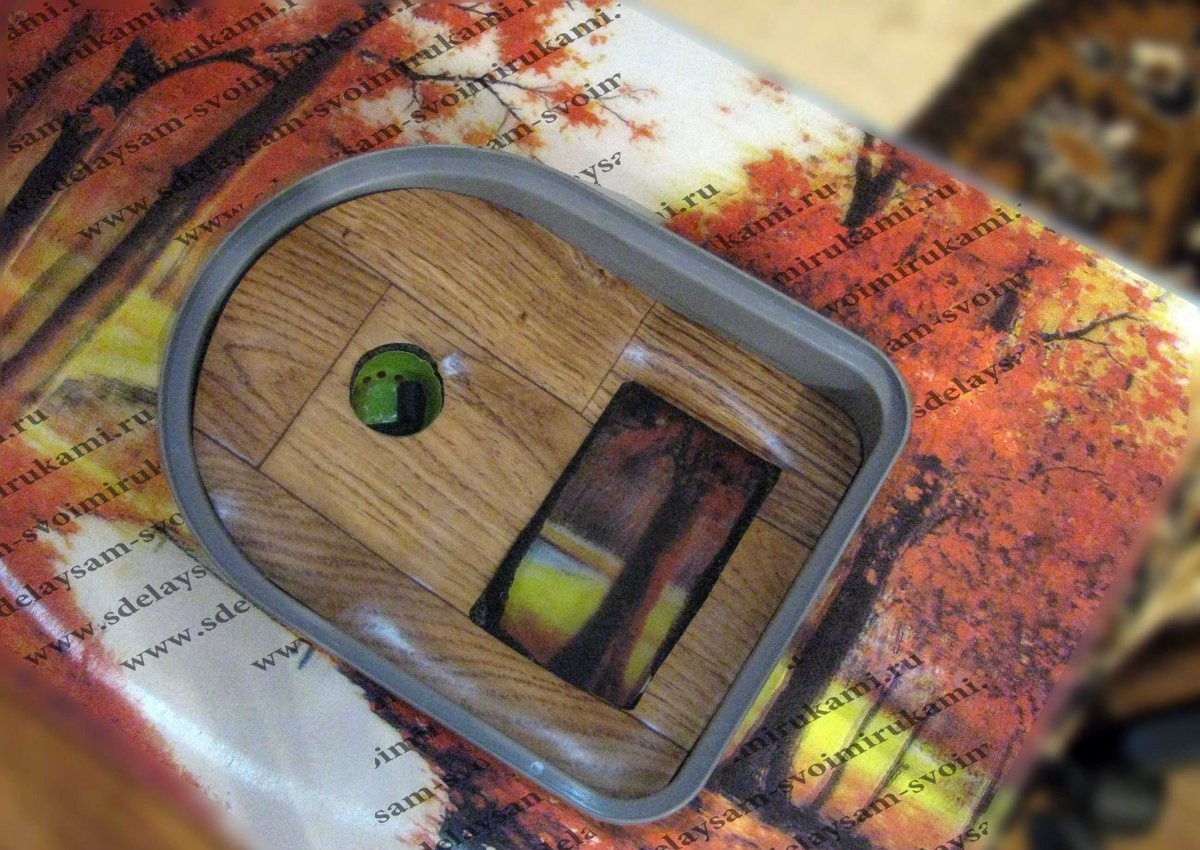
Front cover. A half of a chocolate egg is inserted into the hole for releasing the drizzle. With some effort, it can rotate.I advise you to burn holes in it only on one side so that the flow of cold steam can be directed away from the fan assembly and the air intake hole.
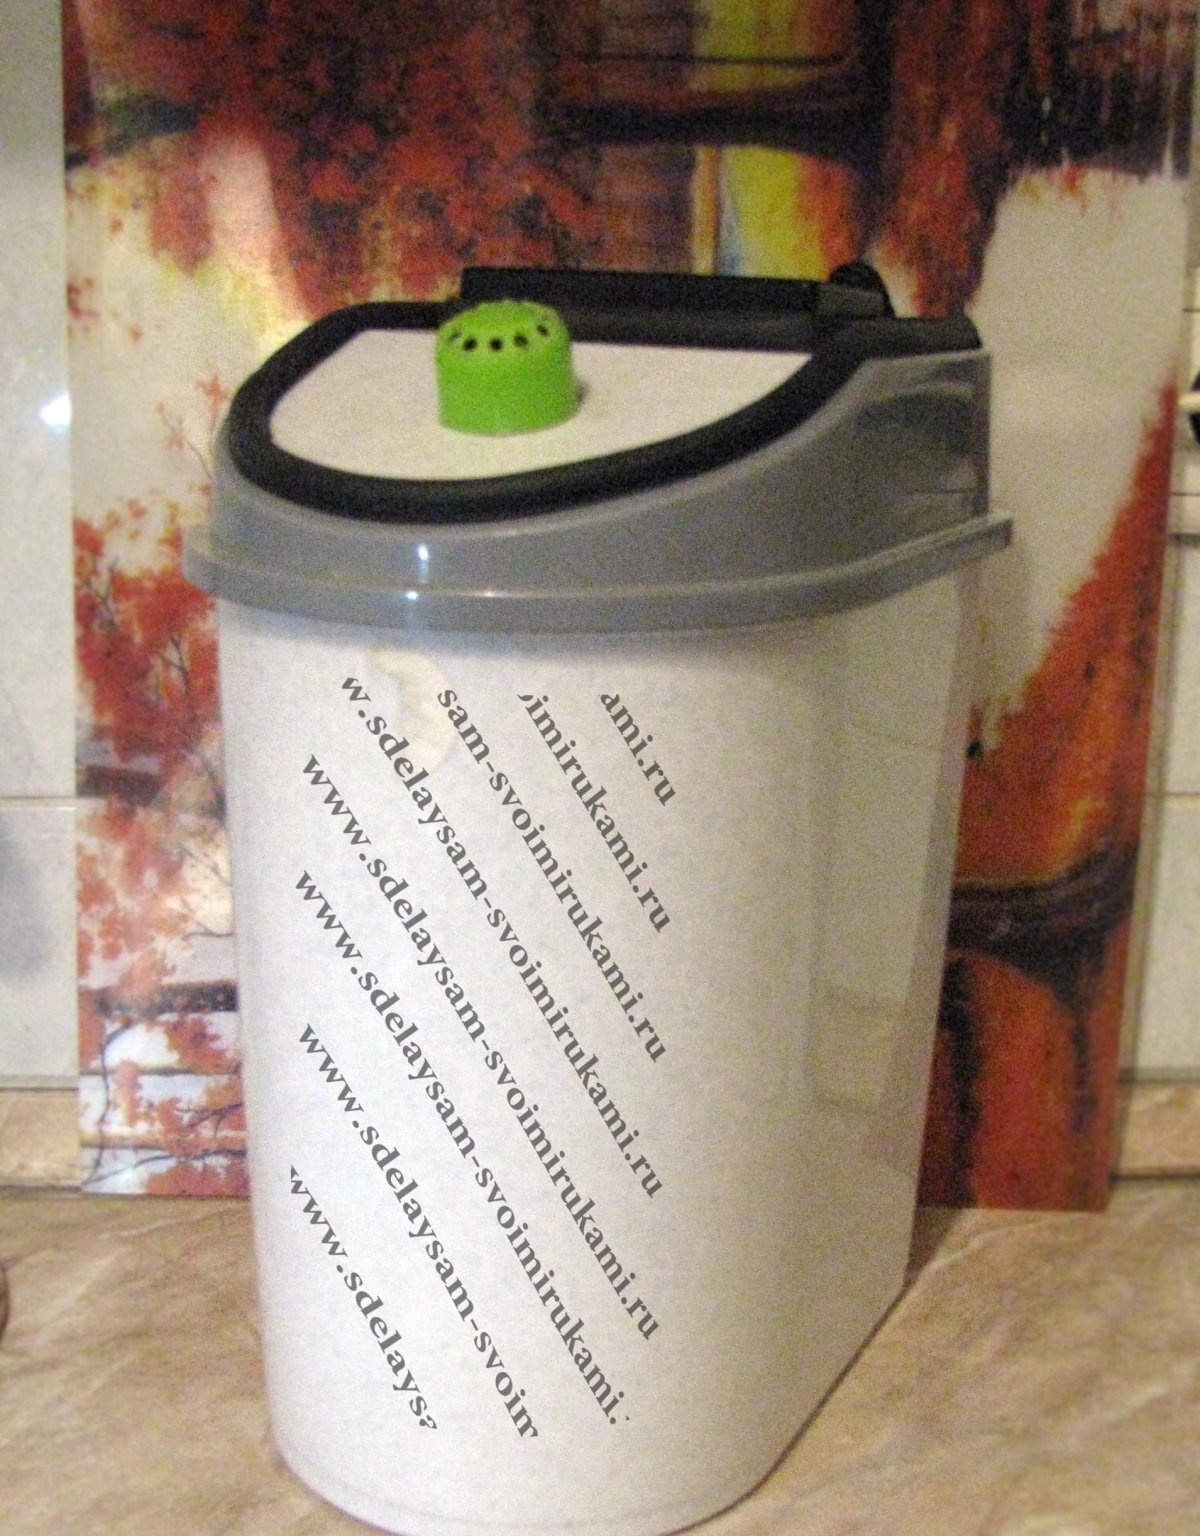
As a result, the general appearance of a washed office basket without an installed fan unit is like this.
To give it a less collective farm look, I glued the remaining sealant tape along the contour of the slot of the rotating valve.
Float assembly
I cut a round float from foamed polyethylene; displays and televisions are “dressed” in a frame made of this material.
A yogurt cup is inserted into the float, into which an ultrasonic atomizer will be inserted.
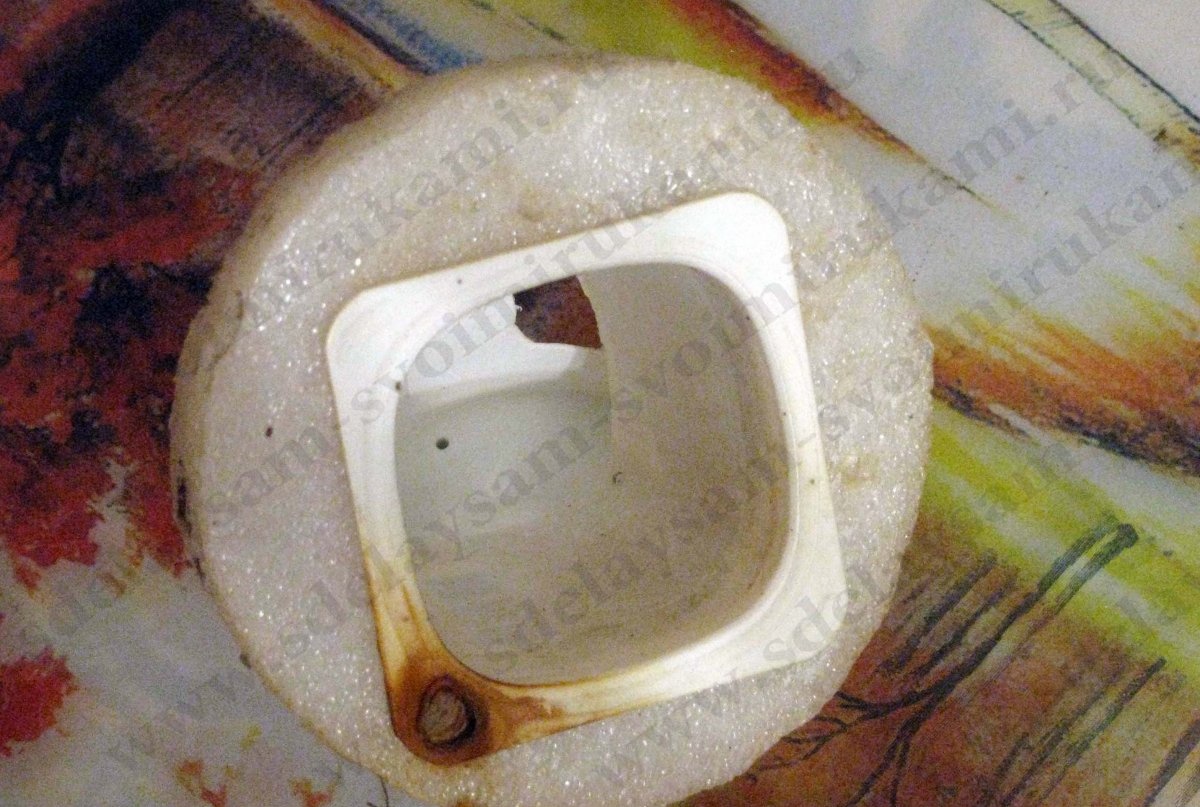
The first tests immediately showed that the ultrasonic head should be recessed under the surface of the water, to the depth of the phalanx of the finger, but at the same time, individual splashes still flew out of the fog fountain. Therefore, I had to think about a drop arrester. It was made from the cap of a foam container, and luckily it had an eyelet with a hole for the foam supply tube.
The signs of rust are due to the fact that I used a metal pin instead of nylon cable ties, and after soaking in citric acid, this is what I will use during final assembly.
Actually, that's it - the cleaning is finished, then there will be a series of photographs with explanations in which you will see the process of the final compilation of spare parts.
Following it, I will share my thoughts on what I would do differently and a video of the assembled humidifier in operation.
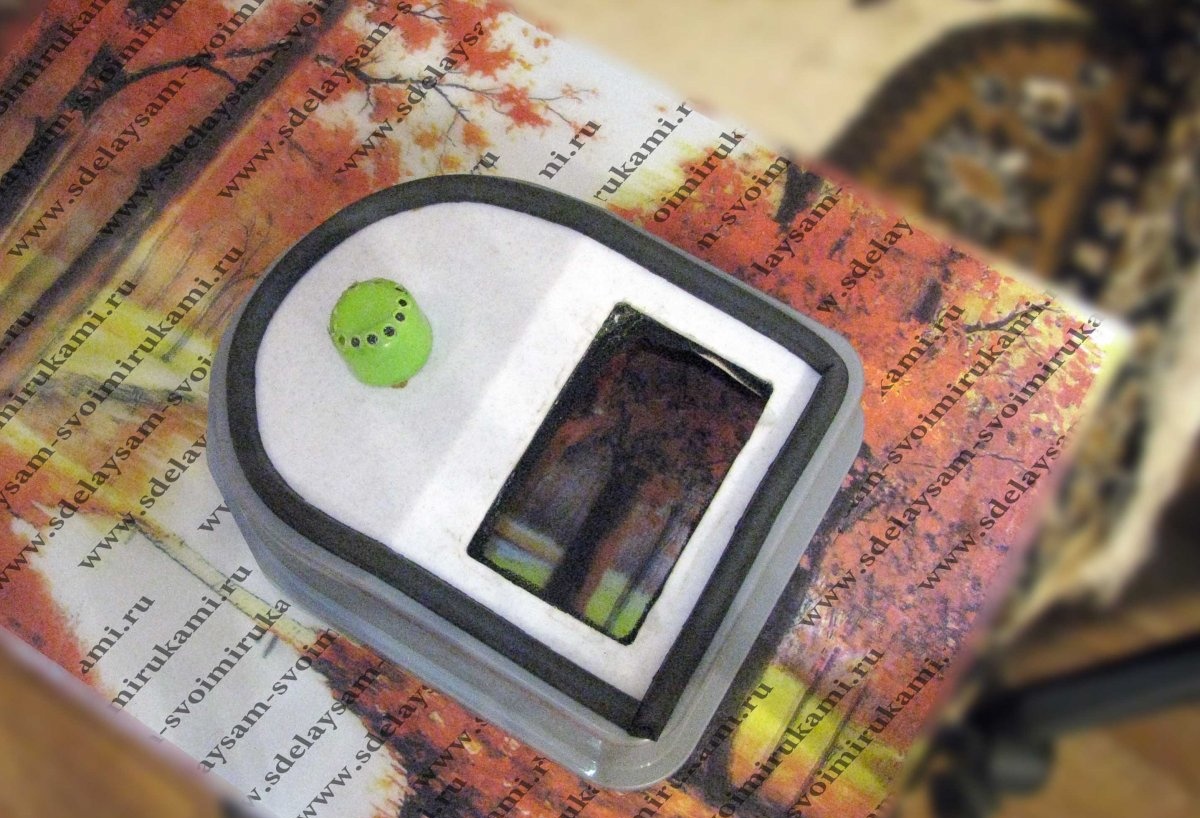
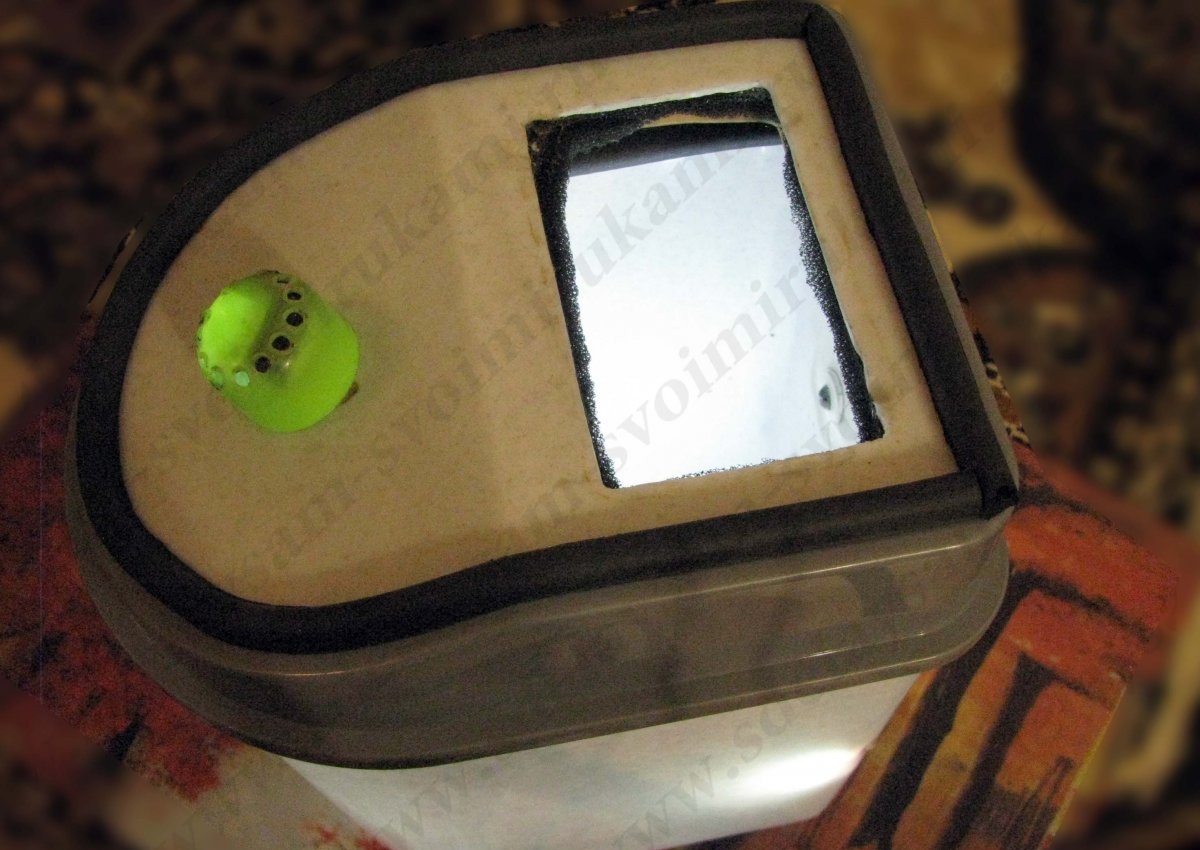
Electronics unit
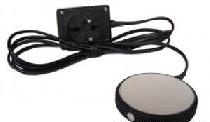
The wires were soldered. At the same time, on the left, you see a socket for connecting the fan unit.
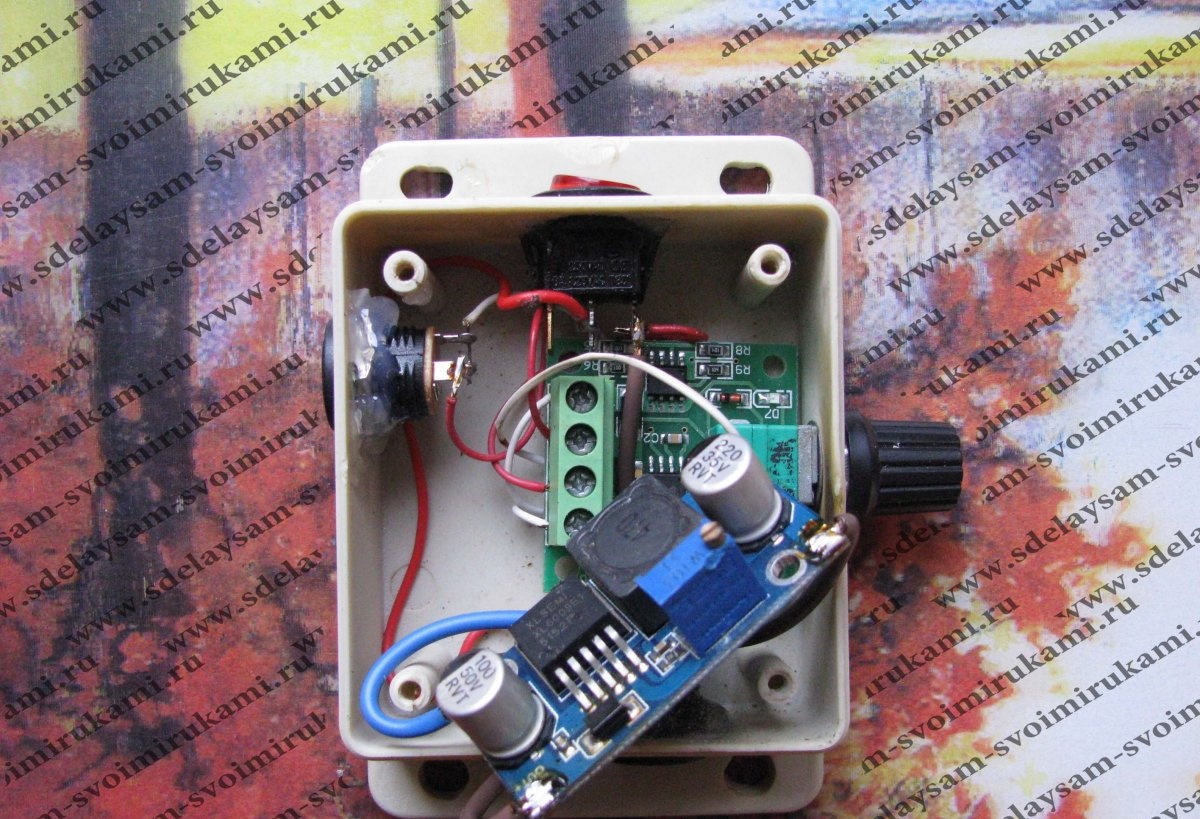
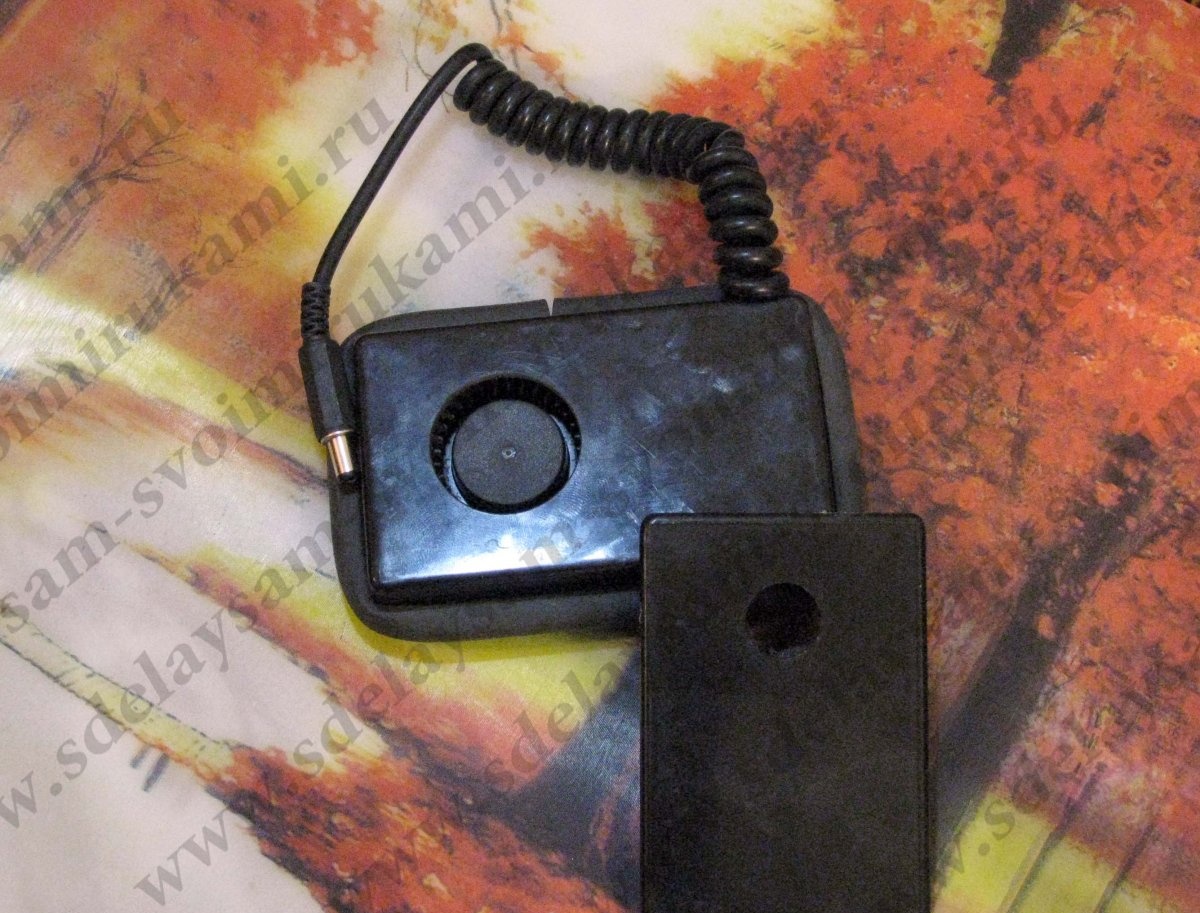
And the lid is closed. Two lower sockets. The right one is the output for the ultrasonic head, the left socket is intended for connecting an external +12 volt power supply.
Ultrasonic head and float system
I had to cut the stock wire due to its poor flexibility and splice it with flexible conductors in a silicone sheath. The solder joints were generously sealed with hot glue. And, pay attention, the wire is passed through a silicone cap that seals jars of antibiotics.
You saw a through hole in the office basket; a lid with a wire in its center will be inserted into it, which will not only serve as an obstacle to the escape of fine mist, but will also allow you to remove this entire assembly without cutting the conductors.
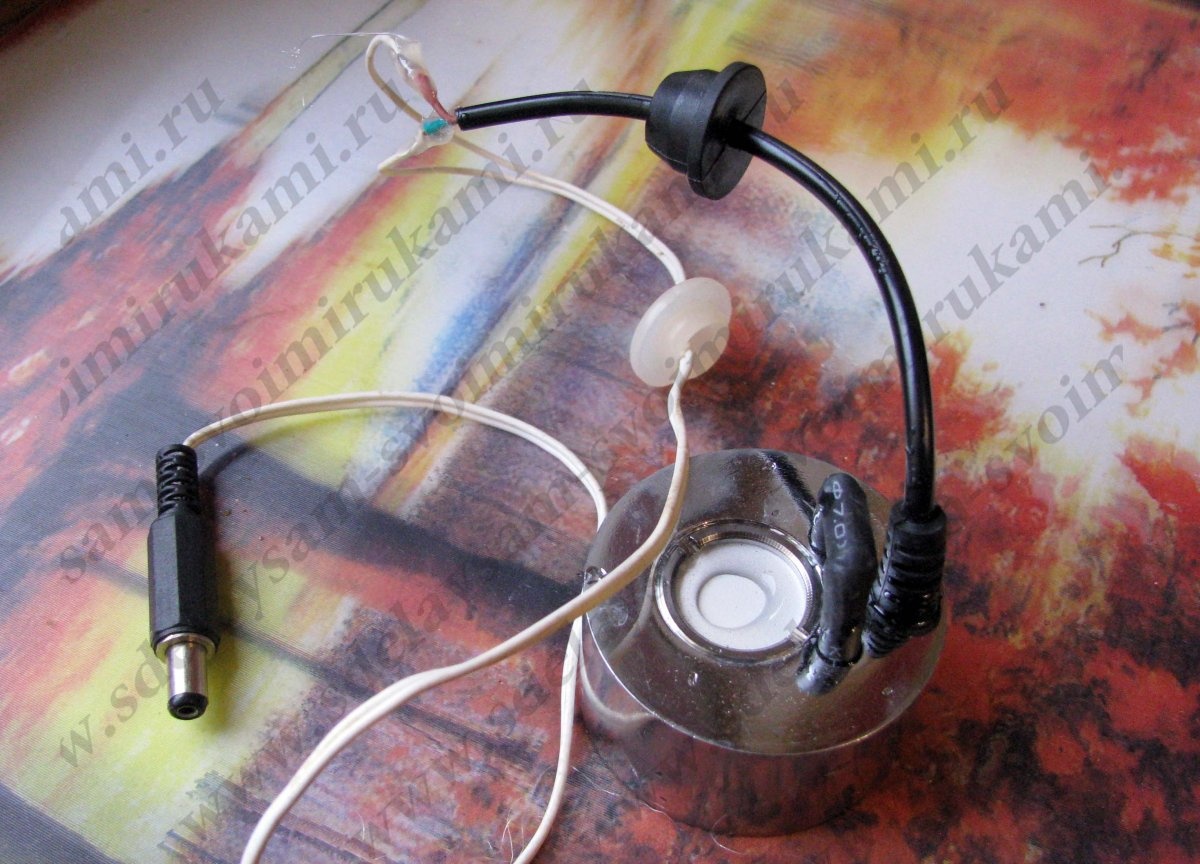
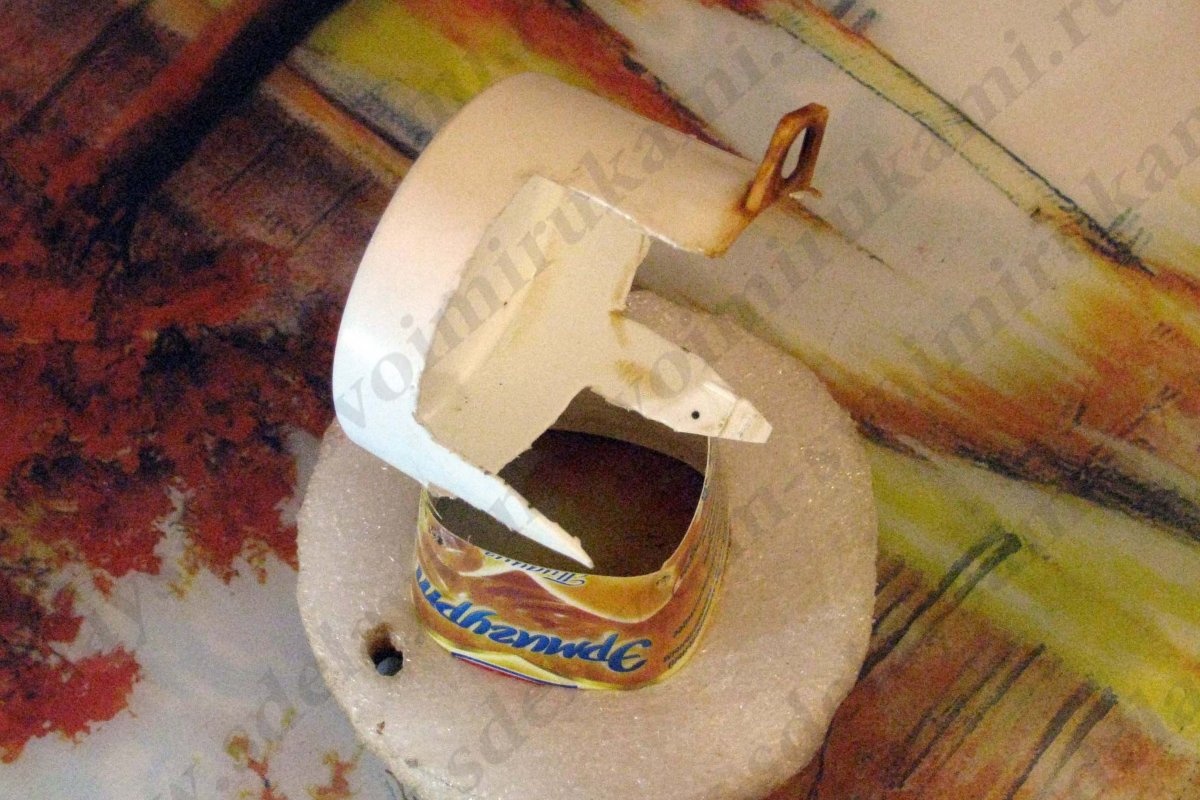
But the floating platform had to be completely changed. The metal sprayer turned out to be heavy for her and her buoyancy was negative.
I took, as you can see, polystyrene foam, I was lucky, it’s dense foam plastic from a foam box measuring 24 mm in width and 100 by 115 mm on the sides.
The basket for the ultrasound head also had to be replaced with a whole yogurt cup. The sprayer was pressed tightly into the cup to the bottom, and with a soldering iron, holes were burned to allow water to enter this small container.
You will have to experimentally find out the buoyancy of the platform, but I will say right away that there is no alternative to foam plastic.
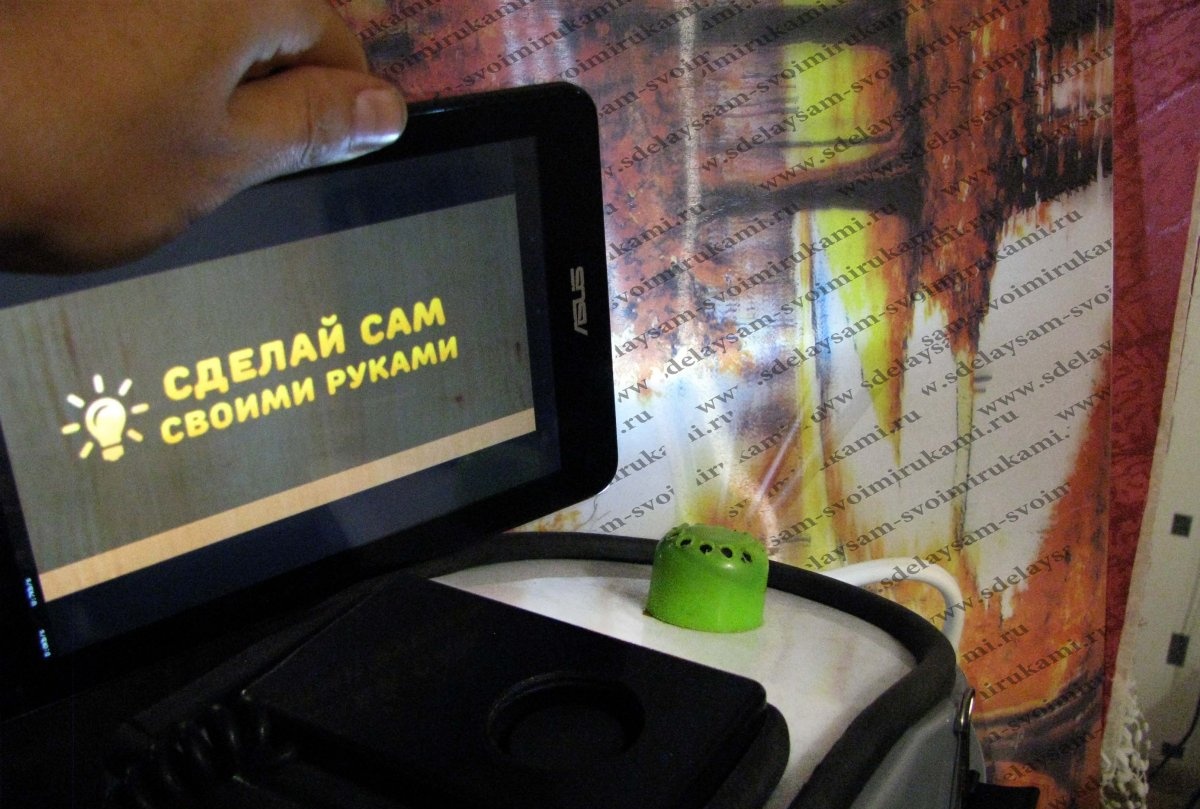
Test run
Water is poured into the basket, the ultrasonic unit is lowered to the surface, the plug of the ultrasonic unit goes through the silicone cap through the wall of the office basket. You can also see that the same sealing cord is glued along the inner perimeter of the basket.
System at medium speed.
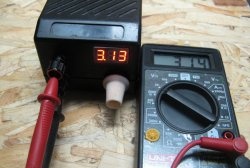
The system consumption was 1.92A at maximum fan speed and with an external power supply of 12V. Without fan 1.72A.
So that I can change now.
Firstly, the lid, it seems to me, didn’t turn out very well.Go up to the picture where I showed the upside down lid. It will be better if you cut a blank from a single sheet of plastic the size of the inner side (step) of the lid. After gluing and checking for sealing, the fan assembly can be placed in the resulting space under the rotating flap of the office basket lid. I think there was also room for other electronics. Which?
For example, a humidity sensor. There are modules with humidity sensors combined with relays, and after calibrating and setting the module to 40% humidity, you can forget about playing with the switch. Humidity will always be automatically maintained at the optimal level.
Secondly, the security system. I can guess why the previous fog generator in a plastic case burned out. On it (as well as on this one), a capacitance sensor is installed in the form of a bracket and probably the fog generator, due to its lightness, was warped - the capacitance sensor ended up in water, and the piezo membrane ended up partly in the air, which led to overheating of the entire head. Compact capacity sensors are produced on the TTP223 microcircuit; it can and should be glued to the minimum water level in the basket on the outside, at which it is guaranteed that this ultrasonic head, although heavy, would still be in water. The sensor itself can control the boost module; the boost module has a controlled input.
Thirdly, the boost module can be cheaper, not necessarily the one I used - I didn’t have anything else at hand.
Approximate cost of the entire set:
- - office basket – 2.5 dollars.
- - ultrasonic nebulizer – 5.6 dollars.
- - boost module Xl6009, which may be different - $0.80.
- - turbine – 1.43 dollars.
- - black box 100x60x25 mm – $1.08.
- - ready-made speed controller – $1.32.
Total: approximately $12.
I had everything else available. I believe that this homemade product, which does not pretend to be the center of the holiday table like a samovar, nevertheless has all the necessary consumer qualities that, for this money, most likely cannot be found in a ready-made version.
Thank you for your attention.
Ruslan.