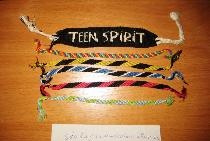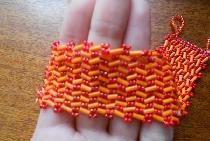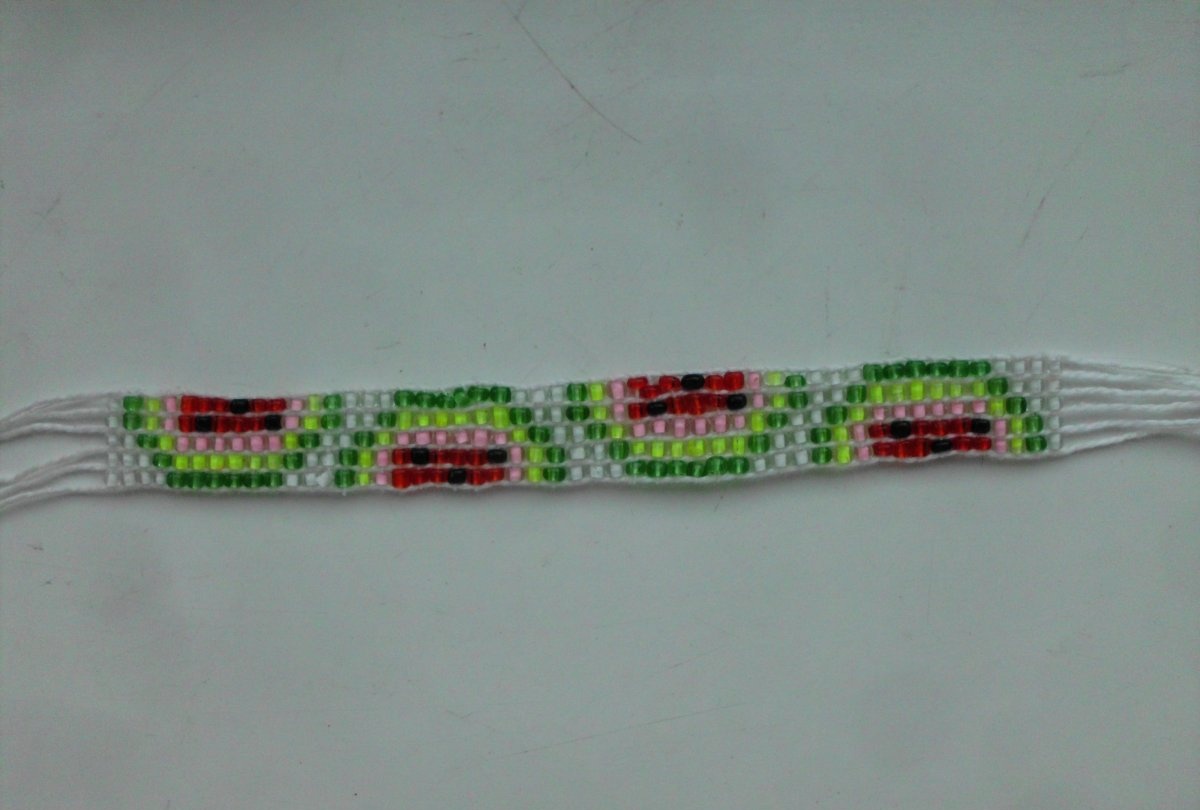
All girls love to weave baubles. They can be worn as a sign of friendship or love, or simply as decoration. They can be woven from floss threads, and in this article we will talk about a beaded bauble. It is woven as easily as from thread, so anyone can make such a decoration for themselves.

Materials
In order to weave a beaded bauble with watermelons, you need to prepare the following materials:
- Small beads in six colors: 58 white, 36 red, 12 black, 56 dark green, 48 light green, 40 pink.
- Regular white sewing thread for leading thread.
- A ball of white “Iris” thread for the base.
- Scissors.
- A thin needle for beads.
- The surface on which the work will be done, you can take an old book.
- Scotch tape for securing threads.
Making a beautiful watermelon bauble
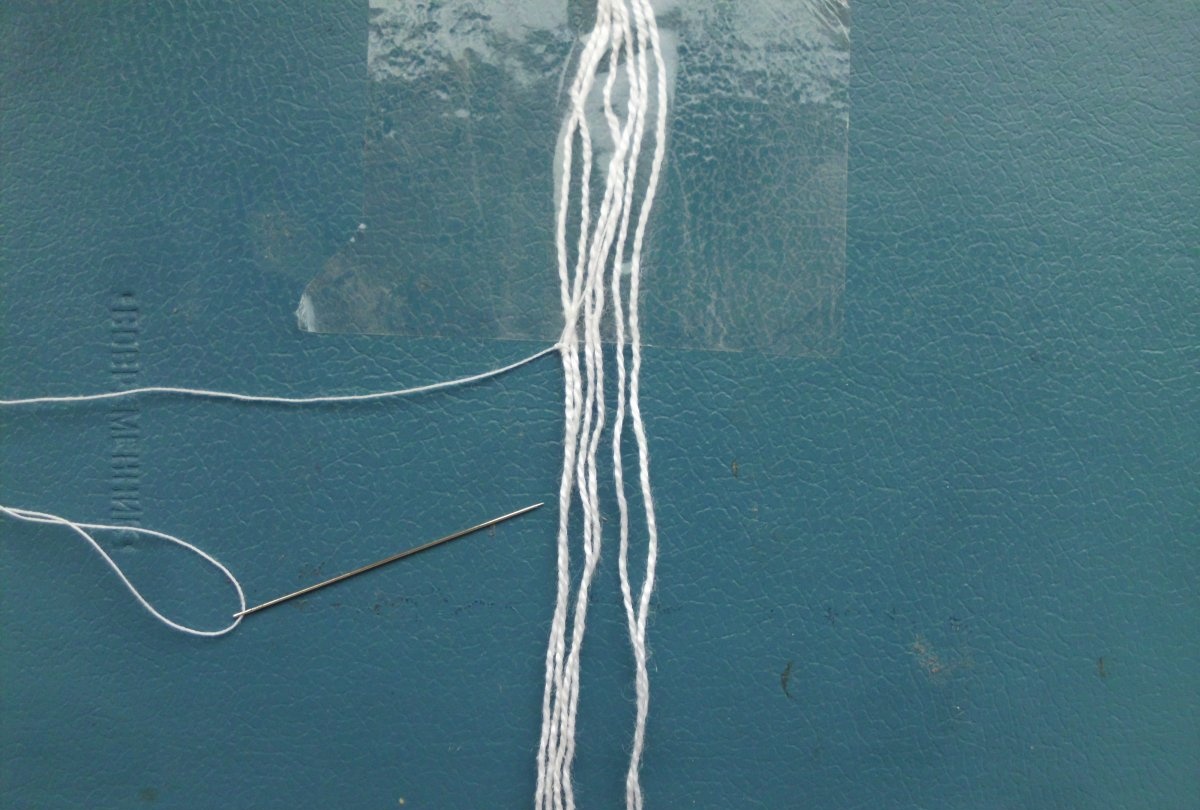
The bauble will consist of five beads in a row. Therefore, you need to prepare 6 threads from “Iris”, each 40-50 cm in length. They must be secured with tape to the surface. The leading sewing thread must be tied to the first thread, which should be about 1.5 m in length.
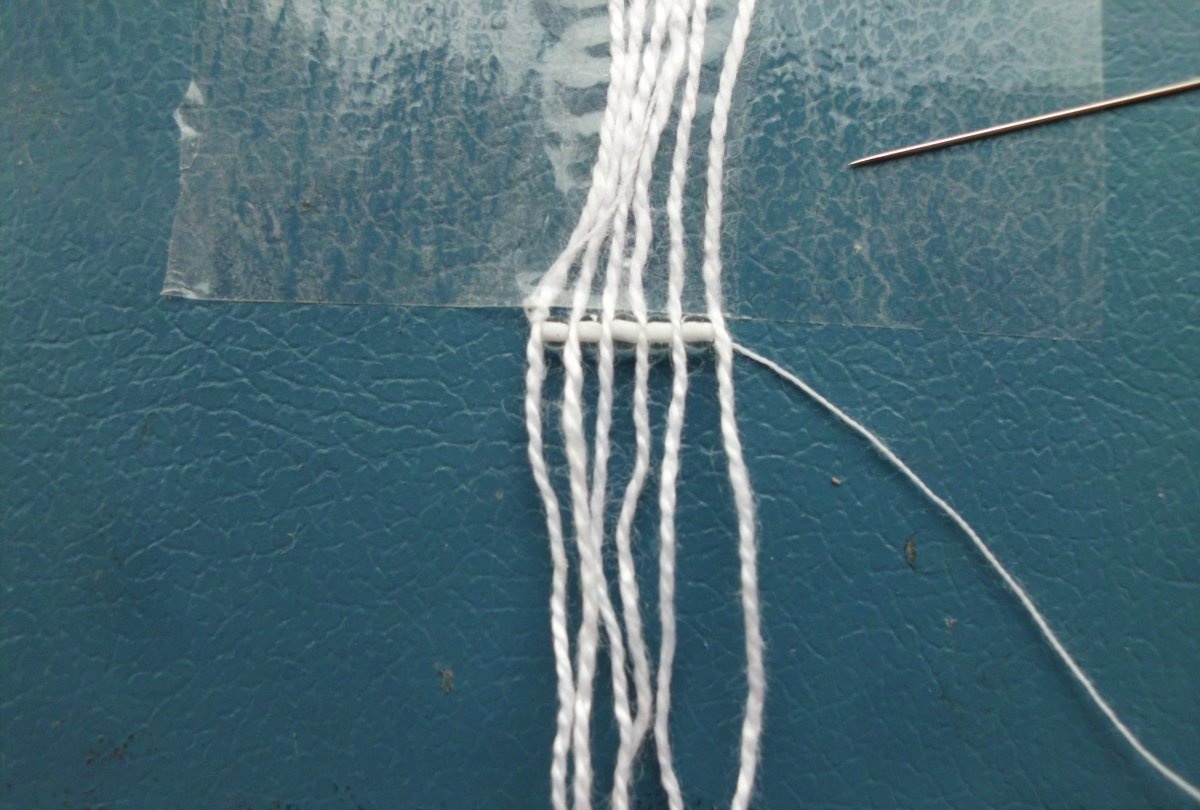
Now we need to make the first row. The bauble will consist of four watermelons looking in different directions. For the first row, string 5 white beads onto a needle and bring them to the end of the thread. After this, the beads must be placed under the warp threads so that each piece falls into its own cell.
Then you need to pass the needle back through all the beads, but already above the warp threads. The first row is ready.
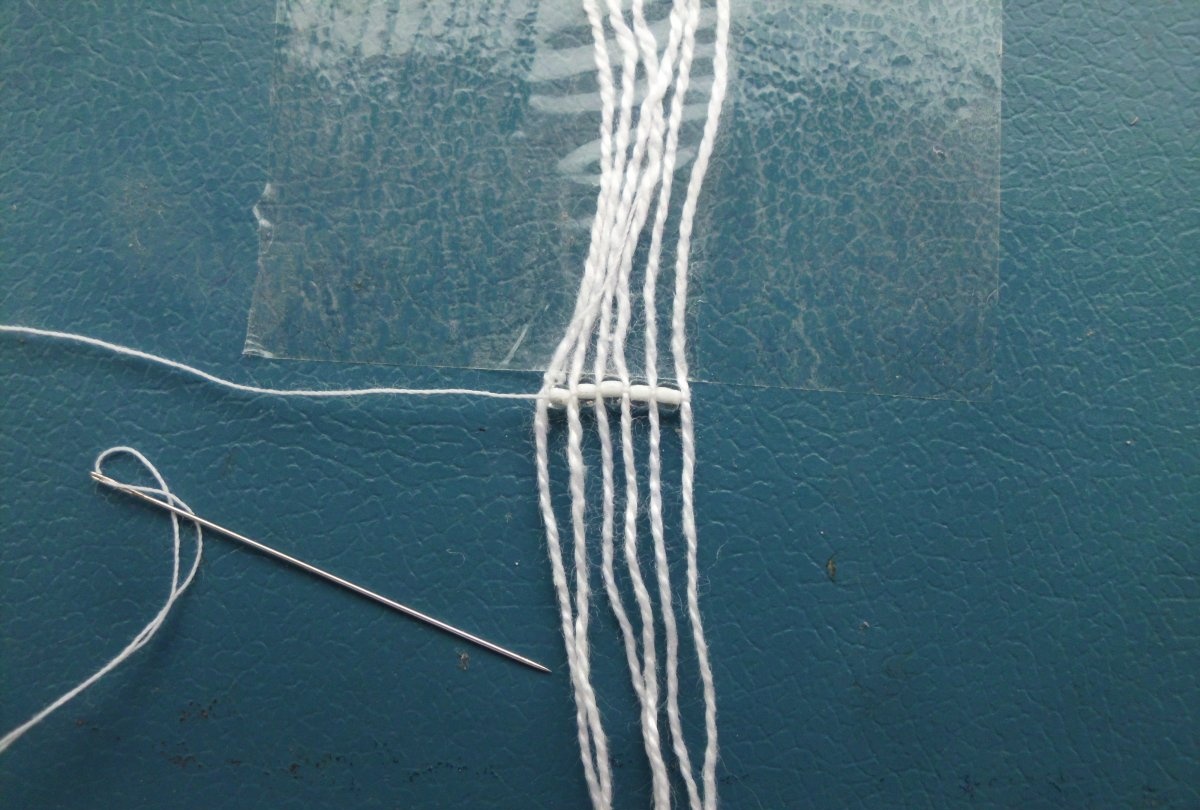
On the second row the watermelon crust begins. All subsequent rows are woven in the same way as the first. 3 white and 2 dark green beads are strung on a needle. They are again placed under the warp threads, each should be in its own cell. The needle then passes back through all the beads above the warp threads. The second row is finished. Each row must be pulled up to the previous one to avoid creating holes.

All other rows must be woven according to the following pattern:
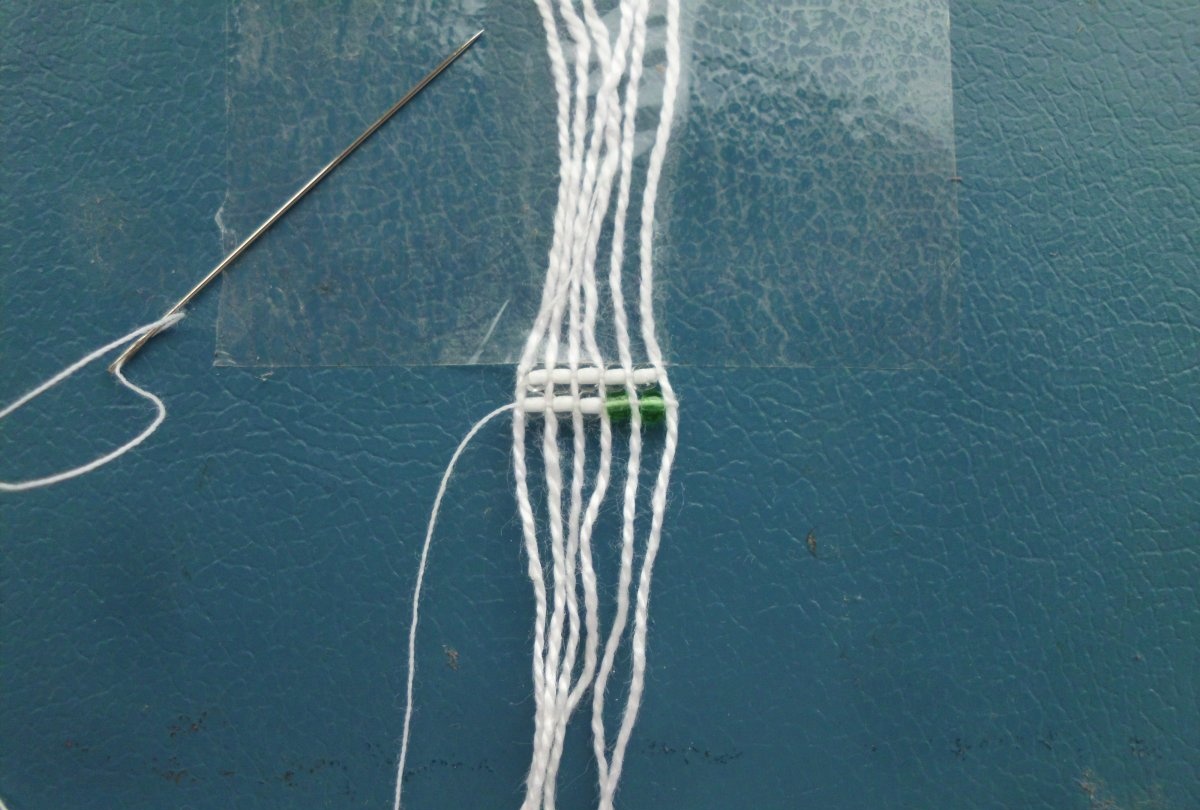
- 3rd row: 2 white, 1 dark green, 2 light green.
- 4th row: 1 white, 1 dark green, 1 light green, 2 pink.
- 5th row: 1 dark green, 1 light green, 1 pink, 1 black, 1 red.
- 6th row: 1 dark green, 1 light green, 1 pink, 2 red.
- 7th row: 1 dark green, 1 light green, 1 pink, 1 red, 1 black.
- 8th row: 1 dark green, 1 light green, 1 pink, 2 red.
- 9th row: 1 dark green, 1 light green, 1 pink, 1 black, 1 red.
- 10th row: 1 dark green, 1 light green, 1 pink, 2 red.
- 11th row: 1 white, 1 dark green, 1 light green, 2 pink.
- 12th row: 2 white, 1 dark green, 2 light green.
- 13th row: 3 white, 2 dark green.
The first watermelon is ready. The second begins already on the 14th row and is woven in exactly the same way as the first, but in the other direction.
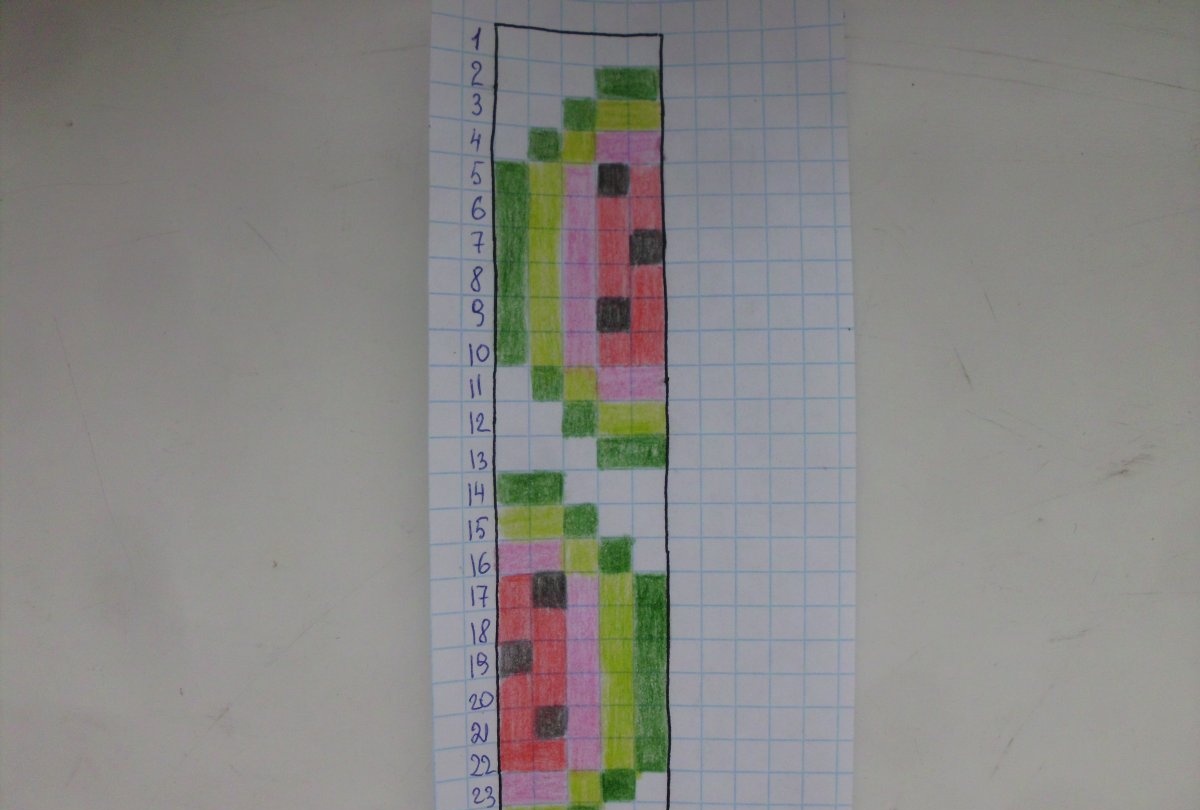
To make your work easier, you can use the diagram. One square in the diagram is one bead. After the 25th row has ended, you need to start weaving the bracelet in the same way as the 2nd row.
The bauble of four watermelons is ready! All that remains is to carefully remove the tape and make pigtails at the ends. This bauble can ideally complement any summer look.