Friends, hello. The complexity of the topic, how to build a domed greenhouse with your own hands, does not lie in the procedure, calculation or even sawing of the material. And in another. Since the desire to erect this structure arises for several atypical reasons:
- If you take the matter seriously, the first fundamental reason is knowledge of dome structures and dome construction.
A landowner who operates a film greenhouse or, at best, switched to a polycarbonate greenhouse is unlikely to be interested in the new design without knowing anything about it. However, the benefits that the dome brings with it are shifted from the place of the most conservative farmer. It remains only to obtain detailed information. - Following is the spirit of the experiment. Everyone wants to try something new. And why not, if the land area allows. However, there are two things:
- The new is the well-forgotten old. More precisely, out of sight.
- Again, knowledge.
- The new is the well-forgotten old. More precisely, out of sight.
- The third case, which can be limited, occurs to those who have already seen the domed greenhouse, went into it, tasted the result. But again there is a separation:
- The one who believed in the advantages over an ordinary greenhouse.
- And those who did not believe, but wanted, sorry for the expression, show off in front of the neighbors.
So, the construction of a domed greenhouse with your own hands for brave farmers who know how to count and count well. For people using advanced soil cultivation technologies, as well as natural growing plants. Here is more a hint of vegetables. Although exotic with domed heat transfer characteristics is just around the corner. It's time to ask you questions: - Did you know that in a domed greenhouse you can harvest three times a year? For example, in central Russia with a period of pronounced summer from late May to mid-August.
- Did you know that with minimal winter heat supply, planting and picking potatoes is possible at least all year round? Moreover, electricity is optional.
But about the secrets below. And for starters, a cannon salvo from the list of basic advantages of the dome. - The one who believed in the advantages over an ordinary greenhouse.
About design and materials in a simple way
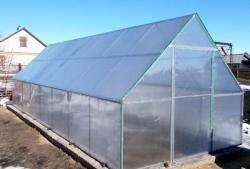
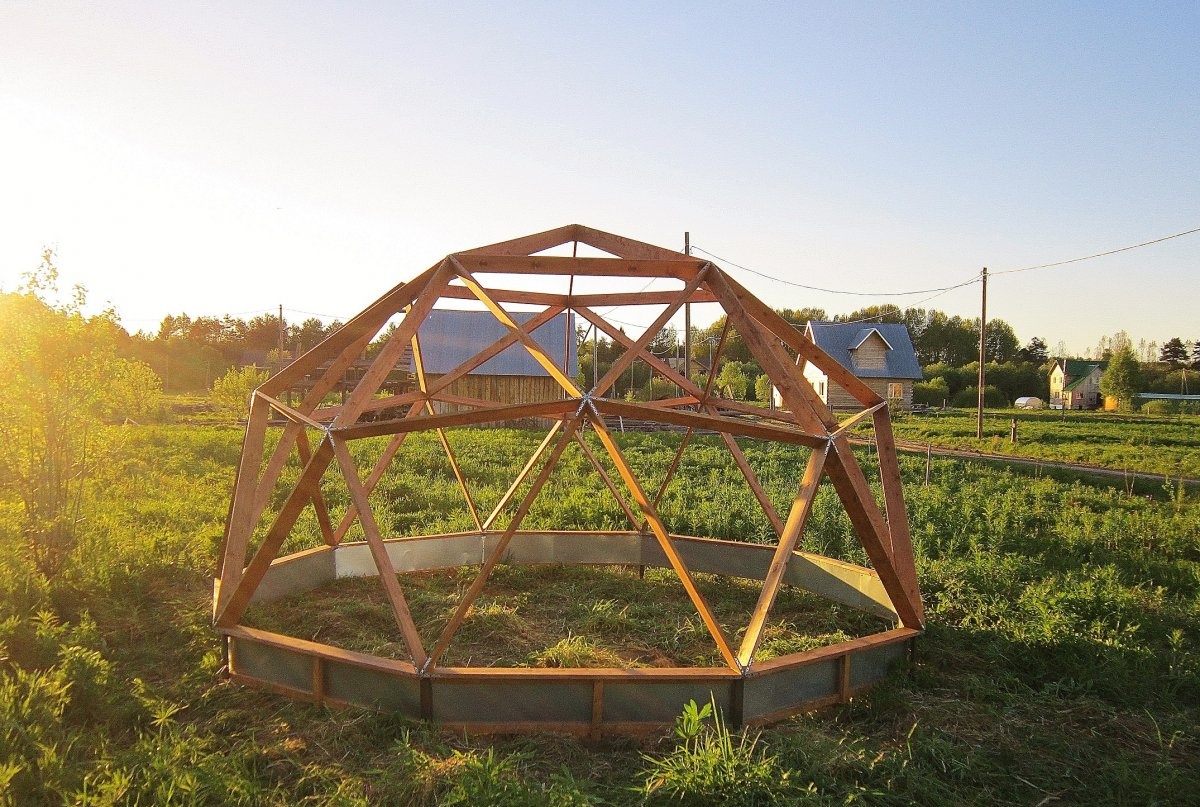
The dome represents the construction of Fuller, an American researcher in the field of geodetic architectural structures. The mesh shell of the triangles is nothing but a self-supporting frame. Therefore, the principles for resolving the post-war housing crisis were transferred to construction audiences, warehouses, hangars and greenhouses. Our domed greenhouse is based on five elements:
- Foundation. Here, the opinion is divided into piles, followed by lining and a welded corner. The choice is yours. And I used the pile option. Building the foundation for the dome is a very tricky thing. Miscalculations should not be both vertically and horizontally.
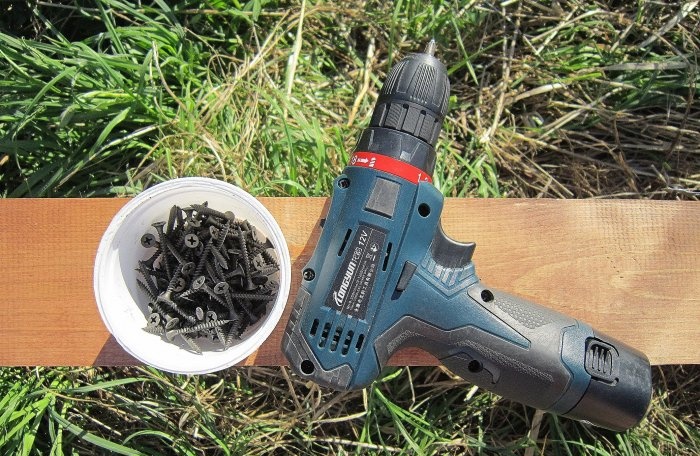
- Caracas. The fence is taken as the basis of the frame. It has a standard size of 100x20 mm. This is enough for a one-sided film package of a summer sample. For the winter version with double-skinned triangles, a board thickness of 40 mm is required. Keep in mind that a smaller end face size of 40x20 will require the use of scaffolding. And on the frame from the boards 100x20 you can navigate acrobatically.
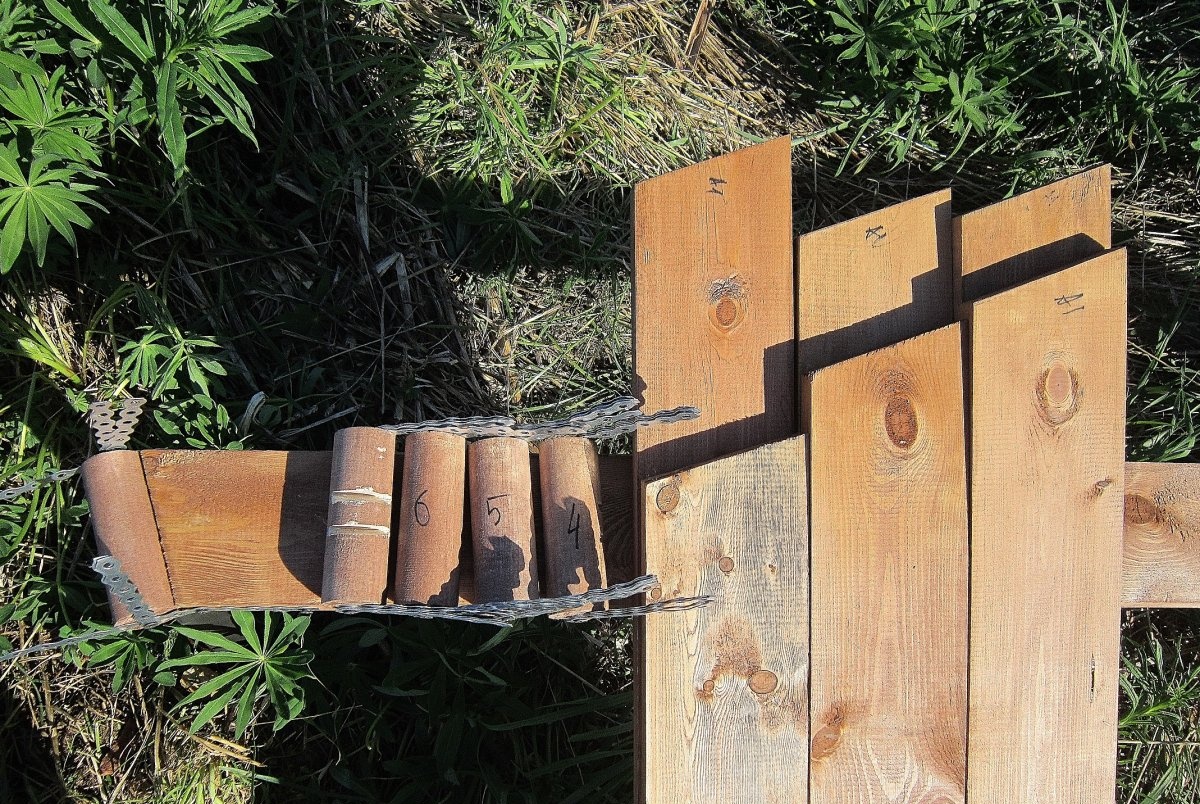
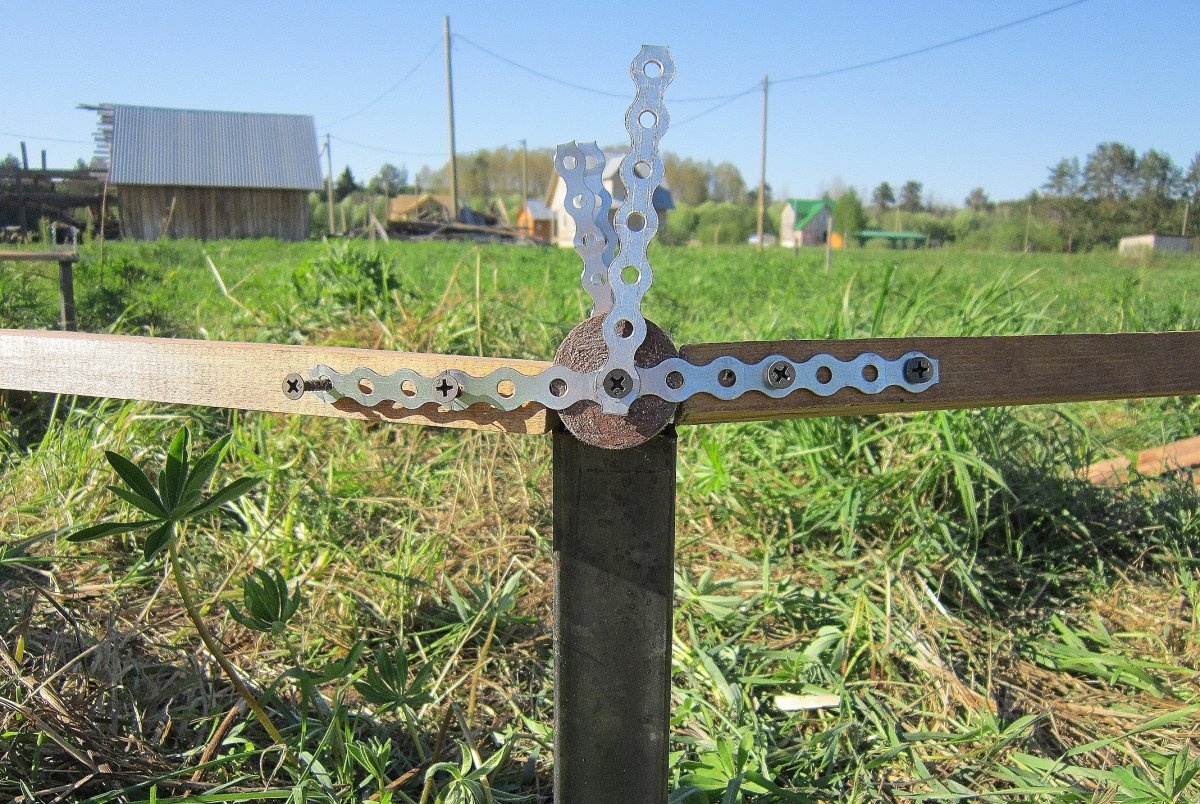
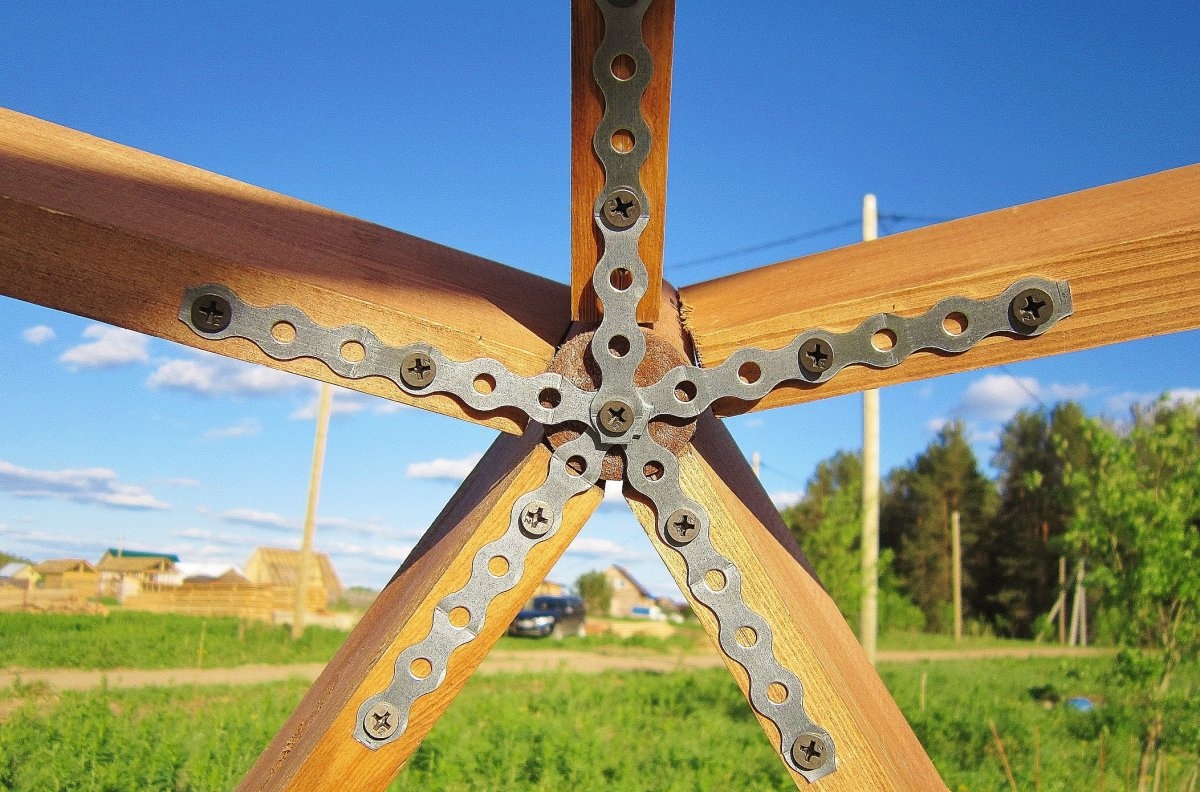
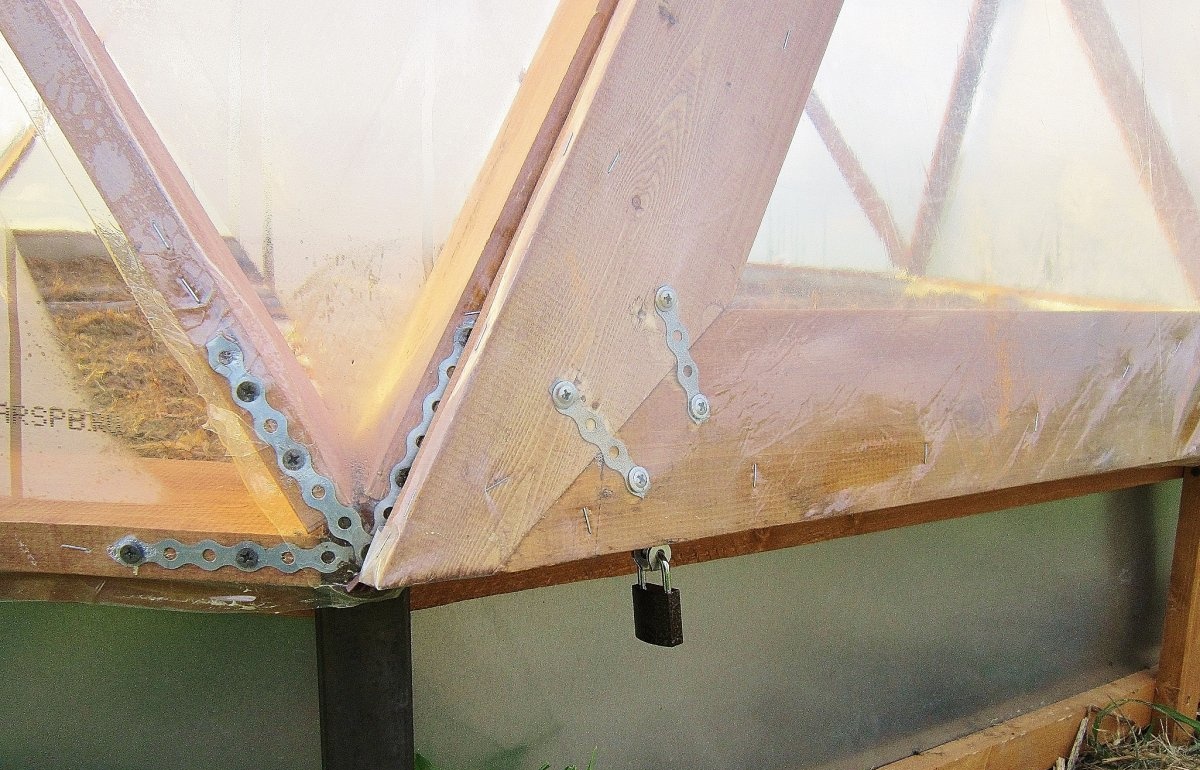
- Connectors Just don’t laugh. I used shovel cuttings. The standard diameter size is 38–40 mm. The compound was a medium-hard punched tape with one strip of holes.
- Film. Why is the Svetlitsa brand film selected? The answer to this question lies in the analysis of film tests. In Russia, of the six types of film material, Svetlitsa shows the best results. Moreover, the evaluation criteria are different:
- Hydrophilicity. Drops of condensate do not fall from Svetlitsa.
- Rigidity. The film package withstands surface tension on a nail under its own weight. A frame of 50x30 cm was taken as a sample.
- Transparency. Svetlitsa has the highest rate. Loss of light is 10%. And polycarbonate has all 40%.
- Price. A square meter of film costs about 100 rubles when taking into account the thickness. My choice fell on a thickness of 120 microns. The cost of a square meter from an authorized dealer with self-delivery is 47 rubles. The exact calculation of triangles with overlaps for adhesions determines the option of a running meter. It can be of different widths: three meters or four meters.
And most importantly, Svetlitsa is a perennial year-round film for greenhouses. Service life 7 years. - Hydrophilicity. Drops of condensate do not fall from Svetlitsa.
- Hardware group. I used 4 cm long self-tapping screws. There are recommendations for using self-tapping screws with a drill at the end. This will prevent cracking of the wood along the fibers. But everything requires skill and experience. With accurate work with a screwdriver at the required speeds, the percentage of cracking will be minimal. At least I chose self-tapping screws with a fine thread pitch.
What tools are required to build a domed greenhouse with your own hands?
- For sawing you will need a sharp hand saw with a small tooth. Among the circular saws, a stationary version with an angle of rotation is chosen.
- To cut the punched tape, metal scissors are needed.
- A screwdriver is a universal device for today. Although we need the function of twisting self-tapping screws and drilling holes.
- To cut the film, it is better to take not a knife, but scissors. And you also need a cutting table.
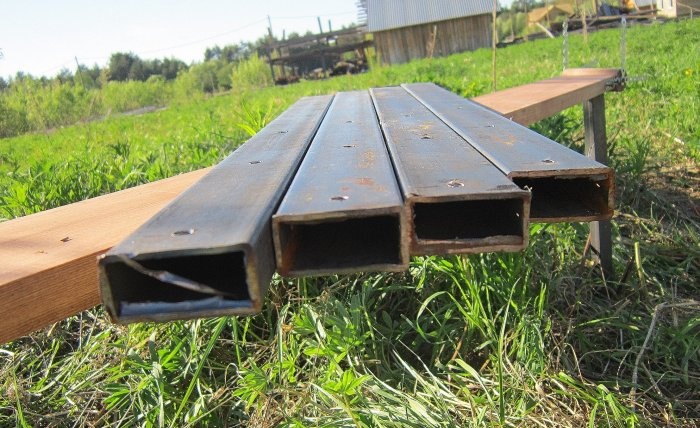
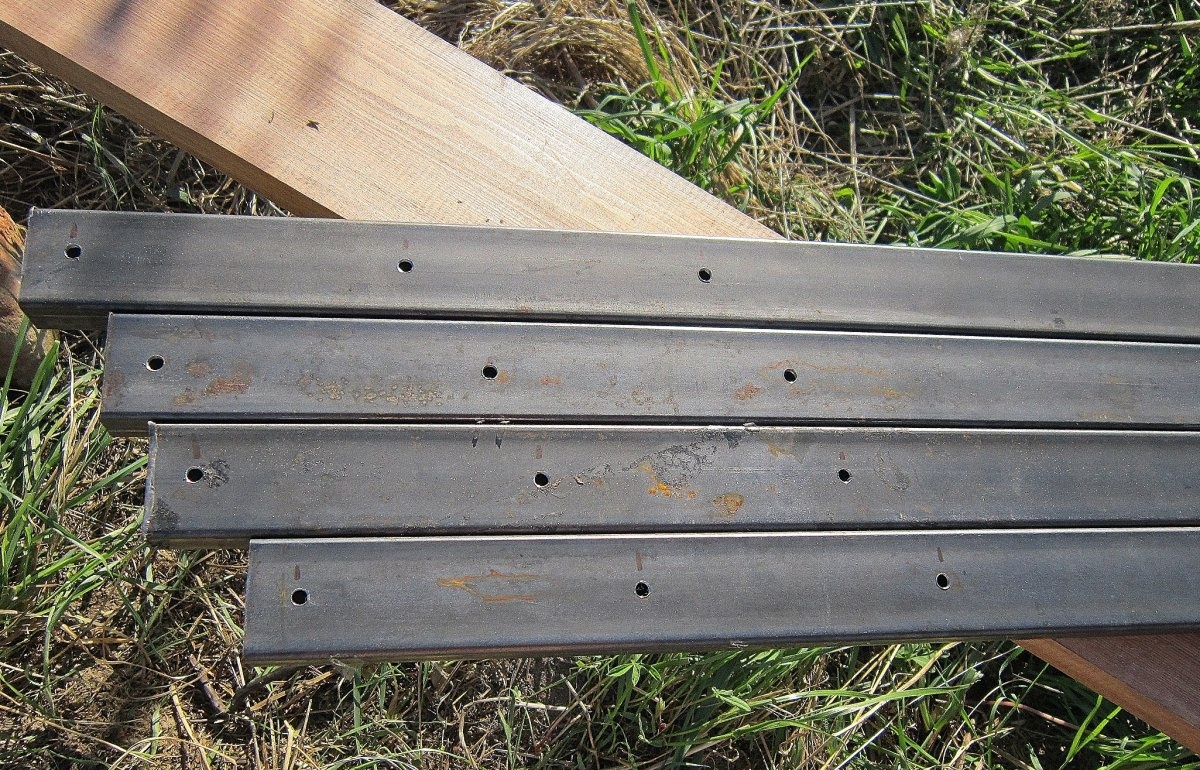
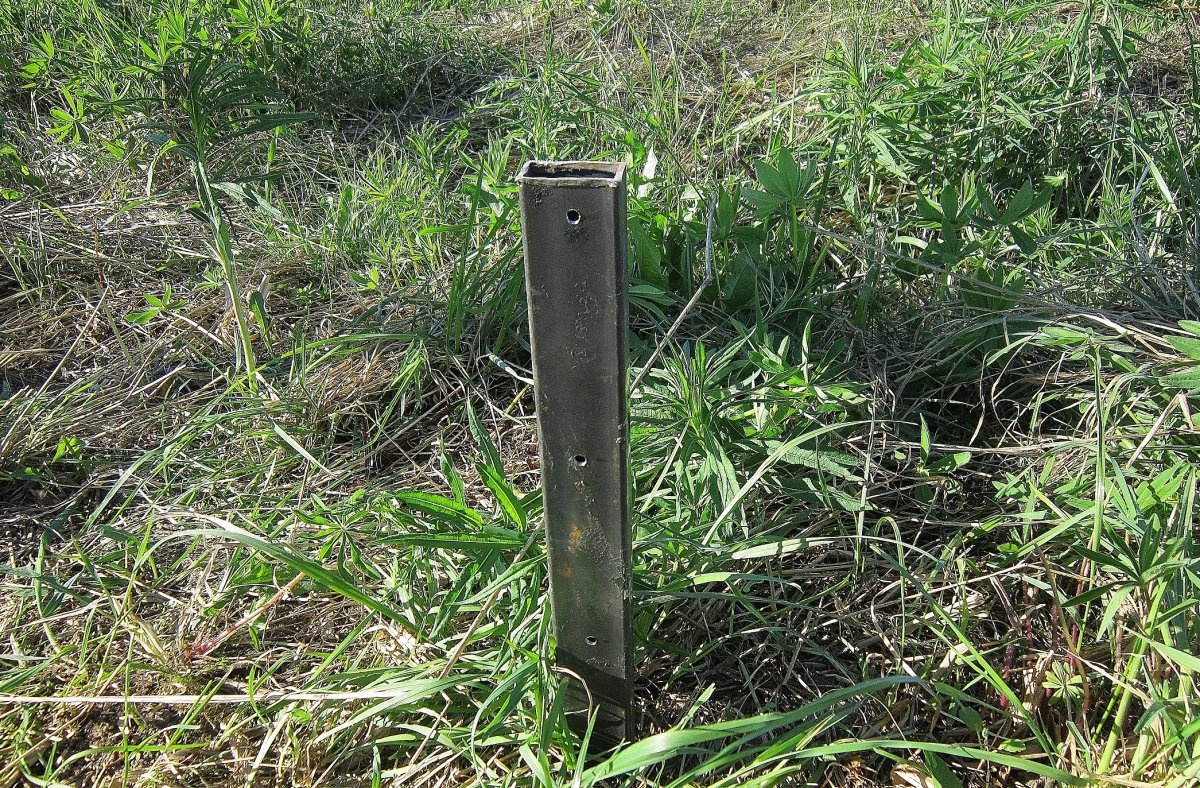
- Pile foundations differ from each other. Screw construction involves a welding machine. It is also necessary if corners are used on the foundation. I decided to get by with small forces. To hammer a metal profile of 40x20 mm, only a sledgehammer is required.
- The entire success of the construction of the dome depends on the accuracy of the hydraulic level. Although the hydraulic level itself is used in the installation of piles and no more.
- Do not forget about the building hair dryer. I specifically purchased a Chinese-made device for 800 rubles. And, you know, no complaints. He justified himself one hundred percent. That's just the readings of the electricity meter, I passed 10 times more. Since the first time I did it. Experience.
- Particular attention should be paid to the measuring tool. Roulettes, building level or meter, ruler, corner and even plumb are not enough. You need patterns.
- Take care of the stairs. Desirable about the stepladder.


So, let's move on to the calculations. They seem complicated to you, but all the sizes are in the hands, or rather, in the memory of the calculator for calculating the dome.
Payment
With the increasing popularity of dome construction, the automatic calculation algorithm has become widespread in many languages and servers in different parts of the world. A query in the Internet search engine will give you several options at once. This is actually the same calculator. To compile the data, you must specify the radius of the sphere. The remaining parameters reflected in the three-dimensional figure are intuitive:
- The frequency of the triangles.
- Partition class.
- Axial symmetry.
- Part of the scope.
- Connection method.
- Connector Diameter
- Width and thickness of ribs.
It looks like a children's designer, only in an interactive form.
The measurement results will reflect the area of the coating and the base, as well as the volume of lumber and the total length of the ribs. Drawings of edges, triangles and vertices will be reflected a little lower. As you study the calculations of the calculator, you will understand that you need to build on the standard sizes of materials:
- Board lengths.
- Cutting length for the connector.
- The area and dimensions of the film.
- Pile lengths.
The main thing is to fit the basic elements of the structure into unassembled material with the smallest residue. The number of screws is counted up to plus / min of five pieces. Although the stock does not hurt. Triangles made of film can be glued from residues. And here I do not advise doing this:
- Many forget about overlaps.
- Gluing two halves is time consuming.
- Glued triangles are inferior in safety margin. Especially in the winter.
I glued from halves. Saved money.But not time and nerves. And now we turn to the main part of the description. This is an assembly of a domed greenhouse with your own hands.
Assembly order
The acquisition of materials is a master's business. Where, how and how much it is for everyone to decide. Therefore, I will miss information. But there were nuances. Most of the consumables I bought at a hardware store. Boards acquired at the sawmill. But the film was delivered to me from Moscow to order. Your option may be more practical. Nevertheless, the dome is an object of economy. If you prepare all the elements, it remains only to collect them. And now it's time to describe the order of construction activities:
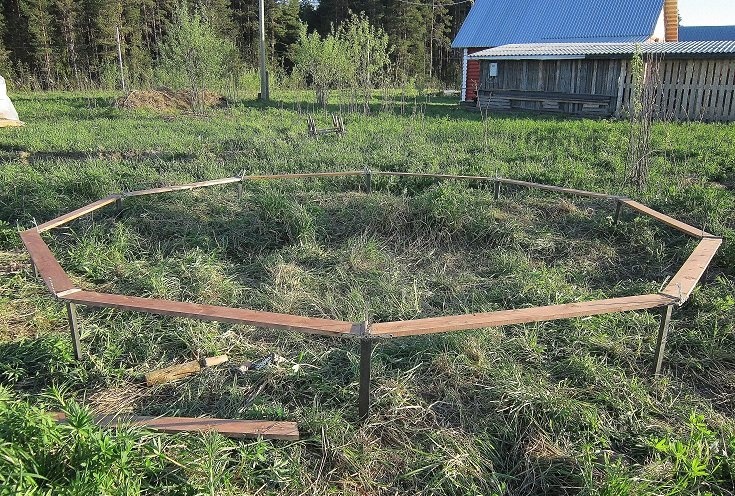
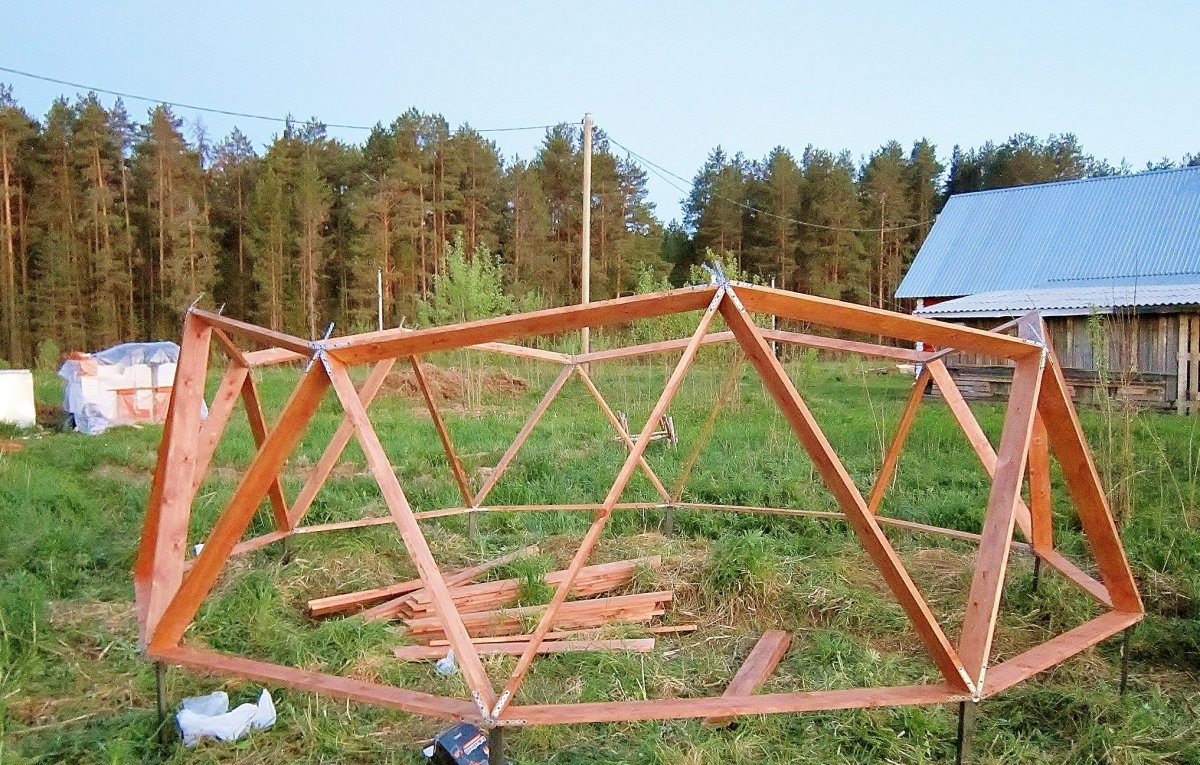
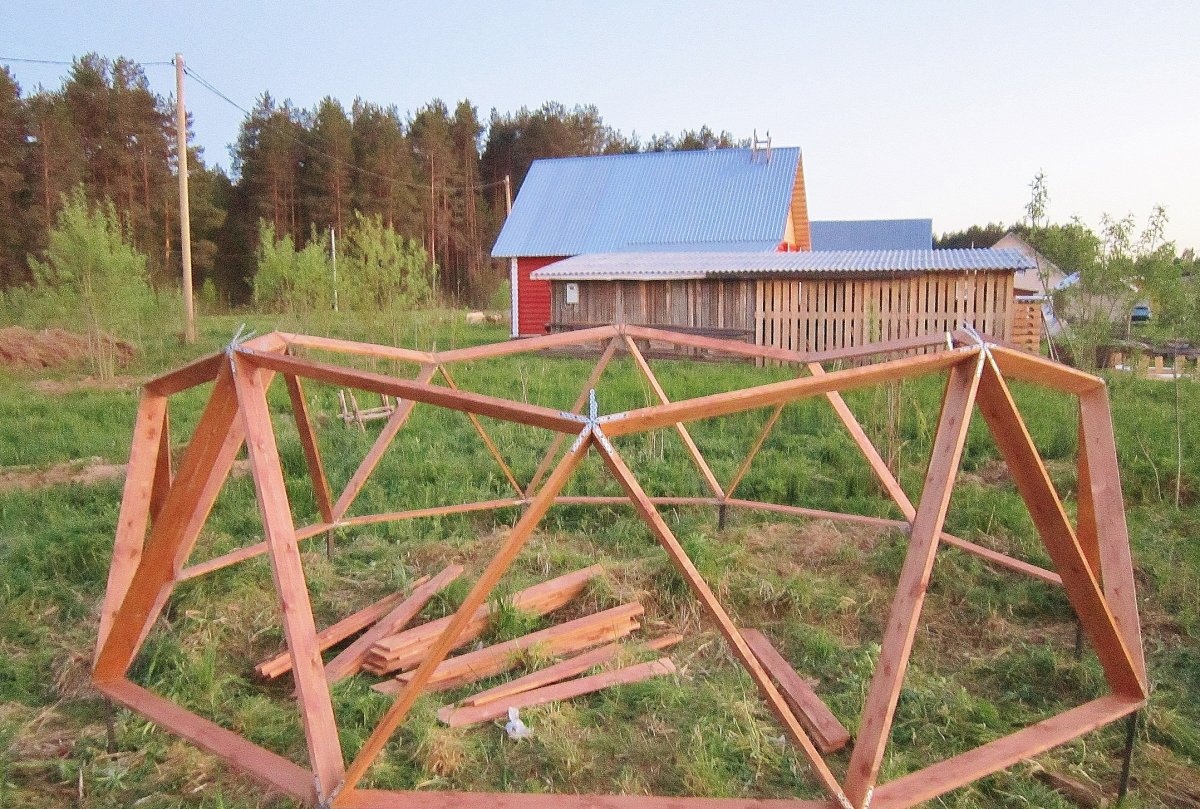
1. The foundation. For ten piles, one six-meter rectangular profile was required. After sawing, the length of each pile was 60 cm. The supports were deepened by 40 cm. It might seem that this length is not enough for reliability. However, the dome, as a self-supporting structure, redistributes the weight proportionally. Moreover, the voltage on the piles to some extent remains inside the frame elements. The main thing when installing piles is to set the level. Even millimeter deviations will be noticeable. What happened to me. Three points of support of the dome were in limbo. But this did not affect the strength of the greenhouse. Nevertheless, much depends on the work of a sledgehammer. As for vertical alignment, it is much more complicated. I initially did not fill the construction site and built a greenhouse on a landscape with natural irregularities. Checking the accuracy of the installation of piles checked by the perimeter, assembled from the bottom row of ribs. The error was on the face. Differences in height gave an error. The ribs did not meet. I had to re-score half the pylons. Consider this point.
2. Mounting the frame on piles. There are many installation methods. How much imagination is enough. But the robust, sturdy options have the obvious advantage. I'll tell you how I did it. I saw two grooves in the connector with four petals according to the size of the end of the square pipe.
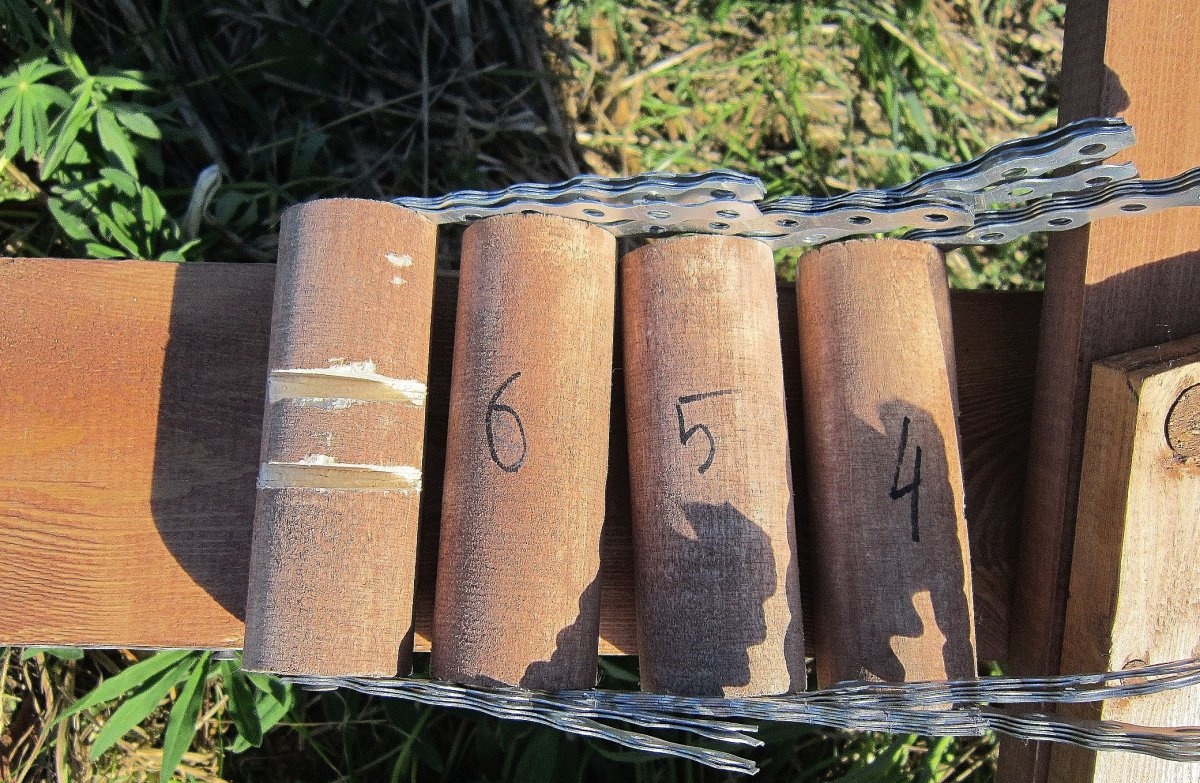
He planted the connector on the pile. Next, in order, mounted the first row of ribs. The assembly of triangles has its own sequence.
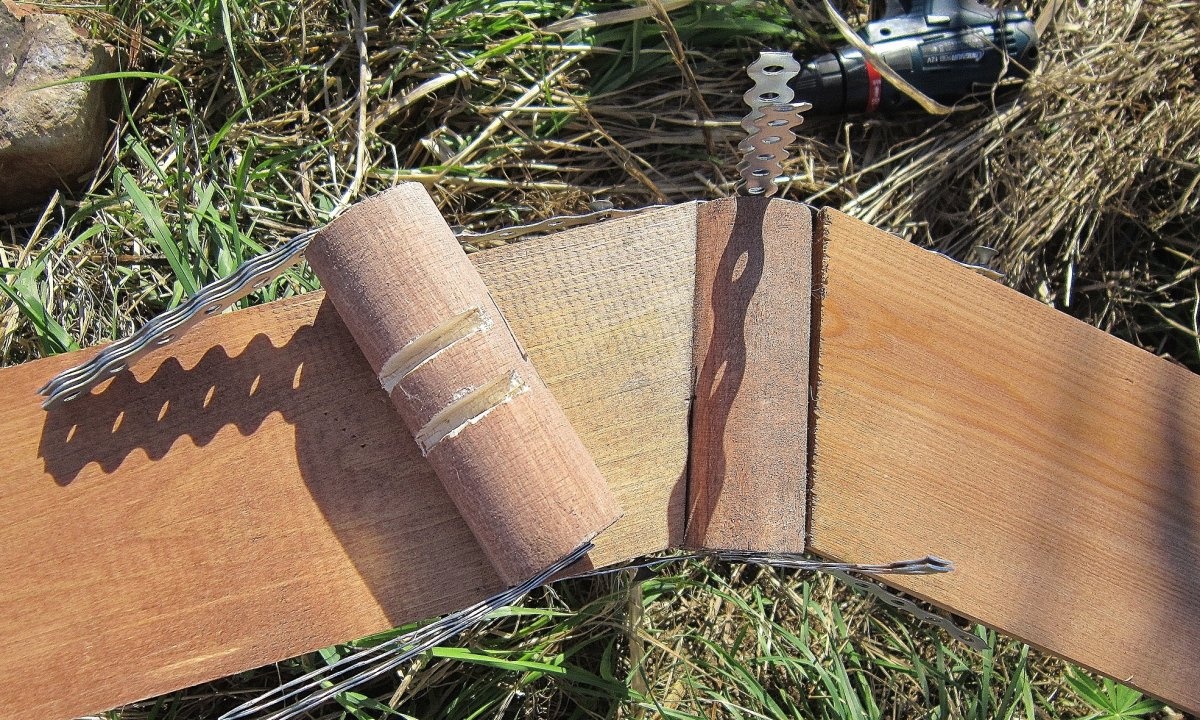
You cannot collect the next row without completing the previous one. Do not tighten the screws to the end. Since alignment of the ribs due to their natural irregularities requires play in the connector. Each petal is screwed onto two self-tapping screws. Near and far from the center of the connector. Two points where the distant is fixed at an angle give rigidity.
Mounting the frame is a very exciting activity. But the beginner is faced with the difficulty of connecting the extreme points of the ribs at any level. Therefore, I can advise this: do not overdo it with the twisting of screws. They will probably have to be weakened, more than once. And the tree does not like it. To assemble the vertex, you will have to use additional forces to pull or push the connection points apart. Do not be alarmed if the ribs do not converge.
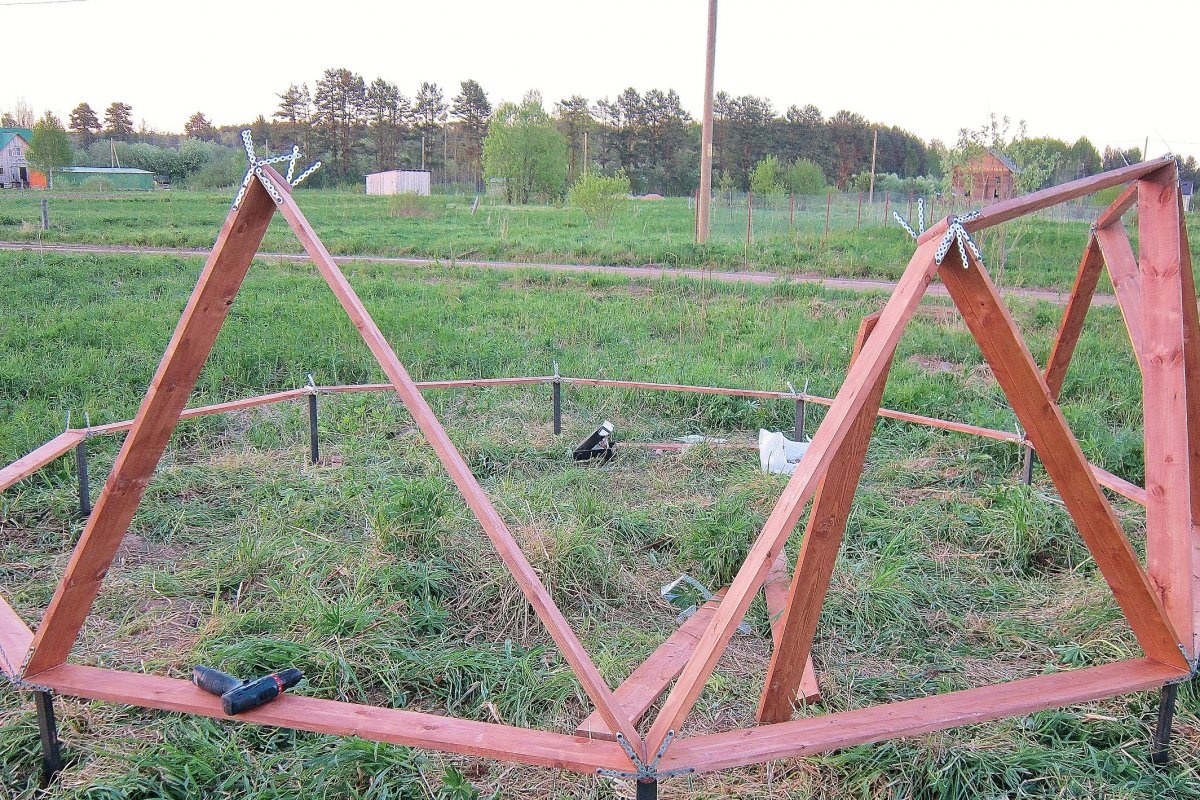
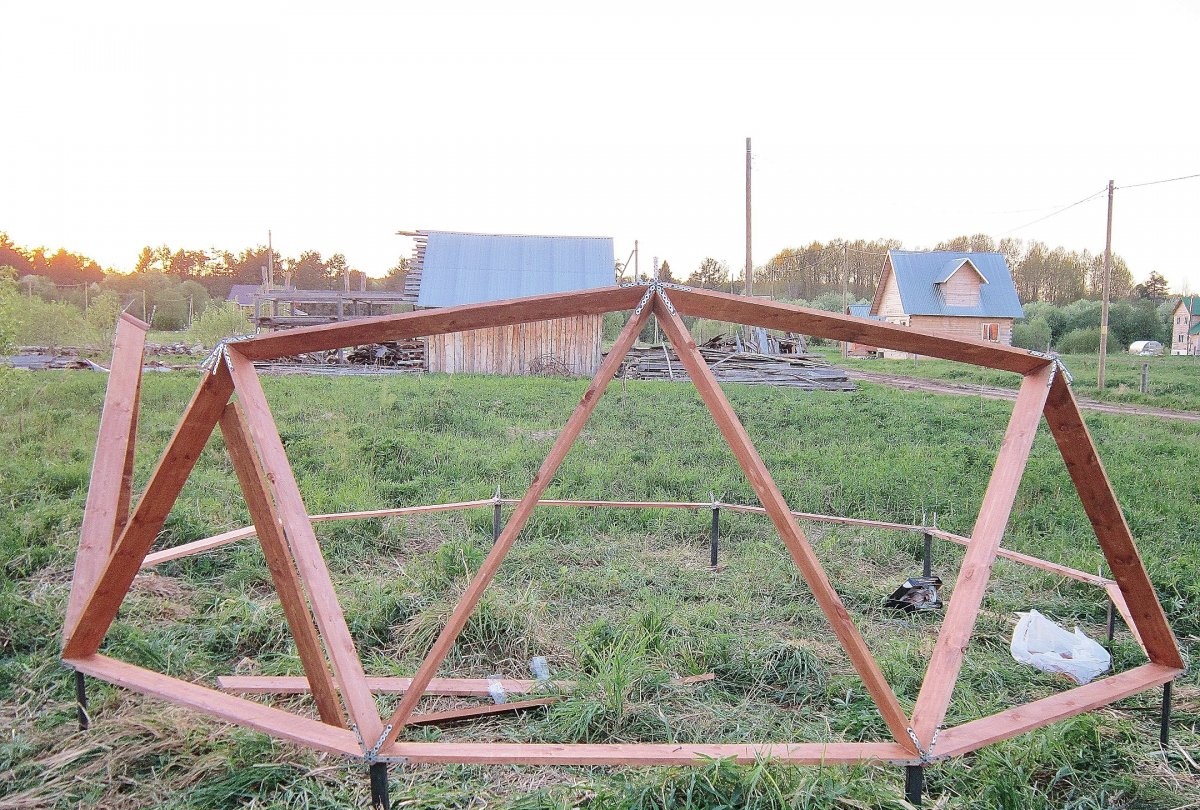
With proper cutting, the problem is solved simply. It is necessary to weaken the previous nodes of the hitch. The installation process of the wooden part of the dome is difficult to describe, since it is understandable only in direct contact with the object. Remember to observe the exact dimensions when sawing material. Otherwise, the dome will not assemble. The way to move around the frame under construction is individual. The choice is between forests and acrobatic stunts along triangular segments. The second option is available to builders with a small body weight.
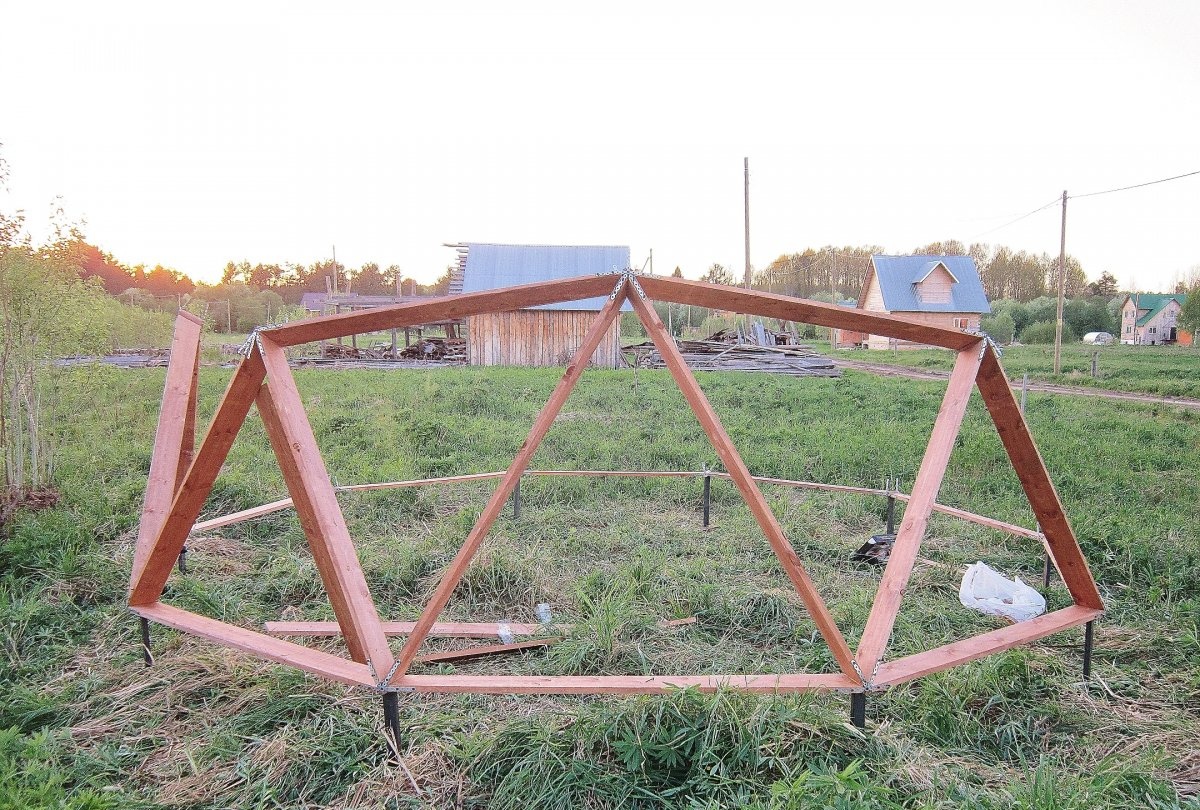
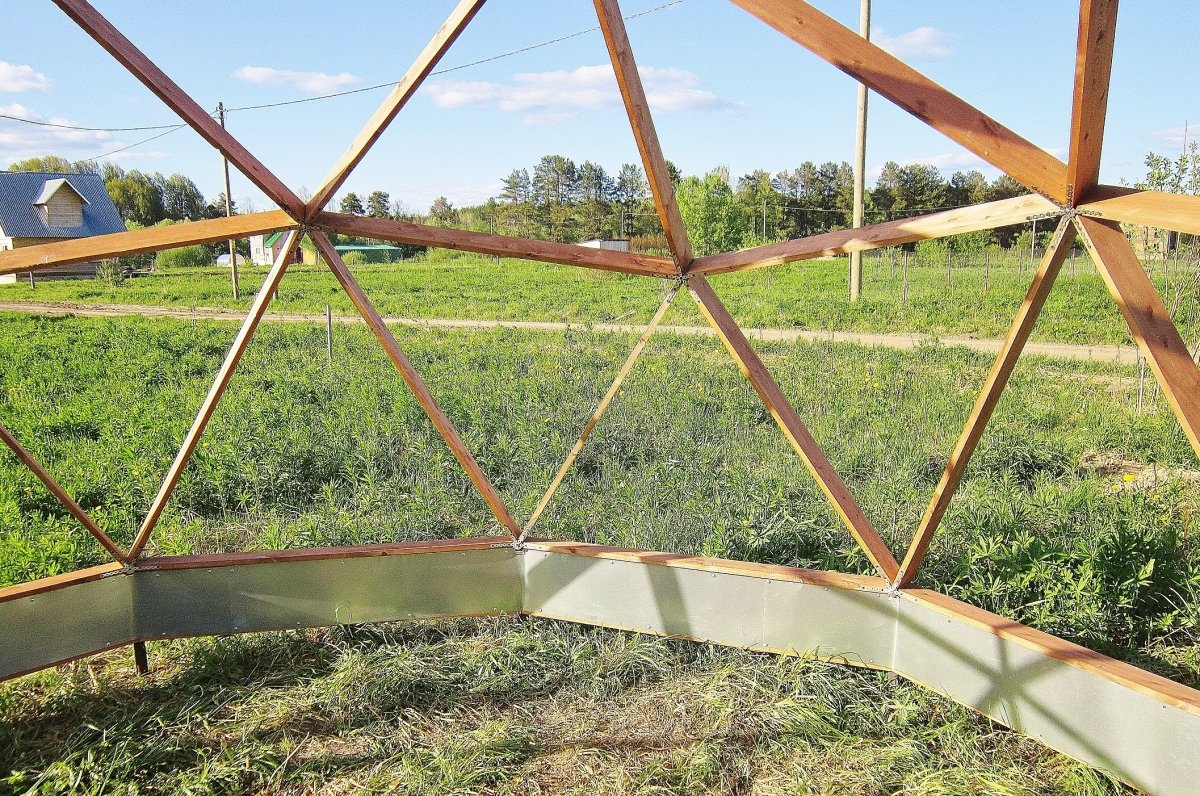
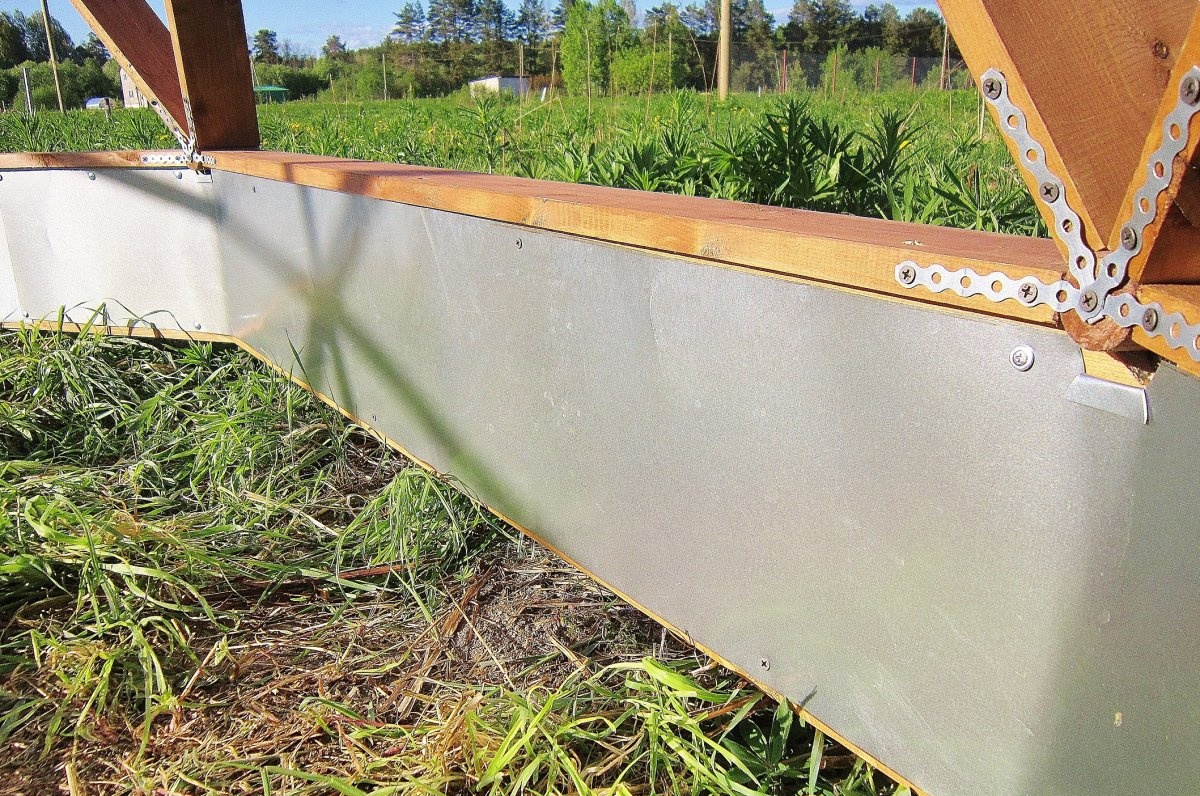
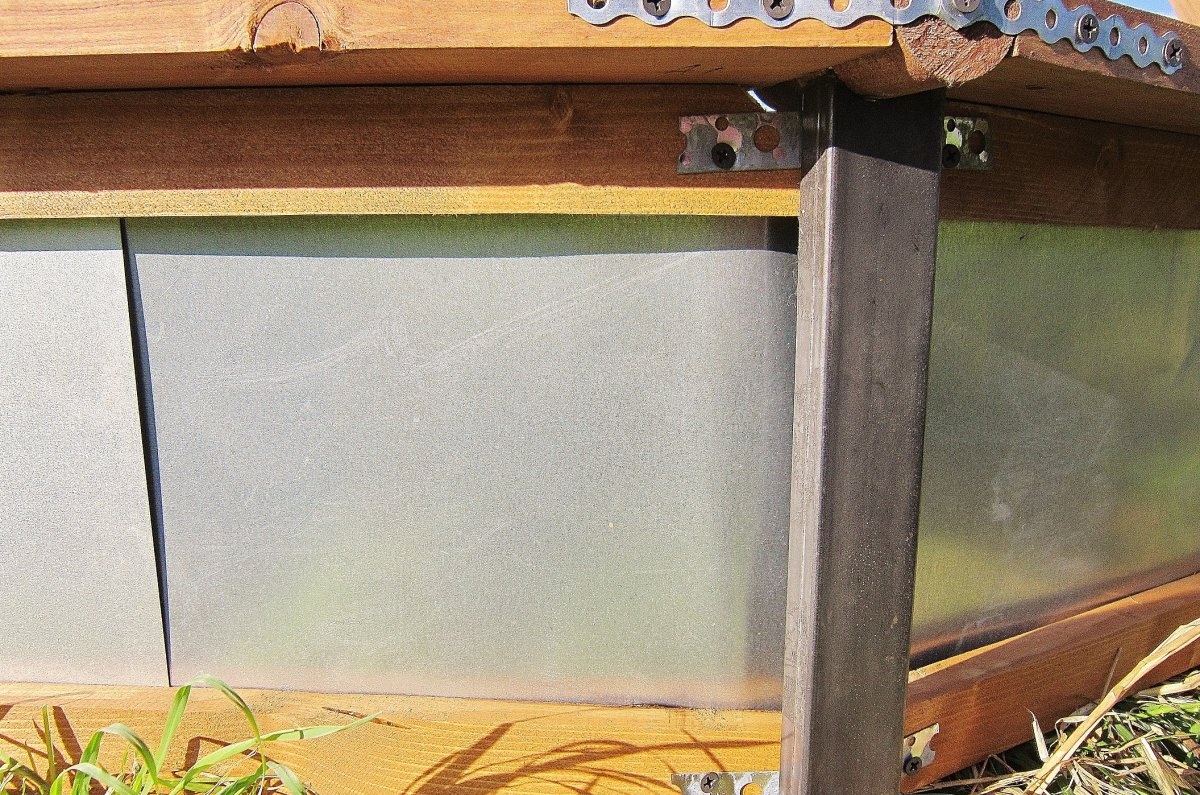
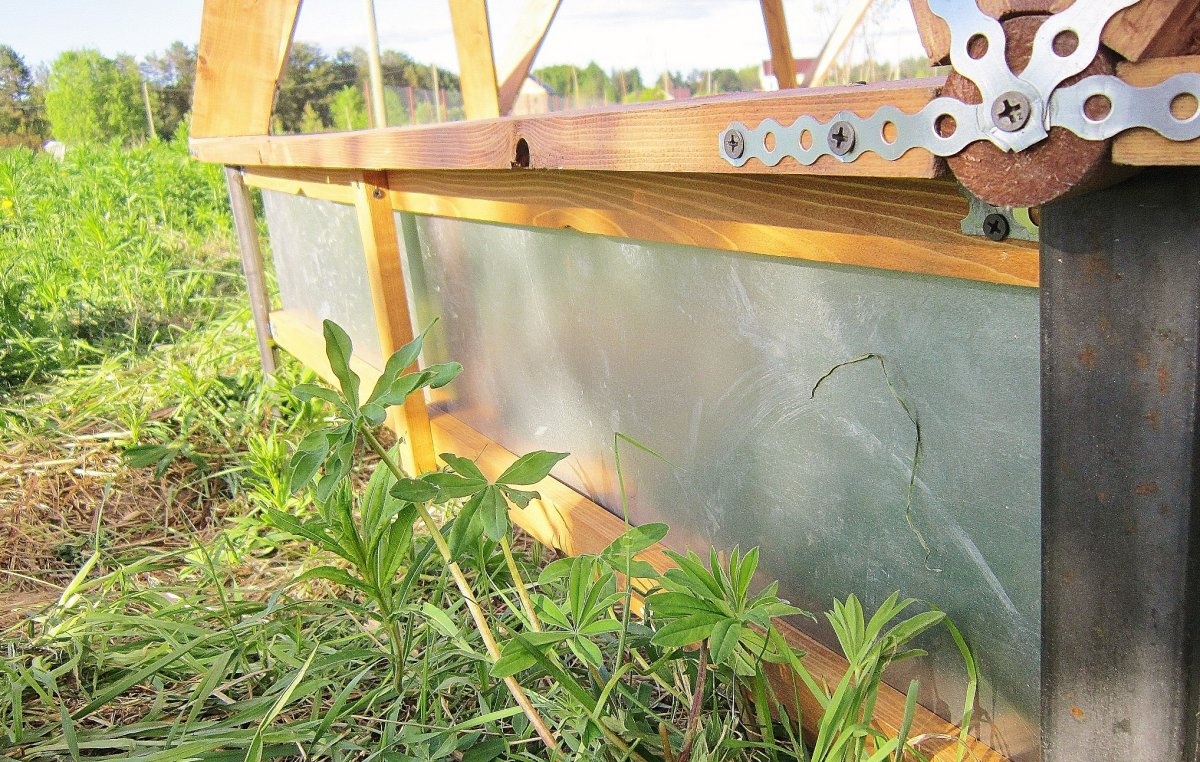
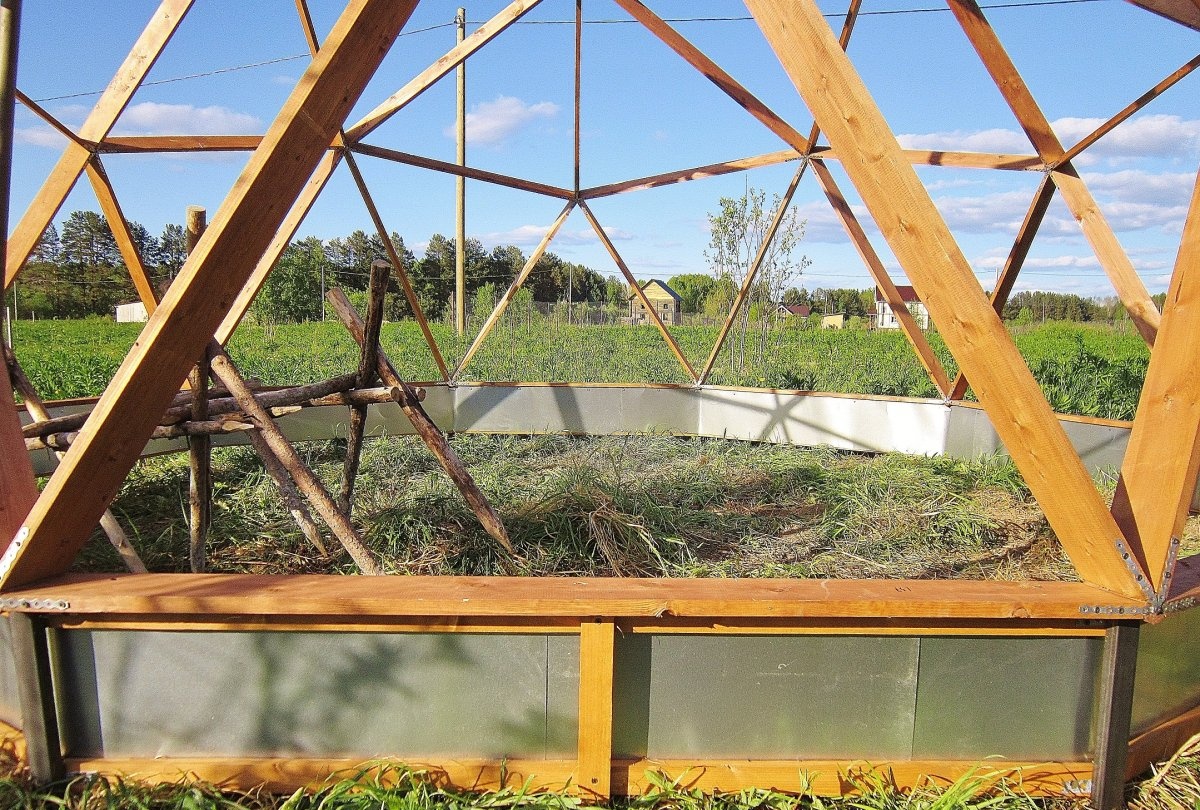
3. Sheathing the sides. The assembled frame is very cruel and strong. A further question arises: to glue the film or create a board by sheathing piles around the perimeter? The introduction of soil into the greenhouse is possible only in the second case. I sheathed the perimeter with strips of galvanized iron with a width of 20 cm and a length of 200. The only inconvenience was that I had to sit or kneel. Sheets were sewn in two fixing lines:
- To pile into pre-installed brackets.
- In the lower ring of ribs, which at that time was reinforced by an additional longitudinal rib.
For installation, I used a metal drill with a diameter of 3 mm and a screwdriver.In those places where the sheets did not converge in a single line, I cut them and mounted them from new points. Between the piles, I fastened wooden cross-beams to strengthen the lining strength.
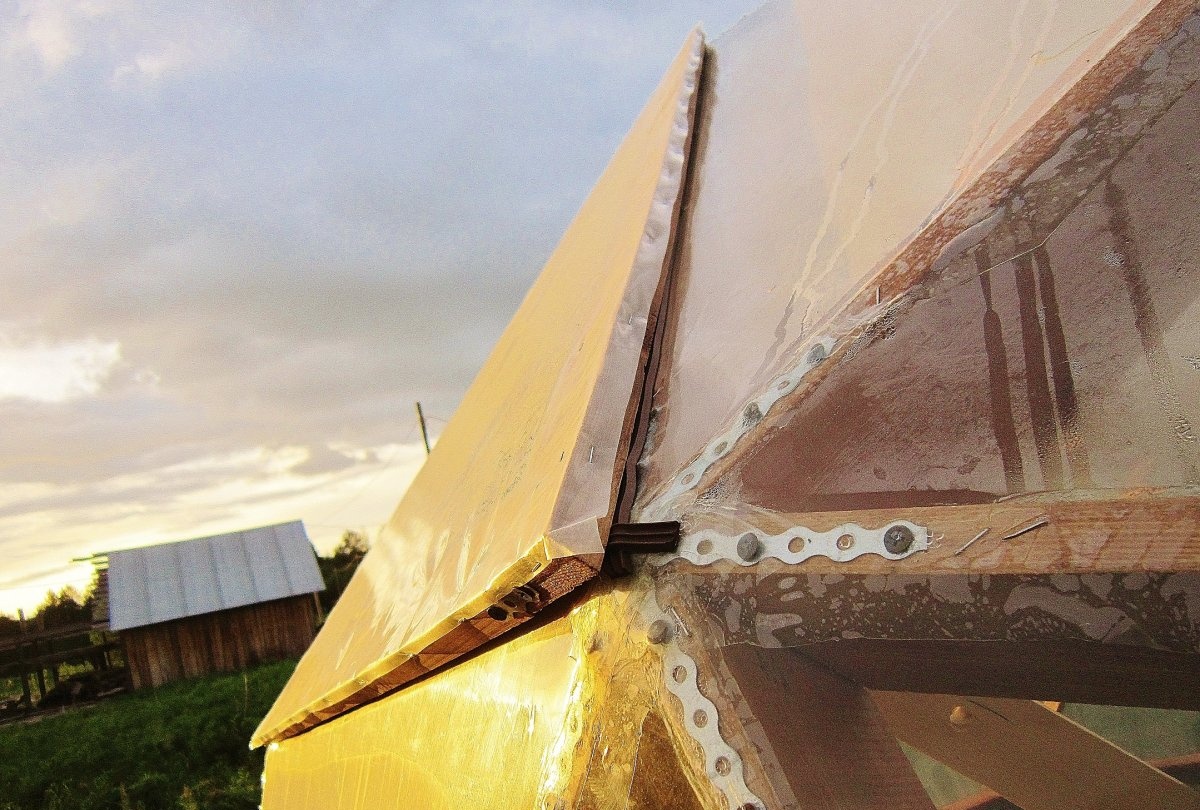
4. The film. Bonding a film is the most difficult process. And if you have never worked with a building hairdryer or suspended ceilings, then you should practice before you go. My mistake was the installation of the upper pentagon of half triangles. They stuck together at home in advance. The fact is that I saved on the film, taking into account the residues from which I collected triangles. I do not advise you to do this. A solid triangular sheet is less capricious in sizing. Well and so on. Order film only for whole segments. Yes, there will be scraps, but they are not worth it. With each new sizing, I mastered a difficult art. Indeed, with maximum heating, the film shrinks or burns out. If not, it does not stick. Experience comes quickly. Especially if you are limited in expensive material. The bottom row of triangles turned out to be glorious. In segments for window leaves, consider the maximum overlap. The main thing - try to be less nervous when gluing. This is a really complicated process.
5. Installation of window leaves and doors. The opening segments are the same triangles, but without connectors. The ribs in them are located in the same plane and are fastened with punched tape. Three small awnings were left for each door. To attach the vents on the second tier, I used the stairs. He did this carefully so as not to tear the film. Around the perimeter of the windows and doors glued a strip of rubber insulation to protect against heat loss and rainwater. There were no problems at this stage of construction. However, fixing the elements in the open state needed to ventilate the greenhouse made me think. Your option is your fantasy. Just remember, with an open window there is windage. First of all, the window itself. The latch for ventilation should be very strong both on the windows and on the door.

Mistakes I made
Even without much experience in construction, the greenhouse was easy to assemble. But mistakes were inevitable. The insidious thing is that they showed themselves after assembly. I will list them:
- Disregard for setting the exact level of piles. Unlike other designs, the dome of errors does not like.
- Excessive tightening of screws during assembly of the frame, which led to cracking of wood or the inconvenience of connecting the locking points.
- Bonding of triangular segments from shreds. I wouldn’t do it now.
I forgot to say that the soil for planting is introduced before gluing the film. It is easier to distribute around the perimeter. Take care of the fasteners inside the greenhouse. They are required for gartering plants or hanging watering cans, bottles, garden clothes. In fact, this version of the greenhouse is far from perfect. After all, the dome can be equipped with a storm drain around the perimeter, since the design collects the maximum amount of water during rain. The drip irrigation system does not hurt. But this topic intersects with the operation of the building. And there are indicators of temperature, humidity, illumination and the characteristics of the cultivation of certain plants. You understand that this is a different story.
Benefits of a Dome Greenhouse
Their description is easier through comparison with the arched greenhouse made of polycarbonate and a metal profile common today. Yield in the dome with your own hands is 4 times higher than under the polycarbonate arch. This is due to several factors:
- You can start planting a month earlier.
- The harvest season will end a month later.
- If in an ordinary greenhouse the last tomatoes remain green and freeze, then everything in the dome ripens.
- If the number of tomatoes from the same number of bushes in an ordinary and domed greenhouse does not differ, then the size of the fruits in the second is much larger.
- The correct design of the dome collects light over the entire area, as well as over the entire length of the movement of the sun. That is, for the whole sunny day. When, as a polycarbonate construct, it takes light only at an angle of 90 degrees.
- In the arched structure, the total heat due to the shape is at the level of 1–1.2 meters, and with a square base even higher. Due to the reduced volume of air in the dome, the heat is at a level of 0.8 meters or less.
- The dome warms up faster and gives off heat longer. Since the area of dispersion and heat loss is lower than that of the arched structure. At a temperature in the arched greenhouse in the morning the temperature is +5 degrees Celsius, then in the dome from the night remains +20.
- On the economic side, the benefits are obvious. Polycarbonate material is taken as an example. It is also used in the construction of the dome. Although the film remains a more practical material. So, on a domed greenhouse with a diameter of 6 meters and an area of 27 squares, 4 sheets of polycarbonate would have gone. And on an arched area of 18 squares - also 4 sheets of plastic coating. Dome construction comes out 30% cheaper in materials.
- By the way, the material for the manufacture is widespread in construction stores.
- DIY assembly is quite simple. The construction is available to everyone. Even alone. Only the ability to work with a screwdriver is required. The film version involves the operation of a building hair dryer. Oddly enough, but the preliminary calculation takes more mental effort. However, today there are interactive dome calculators.
- Erection time. Assembly and preparation of elements takes 5 days. Production - 2 days. In total, a week is obtained. That is, for a week of creative fruitful work, you get a greenhouse with a round base with a diameter of, say, 8 meters and an area of 50 squares.
Simply put, small mass and large internal space, repeating the movement of the sun.
Conclusion
When assembling the dome greenhouse with your own hands, do not rush and rush into the cutting of the material. Preparatory work should take more time. A calculation is best done several times in a row during the week. In any case, not a single mistake in the calculations or construction will discourage you from erecting a dome structure.