Apparently, it’s time to talk about the aspects of creating a reinforced concrete fence post. Because I've been wanting to do this for a long time. And for beginners in the business of concreting something, it would be useful to learn the true technology for creating cement mortar. Why am I telling the truth? The fact is that, having shoveled (no, not sand and cement) a lot of information sources on the topic of cementing, I was faced with an incredible range of opinions, variability of actions, and a range of proportions. It seems to be true. Depending on the brand of cement and the required brand of concrete, the required proportions and consistency are selected. But the authors of many articles did not pay attention to the details. After all, such work is considered dusty, dirty, and even inconvenient. I want to deal with them as quickly as possible. What can we say about pouring concrete pillars with your own hands? But in everything there is a measure, or rather, a golden mean. And in this article I will tell you how to create a reinforced concrete pillar structure with your own hands using the right cement-sand mortar.After much thought, I decided that I would also share calculations regarding the cost of the material. Therefore, those who want to save on the manufacture of concrete posts when erecting a fence will be sure to read the article to the end. And perhaps they will re-read it again.
Pillar Pouring Tools
- Yardstick.
- Gloves.
- Powerful cutters.
- Pliers.
- Wrench and screwdriver.
- Hand saw or electric jigsaw.
- A sledgehammer and anvil for straightening an armored belt.
- Master OK.
- Bucket 15 liters.
- Measuring containers.
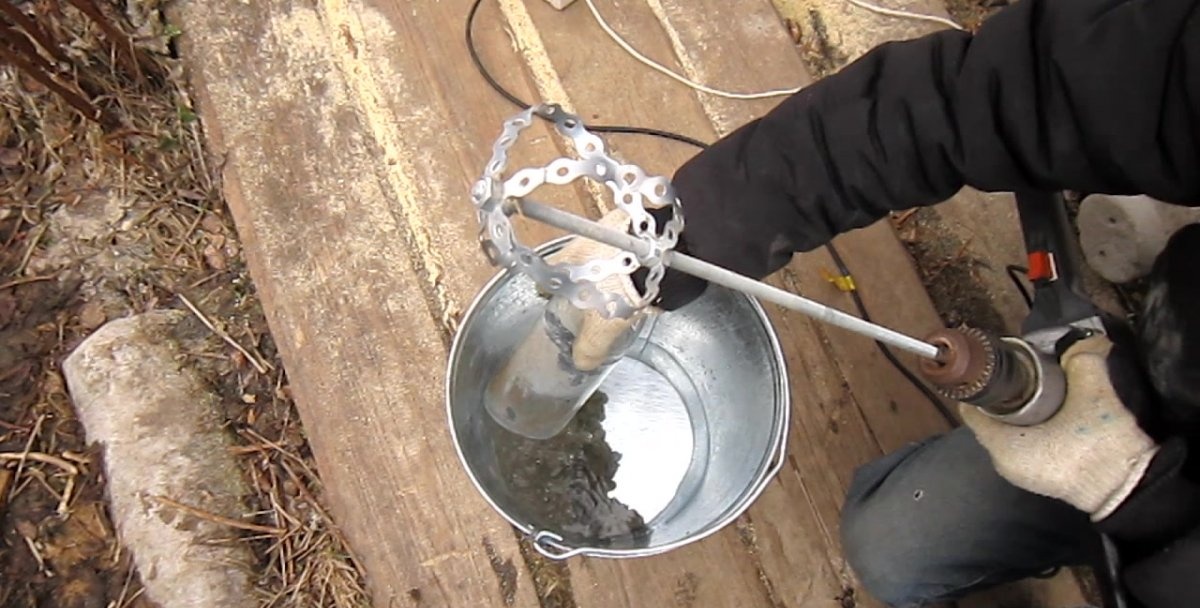
- To mix, you will need an electric drill with a mixer attachment. It will make the process easier. After all, twenty-five pillars is no joke.
Preparatory work
For a successful start, I divide the work into preparing the material and manipulating the cement mortar. The procedure is as follows:
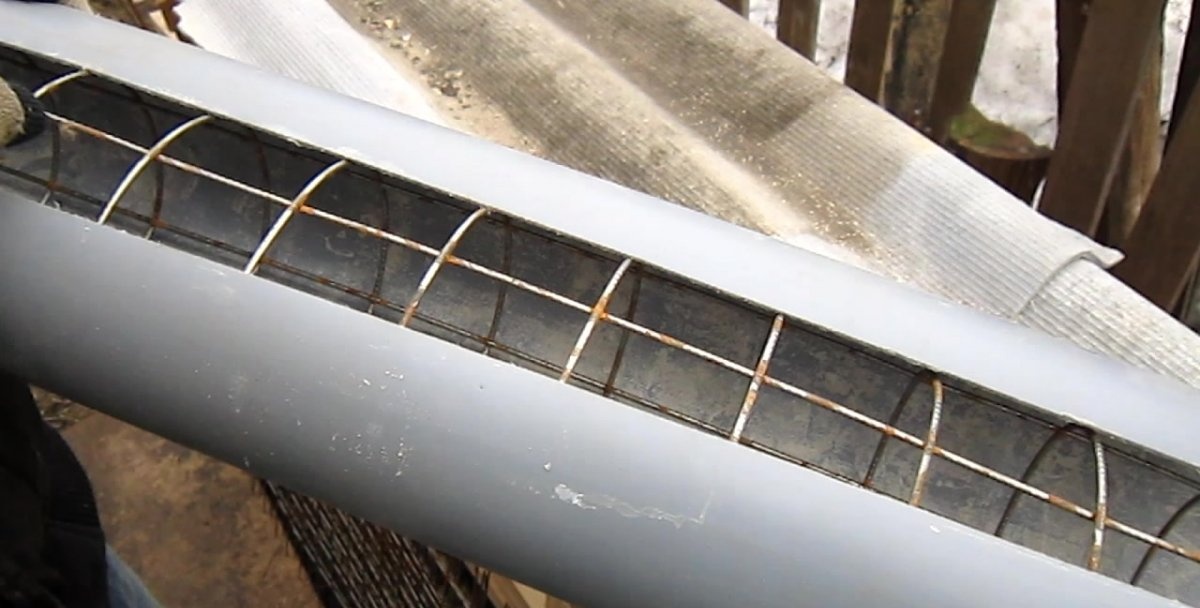
- Let's start with the pipe. Mark two parallel longitudinal lines on opposite sides of the pipe. These are the cutting lines.
- For sawing, use a hand saw or an electric jigsaw.
- Align the two halves by placing one inside the other.
- Drill a hole for the stud exactly in the middle of the pipe.
- Set aside the pipe parts and move on to the reinforcement element.
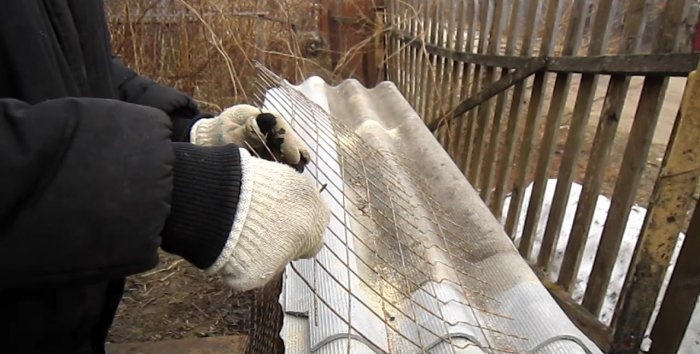
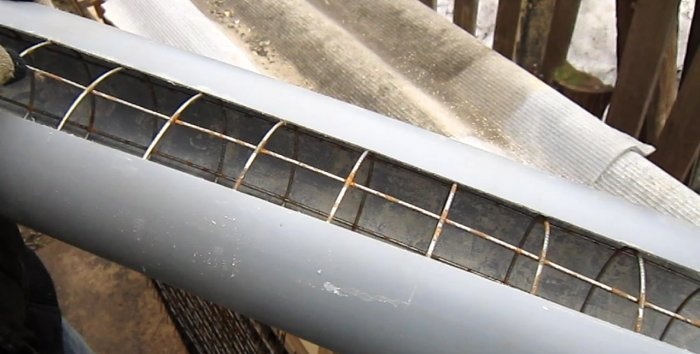
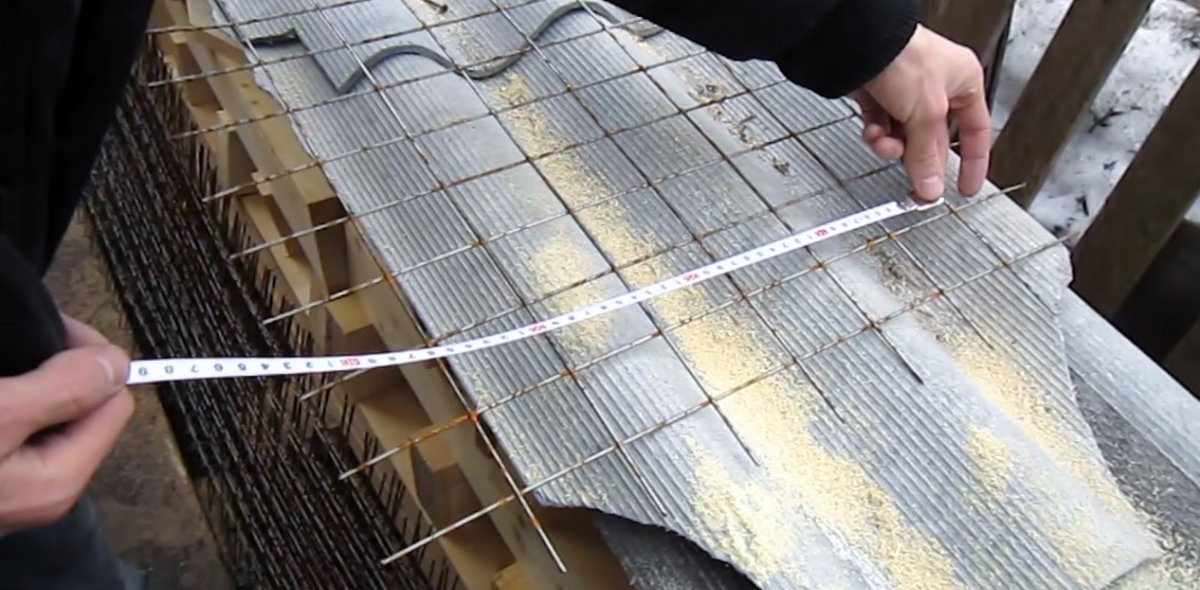
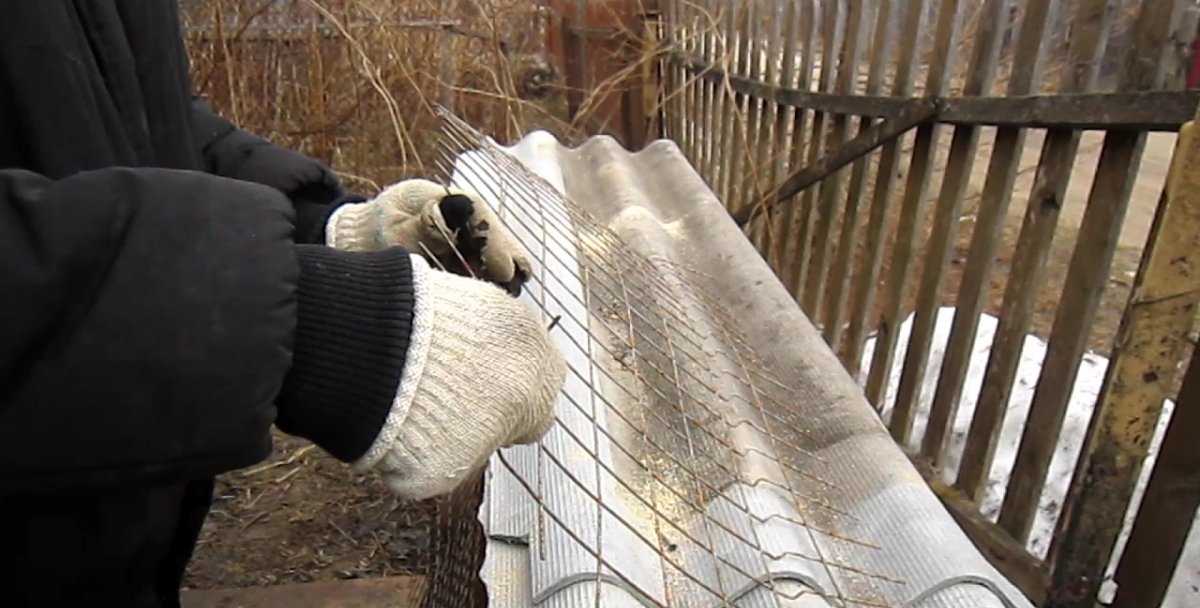
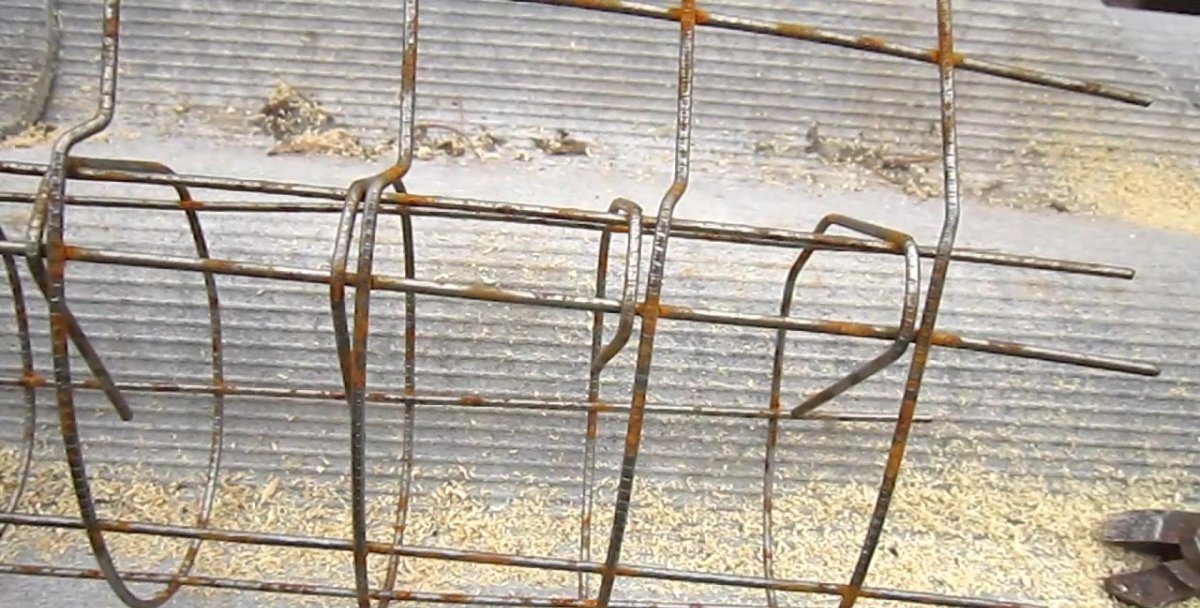
- Measure the length and width of the mesh for reinforcement. The length is exactly half of a purchased sheet of 1x2 meters. But the width is equal to the perimeter of the pipe, that is, 34 cm. Use wire cutters here.
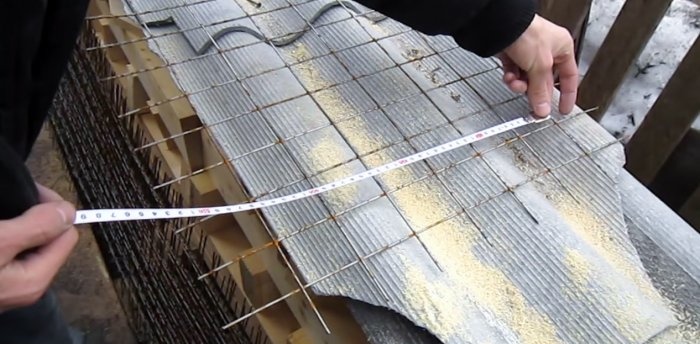

- Roll the workpiece into a cylinder. There are two ways to unfold: outward with crossbars or inward. Of course, you need to twist it outward with transverse rods. In the opposite case, the pipe halves will encounter an obstacle when closing the box in the form of longitudinal rods. Bending and twisting the mesh is not an easy task.Use gloves, natural stops and pliers. Be careful and careful. The mesh bends gradually. Maintaining the exact size of 34 cm will save you from unnecessary steps in the future.
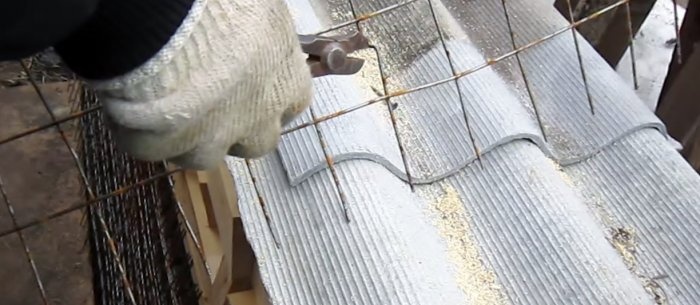
- After twisting, thoroughly beat off the unevenness with a sledgehammer.


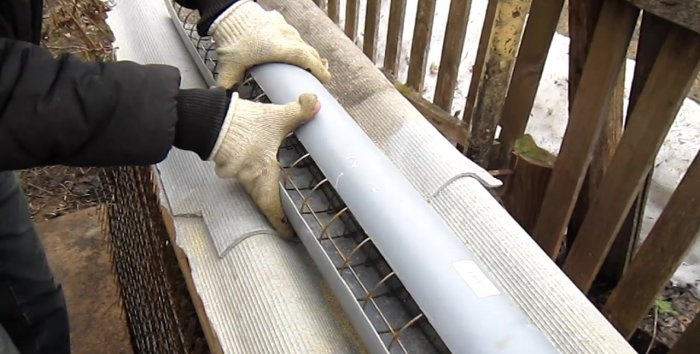
- Try on the armored belt in two halves of the pipe.
- Correct inaccuracies in closing with a sledgehammer by disassembling the structure.
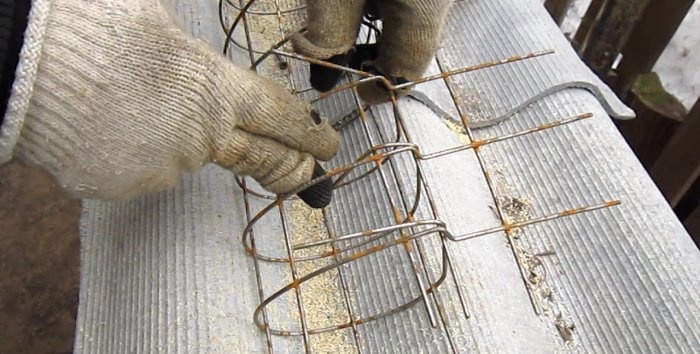
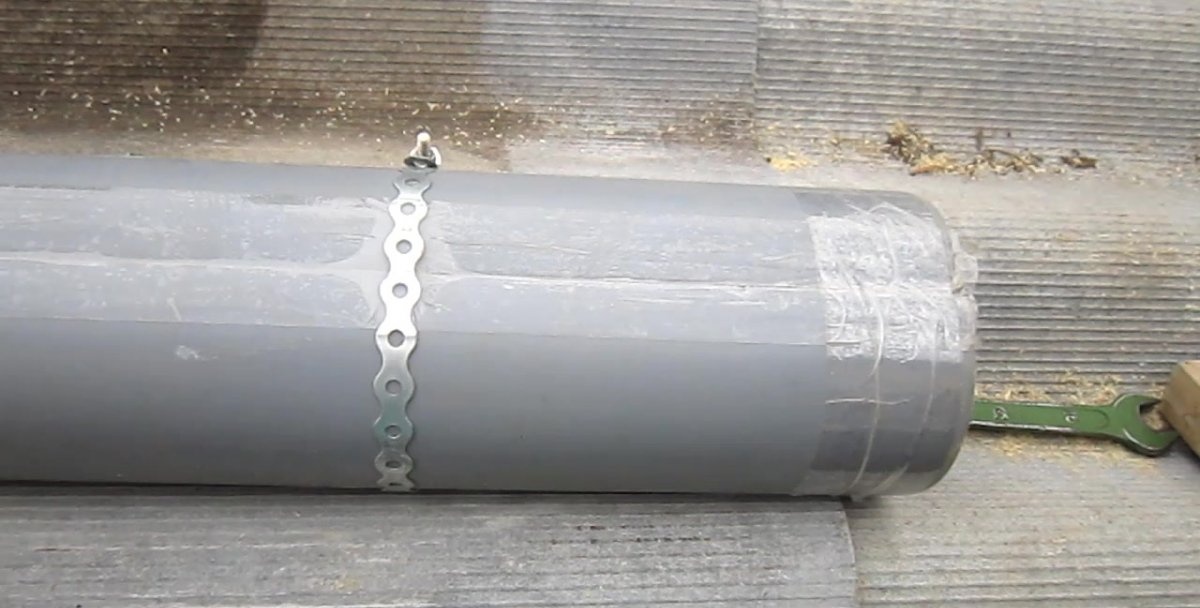
- Cut the punched paper tape into three equal lengths.
- Make clamps out of them.
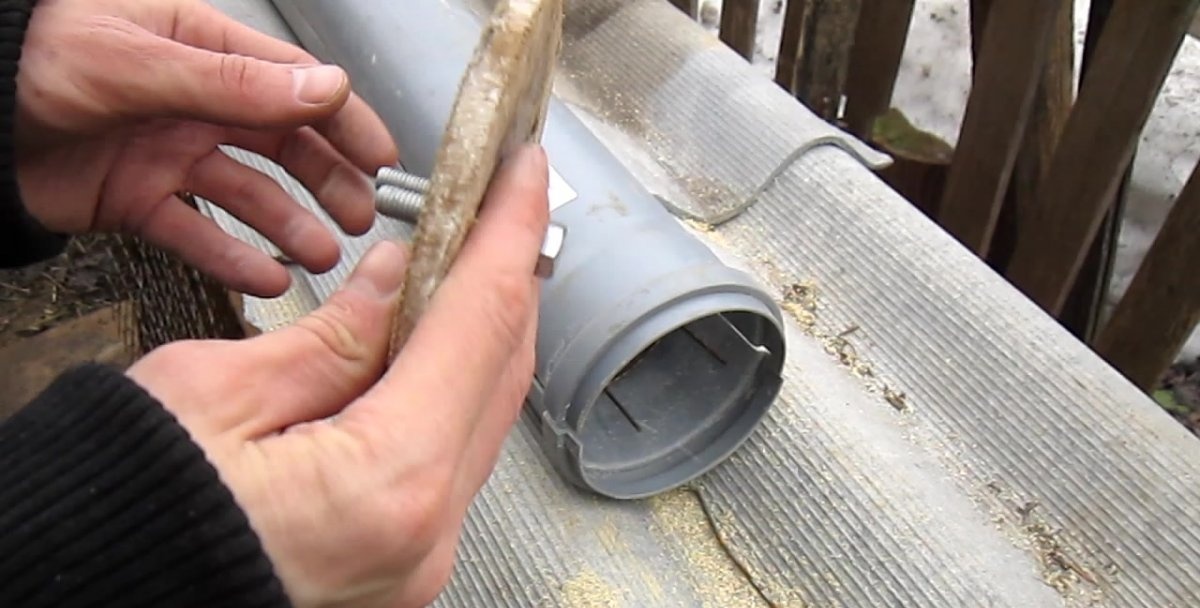
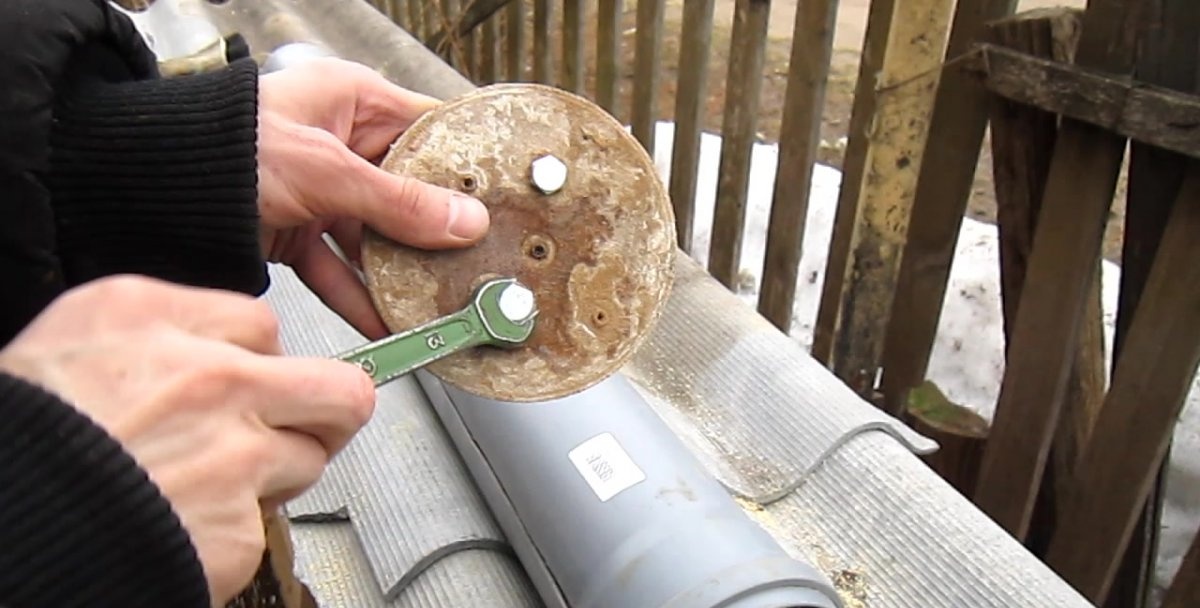
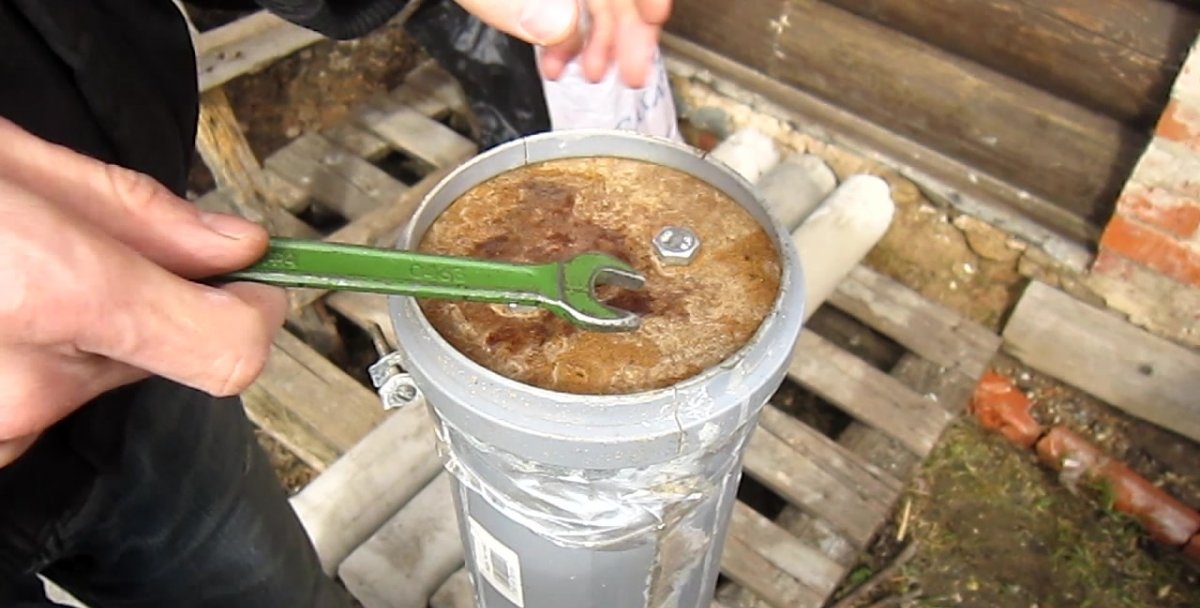
- An additional element that is required is a plywood disk with two short bolts. It is needed as a bottom. And the bolts are necessary to form holes for future fastening of the transverse bars of the fence. The diameter of the bottom must exactly match the diameter of the sealing ring of the sewer pipe. The sealing point, also known as the pipe joining point, is distinguished by a socket.


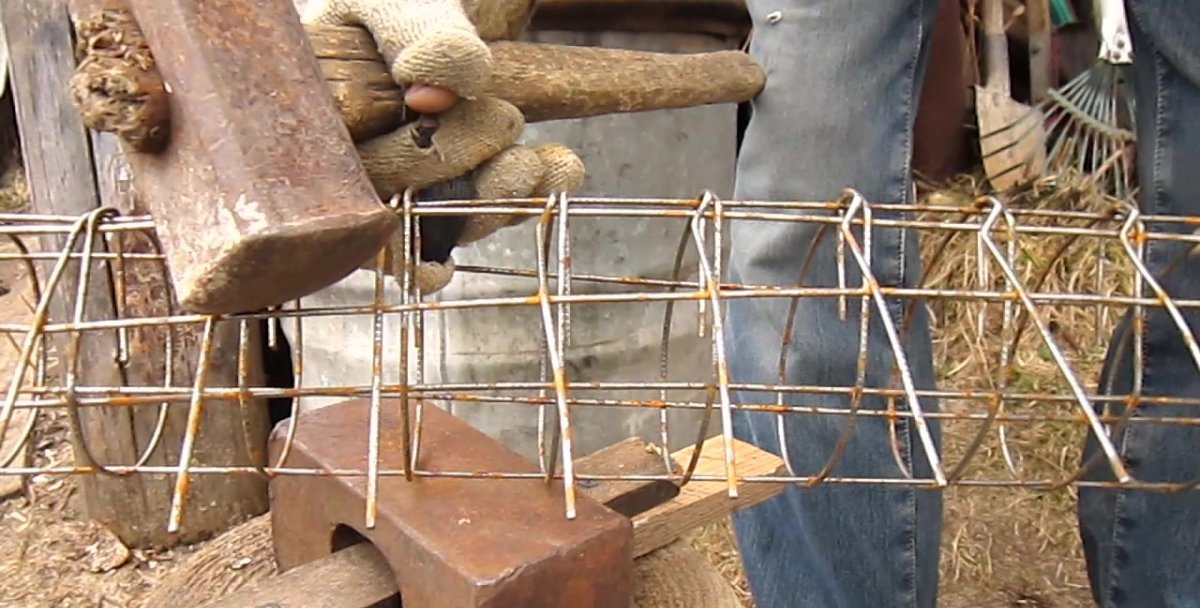


After the bottom is ready, proceed to assembling the structure:
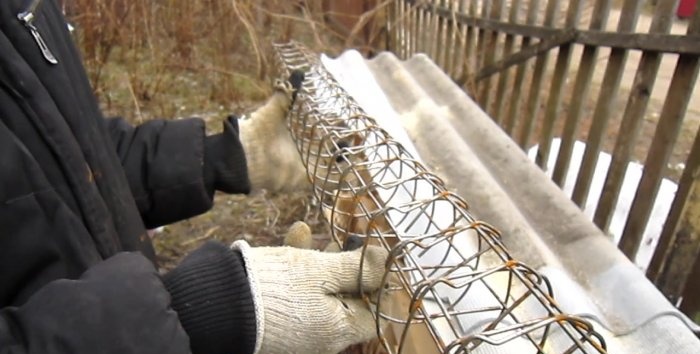
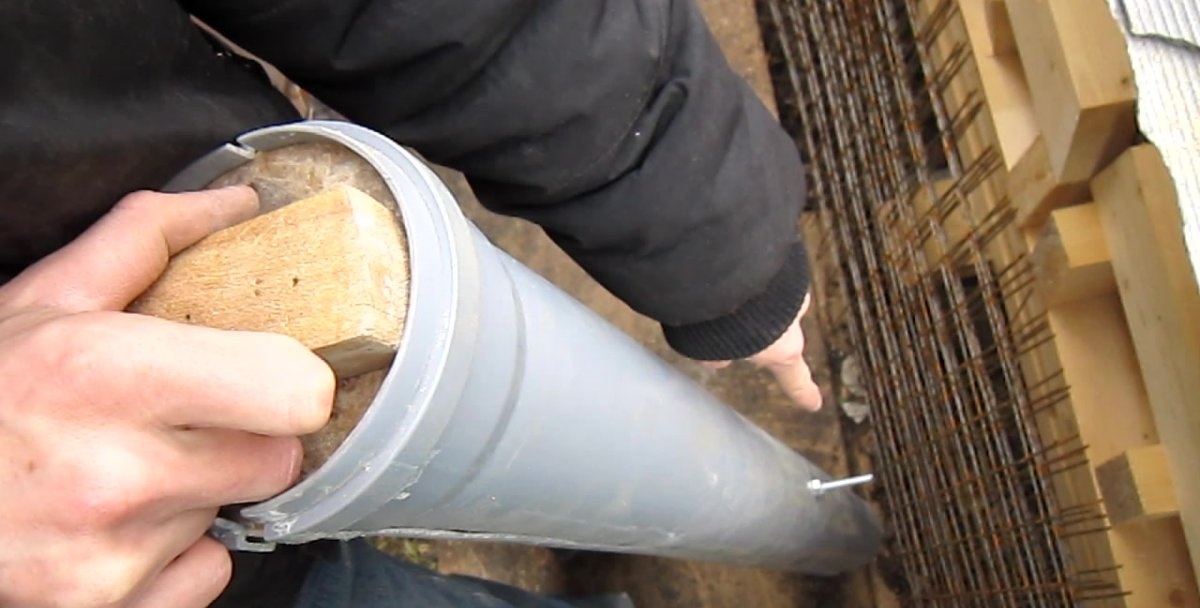
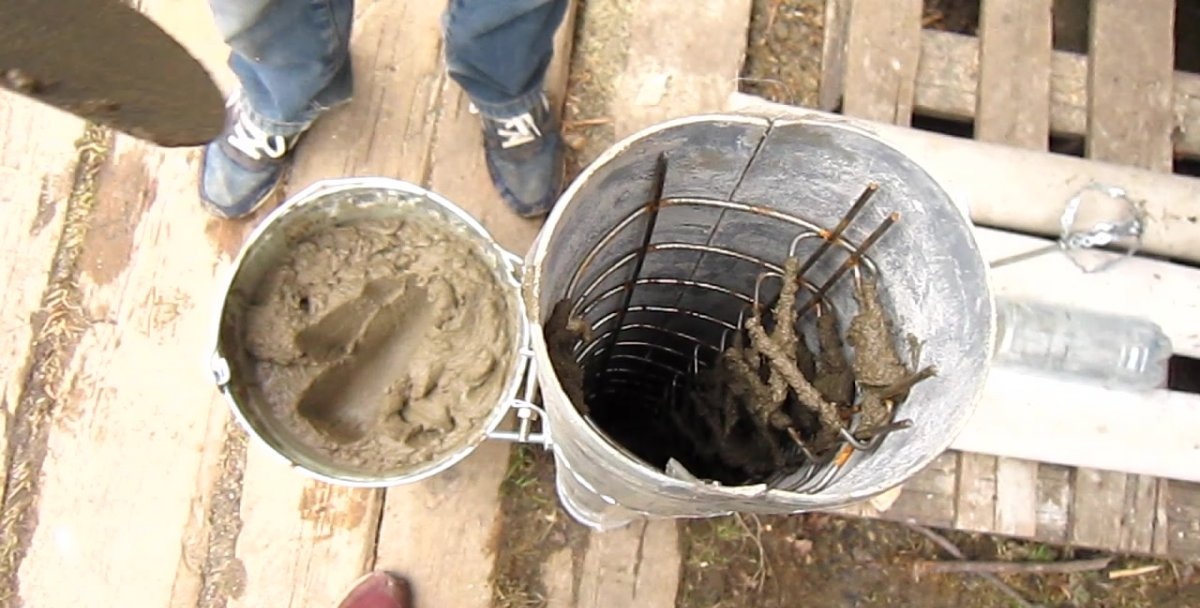
- Place the mesh in the pipe.
- Place a plywood disc instead of the seal.
- Secure the clamps at an even distance.
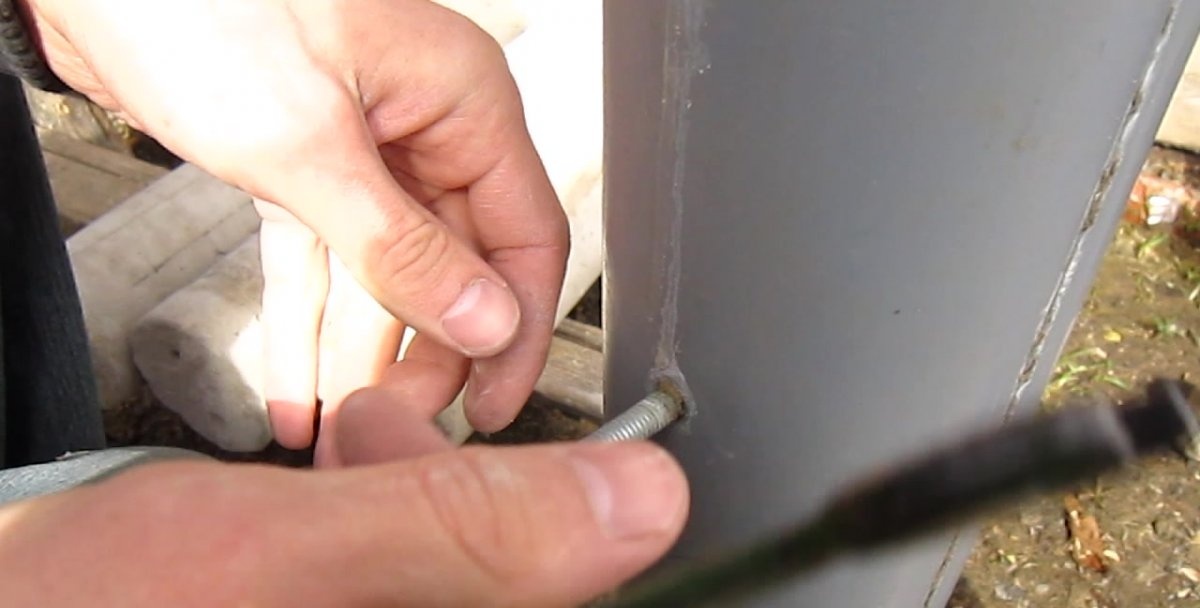
- Thread a pin through the holes.
- Center the line of bolts on the bottom and the protruding ends of the studs. These points are where the fence is attached.
- Tighten the bolted connections.
- Tape the two side lines with tape.
Filling a column with your own hands
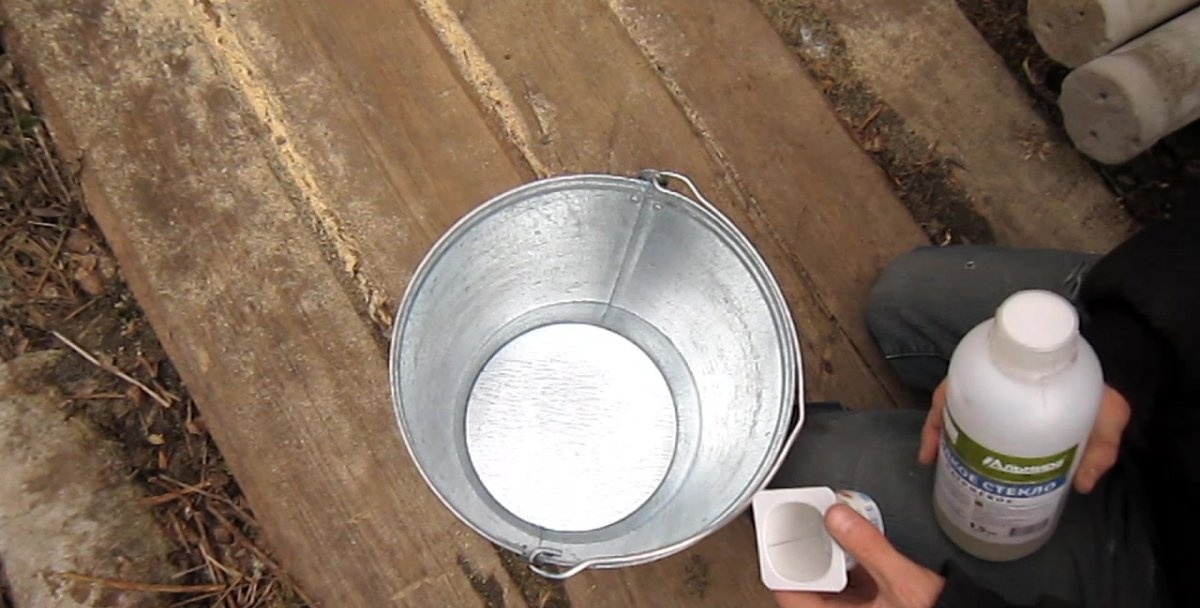
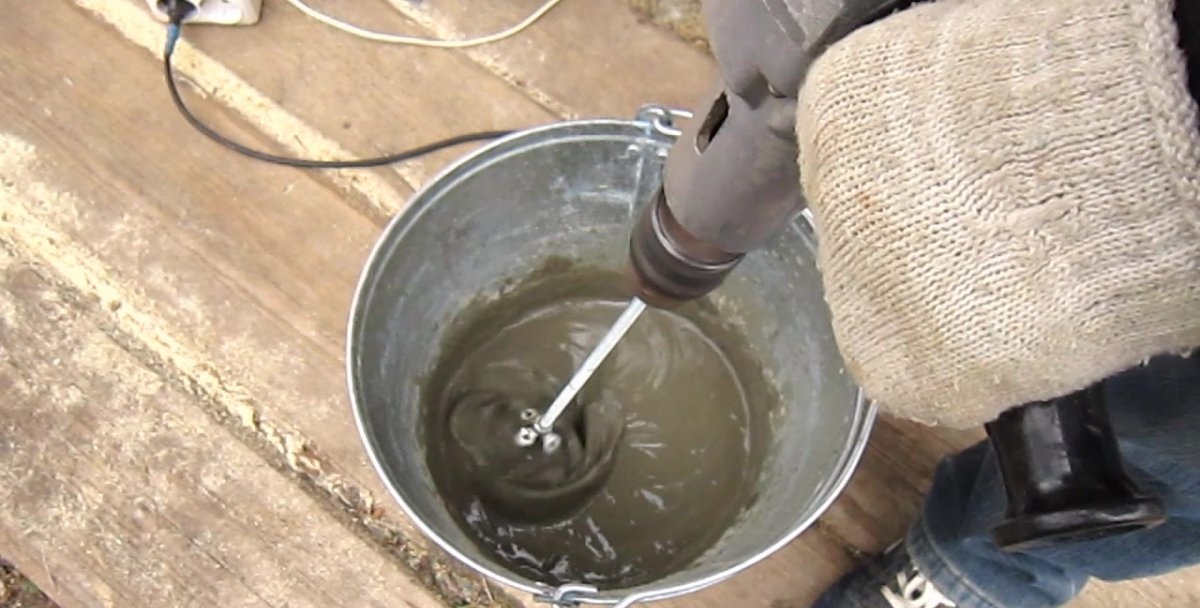
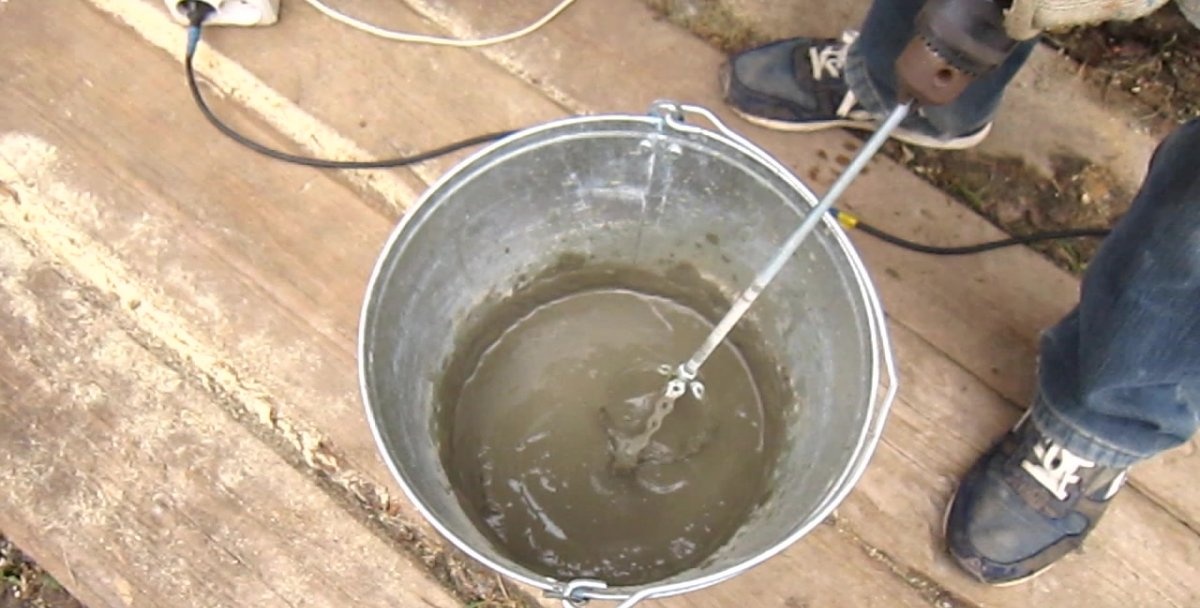
Cement manufacturers recommend mixing the solution at a temperature not lower than +20 degrees. I stuck to this meaning. In my opinion, it is optimal. I will not repeat the proportional composition described above, but I will draw your attention to the second important point - the mixing order. The fact is that liquid glass reacts with water. Can you tell me what kind of reaction? I answer: it dissolves in it.
- A portion of liquid glass is poured into water, preferably warm (+20 degrees).Then, stir.
- Next, the cement is measured and poured out. It should be stirred thoroughly. In two minutes it will swell.
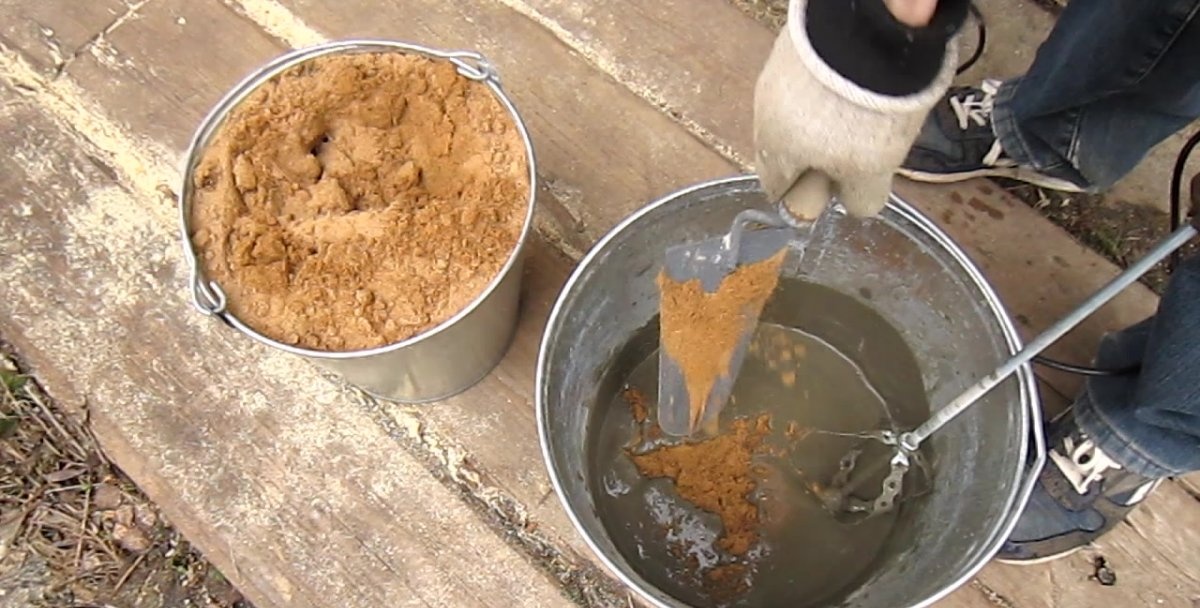
- Then sand is added in equal portions. I kneaded with a homemade mixer attached to a drill. The four-blade mixer is made from the same hairpin and punched paper tape. Plus four nuts.
- Be aware that by adding water while adding sand to facilitate mixing, you are breaking the integrity of the glass-cement bond. And this is a disadvantage in the future. However, a minimal amount of water at the end of mixing is sometimes necessary.
The solution is poured into the mold on level ground without the threat of falling. Compact with a long rod or pin. Although long, but light taps on the body are more effective. Airing occurs mainly in the upper part of the column, as the mass of pressing concrete becomes smaller. By the way, the column itself is filled upside down. After 24 hours the concrete will harden. This speed is facilitated by liquid glass. After another 6 hours, you can remove the plastic molds. But I don’t recommend overexposure. There is a possibility of sticking if overexposed. I want to say that I do not use central fittings. The cost turns out to be more expensive. But for a pole length of 2 meters it is necessary.

Conclusion
In conclusion, it is worth noting that many inexperienced householders and even workers neglect the calculations regarding pouring concrete. From my experience, I have shown that in this matter, saving money is not the last thing. In addition to the 13,080 rubles spent on the tree, pouring 25 pillars cost 2,975 rubles. A productivity of 1 column/day will provide you with daily two-hour work for about a month. Although installation and pouring can be done in 1.5 hours.And these are questions of experience, consisting of acquired skills and knowledge.
A little calculation and why is a concrete column needed?
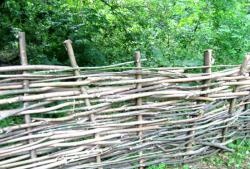
Imagine that you need a fence. Let it be a small ventilated fence made of slats or a little more massive - from a board with end dimensions of 100x20 mm. A completely normal fence. You are not one of those who hide your garden plot from your neighbors behind a profiled sheet of iron, are you? I agree that iron is durable. But nature must breathe. Your land is no exception. Let's say you counted the cubic capacity of the boards. The amount is not small. And the overwhelming number of private homeowners want to save money. I will describe the first calculation based on the meter height of the fence on a plot of 7 acres:
- The length of one side of the plot is approximately 25 meters.
- The board used at the end is 100x20 mm.
- The interval between boards in the fence is 100 mm.
- You will need 5 boards per meter of fence length.
- 25 meters of length will require 125 boards.
In total, at a price of 10 thousand rubles per cube of edged planed board, for one side of the fence, consisting of 125 boards (0.25 m3), you will have to pay 2,500 rubles. Why do we need to count boards if the subject of the question is a concrete pillar? But I have a counter question. Why do you need a concrete pillar? Is it really possible to play sports and lift weights? This is, of course, a joke. But I want to scare you a little with the initial prices in order to give you an idea of the number of pillars around the site. You can't do without saving here, so get ready for more complex mathematical formulas. The cost of the longitudinal bar acting as fence crossbars is added to the upper amount. And here is the moment. The optimal span between supports is three meters. Divide 25 by 3 to get the rounded value of 8.That is, 16 three-meter bars are required on one side of the site (this is the top and bottom). With an end size of 40x40 mm, the cost is 770 rubles. In total, bars and boards worth 13,080 rubles are needed for the entire perimeter. This is really a lot if you add about 20 m2 more area for painting with a protective composition. Due to your preferences regarding anti-corrosion coating, it is up to you to decide which composition to buy. Here it is worth thinking about saving on poles. And make the fence beautiful and natural. Returning to the columns, their number is easily calculated:
- 8 pieces are required per side.
- For the entire perimeter 24.
- Plus 1 for the wicket.
The support is buried at least half a meter into the ground. If the fence is one meter high, the height of the post will be 1.5 meters. But there is a trick: use meter-long pillars, deepening them also by half a meter and leaving the same height from the ground. The crossbars are attached to the top point of the post and in its middle, right at the surface of the ground. This design of a meter-high fence with half-meter supports meets the requirements for material resistance. That is, it is strong, reliable, and economical in terms of construction. And now I answer the question, why do you need a concrete pillar made by yourself:
- Creating a reliable support.
- Natural combination of materials.
- Good design. After all, the pole can easily be painted the same color as the tree.
- Savings with zero losses.
- Ease and simplicity of pouring meter columns, in contrast to samples of greater height. But more on that later.
In addition, you will practice one of the construction technologies.
Required materials and calculation of a concrete pillar
Having decided on the quantity, and we have 25 of them, let’s move on to calculating the manufacturing materials. We will need:
- - Sewage pipe.
- - Punched tape.
- - Hardware group.
- - Welded steel mesh.
- - Cement.
- - Sand.
- - Water.
- - Additive.
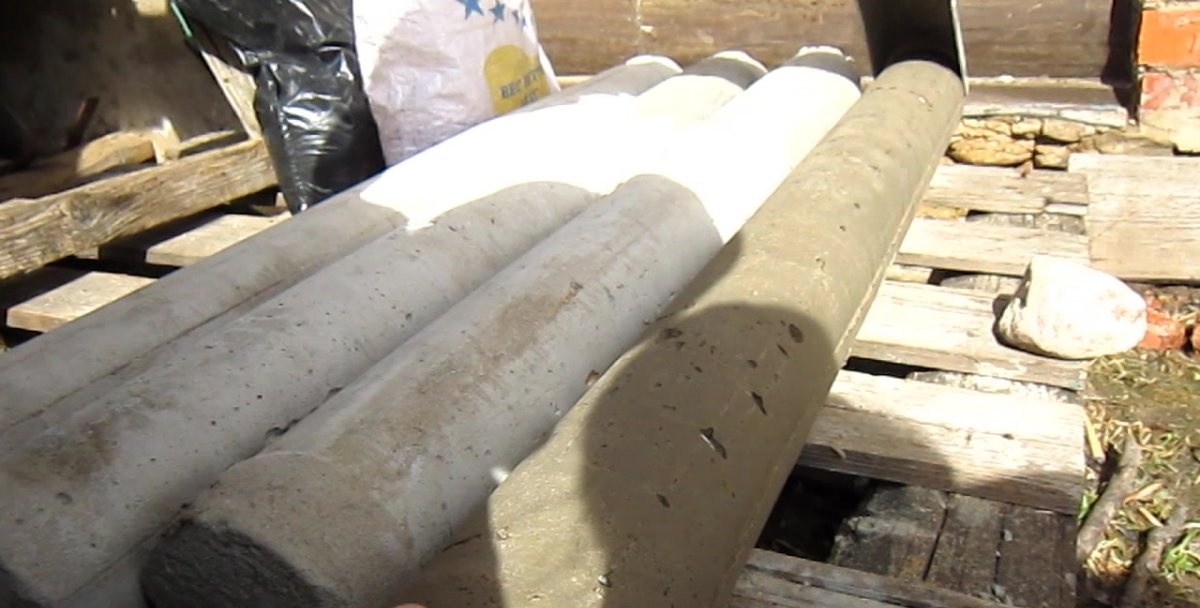
As a form, I used a standard PVC pipe with a diameter of 110 mm. The mistake was that I bought a pipe for internal sewerage. After a longitudinal cut, after a while, it literally shrank. It's as if it's dried up. Therefore, you need to take not a gray, but a brown pipe for external sewage, marked polyvinyl chloride with nylon or polypropylene. These are two materials of manufacture. The first one is more rigid, the second one is flexible. Although the wall thickness of both is 3.2 mm. And the plastic holds its shape well after repeated pouring. I personally prefer nylon polyvinyl chloride as it is rigid. The cost of a meter tube is 180 rubles. We will need one piece as a form.
Let's do the calculation right away:
- With a diameter of 11 cm, the perimeter is 34.5 cm. We take 34 cm, since 0.5 cm will go to two lines of longitudinal cutting of the pipe.
- The volume is 9.47 liters. Let's round up to 9.5 liters. This is exactly how much solution needs to be prepared for one column.
To tie two half-shells together, three pieces of punched paper are required. The length will be 34 cm plus reserve for the hardware grip. You will get an ordinary clamp. I recommend buying 1.5 meters of tape, taking into account the folds. After all, places for screeding require reinforcement. A meter of tape costs up to 25 rubles.
To tie the tape, three bolts and three nuts are required. There is no point in buying them. It's better to look in unnecessary equipment. But you need to buy an 8 mm stud and similar bolts. Since the pin will play the role of supporting the lower crossbar of the fence. It will hold a 40x40 mm block.
The calculation is as follows:
- On the sides of the post at the lower point of attachment of the fence, 4 or 5 cm is enough for the protrusion of the pin.
- Since the diameter of the post is 11 cm, then after thinking, we will divide the meter pin into 5 equal parts of 20 cm.
- For 25 poles, 5 pins 5 meters long are required for 15 rubles each. Total – 75 rubles.
Twice as many bolts are required as posts. Namely 50 pieces. The price for everything is 250 rubles. We use the simplest mesh with a cell of 40x40 mm and a wire thickness of 3 mm. The cost of a 1x2 m sheet, which is enough for two pillars, is 95 rubles. We need 13 sheets of mesh. Total 1,235 rubles.
Calculation of concrete for a pillar
I do not include sand and water in the cost calculation, since this is a common building material. But together with cement and a moisture-repellent additive, an accurate calculation of the volume is required. After all, you want to save money. Therefore, buy the optimal number of bags of cement and volume of liquid glass, which I recommend as an additive. By the way, 1 liter of liquid glass contains 1.5 kg of weight. So, calculate the mixture. We need to fill a volume of 9.5 liters. But its mass is not 9.5 kg, but, naturally, more. This is explained by the characteristics of the materials:
- Concrete:
- The brand of concrete we need is B15 (M200). This grade of concrete is used for foundations and columns. Just what we need.
- Concrete liquid. In the characteristics it is indicated by the letter P and a number. The liquid mixture has great advantages of air removal. It's easier to fill. But then more cement is required and the frost resistance index becomes lower. Therefore, we take the consistency of P3, which is similar to a medium liquid porridge.
- Brand of cement. To keep things short, I use the M400. If you take the M300, then you need more of it. If M500, then, accordingly, less. In fact, a ratio of 1:4 is enough. But we don't stop there.
- Bulk density of cement. Just weigh out a liter of cement.Divide the resulting weight by the volume. Then multiply by a thousand. The average is 1,300 kg/m3.
- The cost of a bag of cement weighing 50 kg is 325 rubles.
The following features are available from the factory:
- Frost resistance. The optimal indicator is F150. That is, the column will withstand 150 freezing cycles. You will say that this is not enough. Wait. If drainage is done correctly, the pole will not get wet and absorb water. Accordingly, the destruction will last for a long time.
- Waterproof. Here the figure is above the W8 average. But who knows what happens to the primer in the spring?
- Surface smoothness. To make it smoother, add more sand. This also applies to dense reinforcement. This solution penetrates more easily between the reinforcement.
- Margin of safety. It's a very complicated thing. In short, with accurate calculations, a small margin of safety is taken. And it starts at 7%. If proportions are measured by eye, you should take the upper margin of 41%. Strength depends on this. We will strive for the smallest coefficient of variation. That is, we will try to prepare the same solution every time. Therefore, we take the value for the safety margin of 9%. - Additive:
- I use liquid glass in a ratio of one percent of the volume of the column. Of course, they take more. Expensive plasticizers are also used. But we save. One percent of 9.5 liters is 95 milliliters. But it’s easier to take 100 ml, dividing a liter container into 10 equal parts. This means that 25 pillars will require 2.5 liters of liquid glass. One liter bucket costs 85 rubles. The total for three is 255 rubles. If you are planning a big construction When using liquid glass, you need to take containers of 20 liters or more. Because it's half the price. - Sand:
- The emptiness of sand.It's easy to calculate. You need to take a bucket of sand and the same volume of water. Pour water into the sand to the brim. And then the formula. Divide how much water is left by the capacity of the bucket. Multiply by 100%. I got 6 l / 15 l * 100% = 40%.
- Sand humidity. If you have wet sand, you need to calculate the percentage. The volume of water and further costs depend on this. Take 1 kg of raw sand. Dry it. Then weigh it. The formula is as follows: subtract the weight of dry sand from the weight of wet sand and divide by the weight of wet sand in the second step. Approximate value 5%.
- Smoothness of grains. An indicator close to practical actions. The sand from the river is smooth. Kneading is easy with less water. But the disadvantage of such concrete is its low strength. Using sand from a quarry with sharp edges will eliminate the problem.
Yet again. hollowness and humidity in handicraft production are of interest to the most inquisitive. And in industrial conditions, the density of cement, the grain size and bulk density of sand, and admixtures of clay or silt are also taken into account.
Final results
The final proportions and volume, verified experimentally, are as follows:
- Cement 1 part – 4.5 l.
- Sand 2.2 parts – 9.7 l.
- Water 0.6 parts - 2.77 l.
- Liquid glass 0.01 part - 100 ml.
Converted to kilograms, other figures are obtained:
- Cement 1 part – 5.85 kg.
- Sand 2.2 parts – 12.65 kg.
- Water 0.5 parts - 2.77 kg.
- Liquid glass 0.015 parts – 0.15 kg.
In most cases, proportions are measured by volume. Now let's estimate how much material is needed for 25 pillars:
- Liquid glass, as mentioned, is 2.5 liters. That is, you need to buy cans.
- Sand 316 kg or 0.242 m3.
- Water 69.25 liters.
- Cement 146 kg. Divide by 50. We get almost three bags of cement with a total cost of 975 rubles.
Of course, you don't have to make preliminary calculations based on the moisture content and voids of the sand or the safety factor or fluidity of the concrete. This information is given for the purpose of further development. Because old-fashioned methods do not always lead to success. But a high-quality concrete support can compete with a factory one.